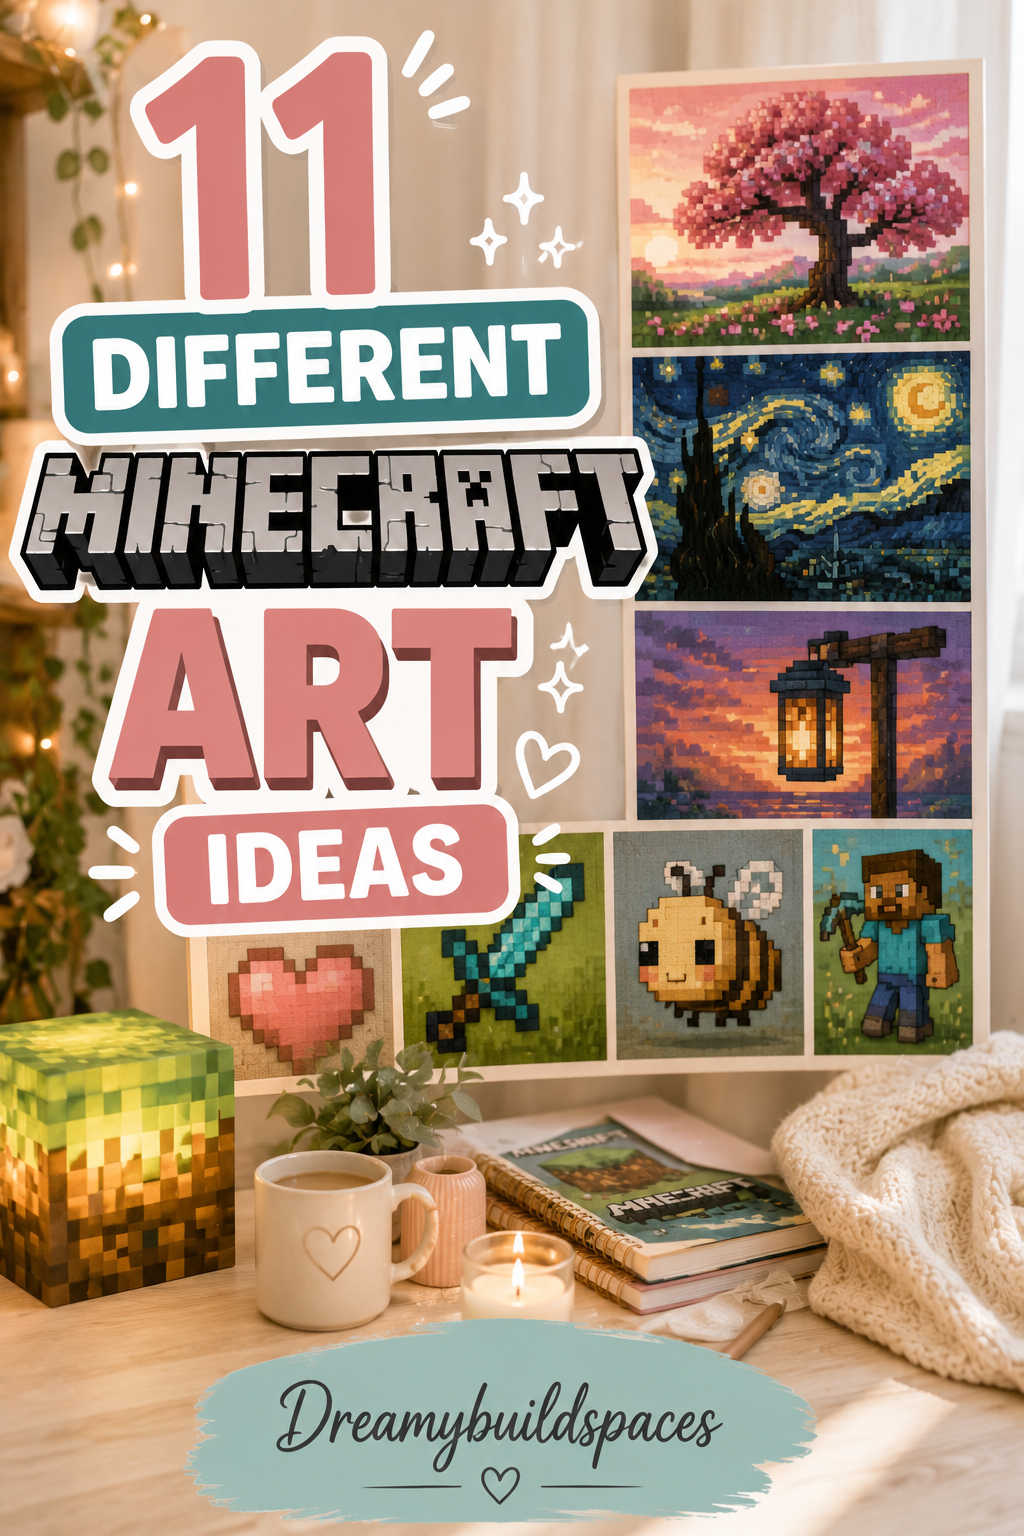
11 Different Minecraft Art Ideas
Minecraft is a world where creativity has no boundaries. While many players focus on building houses, castles, and survival bases, Minecraft also offers endless opportunities to create beautiful works of art. From giant pixel paintings to detailed sculptures, artistic builds allow players to transform simple blocks into impressive masterpieces. Minecraft art is not just decoration; it is a way to express imagination, storytelling, and personal style inside the game.
One of the most exciting parts of creating Minecraft art is the freedom to design anything you can imagine. Since the game uses simple blocks as building materials, players can recreate almost any idea by combining colors, shapes, and patterns. A blank landscape can become a giant mural, a fantasy statue, a magical garden, or even a complete interactive art installation.

Minecraft art ideas are popular because they bring a different type of creativity into the game. Instead of focusing only on practical structures, artistic builds focus on emotions, details, and visual impact. These projects help players improve their building skills while creating something unique that can become the centerpiece of their world.
Pixel art is one of the most common forms of Minecraft art. Because Minecraft itself is based on block shapes, creating pixel images feels natural. Players use different colored blocks to recreate characters, animals, symbols, landscapes, and famous designs. A simple wall can become a colorful masterpiece with careful planning and patience.
Another amazing type of Minecraft art is sculpture building. Players can create three-dimensional statues using blocks to represent animals, fantasy creatures, characters, or abstract designs. These sculptures often become landmarks in a Minecraft world because they add personality and creativity to the environment.
Minecraft art is also strongly connected to architecture. Many artistic builds combine design and construction by creating beautiful structures that are visually impressive. For example, a fantasy tower with detailed patterns, a glowing crystal monument, or a magical tree can be considered both architecture and art.
Color selection plays a major role in Minecraft art. Since players have access to many different blocks, choosing the right combinations can completely change the final appearance. Bright colors can create a playful style, while darker shades can produce a dramatic or mysterious atmosphere. Successful artists often experiment with different textures to make their creations more realistic.
Lighting is another important element in artistic Minecraft builds. A structure can look completely different during the day and night. Adding lanterns, glowstone, sea lanterns, or hidden lighting can create magical effects and highlight important details. Many builders design their art specifically to look amazing at night.
Minecraft art projects are also a great way to decorate worlds and servers. Large murals, statues, and creative installations can make an area feel more alive. Multiplayer servers often use art builds as attractions, landmarks, or community projects where players work together to create something impressive.
The best Minecraft art does not always require advanced skills. Beginners can start with simple designs and slowly improve their techniques. Even a small decorative piece can become beautiful with thoughtful planning. The most important part is creativity and the willingness to experiment.
Another interesting aspect of Minecraft art is storytelling. Many artistic builds tell a story through their design. A ruined castle may represent an ancient civilization, a statue may honor a character, and a fantasy landscape may create an entirely new world. These artistic choices make builds more meaningful and memorable.
Modern Minecraft creators often combine different art styles to create unique results. A build might include pixel art, sculptures, landscaping, and architecture all together. This combination creates immersive experiences where every detail contributes to the overall design.
These 11 different Minecraft art ideas are designed to inspire both beginners and experienced builders. Each idea explores a different creative direction, helping players discover new ways to use blocks, colors, and imagination. Whether you want to create something simple and cute or a massive world-changing masterpiece, Minecraft art gives you the tools to bring your ideas to life.
Idea 1: Minecraft Pixel Art Masterpiece — Create Stunning Block-Based Artwork
Minecraft pixel art is one of the most popular and creative ways to express yourself inside the game. This art style transforms simple blocks into colorful images, characters, symbols, and designs that look like giant digital paintings. Since Minecraft itself is built with square blocks, pixel art feels like a natural extension of the game’s visual style.
The main idea behind pixel art is recreating an image using different colored blocks. Instead of drawing with a brush, players use wool, concrete, terracotta, glass, and other materials to create detailed pictures. A small wall can become a beautiful piece of artwork, while a large open area can become a massive masterpiece visible from far away.
Pixel art can range from simple beginner-friendly designs to extremely detailed professional creations. Players can create animals, fantasy characters, game-inspired images, landscapes, logos, or completely original artwork. The possibilities are unlimited because every block color becomes a part of the creative process.
One of the best things about Minecraft pixel art is that it improves building skills. Players learn about color combinations, symmetry, spacing, and planning. Before placing blocks, most creators design a grid or reference image to make sure the final result looks accurate.
Pixel art is also a great way to decorate Minecraft worlds. A colorful mural can make a village feel more alive, while a giant character design can become the main attraction of a server. Many players use pixel art as landmarks or decorative features around their builds.
Materials & Elements Used
- Colored wool blocks
- Concrete blocks
- Terracotta blocks
- Stained glass
- Concrete powder
- Glowstone or sea lanterns
- Large flat wall surface
- Reference image or grid design
- Lighting effects
- Decorative surroundings
These materials help create colorful and detailed artwork.
Step-by-Step How to Create Minecraft Pixel Art
Step 1: Choose Your Design
Start by selecting what you want to create. Beginners should choose simple designs with fewer colors.
Step 2: Create a Block Grid
Plan the size of your artwork using a grid system. Each square represents one Minecraft block.
Step 3: Select Your Color Palette
Choose blocks that match the colors of your design. Try to use similar shades for smoother details.
Step 4: Build the Outline
Start by creating the basic shape before adding internal details.
Step 5: Fill the Colors
Place blocks carefully according to your planned design.
Step 6: Add Lighting Effects
Use glowing blocks behind or around the artwork to make it stand out at night.
Final Styling Tips
The secret to beautiful Minecraft pixel art is patience and planning. Avoid placing random blocks without a design because organized patterns create the best results. Even simple pixel art can look amazing when colors and proportions are balanced.
Idea 2: Minecraft Statue Art — Build Giant 3D Sculptures
Minecraft statue art is a creative building style where players transform blocks into large three-dimensional sculptures. Unlike pixel art that focuses on flat images, statues create depth, shape, and realistic forms. This makes them one of the most impressive types of Minecraft artwork because they can become giant landmarks in a world.
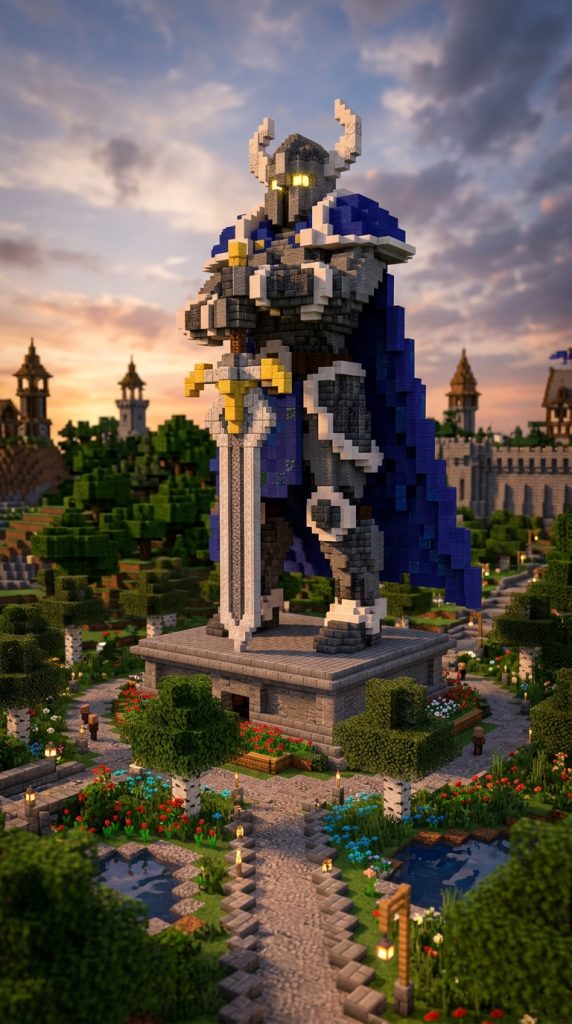
The main idea behind statue building is creating recognizable shapes using blocks. Players can build animals, fantasy creatures, warriors, characters, mythical beings, or abstract sculptures. A well-designed statue can completely change the atmosphere of an area by adding personality and storytelling.
Statue builds require more planning because they involve height, width, and depth. Builders need to understand proportions and structure to make the sculpture look realistic. Many creators start with a basic frame before adding details and textures.
One of the most exciting parts of statue art is the ability to make massive creations. A small statue can decorate a garden, while a giant statue can become a world-famous landmark inside a Minecraft server. Large sculptures often include hidden rooms, viewing areas, or interactive features.
Materials play a major role in statue design. Different blocks create different textures. Stone gives a realistic carved appearance, while concrete creates a smooth modern look. Wood can create warmth, and colorful blocks can create fantasy-style characters.
Materials & Elements Used
- Stone bricks
- Quartz blocks
- Concrete blocks
- Wood materials
- Terracotta
- Stairs and slabs for curves
- Decorative blocks
- Lighting elements
- Scaffolding for building
- Landscaping materials
These materials help create detailed three-dimensional artwork.
Step-by-Step How to Create a Minecraft Statue
Step 1: Pick Your Subject
Choose what you want to build. Simple animals or characters are great for beginners.
Step 2: Create a Skeleton Frame
Build a basic outline using temporary blocks to define height and shape.
Step 3: Establish Proportions
Make sure the head, body, and other parts have balanced sizes.
Step 4: Add Main Structure Blocks
Replace temporary blocks with your chosen building materials.
Step 5: Create Details
Add eyes, textures, clothing, patterns, or unique features.
Step 6: Design the Surrounding Area
Add gardens, platforms, or lighting to make the statue more impressive.
Final Styling Tips
Great Minecraft statues are created through layers of detail. Do not rush the process. Start with the overall shape first, then slowly add smaller features. A simple statue with good proportions can look better than a complicated one without structure.
Idea 3: Minecraft Fantasy Garden Art — Magical Landscape Creation
A Minecraft fantasy garden is an artistic build that combines nature, imagination, and decorative design. Instead of creating a normal garden, this style focuses on creating a magical environment filled with unique plants, glowing elements, hidden paths, and fantasy-inspired structures.
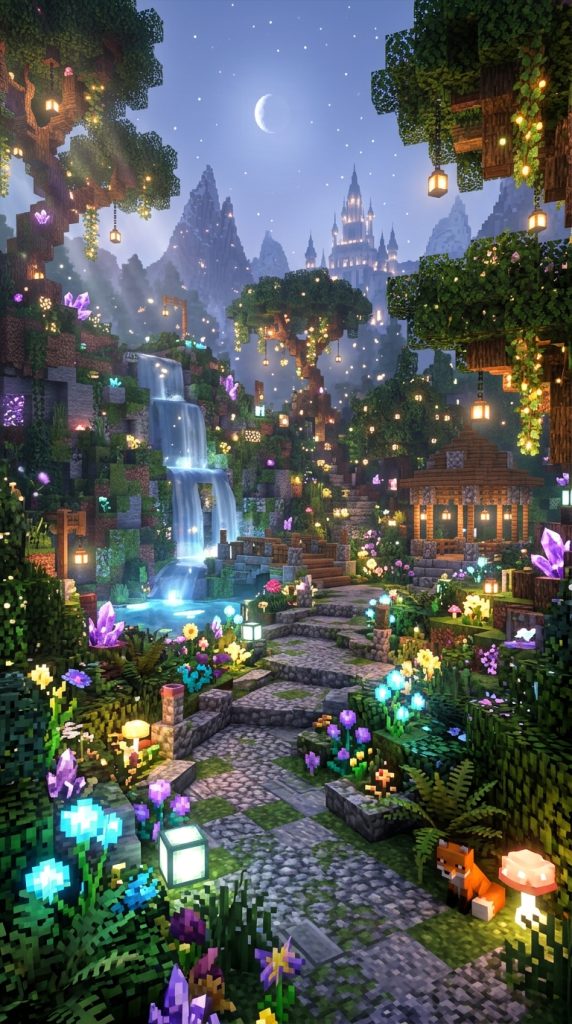
The main idea behind fantasy garden art is creating an atmosphere. The goal is not only to place flowers and trees but to design a space that feels like another world. A well-built fantasy garden can feel peaceful, mysterious, or magical depending on the style.
Players often use natural Minecraft elements such as trees, water, flowers, and terrain while adding creative details like glowing mushrooms, fairy-style houses, magical fountains, and floating decorations. This combination creates a dream-like environment that feels different from ordinary landscapes.
Fantasy gardens are perfect for decorating large builds. They can surround castles, mansions, villages, or even stand alone as artistic locations. The garden itself becomes a piece of artwork where every pathway and detail has a purpose.
Lighting is especially important in fantasy gardens. Glowstone, lanterns, and hidden lights create a magical appearance at night. Small lighting details can make plants, water features, and paths look much more impressive.
Materials & Elements Used
- Grass blocks
- Flowers and plants
- Leaves and trees
- Glowstone and lanterns
- Water features
- Stone paths
- Moss blocks
- Mushrooms
- Decorative structures
- Fantasy-style bridges
These materials create a magical natural environment.
Step-by-Step How to Create a Fantasy Garden
Step 1: Choose a Location
Select an area with enough space for plants, paths, and decorative features.
Step 2: Shape the Landscape
Create hills, small rivers, and different terrain levels.
Step 3: Add Plants and Trees
Place flowers, custom trees, and greenery in different patterns.
Step 4: Create Pathways
Build stone or dirt paths connecting different areas.
Step 5: Add Magical Details
Include fountains, glowing mushrooms, fairy houses, or floating decorations.
Step 6: Add Night Lighting
Place hidden lights to create a fantasy atmosphere after dark.
Final Styling Tips
A fantasy garden should feel natural but magical. Avoid making everything perfectly organized because a little randomness creates a more realistic enchanted look. Focus on storytelling and atmosphere to make the garden truly artistic.
Idea 4: Minecraft Modern Art Gallery — Create a Creative Block Museum
A Minecraft modern art gallery is a unique way to turn your world into a professional-looking exhibition space. Instead of creating only one artwork, this idea focuses on designing an entire environment where multiple creations can be displayed. It combines architecture, decoration, and artistic expression to create a place that feels like a real museum.
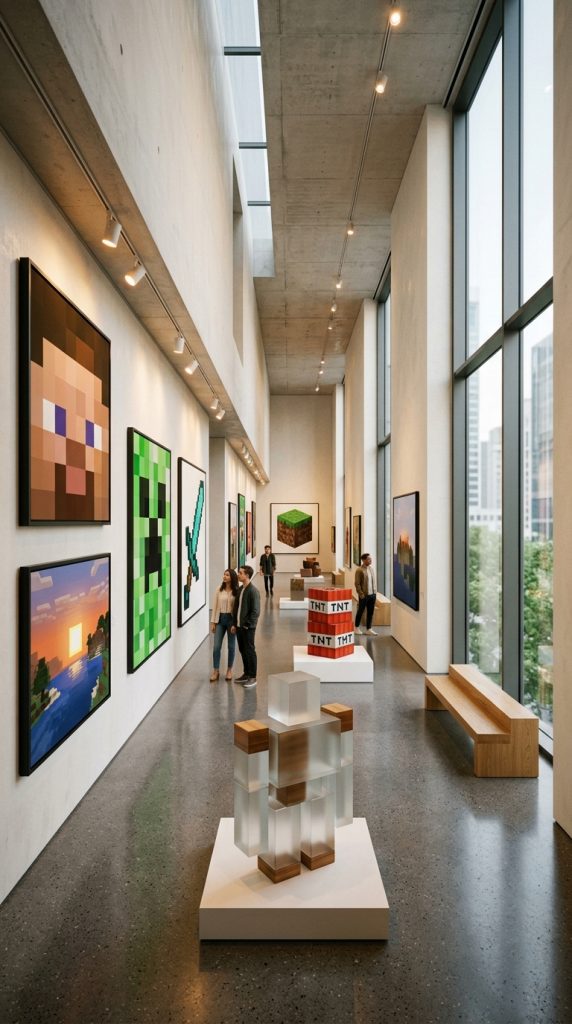
The main concept of a modern art gallery is presentation. The artwork itself is important, but the surrounding space makes it more impressive. Clean walls, open rooms, proper lighting, and organized displays help each piece stand out. This build style is perfect for players who want to showcase pixel art, sculptures, paintings, or creative experiments.
Modern galleries often use minimalist architecture. Large empty spaces, smooth surfaces, and simple designs create a professional atmosphere. Instead of filling every corner, the focus remains on the artwork. This makes even small creations feel more valuable and important.
Lighting is one of the most important parts of a Minecraft art gallery. Real-world museums use lighting to highlight specific pieces, and the same idea works in Minecraft. Hidden lights, ceiling lamps, and spot-style effects can make artwork look more dramatic.
A gallery can also become a social space on multiplayer servers. Players can invite friends to explore different rooms and view creative projects together.
Materials & Elements Used
- Quartz blocks
- White concrete
- Smooth stone
- Glass panels
- Glowstone and sea lanterns
- Wooden flooring
- Display platforms
- Item frames
- Paintings
- Decorative plants
These materials create a clean museum-style environment.
Step-by-Step How to Build a Modern Art Gallery
Step 1: Choose the Gallery Location
Pick a large flat area where you have enough room for multiple exhibition rooms.
Step 2: Create the Building Structure
Build a simple modern exterior with clean lines and large entrances.
Step 3: Design Exhibition Rooms
Create separate spaces for different art styles, such as statues, pixel art, and decorations.
Step 4: Add Display Areas
Use walls, platforms, and item frames to present artwork beautifully.
Step 5: Install Proper Lighting
Place lights above or around artwork to highlight important details.
Step 6: Add Final Decorations
Include plants, benches, pathways, and small design elements to complete the gallery.
Final Styling Tips
A modern art gallery should feel clean, organized, and inspiring. Leave enough empty space around each artwork so every creation gets attention. The best galleries are not crowded—they allow visitors to enjoy each piece.
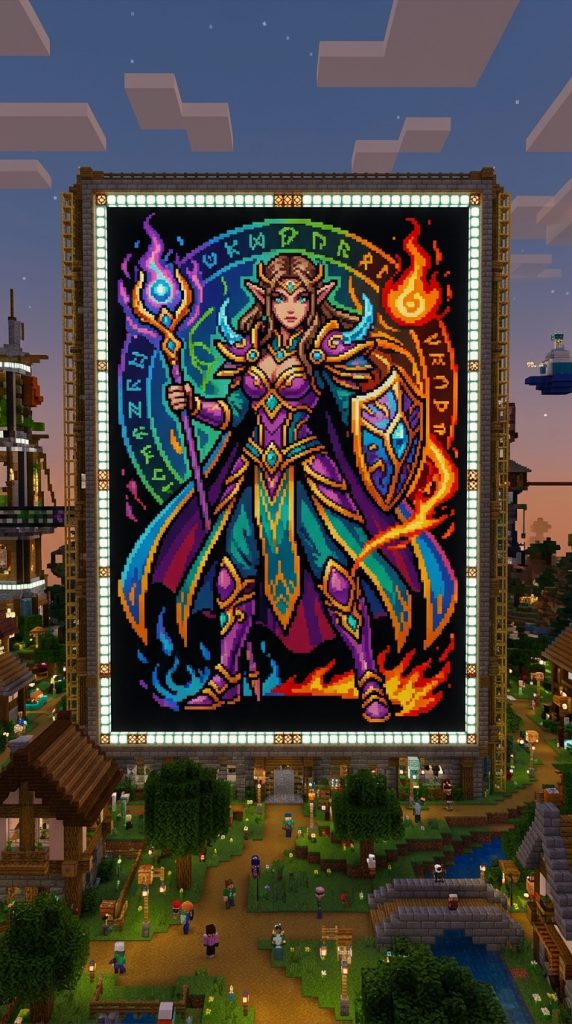
Idea 5: Minecraft Giant Mural Art — Create Massive Wall Paintings
Giant mural art is one of the most impressive Minecraft art ideas because it transforms ordinary walls into massive creative displays. This style focuses on creating large-scale images that cover buildings, mountains, or specially designed walls. A giant mural can become the main visual attraction of an entire Minecraft world.

The main idea behind mural art is storytelling through a large image. Players can create anything from fantasy landscapes and characters to abstract patterns and detailed scenes. Because the artwork is much larger than normal pixel art, it allows for more detail and creativity.
Large murals are especially popular on multiplayer servers because they create memorable landmarks. A giant dragon on a castle wall, a fantasy landscape on a mountain, or a colorful design in a city area can completely change the atmosphere.
Creating a mural requires careful planning. The bigger the artwork, the more important the preparation becomes. Builders often create a smaller version first or use a grid system to make sure the final design stays accurate.
Color choices are extremely important. Since Minecraft blocks have different textures, selecting the right combination creates depth and realism. Adding shadows, highlights, and patterns can make a flat wall appear much more detailed.
Materials & Elements Used
- Colored concrete blocks
- Wool blocks
- Terracotta
- Glass blocks
- Large building wall
- Scaffolding
- Lighting blocks
- Reference design
- Surrounding decorations
- Landscape elements
These materials help create a detailed mural.
Step-by-Step How to Build a Giant Mural
Step 1: Select a Large Surface
Choose a wall, mountain, or custom structure as your canvas.
Step 2: Plan the Artwork
Create a grid and decide the size of your mural.
Step 3: Prepare the Color Palette
Choose blocks that match the colors of your design.
Step 4: Build the Main Outline
Start with the biggest shapes before adding details.
Step 5: Add Colors and Shadows
Layer different shades to create depth and dimension.
Step 6: Enhance the Surrounding Area
Add lights, gardens, or structures around the mural.
Final Styling Tips
Large murals look best when they match the environment around them. Think about the location before starting. A good mural should not only look beautiful but should also feel like part of the world.
Idea 6: Minecraft Fantasy Portal Art — Magical Gateway Build
A Minecraft fantasy portal is an artistic build that creates the feeling of entering another world. This idea focuses on designing a magical entrance, mysterious gateway, or fantasy structure that becomes a centerpiece in your environment. It combines creativity, storytelling, and decorative architecture.
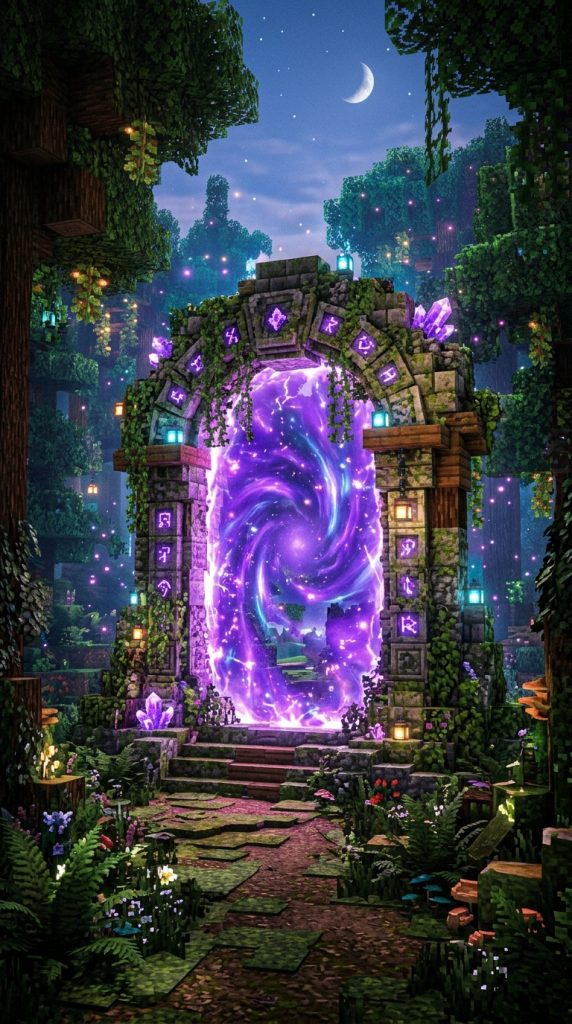
The main concept of portal art is mystery. Unlike regular doors or entrances, fantasy portals create curiosity. They can represent a connection between worlds, a magical location, or a hidden adventure area. Even if the portal is only decorative, it can make a build feel much more immersive.
Fantasy portals can take many forms. Some builders create ancient stone gateways covered in vines, while others design futuristic glowing portals using glass and bright colors. The style depends on the story you want the build to tell.
Detail is very important in portal designs. Small features such as symbols, glowing blocks, floating crystals, and surrounding landscapes make the structure feel magical. A simple frame can become impressive with the right decoration.
Portals are often used near castles, forests, caves, or adventure areas. They can become the entrance to hidden bases, fantasy kingdoms, or custom worlds.
Materials & Elements Used
- Obsidian blocks
- Stone bricks
- Quartz blocks
- Amethyst blocks
- Glowstone and sea lanterns
- Colored glass
- Vines and moss
- Decorative crystals
- Water or lava effects
- Fantasy landscaping blocks
These materials create a magical atmosphere.
Step-by-Step How to Build a Fantasy Portal
Step 1: Decide the Theme
Choose whether your portal will be ancient, magical, futuristic, or mysterious.
Step 2: Build the Main Frame
Create a strong shape using stone, obsidian, or quartz.
Step 3: Add Magical Details
Include crystals, symbols, and glowing decorations.
Step 4: Create the Portal Effect
Use glass, lighting, or special block combinations to create energy effects.
Step 5: Design the Surrounding Area
Add trees, ruins, rocks, or pathways around the portal.
Step 6: Add Final Lighting
Use hidden lights to make the portal stand out at night.
Final Styling Tips
A fantasy portal should create a feeling of wonder. Focus on atmosphere rather than size. Even a smaller portal can look incredible when it has strong details, lighting, and a clear theme.
Idea 7: Minecraft Underwater Art Base — Create a Beautiful Ocean Masterpiece
An underwater art base in Minecraft is a creative build that transforms the ocean into a magical living space. Instead of creating artwork on land, this idea uses the underwater world as the main inspiration. With glass structures, glowing lights, coral decorations, and ocean landscapes, players can create an artistic environment that feels like a hidden underwater civilization.
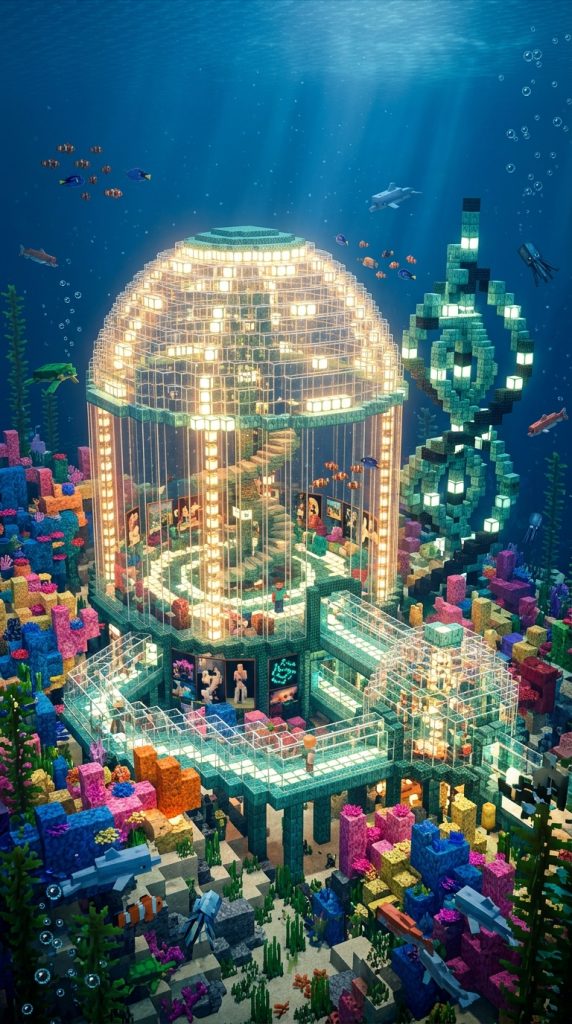
The main concept of an underwater art base is combining architecture with nature. The ocean itself becomes part of the artwork. Fish swimming around glass rooms, colorful coral gardens, and flowing water effects create a peaceful and unique atmosphere. This type of build feels futuristic, mysterious, and relaxing at the same time.
Underwater builds are challenging because players need to think about visibility, lighting, and structure. The darkness of the ocean can make designs difficult to see, so lighting becomes one of the most important artistic elements. Sea lanterns, glowstone, and hidden lighting can transform a dark underwater area into a bright masterpiece.
The beauty of an underwater base comes from transparency. Large glass walls allow players to view the ocean environment while remaining protected inside. This creates the feeling of living inside an aquarium or underwater palace.
Players can create different artistic sections inside the base. One area can be a coral garden, another can be a sculpture room, and another can showcase underwater decorations. The possibilities are endless because the ocean provides a completely different creative environment.
Materials & Elements Used
- Glass blocks and glass panes
- Sea lanterns
- Prismarine blocks
- Coral blocks
- Smooth quartz
- Water features
- Kelp and underwater plants
- Decorative sculptures
- Stone pathways
- Lighting details
These materials help create a beautiful underwater artwork.
Step-by-Step How to Build an Underwater Art Base
Step 1: Choose the Ocean Location
Find a clear ocean area with good visibility and interesting surroundings.
Step 2: Create the Main Structure
Build a glass dome, tunnel, or underwater room as the foundation.
Step 3: Remove Water From Interior
Use blocks and temporary structures to create a dry building area.
Step 4: Add Ocean Decorations
Place coral, plants, and underwater details around the structure.
Step 5: Install Lighting
Add sea lanterns around walls and floors to create a glowing effect.
Step 6: Create Artistic Rooms
Design sections for sculptures, gardens, or creative displays.
Final Styling Tips
An underwater art base should feel peaceful and magical. Avoid covering too much of the ocean because the natural environment is part of the design. Let the water, marine life, and lighting work together to create the final masterpiece.
Idea 8: Minecraft Fantasy Sculpture Park — Build an Outdoor Art World
A fantasy sculpture park is a creative Minecraft art idea that combines large sculptures, landscaping, and imagination into one massive outdoor artwork. Instead of creating a single statue, this build focuses on creating an entire area filled with artistic creations that tell a story.
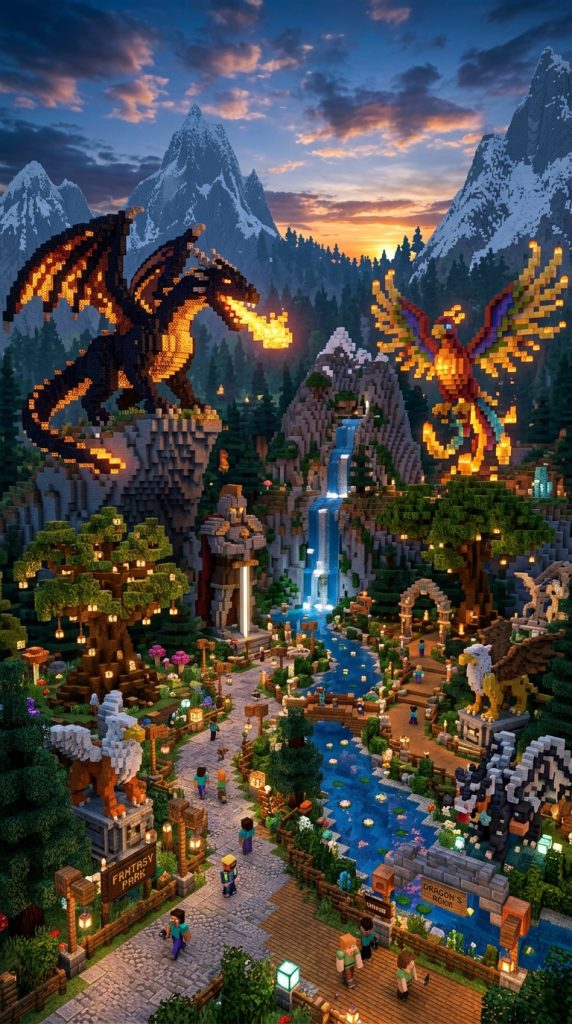
The main idea behind a sculpture park is creating an interactive experience. Players can walk through different areas and discover unique statues, magical creatures, monuments, and decorative structures. The environment becomes like an open-air museum where every corner has something interesting to explore.
This style allows builders to experiment with many different themes. A fantasy sculpture park can include giant dragons, mythical animals, magical trees, warriors, or abstract creations. The combination of different artworks creates a world that feels alive and full of adventure.
Landscaping is just as important as the sculptures themselves. Paths, gardens, waterfalls, and lighting help connect each piece of art. A well-designed park feels like a complete environment rather than random objects placed together.
Nighttime can make sculpture parks even more impressive. Hidden lights around statues create dramatic shadows and highlight important details. Glow effects can make fantasy creatures appear magical.
This idea is perfect for multiplayer servers because multiple players can contribute different sculptures and create a shared artistic world.
Materials & Elements Used
- Stone and stone bricks
- Quartz blocks
- Concrete blocks
- Wood materials
- Leaves and plants
- Water features
- Lanterns and glowstone
- Pathway blocks
- Decorative statues
- Landscaping materials
These materials create a fantasy art environment.
Step-by-Step How to Build a Sculpture Park
Step 1: Plan the Park Layout
Decide where sculptures, paths, gardens, and special areas will be placed.
Step 2: Create Walking Paths
Build beautiful paths connecting different artwork sections.
Step 3: Build Main Sculptures
Start with large centerpieces that become the focus of the park.
Step 4: Add Smaller Art Pieces
Create smaller statues and decorations around the area.
Step 5: Design Nature Elements
Add trees, flowers, rivers, and waterfalls.
Step 6: Add Lighting Effects
Use lights to highlight sculptures at night.
Final Styling Tips
A fantasy sculpture park should feel like a storybook world. Mix different heights, textures, and themes to keep the environment interesting. The goal is to create a place where players enjoy exploring every detail.
Idea 9: Minecraft Pixel Landscape Art — Create Beautiful Block Scenery
Pixel landscape art is a Minecraft building style that transforms natural scenery into detailed block-based artwork. Instead of building objects or structures, this idea focuses on recreating beautiful landscapes using Minecraft blocks. Players can create mountains, forests, oceans, sunsets, and fantasy worlds as giant artistic displays.
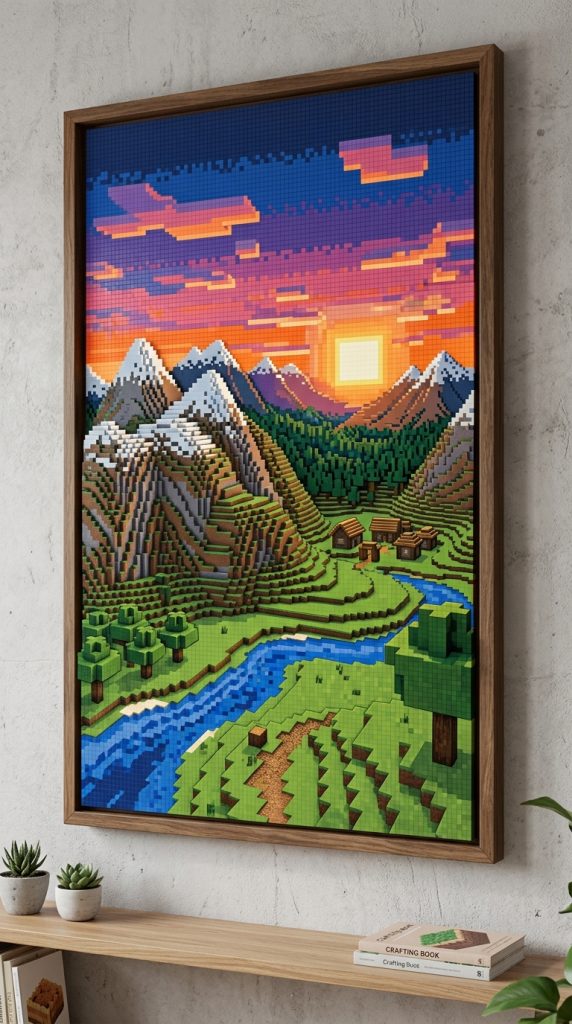
The main concept behind landscape art is capturing the beauty of nature in a block format. A normal Minecraft environment can become a carefully designed artwork with planned colors, shapes, and textures. These builds often look like paintings but exist as three-dimensional creations.
Landscape art can be created on large walls, custom terrain, or even as standalone scenes. Many builders create fantasy landscapes that do not exist in the normal Minecraft world, such as floating islands, magical forests, or impossible mountain ranges.
Color choice is extremely important in landscape builds. Different blocks represent different shades of nature. Green blocks create forests, blue blocks create water and skies, and warm colors can represent sunsets or magical environments.
These builds also help players learn advanced building techniques. Creating realistic landscapes requires understanding depth, layers, and perspective. Small details can completely change how the final artwork looks.
Materials & Elements Used
- Wool blocks
- Concrete blocks
- Terracotta
- Glass blocks
- Leaves and plants
- Stone materials
- Water blocks
- Lighting blocks
- Custom terrain blocks
- Decorative elements
These materials create colorful scenery.
Step-by-Step How to Build Pixel Landscape Art
Step 1: Choose Your Landscape Theme
Decide whether you want mountains, forests, oceans, or fantasy scenery.
Step 2: Create a Basic Outline
Plan the main shapes and important areas.
Step 3: Build Background Layers
Start with distant elements like sky and mountains.
Step 4: Add Middle and Front Details
Create depth by adding closer objects.
Step 5: Adjust Colors and Textures
Mix block shades to make the landscape more realistic.
Step 6: Add Final Details
Include trees, animals, lighting, or magical effects.
Final Styling Tips
Great landscape art uses depth and balance. Do not make everything the same size or color. Layering different elements creates a realistic and beautiful scene that feels alive.
Idea 10: Minecraft Fantasy Castle Art — Create a Magical Architectural Masterpiece
A fantasy castle art build is one of the most impressive ways to combine architecture and creativity in Minecraft. Unlike a normal survival castle, this idea focuses on creating a visually stunning structure that feels like it belongs in a fantasy world. It combines imagination, storytelling, and artistic design to create a powerful centerpiece for any Minecraft world.
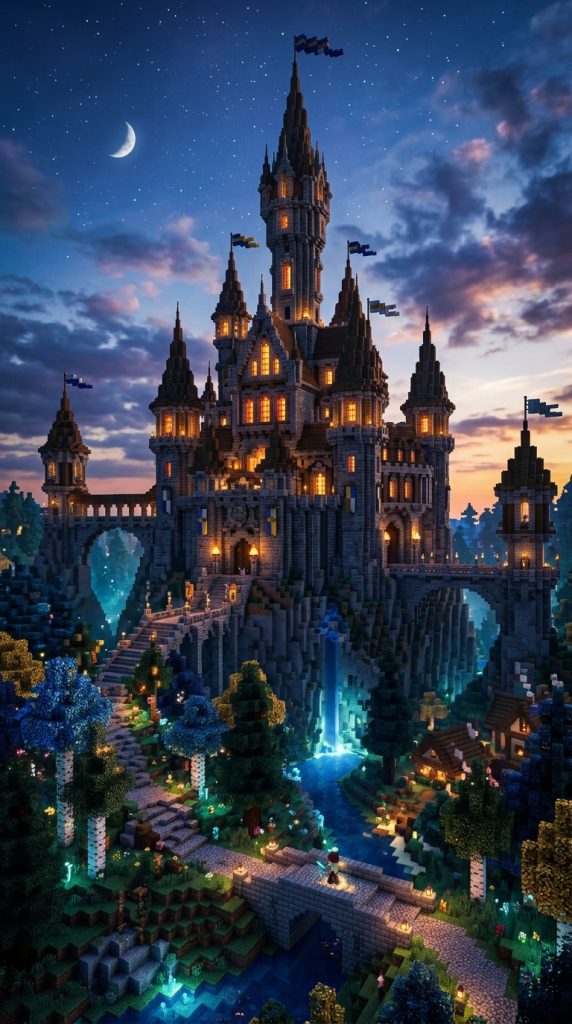
The main idea behind a fantasy castle is creating an atmosphere. The castle is not only a building but a piece of art that tells a story. Tall towers, magical details, glowing windows, mysterious entrances, and dramatic landscapes make the structure feel alive. Players can design castles inspired by fairy tales, ancient kingdoms, magical worlds, or completely original ideas.
Fantasy castles allow builders to experiment with different styles. Some designs may focus on dark mysterious fortresses, while others create bright magical kingdoms. The choice of blocks, colors, and decorations completely changes the personality of the build.
Details are what make fantasy castles special. Small additions like banners, vines, statues, bridges, and glowing elements can turn a simple structure into a masterpiece. The surrounding environment is also important because mountains, forests, rivers, and gardens help complete the fantasy feeling.
Interior design can also become part of the artwork. Players can create royal halls, magical libraries, hidden rooms, throne areas, and enchanting spaces. Every room can contribute to the story of the castle.
Materials & Elements Used
- Stone bricks
- Mossy stone blocks
- Quartz accents
- Dark oak wood
- Glass windows
- Lanterns and glowstone
- Banners and decorations
- Towers and bridges
- Garden elements
- Fantasy landscaping
These materials help create a magical castle atmosphere.
Step-by-Step How to Build a Fantasy Castle
Step 1: Choose a Fantasy Location
Select a dramatic area such as mountains, forests, or cliffs.
Step 2: Create the Main Castle Shape
Build the foundation with towers, walls, and central areas.
Step 3: Add Fantasy Architecture
Create unique towers, bridges, and decorative structures.
Step 4: Design the Castle Interior
Build rooms like throne halls, libraries, and magical chambers.
Step 5: Decorate the Surroundings
Add gardens, pathways, waterfalls, and hidden areas.
Step 6: Add Lighting Effects
Use warm lighting to create a magical nighttime appearance.
Final Styling Tips
A fantasy castle should feel like a world of its own. Focus on storytelling instead of just size. A smaller castle with amazing details can look more impressive than a huge empty structure.
Idea 11: Minecraft Custom Theme Park Art — Build an Interactive Creative World
A Minecraft theme park is a unique artistic project that combines creativity, design, and imagination into one interactive experience. Instead of creating a single artwork, this idea focuses on building an entire world filled with attractions, decorations, and themed areas. It turns Minecraft into a place where players can explore, discover, and enjoy creative designs.
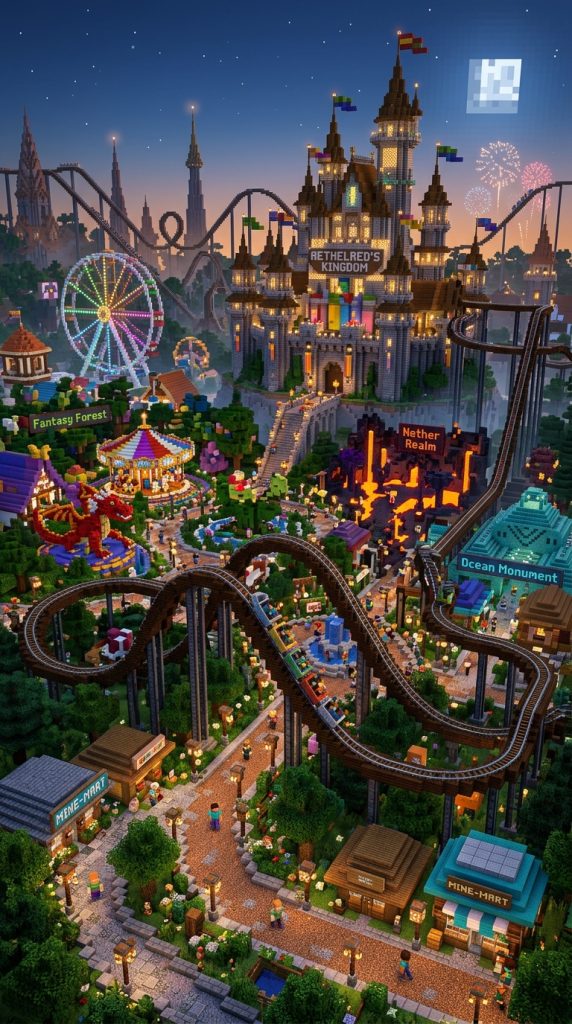
The main concept of a theme park build is creating an environment full of different experiences. Each section can have its own theme, such as fantasy lands, futuristic zones, adventure areas, or magical forests. The goal is to make every part of the park visually exciting and memorable.
Theme parks are one of the best examples of Minecraft art because they combine many different skills. Builders need to design architecture, landscapes, decorations, pathways, and interactive elements. Every attraction becomes a piece of the overall artwork.
A successful Minecraft theme park uses strong organization. Different areas should connect naturally through paths and signs. The colors and styles of each section should match the theme while still feeling like part of the same world.
Lighting is extremely important in theme park designs. Bright lights, glowing decorations, and nighttime effects can completely transform the atmosphere. Many builders design their parks to look beautiful both during the day and at night.
This idea is also perfect for multiplayer worlds because friends can explore the park together and even help create different sections.
Materials & Elements Used
- Concrete blocks
- Wool and colorful blocks
- Glass decorations
- Redstone components
- Rails and minecarts
- Water features
- Trees and plants
- Lanterns and glowstone
- Pathway blocks
- Custom buildings
These materials create a creative entertainment world.
Step-by-Step How to Build a Theme Park
Step 1: Plan Different Zones
Decide what themes your park will include.
Step 2: Create Main Paths
Build roads and pathways connecting different attractions.
Step 3: Design Major Attractions
Create rides, castles, towers, or themed buildings.
Step 4: Add Decorative Details
Include signs, statues, gardens, and small creative elements.
Step 5: Create Interactive Features
Use redstone, rails, and mechanisms for activities.
Step 6: Add Lighting and Final Touches
Decorate the park with lights to create an exciting atmosphere.
Final Styling Tips
A theme park should feel fun, colorful, and full of surprises. Do not focus only on large attractions; small decorative details often make the biggest difference. A well-planned park feels like a complete fantasy world rather than just a collection of builds.