
13 Dreamy DIY Bedroom Decor Ideas
Before diving into individual bedroom decor ideas, it’s important to understand why DIY bedroom decorating has become one of the biggest interior design trends on Pinterest. Your bedroom is more than simply a place to sleep. It serves as your personal retreat, your comfort zone, your relaxation corner, and often even your workspace or creative area. Creating a dreamy bedroom doesn’t always require expensive furniture, luxury decor pieces, or professional interior designers. In fact, some of the most beautiful and inspiring bedrooms are created through simple DIY projects that add personality, warmth, and charm to a space.
Dreamy bedroom decor focuses on creating a soft, cozy, relaxing atmosphere that feels inviting every single day. Whether you love neutral aesthetics, bohemian vibes, vintage charm, cottagecore details, or modern minimalism, DIY projects allow you to customize your room according to your personal style while staying within your budget. This is one of the reasons why bedroom DIY ideas continue to dominate Pinterest searches year after year.

Many people believe that transforming a bedroom requires a complete renovation, but small changes can often make the biggest impact. Adding soft lighting, creating handmade wall art, designing cozy corners, updating bedding, or incorporating natural elements can completely change the mood of your room. DIY projects give you the freedom to experiment with textures, colors, and decorative elements that reflect your personality.
Another reason DIY bedroom decor is so popular is affordability. Decorating stores and designer furniture can quickly become expensive, making it difficult for many homeowners, renters, or students to create their dream spaces. DIY projects allow you to achieve expensive-looking designs without spending large amounts of money. Repurposing old furniture, using affordable materials, and creating handmade decorations can help you design a high-end aesthetic on a budget.
Pinterest has also inspired millions of people to embrace cozy and aesthetic interiors. Soft fairy lights, cloud-inspired decor, neutral color palettes, floating shelves, fabric canopies, and handmade artwork have become highly saved ideas because they make bedrooms feel more personal and comforting. A dreamy bedroom is not necessarily perfect or luxurious—it simply feels peaceful, welcoming, and uniquely yours.
When planning your own bedroom makeover, it helps to think about the overall atmosphere you want to create. Some people prefer bright and airy spaces filled with white tones and natural light, while others enjoy warm and cozy rooms with layered textiles and ambient lighting. The beauty of DIY decor is that you can mix different styles and adapt them to your own preferences.
Lighting plays an especially important role in dreamy bedroom design. Soft lighting creates a relaxing mood and instantly makes a room feel warmer. Fairy lights, candles, table lamps, and LED lighting can all contribute to a cozy atmosphere. Textures are equally important. Soft blankets, fluffy rugs, linen bedding, knitted pillows, and fabric decorations add comfort and depth to a bedroom.
Wall decor is another key element that allows you to express creativity. Handmade artwork, photo walls, fabric hangings, mirrors, and DIY shelves can transform blank walls into beautiful focal points. Even small projects can create major visual impact without requiring advanced crafting skills.
Plants and natural materials also contribute to dreamy aesthetics. Dried flowers, greenery, wooden accents, and woven baskets introduce warmth and organic beauty into the room. These simple additions can make a space feel calm and refreshing while maintaining a Pinterest-worthy appearance.
One of the greatest advantages of DIY decorating is that every project tells a story. Handmade decorations often carry sentimental value because they reflect your creativity and effort. Whether you paint your own artwork, build a shelf, create decorative jars, or sew pillow covers, your room becomes a reflection of your personality rather than a copy of a showroom display.
The following dreamy DIY bedroom decor ideas are designed to inspire both beginners and experienced decorators. These projects focus on affordable materials, easy techniques, and beautiful results that can completely transform your space. From cozy lighting ideas to handmade wall decorations and stylish storage solutions, each project offers practical inspiration that you can adapt to your own room size, style, and budget.
No matter the size of your bedroom or the amount you want to spend, creating a dreamy space is possible with a little creativity and imagination. Small details often make the biggest difference, and DIY decor allows you to build a bedroom that feels warm, relaxing, and truly personal. Whether you are decorating your first apartment, updating your current room, or simply looking for fresh inspiration, these ideas will help you create a beautiful retreat that you’ll love spending time in every day.
Now, let’s explore these 13 dreamy DIY bedroom decor ideas that can turn any ordinary bedroom into a cozy, Pinterest-worthy sanctuary.
1. DIY Fairy Light Canopy for a Magical Bedroom Retreat
One of the easiest ways to create a dreamy bedroom atmosphere is by designing a fairy light canopy above your bed. This decor idea instantly transforms an ordinary sleeping area into a cozy retreat that feels soft, relaxing, and Pinterest-worthy. The warm glow of fairy lights creates gentle ambient lighting that makes the room feel peaceful during the evening while adding a romantic aesthetic during the day.
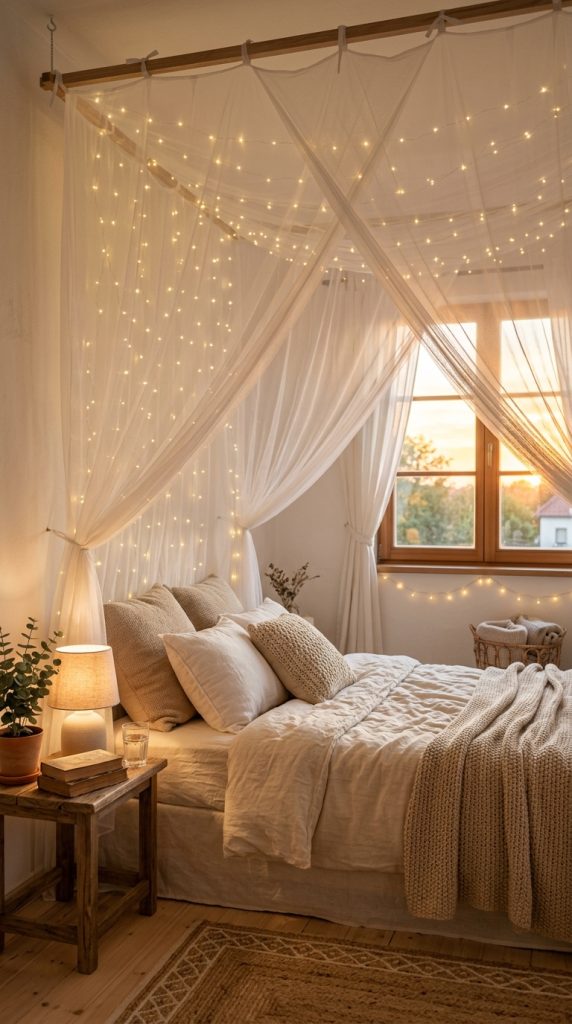
A fairy light canopy works beautifully in small bedrooms, apartments, dorm rooms, or larger master bedrooms. It requires very few materials and can be customized according to your preferred style. Some people choose white sheer curtains for a clean and modern look, while others use beige fabrics, lace curtains, or flowing linen for a bohemian aesthetic.
Why a Fairy Light Canopy Works
The bed is naturally the focal point of any bedroom. Decorating this area instantly changes the entire appearance of the room. The combination of soft fabric and warm lighting creates layers, texture, and visual interest without requiring expensive furniture or renovations.
This project works particularly well because it:
- Creates a cozy sleeping environment.
- Adds soft lighting.
- Makes the room feel larger and more luxurious.
- Provides a hotel-inspired atmosphere.
- Looks beautiful in both daytime and nighttime settings.
Materials Needed
- Warm white fairy lights
- Sheer curtains or lightweight fabric panels
- Ceiling hooks or adhesive hooks
- Curtain rod or wire cable
- Command strips
- Step ladder
- Extension cord if necessary
Step-by-Step Instructions
Step 1: Choose Your Canopy Style
Decide whether you want the canopy directly above the bed, around the bed frame, or hanging from the ceiling corners.
Step 2: Install Hooks
Secure hooks in the ceiling or use removable adhesive hooks if renting.
Step 3: Hang the Fabric
Drape sheer curtains loosely to create a flowing appearance. Avoid pulling the fabric tightly.
Step 4: Add the Lights
Wrap fairy lights around the curtain panels or place them behind the fabric for a softer glow.
Step 5: Style the Bed
Add textured pillows, blankets, and neutral bedding to complete the dreamy aesthetic.
Styling Tips
- Use warm white lights instead of cool white.
- Layer multiple curtain panels for fullness.
- Add hanging greenery.
- Include soft neutral bedding.
- Place candles or lamps nearby.
Budget-Friendly Options
You can create this entire project using affordable curtains and battery-operated lights. Many materials can even be repurposed from existing home decor items.
A fairy light canopy remains one of the most saved bedroom ideas on Pinterest because it delivers maximum visual impact with minimal effort and cost.
2. Handmade Floating Shelves for Cozy Wall Styling
Floating shelves are one of the most versatile DIY bedroom projects because they combine beauty and functionality. They provide storage while also allowing you to display decorative items that reflect your personality. Whether your style is minimalist, cottagecore, bohemian, or modern, floating shelves can easily be customized to fit your bedroom aesthetic.
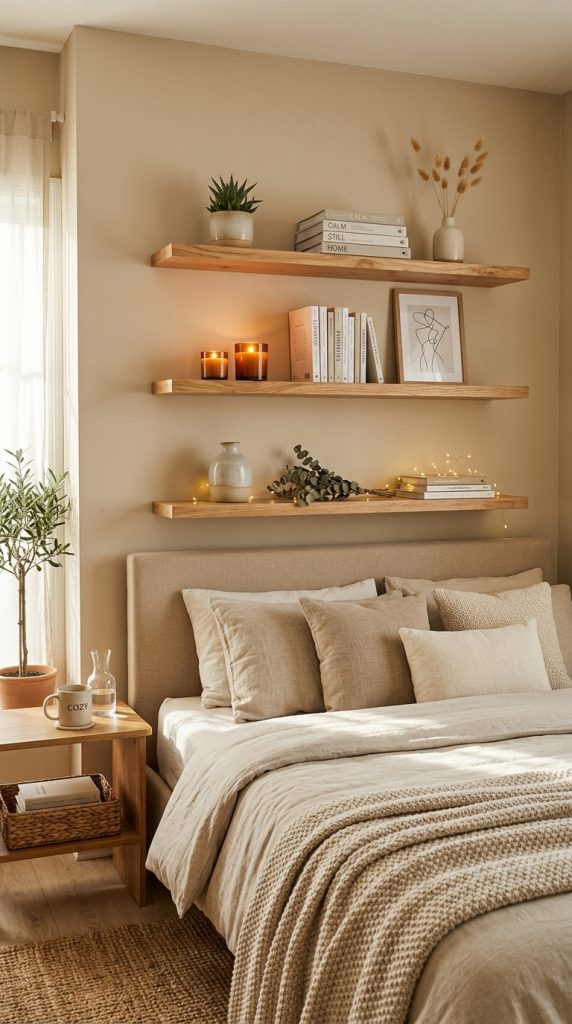
Empty walls often make bedrooms feel unfinished. Adding floating shelves creates dimension and gives you an opportunity to style your room with books, candles, plants, artwork, and personal items.
Why Floating Shelves Are Perfect for Bedrooms
Unlike large furniture pieces, shelves utilize vertical space. This makes them especially useful in small bedrooms where floor space is limited.
Benefits include:
- Additional storage.
- Decorative display space.
- Affordable DIY project.
- Custom sizing.
- Easy installation.
- Highly Pinterest-worthy appearance.
Materials Needed
- Wooden boards
- Sandpaper
- Wood stain or paint
- Shelf brackets
- Screws
- Drill
- Level tool
- Measuring tape
- Decorative items
Step-by-Step Guide
Step 1: Measure Your Space
Choose the wall area above your bed, desk, or dresser.
Step 2: Prepare the Wood
Sand the boards until smooth. Paint or stain them according to your preferred finish.
Step 3: Install Brackets
Use a level to ensure even placement before drilling.
Step 4: Attach Shelves
Secure the boards onto the brackets.
Step 5: Decorate the Shelves
Add decorative objects that complement your bedroom style.
Shelf Styling Ideas
- Small potted plants.
- Framed photographs.
- Candles.
- Books.
- Ceramic vases.
- String lights.
- Dried flowers.
- Decorative baskets.
Creating a Pinterest Aesthetic
The key to beautiful shelf styling is layering different heights and textures. Combine wood, ceramics, greenery, and soft lighting for a balanced display.
A simple formula includes:
- One tall item.
- One medium object.
- One small decorative piece.
- One natural element.
Budget Decorating Tips
Old wooden planks can be repurposed into shelves, making this project extremely affordable. Many homeowners use reclaimed wood for a rustic appearance that adds warmth and character.
Floating shelves not only enhance the room visually but also help keep the bedroom organized and clutter-free, making them one of the most practical dreamy bedroom decor ideas.
3. DIY Photo Wall Collage for a Personalized Dreamy Space
A photo wall collage is one of the most meaningful ways to decorate your bedroom because it tells your personal story. Instead of purchasing expensive wall art, you can create a unique display using photographs, inspirational quotes, postcards, art prints, and aesthetic images that reflect your personality.
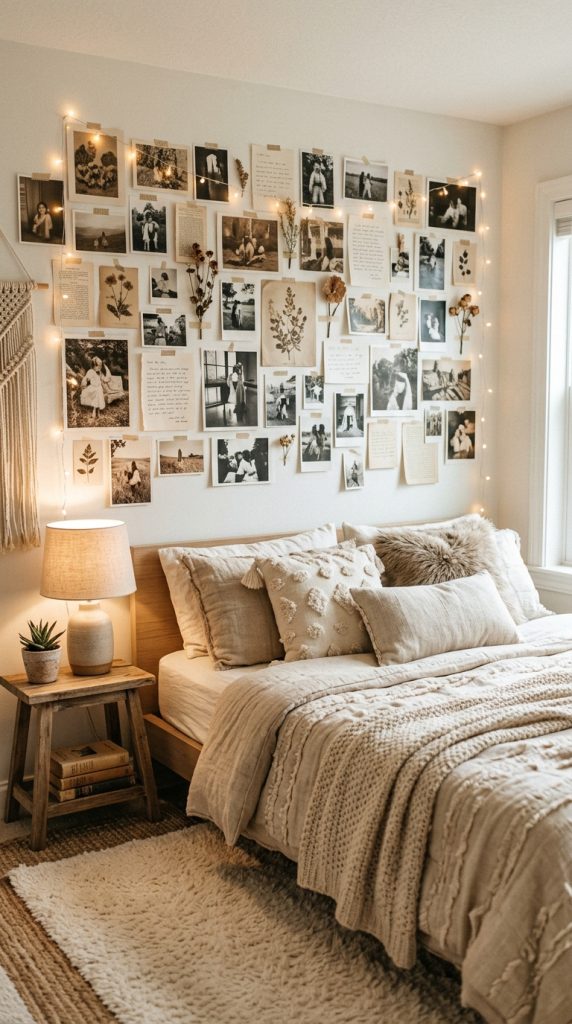
Photo walls have become incredibly popular on Pinterest because they instantly make a room feel warm, lived-in, and creative. Whether you prefer vintage tones, neutral aesthetics, black-and-white photography, or colorful images, this DIY project allows endless customization.
Why Create a Photo Wall?
Bedrooms should feel personal and comforting. A photo wall creates emotional connections by surrounding you with memories, inspiration, and things you love.
Benefits include:
- Inexpensive wall decor.
- Easy customization.
- Personal expression.
- Simple installation.
- Flexible layouts.
- Constantly changeable design.
Materials Needed
- Printed photographs
- Postcards
- Art prints
- Washi tape
- Picture frames
- String lights
- Adhesive strips
- Corkboard or grid panel (optional)
- Scissors
Choosing a Theme
Your collage can follow a specific aesthetic:
- Neutral beige tones.
- Vintage travel photographs.
- Nature-inspired images.
- Minimalist black and white.
- Cottagecore aesthetics.
- Inspirational quotes.
- Fashion photography.
- Personal memories.
Step-by-Step Instructions
Step 1: Collect Images
Print photos or gather aesthetic images that match your style.
Step 2: Plan the Layout
Arrange everything on the floor before hanging.
Step 3: Create Balance
Mix large and small images while maintaining consistent spacing.
Step 4: Attach to the Wall
Use removable adhesive strips or decorative tape.
Step 5: Add Lighting
String lights around the collage create a soft and dreamy glow.
Popular Layout Ideas
- Grid arrangement.
- Heart shape.
- Vertical gallery.
- Corner collage.
- Above-bed display.
- Full accent wall.
Styling Tips
- Use similar color tones.
- Add handwritten notes.
- Include pressed flowers.
- Mix photos with artwork.
- Incorporate small mirrors.
- Layer textures.
Budget-Friendly Options
Most photo wall projects cost very little. You can print pictures at home, use magazine cutouts, or create digital art prints yourself.
The beauty of this decor idea is that it evolves over time. New memories, travel photos, and favorite images can always be added, allowing your bedroom to grow with you.
A DIY photo wall turns blank walls into meaningful art while creating one of the most cozy and personalized bedroom aesthetics found on Pinterest today.
4. DIY Macramé Wall Hanging for a Soft Boho Bedroom Vibe
A handmade macramé wall hanging is one of the most popular Pinterest bedroom decor trends because it adds texture, warmth, and artistic character to a room. Unlike traditional framed artwork, macramé introduces soft woven details that instantly make a bedroom feel cozy and relaxing. Whether your style is bohemian, minimalist, Scandinavian, or cottage-inspired, this DIY project can easily fit into almost any bedroom design.
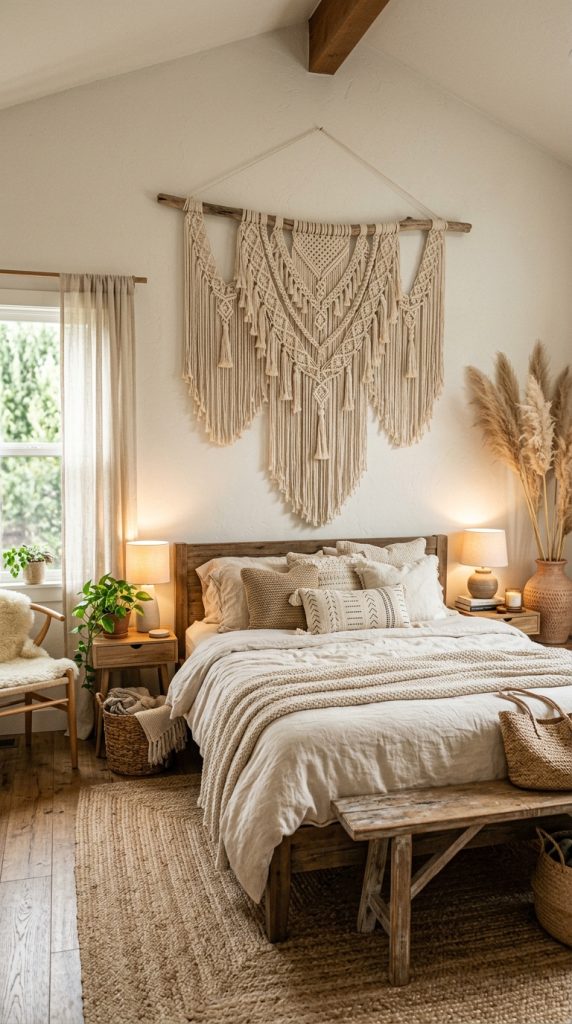
Macramé wall hangings work especially well above the bed, near a reading corner, beside a dresser, or on an empty accent wall. The natural fibers create visual softness and help balance modern furniture with organic textures.
Why Macramé Decor Works
Modern bedrooms often contain smooth surfaces such as painted walls, mirrors, and furniture. Macramé introduces texture, making the space feel warmer and more inviting.
Benefits include:
- Adds visual texture.
- Creates a handmade appearance.
- Works with neutral color palettes.
- Affordable to make.
- Suitable for beginners.
- Complements many decor styles.
Materials Needed
- Cotton macramé cord
- Wooden dowel or driftwood branch
- Measuring tape
- Scissors
- Comb or brush
- Hanging hook
- Decorative beads (optional)
Step-by-Step Instructions
Step 1: Cut the Cord
Cut several equal lengths of cotton rope depending on the desired size.
Step 2: Attach to the Dowel
Fold each piece and secure it using simple knot techniques.
Step 3: Create Patterns
Use square knots, spiral knots, and alternating patterns to create designs.
Step 4: Trim the Bottom
Shape the ends into a triangle, arch, or straight line.
Step 5: Brush the Fibers
Comb the ends gently to create a soft fringe effect.
Styling Ideas
- Hang above the headboard.
- Pair with fairy lights.
- Add dried flowers.
- Combine with wooden furniture.
- Display near plants.
- Layer with framed artwork.
Color Options
Although cream-colored rope remains the most popular choice, you can also experiment with:
- Beige
- Soft gray
- Sage green
- Dusty pink
- Terracotta
Budget-Friendly Tip
Many beginners start with small macramé projects before creating larger wall pieces. Even a simple design can become a beautiful focal point that looks professionally made.
Macramé wall decor adds warmth, texture, and personality, making it one of the easiest ways to achieve a dreamy bedroom aesthetic.
5. Create a Cozy Reading Corner with DIY Decor
A reading corner can transform an unused area of your bedroom into a peaceful retreat where you can relax, read, journal, or simply unwind after a long day. This cozy nook adds both functionality and charm while creating one of the most Pinterest-worthy spaces inside the bedroom.
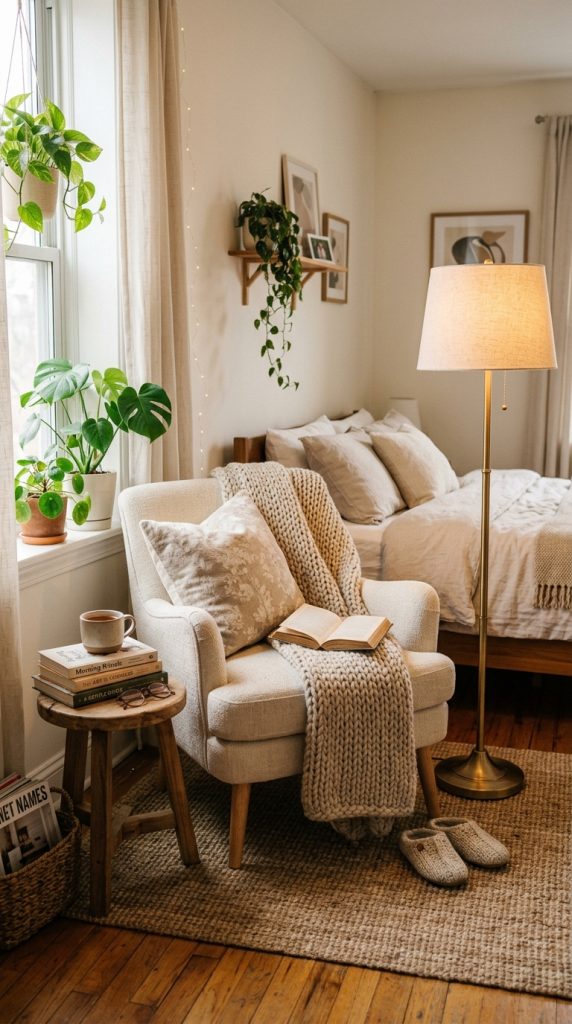
Even small bedrooms can accommodate a reading corner with thoughtful planning. A comfortable chair, soft lighting, and layered textures can instantly make any corner feel inviting.
Why Every Bedroom Needs a Reading Corner
Bedrooms should support relaxation, not just sleep. A dedicated reading space encourages slower routines and creates a calming environment.
Benefits include:
- Encourages relaxation.
- Adds visual interest.
- Uses empty corners effectively.
- Creates a personal retreat.
- Enhances room functionality.
Materials Needed
- Accent chair or floor cushion
- Soft blanket
- Throw pillows
- Small side table
- Floor lamp
- Area rug
- Bookshelf or basket
- Candles or decorative objects
Step-by-Step Guide
Step 1: Choose the Right Corner
Select an area near natural light or a quiet section of the room.
Step 2: Add Comfortable Seating
Choose a chair, bean bag, floor cushion, or upholstered seat.
Step 3: Layer Soft Textures
Add blankets, pillows, and a plush rug.
Step 4: Install Lighting
Use warm lamps or fairy lights for evening comfort.
Step 5: Add Storage
Place books in baskets, shelves, or small side tables.
Decorating Ideas
- Add a hanging chair.
- Include a small plant.
- Display favorite books.
- Use knitted blankets.
- Add framed art.
- Incorporate candles.
Creating a Dreamy Atmosphere
Soft lighting plays a major role in reading corners. Warm table lamps create a relaxing glow, while textured fabrics make the space feel comfortable and welcoming.
Neutral colors such as cream, beige, sage green, and soft gray work especially well in cozy reading areas.
Small Bedroom Solutions
If space is limited:
- Use floor cushions.
- Install floating shelves.
- Choose foldable furniture.
- Use wall-mounted lighting.
- Place seating beside the bed.
A reading corner provides both beauty and purpose, helping your bedroom become a space for rest, creativity, and relaxation.
6. DIY Mirror Wall Arrangement to Make the Room Feel Bigger
Mirrors are one of the most powerful decorating tools because they reflect light, create depth, and make bedrooms appear larger. A DIY mirror wall arrangement can become a stunning focal point while enhancing the overall brightness of your room.
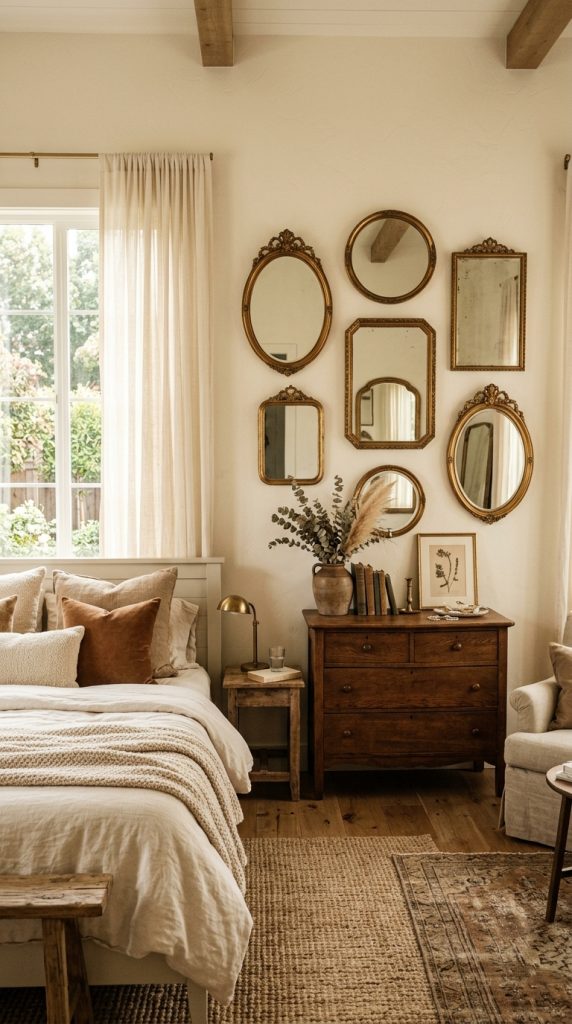
Pinterest is filled with creative mirror designs because they offer both style and functionality. Whether you prefer vintage mirrors, modern geometric designs, or thrifted frames, this project allows endless creativity.
Why Mirrors Are Essential in Bedroom Decor
Mirrors help maximize natural light and visually expand smaller spaces.
Benefits include:
- Makes the room appear larger.
- Reflects natural sunlight.
- Creates visual interest.
- Enhances wall decor.
- Adds elegance and style.
Materials Needed
- Mirrors of various sizes
- Adhesive strips
- Measuring tape
- Pencil
- Picture hanging hardware
- Frames (optional)
- Spray paint (optional)
Choosing Your Mirror Style
Popular options include:
- Round mirrors.
- Arched mirrors.
- Vintage frames.
- Gold accents.
- Minimal black frames.
- Sunburst mirrors.
Step-by-Step Instructions
Step 1: Plan the Layout
Arrange the mirrors on the floor first to visualize the design.
Step 2: Mark the Wall
Use tape or a pencil to indicate placement.
Step 3: Install Securely
Attach mirrors using appropriate hanging hardware.
Step 4: Check Alignment
Ensure spacing remains balanced.
Step 5: Style the Surrounding Area
Add plants, lamps, or furniture nearby.
Placement Ideas
- Above the dresser.
- Beside the bed.
- Full accent wall.
- Reading corner.
- Opposite windows.
- Above floating shelves.
Creating a Pinterest Look
Mix mirror shapes and sizes for a collected appearance. Combining vintage and modern frames creates character and uniqueness.
You can also paint old thrift-store frames to match your bedroom color palette.
Budget-Friendly Options
Secondhand stores often offer affordable mirrors that can be refinished or repainted. Dollar-store mirrors can also be arranged into creative gallery walls.
Extra Styling Tips
- Position mirrors across from windows.
- Add fairy lights nearby.
- Use warm metallic frames.
- Combine mirrors with artwork.
- Include natural textures.
A mirror wall arrangement brings light, elegance, and openness into the bedroom while serving as both functional decor and beautiful wall art. This simple DIY project can dramatically transform the entire appearance of your room without requiring a major budget.
7. DIY Bedside Crate Nightstand for Rustic Charm
A bedside table is one of the most useful pieces of furniture in any bedroom, but stylish nightstands can often be expensive. A DIY crate nightstand offers an affordable and creative solution that adds both storage and personality to your room. Wooden crates can easily be transformed into beautiful bedside tables that complement farmhouse, boho, modern rustic, or cottage-inspired bedroom designs.
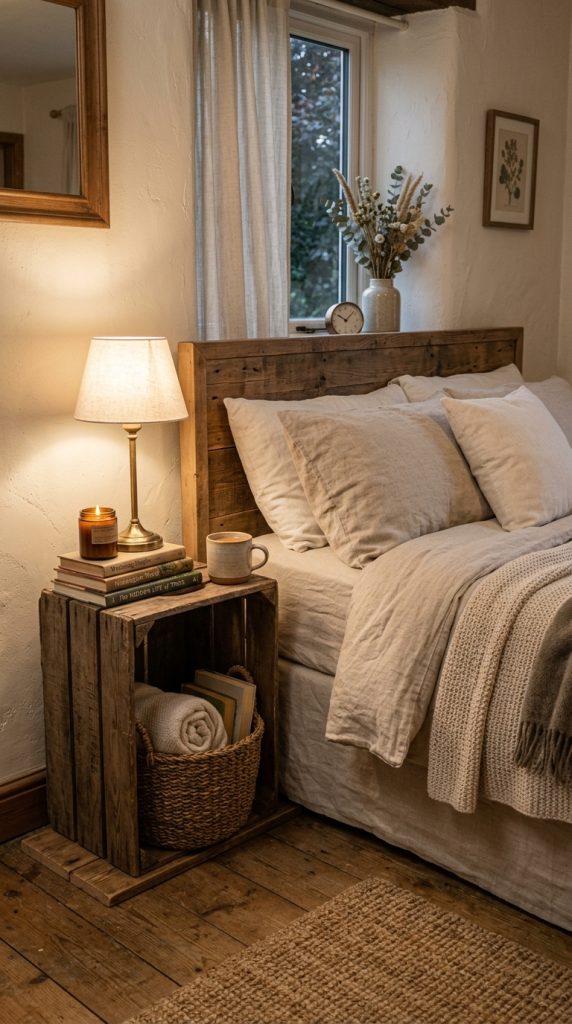
This project is particularly popular on Pinterest because it combines functionality with aesthetic appeal. The natural wood texture creates warmth while the open storage design helps keep everyday essentials organized.
Why Crate Nightstands Are Popular
Traditional bedside tables can take up space and often cost more than expected. Wooden crates provide an inexpensive alternative that can be customized to match your bedroom style.
Benefits include:
- Affordable furniture solution.
- Easy beginner project.
- Extra storage space.
- Customizable finishes.
- Rustic and cozy appearance.
- Suitable for small bedrooms.
Materials Needed
- Wooden crates
- Sandpaper
- Wood stain or paint
- Paintbrush
- Screws or brackets
- Protective wood finish
- Small caster wheels (optional)
- Decorative baskets
Step-by-Step Instructions
Step 1: Choose Your Crates
Select sturdy wooden crates of similar sizes. New or reclaimed crates both work well.
Step 2: Sand the Surface
Smooth rough edges to create a polished appearance.
Step 3: Paint or Stain
Apply a wood stain for a rustic look or paint for a modern finish.
Step 4: Assemble the Design
Use one crate vertically for open shelving or stack two crates for additional storage.
Step 5: Add Finishing Touches
Install wheels if desired and apply a protective sealant.
Styling Your Nightstand
Decorate the top surface with:
- Table lamps.
- Candles.
- Small plants.
- Books.
- Decorative trays.
- Clocks.
- Ceramic vases.
The open compartment can store:
- Blankets.
- Books.
- Storage baskets.
- Chargers.
- Journals.
Popular Color Choices
- Natural wood.
- White.
- Beige.
- Sage green.
- Matte black.
- Warm walnut.
Small Bedroom Solutions
Because crates offer built-in storage, they eliminate the need for larger furniture pieces. This makes them ideal for apartments, dorm rooms, and compact bedrooms.
Budget-Friendly Tips
Many local stores sell inexpensive wooden crates, and some can even be found secondhand. Repurposing old crates keeps costs low while creating a one-of-a-kind piece.
A DIY crate nightstand adds warmth, practicality, and handmade charm, making it one of the easiest ways to create a cozy Pinterest-inspired bedroom.
8. Handmade Decorative Pillow Covers for a Cozy Bed
One of the simplest ways to completely transform a bedroom is by updating your pillows. Decorative pillow covers add texture, color, and softness while helping your bed become the focal point of the room. Instead of purchasing expensive designer cushions, you can create your own custom pillow covers that perfectly match your bedroom aesthetic.
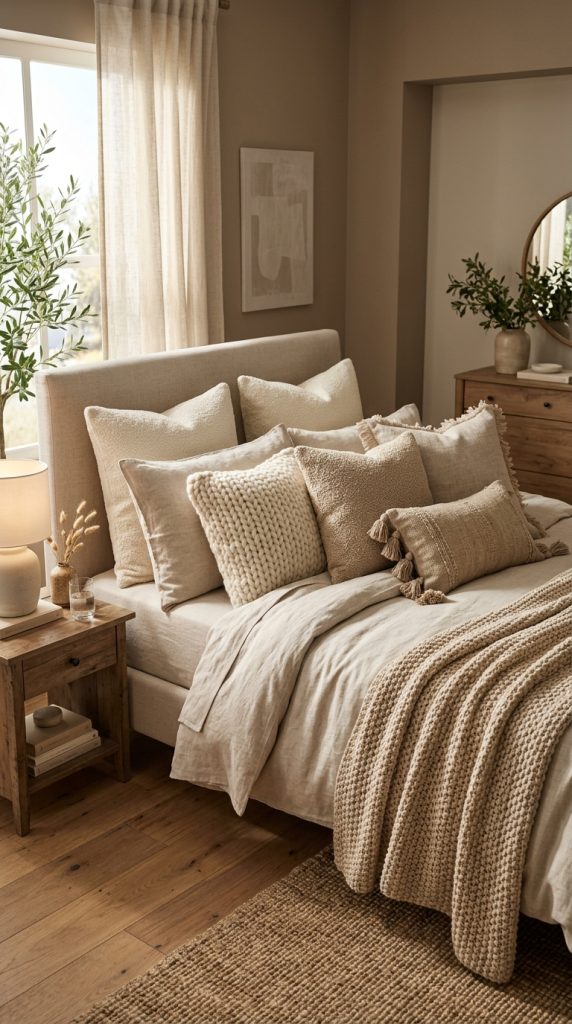
Pinterest bedrooms often feature layered bedding with multiple pillows in different textures and patterns. This layered look makes the room feel luxurious, inviting, and professionally styled.
Why Decorative Pillows Matter
The bed is usually the largest piece of furniture in the room, so even small changes to bedding can significantly impact the overall appearance.
Benefits include:
- Affordable room updates.
- Seasonal decorating options.
- Added comfort.
- Personalized style.
- Easy beginner sewing project.
- Endless fabric choices.
Materials Needed
- Fabric of your choice
- Pillow inserts
- Measuring tape
- Sewing machine or fabric glue
- Scissors
- Thread
- Zippers or buttons (optional)
- Decorative trims
Choosing the Right Fabrics
Popular Pinterest fabrics include:
- Linen.
- Cotton.
- Velvet.
- Knit fabrics.
- Faux fur.
- Woven materials.
Neutral colors such as cream, beige, and soft gray create timeless looks, while muted earth tones add warmth.
Step-by-Step Instructions
Step 1: Measure the Pillow
Measure the pillow insert carefully before cutting the fabric.
Step 2: Cut the Fabric
Add extra inches for seams and overlap.
Step 3: Sew the Edges
Create an envelope closure or install a zipper.
Step 4: Turn the Cover Right Side Out
Press the seams for a clean finish.
Step 5: Insert the Pillow
Arrange the pillow to create a full, plush appearance.
Layering Techniques
Professional-looking beds often include:
- Two large pillows.
- Two medium pillows.
- One accent pillow.
- One textured cushion.
Mixing different sizes creates depth and comfort.
Decorative Additions
You can personalize your pillow covers with:
- Tassels.
- Fringe.
- Embroidery.
- Pom-poms.
- Buttons.
- Fabric patches.
Seasonal Styling
Changing pillow covers allows you to refresh your room throughout the year:
- Light linen for summer.
- Velvet for winter.
- Floral prints for spring.
- Warm earth tones for autumn.
Budget Decorating Tips
Old curtains, blankets, or unused fabric can be repurposed into pillow covers, making this project highly affordable.
Decorative pillows instantly make a bedroom feel softer, cozier, and more luxurious while allowing you to showcase your personal style through textures and colors.
9. DIY Hanging Plants for a Fresh and Natural Bedroom
Adding plants to your bedroom is one of the easiest ways to create a calm, relaxing environment. Hanging plants bring life, color, and natural beauty into a room while making use of vertical space. This DIY project is especially popular on Pinterest because it combines greenery with decorative design.
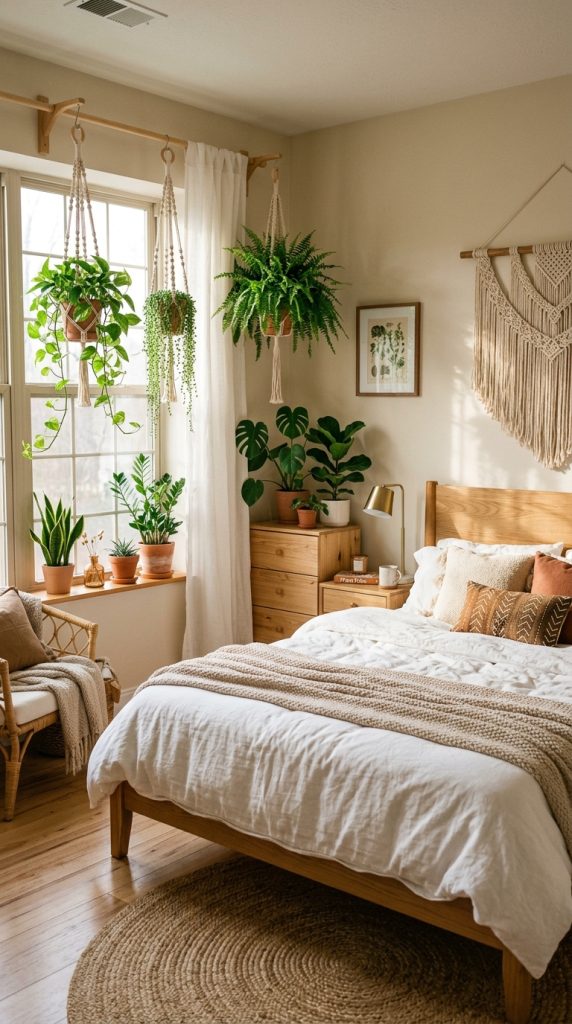
Plants not only improve the appearance of a room but also help create a peaceful atmosphere that promotes relaxation. Whether you choose real plants or realistic artificial greenery, hanging displays can make your bedroom feel fresh and inviting.
Why Plants Improve Bedroom Decor
Natural elements soften interior spaces and add organic texture.
Benefits include:
- Adds color and life.
- Creates a calming environment.
- Uses vertical space.
- Improves visual balance.
- Enhances cozy aesthetics.
- Complements many decor styles.
Materials Needed
- Small indoor plants
- Hanging planters
- Macramé holders
- Ceiling hooks
- Wall brackets
- Potting soil
- Decorative pots
- Water tray
Best Bedroom Plants
Popular low-maintenance plants include:
- Pothos.
- Spider plants.
- Philodendrons.
- String of pearls.
- English ivy.
- Ferns.
- Artificial vines.
Step-by-Step Instructions
Step 1: Choose the Location
Identify areas near windows or well-lit corners.
Step 2: Install Hooks
Secure ceiling hooks or wall brackets safely.
Step 3: Prepare the Plants
Transfer plants into decorative containers.
Step 4: Hang the Planters
Adjust the height to create balance.
Step 5: Arrange Multiple Plants
Group different sizes together for visual interest.
Creative Hanging Ideas
- Corner plant clusters.
- Window displays.
- Above-bed greenery.
- Shelf arrangements.
- Hanging vine walls.
- Bedside plant displays.
Styling Tips
Combine plants with:
- Fairy lights.
- Wooden furniture.
- Neutral bedding.
- Woven baskets.
- Macramé hangers.
- Ceramic pots.
Small Bedroom Solutions
If floor space is limited, hanging plants provide greenery without occupying valuable space. Wall-mounted planters and shelves work especially well in apartments and compact bedrooms.
Plant Care Basics
- Avoid overwatering.
- Rotate plants toward sunlight.
- Remove dead leaves regularly.
- Use appropriate containers.
- Check drainage.
Budget-Friendly Options
Small plants are usually inexpensive, and many can be propagated from existing plants. Artificial greenery also provides a maintenance-free alternative.
DIY hanging plants create a peaceful and refreshing atmosphere while bringing natural beauty indoors. This simple decor project instantly adds warmth and life to any dreamy bedroom design.
10. DIY Fabric Headboard for a Luxurious Bedroom Look
A beautiful headboard can instantly elevate the entire appearance of a bedroom, but designer headboards often come with expensive price tags. Creating your own fabric headboard is an affordable DIY project that adds elegance, comfort, and softness to your sleeping space. This project can make even the simplest bed frame feel luxurious and customized.
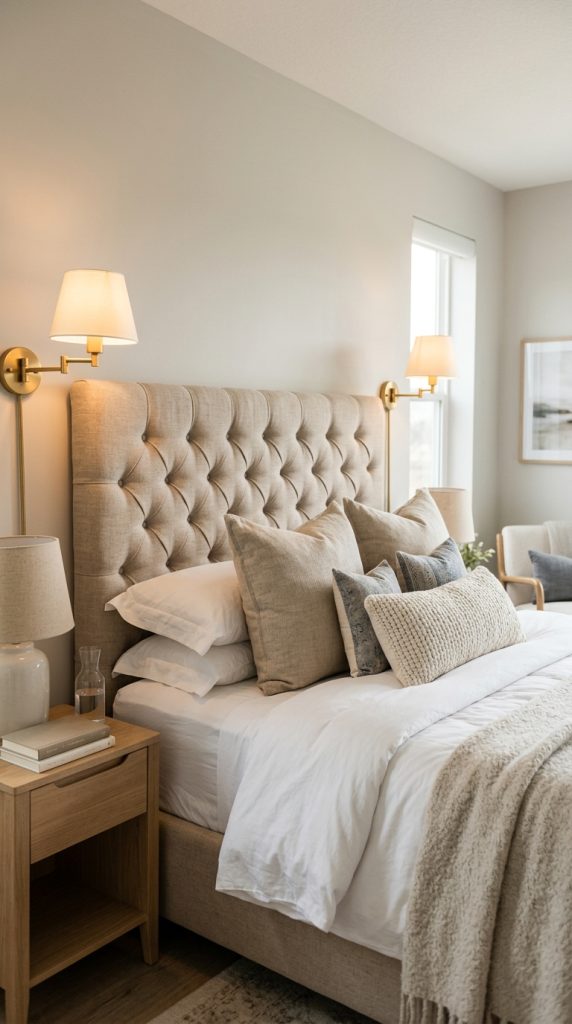
Fabric headboards are especially popular on Pinterest because they introduce texture and create a hotel-inspired atmosphere. Whether you prefer modern neutrals, cozy linen, velvet textures, or soft boucle fabric, a handmade headboard can become the focal point of your bedroom.
Why a Fabric Headboard Makes a Difference
The area behind the bed naturally attracts attention. A soft upholstered headboard adds depth and creates a finished appearance.
Benefits include:
- Creates a luxurious feel.
- Adds softness and comfort.
- Improves bedroom aesthetics.
- Customizable colors and fabrics.
- Budget-friendly alternative.
- Suitable for renters.
Materials Needed
- Plywood board
- Foam padding
- Fabric
- Staple gun
- Scissors
- Measuring tape
- Batting
- Wall mounting hardware
Step-by-Step Instructions
Step 1: Measure the Bed Width
Determine the size of the headboard according to your mattress.
Step 2: Cut the Board
Trim the plywood to your desired dimensions.
Step 3: Add Foam Padding
Attach foam using adhesive for extra comfort.
Step 4: Wrap with Batting
Cover the foam completely.
Step 5: Attach the Fabric
Pull the fabric tightly and secure it with staples.
Step 6: Mount the Headboard
Attach it to the wall or bed frame.
Popular Fabric Choices
- Linen.
- Velvet.
- Boucle.
- Cotton.
- Faux suede.
- Textured woven fabrics.
Styling Ideas
- Add fairy lights.
- Layer decorative pillows.
- Use neutral bedding.
- Hang artwork above.
- Add wall sconces.
A DIY fabric headboard instantly creates a cozy, luxurious, and Pinterest-worthy bedroom without requiring a major budget.
11. DIY Candle and Lantern Corner for Soft Ambient Lighting
Lighting is one of the most important elements in creating a dreamy bedroom. A candle and lantern corner provides warm ambient lighting that makes the room feel relaxing, romantic, and peaceful. Instead of relying only on overhead lights, adding soft lighting sources creates layers that completely transform the atmosphere.
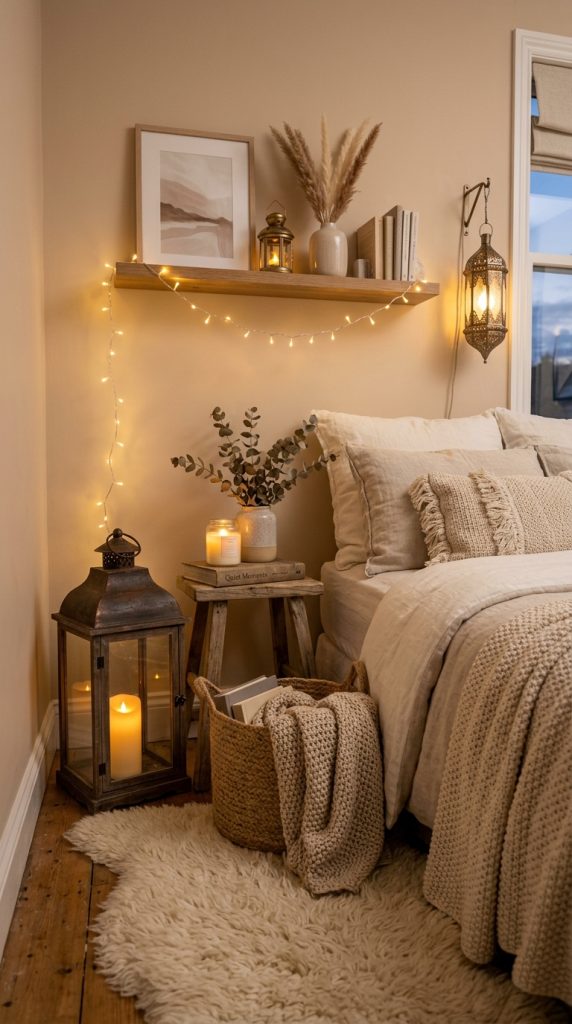
Pinterest bedrooms often feature glowing corners filled with lanterns, candles, and soft decorative lights that create a calming environment.
Why Ambient Lighting Matters
Harsh ceiling lights can make a bedroom feel cold and uninviting. Soft lighting encourages relaxation and creates a cozy atmosphere.
Benefits include:
- Creates a relaxing environment.
- Adds warmth.
- Enhances bedroom aesthetics.
- Improves nighttime ambiance.
- Affordable decorating option.
Materials Needed
- LED candles
- Decorative lanterns
- Candle holders
- Wooden trays
- Fairy lights
- Small plants
- Decorative books
- Mirrors
Step-by-Step Instructions
Step 1: Select a Corner
Choose an unused bedroom corner or bedside area.
Step 2: Add Lanterns
Place different-sized lanterns on the floor or shelves.
Step 3: Arrange Candles
Group candles in varying heights.
Step 4: Add Decorative Accessories
Include books, plants, or vases.
Step 5: Turn on the Lighting
Use warm LED candles for safety.
Styling Tips
- Use warm white lighting.
- Mix metal and wood textures.
- Add mirrors to reflect light.
- Include woven baskets.
- Use neutral accessories.
Safety Tips
Battery-operated candles provide the same warm effect while reducing fire risks, especially in bedrooms.
A candle corner creates a peaceful retreat that makes your bedroom feel cozy every evening.
12. DIY Vintage Frame Gallery Wall
A vintage gallery wall can add personality, elegance, and timeless charm to your bedroom. Mixing different frames, artwork, and decorative pieces creates a curated appearance that looks both stylish and personal.
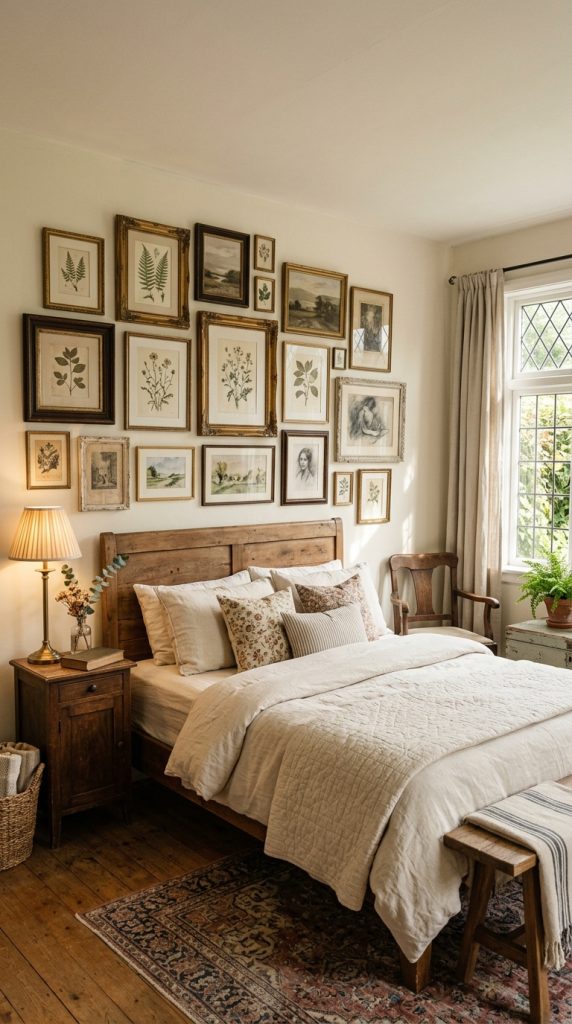
Pinterest users love gallery walls because they allow complete customization while making blank walls more visually interesting.
Why Gallery Walls Work
Large empty walls often feel unfinished. A collection of frames adds texture and artistic interest.
Benefits include:
- Personal expression.
- Budget-friendly artwork.
- Flexible arrangements.
- Vintage charm.
- Easy updates.
Materials Needed
- Picture frames
- Art prints
- Family photographs
- Decorative prints
- Adhesive strips
- Measuring tape
- Paint (optional)
Step-by-Step Instructions
Step 1: Collect Frames
Look for various sizes and styles.
Step 2: Paint the Frames
Unify the collection with similar colors if desired.
Step 3: Plan the Layout
Arrange the frames on the floor.
Step 4: Mark the Wall
Use paper templates for accurate placement.
Step 5: Hang the Artwork
Install the frames securely.
Popular Artwork Ideas
- Botanical prints.
- Vintage sketches.
- Neutral photography.
- Inspirational quotes.
- Landscape art.
- Personal photos.
Styling Tips
- Mix frame sizes.
- Keep similar color tones.
- Add mirrors.
- Include small shelves.
- Use warm lighting.
Budget Decorating Tips
Thrift stores often sell inexpensive frames that can easily be repainted or updated.
A vintage gallery wall makes your bedroom feel collected, personal, and beautifully styled.
13. DIY Decorative Storage Baskets for an Organized Dream Bedroom
Beautiful bedrooms are not only about decoration; organization also plays an important role. Decorative storage baskets provide a practical solution for reducing clutter while enhancing the overall aesthetic of the room.
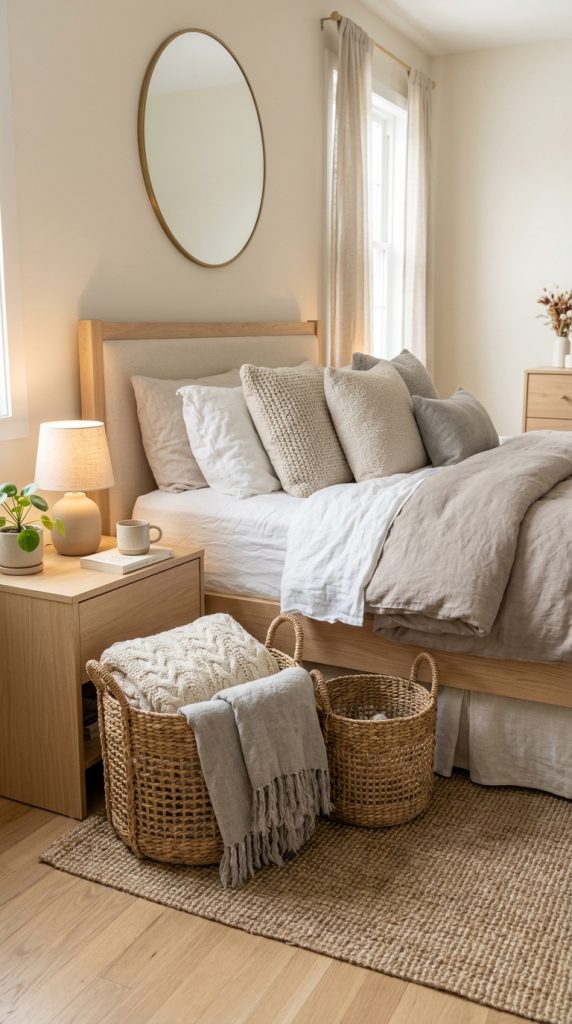
Pinterest bedrooms often appear calm and relaxing because unnecessary items are hidden inside stylish storage containers.
Why Storage Baskets Are Essential
Organized spaces feel more peaceful and visually appealing.
Benefits include:
- Reduces clutter.
- Adds texture.
- Improves organization.
- Provides hidden storage.
- Enhances bedroom aesthetics.
Materials Needed
- Woven baskets
- Rope baskets
- Fabric bins
- Paint
- Labels
- Decorative liners
- Handles
Storage Ideas
Use baskets for:
- Blankets.
- Pillows.
- Books.
- Clothing.
- Accessories.
- Beauty products.
- Chargers.
- Seasonal items.
Step-by-Step Instructions
Step 1: Select Basket Sizes
Choose different sizes according to storage needs.
Step 2: Customize the Appearance
Paint or decorate the baskets if desired.
Step 3: Add Labels
Identify contents for easier organization.
Step 4: Place Strategically
Position baskets under benches, beside beds, or on shelves.
Step 5: Maintain Organization
Regularly sort and remove unnecessary items.
Decorating Tips
- Use natural woven textures.
- Add fabric liners.
- Match your bedroom colors.
- Pair with wooden furniture.
- Combine with plants.
Small Bedroom Solutions
Baskets can fit:
- Under the bed.
- Inside closets.
- On floating shelves.
- Under benches.
- Beside dressers.
Budget-Friendly Options
Affordable baskets are available at thrift stores, discount shops, or can even be made using rope and fabric.
Decorative storage baskets prove that organization and beauty can work together. By keeping clutter hidden while adding texture and warmth, they help create the calm and dreamy bedroom aesthetic that so many Pinterest users love.