
12 Modern Garage Organization ideas Aesthetics
The garage is no longer just a place to park vehicles or store forgotten boxes. Today, homeowners are transforming their garages into clean, organized, and highly functional spaces that look just as stylish as the rest of the home. Modern garage organization focuses on combining smart storage solutions with minimalist design, creating a clutter-free environment that’s practical for everyday use. Whether your garage serves as a workshop, home gym, hobby room, storage area, or all of the above, an organized layout makes every task easier while improving the overall appearance of your home. Pinterest has played a huge role in this trend, showcasing beautifully arranged garages with sleek cabinets, wall-mounted storage systems, labeled containers, and coordinated color palettes. These designs prove that organization doesn’t have to sacrifice style—in fact, a well-designed garage can become one of the most aesthetically pleasing spaces in your home.

Planning an Organized and Functional Garage
Before purchasing storage bins or installing shelving, it’s important to evaluate how your garage is currently being used. Take time to sort your belongings into categories such as tools, gardening equipment, sports gear, automotive supplies, seasonal decorations, cleaning products, and household storage. Removing unnecessary clutter is the first step toward creating a modern garage that feels spacious and efficient. Once you’ve decluttered, think about how often you use each category. Frequently used items should be placed within easy reach, while seasonal or rarely used belongings can be stored on higher shelves or overhead racks. Planning storage zones before organizing prevents wasted space and ensures every item has a designated home, making it much easier to maintain a tidy garage over time.
Essential Elements of an Aesthetic Garage Organization System
A beautiful garage isn’t created by expensive cabinets alone—it’s the result of thoughtful organization and consistent design. Modern garage aesthetics rely on clean lines, coordinated storage containers, neutral color palettes, durable materials, and efficient layouts. Wall-mounted cabinets keep floors clear while maximizing vertical storage, and pegboards, slatwall systems, and floating shelves provide flexible organization for tools and accessories. Clear storage bins with printed labels make it easy to find items quickly while maintaining a neat appearance. Durable flooring such as epoxy coatings or interlocking garage tiles further enhances the clean, polished look while making maintenance simple. Good lighting also plays a significant role. Bright LED ceiling fixtures, task lighting above workbenches, and under-cabinet lighting improve visibility while giving the garage a fresh, modern atmosphere that feels welcoming rather than purely functional.
Creating a Garage That Stays Organized Every Day
The key to maintaining an organized garage is creating systems that are easy to use consistently. Every item should have a permanent storage location, making cleanup quick and effortless after each project. Modular cabinets, adjustable shelving, rolling carts, and stackable containers allow the organization system to grow alongside your changing needs. Simple habits such as returning tools immediately after use, labeling every storage bin, and performing seasonal decluttering sessions help preserve the clean aesthetic throughout the year. Personal touches like framed artwork, coordinated storage colors, decorative planters, or stylish wall clocks can also make the garage feel more inviting without reducing functionality. Whether you have a compact single-car garage or a spacious workshop, the following modern garage organization ideas will help you maximize storage, improve efficiency, and create an aesthetically pleasing space that’s worthy of saving on Pinterest.
1. Floor-to-Ceiling Modular Cabinet Storage
One of the best ways to achieve a clean and luxurious garage is by installing floor-to-ceiling modular cabinets. Modern garages prioritize concealed storage because it instantly eliminates visual clutter while creating a sleek, high-end appearance. Instead of leaving tools, paint cans, cleaning products, and automotive supplies exposed on open shelves, store them neatly behind matching cabinet doors. This simple upgrade makes the garage feel more like a professionally designed workspace than a basic storage area.
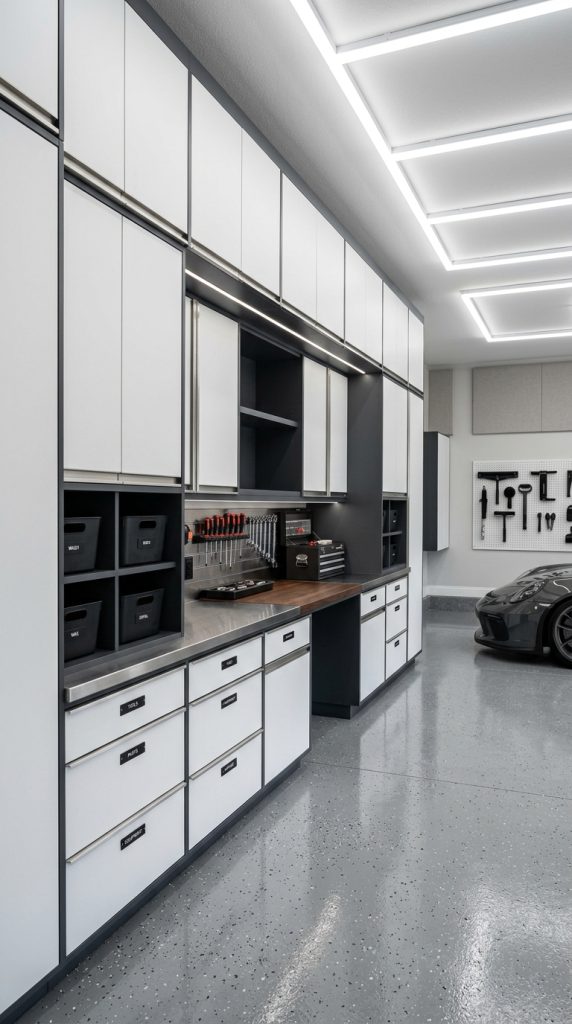
Pinterest is filled with beautiful garages featuring matte black, white, gray, or natural wood cabinets because they create a cohesive aesthetic while maximizing every inch of wall space. Modular cabinet systems can be customized to fit garages of any size, allowing you to combine tall cabinets, base cabinets, drawers, and overhead storage according to your needs. Adjustable shelving also makes it easy to reorganize the interior as your storage requirements change over time.
A consistent color palette further enhances the modern look. Pair neutral cabinets with epoxy flooring, stainless steel hardware, and bright LED lighting to create a garage that feels spacious, organized, and easy to maintain.
Why Modular Cabinets Are Worth It
They combine maximum storage with a clean, sophisticated appearance.
Benefits include:
- Hides everyday clutter.
- Maximizes vertical storage.
- Creates a luxury garage look.
- Protects stored items from dust.
- Easy to customize.
- Highly Pinterest-worthy.
Materials You’ll Need
Gather:
- Modular garage cabinets
- Adjustable shelves
- Cabinet handles
- Wall anchors
- Power drill
- Measuring tape
- Level
- Storage bins
- Labels
- LED lighting
- Tool organizers
- Cleaning supplies
Step-by-Step Organization Guide
Step 1: Empty the Garage Wall
Remove existing shelves and clean the area thoroughly.
Step 2: Measure the Space
Plan cabinet placement before installation.
Step 3: Install the Cabinets
Secure upper and lower cabinets according to the manufacturer’s instructions.
Step 4: Organize by Category
Store similar items together inside each cabinet.
Step 5: Label Everything
Clearly identify each cabinet section for quick access.
Step 6: Maintain the System
Return every item to its designated place after use.
Styling Ideas
Complete the garage with:
- Matte black hardware.
- White cabinets.
- Hidden LED lighting.
- Minimalist labels.
- Decorative storage baskets.
- Epoxy flooring.
Expert Tip
Choose cabinets with adjustable shelves so your storage system can easily adapt as your tools and equipment collection grows.
Floor-to-ceiling modular cabinets create a streamlined garage that feels organized, elegant, and incredibly functional for everyday use.
2. Slatwall Storage System for Tools and Accessories
A slatwall storage system is one of the smartest ways to organize tools while keeping everything visible and easily accessible. Unlike traditional pegboards, slatwall panels offer greater strength, flexibility, and a cleaner appearance. Hooks, baskets, shelves, and specialized holders can all be repositioned without damaging the wall, making it easy to customize the layout whenever your storage needs change.
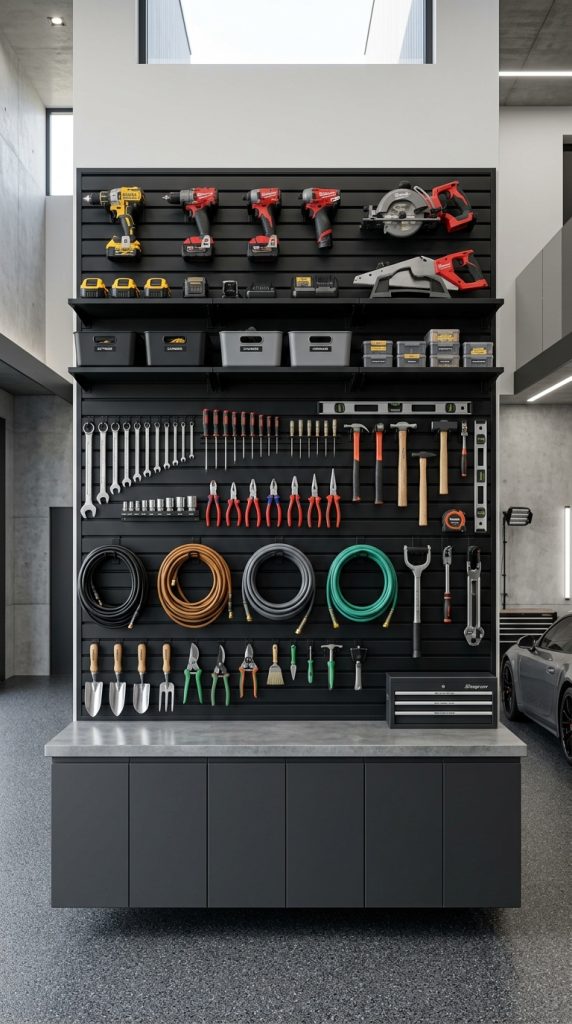
Modern Pinterest garages frequently feature full slatwall installations because they create an organized workshop while adding visual appeal. Instead of piling tools into drawers, frequently used items are displayed neatly on the wall where they’re always within reach. Power tools, extension cords, garden equipment, cleaning supplies, and sports accessories can all have dedicated locations, making the garage feel efficient and clutter-free.
Matching hooks and accessories in black or brushed metal further enhance the modern aesthetic while ensuring durability for years of daily use.
Why Slatwall Systems Work So Well
Wall-mounted storage keeps tools organized while freeing valuable floor space.
Benefits include:
- Easy tool access.
- Flexible organization.
- Saves floor space.
- Clean professional appearance.
- Highly customizable.
- Perfect Pinterest aesthetic.
Materials You’ll Need
Prepare:
- Slatwall panels
- Wall anchors
- Hooks
- Storage baskets
- Tool holders
- Shelves
- Screwdriver
- Drill
- Measuring tape
- Level
- Labels
- Cleaning cloth
Step-by-Step Organization Guide
Step 1: Install the Panels
Secure the slatwall firmly to wall studs.
Step 2: Plan the Layout
Arrange frequently used tools at eye level.
Step 3: Install Hooks
Place specialized holders for different equipment.
Step 4: Group Similar Items
Keep gardening, automotive, and household tools together.
Step 5: Add Storage Baskets
Store smaller accessories neatly inside labeled containers.
Step 6: Review Regularly
Adjust hook positions whenever your storage needs change.
Styling Ideas
Decorate the wall with:
- Black metal hooks.
- Matching storage bins.
- Magnetic tool strips.
- Floating shelves.
- LED task lighting.
- Minimalist labels.
Expert Tip
Leave some empty space on the slatwall so you have room to expand your organization system as you acquire new tools.
A slatwall storage system creates a modern, highly organized garage where every tool has a dedicated place and every project becomes easier.
3. Modern Workbench with Built-In Storage
A thoughtfully designed workbench serves as the centerpiece of any organized garage. Rather than using a simple table, create a modern workstation with built-in drawers, cabinets, shelving, and integrated lighting. This provides a dedicated area for repairs, DIY projects, hobbies, and home maintenance while keeping essential tools neatly organized and close at hand.
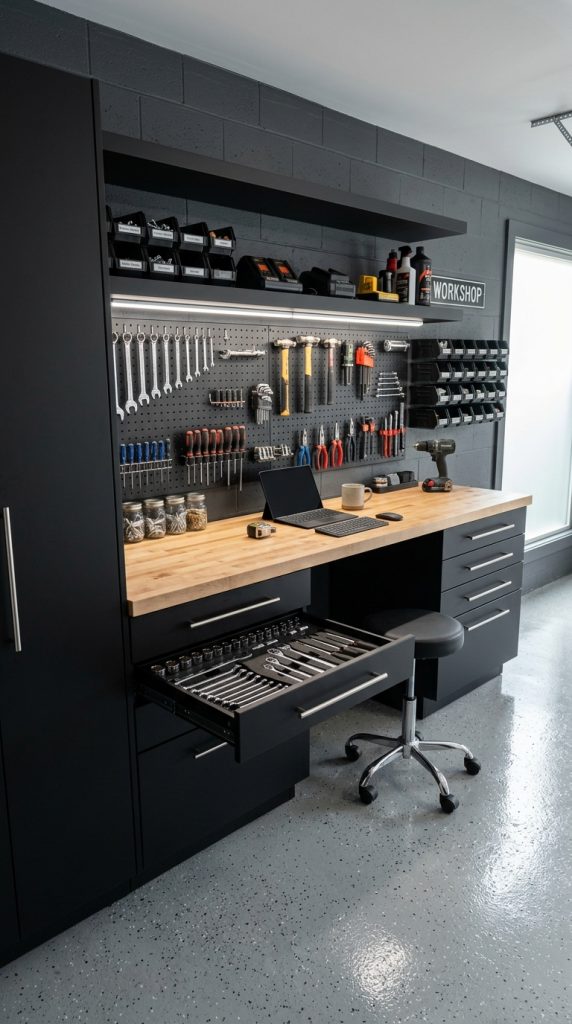
Pinterest-inspired garage workbenches combine durable materials with minimalist styling. Wooden countertops paired with matte black cabinetry, stainless steel hardware, and bright LED task lighting create a workspace that feels both practical and luxurious. Adding drawers beneath the countertop allows frequently used hand tools to remain hidden but easily accessible, while upper shelving provides storage for larger equipment and decorative accessories.
A clean workbench also encourages productivity because everything you need is organized within easy reach, reducing wasted time searching for tools or supplies.
Why Every Garage Needs a Workbench
A dedicated workspace improves organization and makes projects more enjoyable.
Benefits include:
- Functional DIY workspace.
- Organized tool storage.
- Clean modern appearance.
- Improves efficiency.
- Multi-purpose design.
- Highly Pinterest-worthy.
Materials You’ll Need
Gather:
- Solid wood countertop
- Base cabinets
- Drawer organizers
- Floating shelves
- Pegboard or slatwall
- LED task lights
- Power strip
- Tool organizers
- Storage bins
- Measuring tape
- Drill
- Screws
Step-by-Step Organization Guide
Step 1: Install the Base Cabinets
Secure them evenly along the chosen wall.
Step 2: Add the Countertop
Install a durable wood or composite work surface.
Step 3: Mount Shelving
Place floating shelves above the workbench.
Step 4: Install Lighting
Position bright LED lights directly above the workspace.
Step 5: Organize the Drawers
Separate tools using drawer dividers and organizers.
Step 6: Finish the Area
Add labels, charging stations, and decorative storage containers.
Styling Ideas
Complete the workspace with:
- Butcher block countertop.
- Matte black cabinets.
- Stainless steel handles.
- Floating shelves.
- LED strip lighting.
- Matching storage bins.
Expert Tip
Install electrical outlets and USB charging ports above the workbench so power tools and rechargeable equipment are always ready to use.
A modern workbench with built-in storage transforms your garage into a stylish, efficient workspace that combines professional organization with contemporary design.
4. Clear Storage Bin System with Minimalist Labels
A clear storage bin system is one of the easiest ways to create an organized and aesthetically pleasing garage. Instead of storing items in random cardboard boxes or mismatched containers, use uniform transparent bins that allow you to quickly identify what’s inside without opening every lid. This simple upgrade not only saves time but also creates a clean, cohesive appearance that instantly makes the garage feel more spacious and professionally organized.
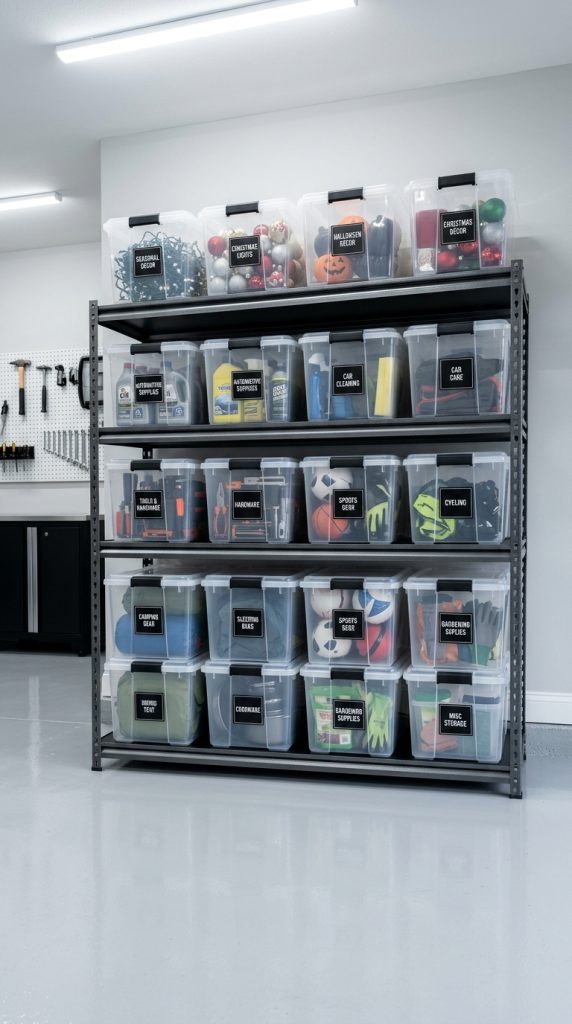
Pinterest garages often feature rows of identical clear bins with minimalist black-and-white labels because the uniformity creates visual order. Group similar items together, such as holiday decorations, camping gear, automotive supplies, painting tools, and seasonal clothing. Place frequently used bins on lower shelves for easy access, while storing less frequently used items higher up.
Adding durable waterproof labels helps every family member know exactly where items belong, making it easier to maintain the organization system over time. Stackable containers also maximize vertical storage while keeping the garage neat and clutter-free.
Why Clear Bins Are So Effective
Transparent containers improve organization while maintaining a modern aesthetic.
Benefits include:
- Easy to identify contents.
- Creates a clean appearance.
- Maximizes shelf space.
- Protects belongings from dust.
- Simple to maintain.
- Perfect Pinterest aesthetic.
Materials You’ll Need
Gather:
- Clear plastic storage bins
- Matching lids
- Waterproof labels
- Label maker
- Metal shelving
- Step ladder
- Storage dividers
- Permanent marker
- Cleaning cloth
- Measuring tape
- Storage baskets
- Shelf liners
Step-by-Step Organization Guide
Step 1: Sort Your Items
Separate everything into organized categories.
Step 2: Fill the Containers
Store similar items together inside each bin.
Step 3: Label Every Bin
Use consistent fonts and simple wording.
Step 4: Arrange by Frequency
Keep everyday items within easy reach.
Step 5: Stack Neatly
Place heavier bins on lower shelves.
Step 6: Review Seasonally
Reorganize and declutter every few months.
Styling Ideas
Complete the storage area with:
- Uniform clear containers.
- Black minimalist labels.
- Matching shelf bins.
- Metal shelving.
- Neutral color palette.
- LED shelf lighting.
Expert Tip
Choose stackable storage bins with locking lids to keep contents protected while maximizing vertical storage space.
A clear storage bin system creates a garage that’s easy to navigate, visually organized, and effortlessly stylish.
5. Overhead Ceiling Storage for Seasonal Items
One of the most overlooked areas in any garage is the ceiling. Installing overhead storage racks allows you to take advantage of unused vertical space while freeing valuable floor area for vehicles, workbenches, or daily storage. Seasonal decorations, camping gear, luggage, sports equipment, and rarely used household items are perfect candidates for ceiling storage because they don’t require frequent access.
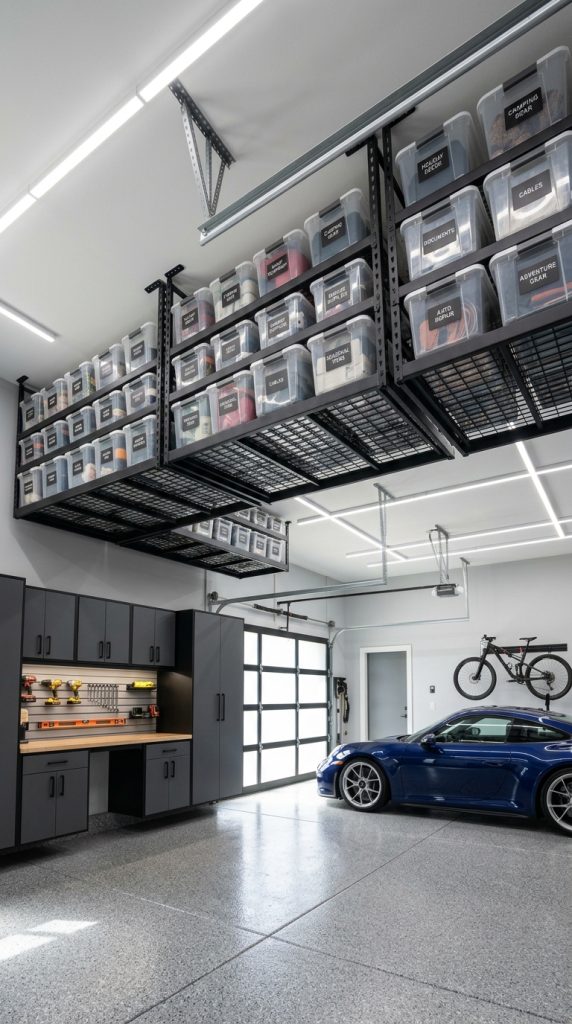
Pinterest-inspired garages often look spacious because bulky storage has been moved off the floor and onto sturdy overhead racks. This creates a cleaner environment while making the garage safer and easier to move around. Modern ceiling-mounted storage systems are designed to hold significant weight when installed correctly into ceiling joists, making them both practical and reliable.
Pair overhead racks with matching labeled storage bins to maintain a cohesive aesthetic. Consistent organization not only improves functionality but also gives the entire garage a polished, professional appearance.
Why Ceiling Storage Is So Smart
Unused ceiling space provides valuable storage without sacrificing floor area.
Benefits include:
- Maximizes available space.
- Reduces floor clutter.
- Ideal for seasonal storage.
- Keeps garage organized.
- Improves overall safety.
- Highly Pinterest-worthy.
Materials You’ll Need
Prepare:
- Ceiling storage racks
- Mounting brackets
- Lag bolts
- Power drill
- Measuring tape
- Stud finder
- Clear storage bins
- Labels
- Step ladder
- Safety glasses
- Socket wrench
- Storage straps
Step-by-Step Organization Guide
Step 1: Locate Ceiling Joists
Use a stud finder before installation.
Step 2: Install the Racks
Secure brackets firmly into structural framing.
Step 3: Fill Storage Bins
Organize seasonal items into labeled containers.
Step 4: Lift the Bins
Carefully place them onto the overhead racks.
Step 5: Keep Heavy Items Balanced
Distribute weight evenly across the system.
Step 6: Update Storage Annually
Rotate seasonal items as needed.
Styling Ideas
Enhance the look with:
- Matching clear bins.
- Printed labels.
- Black steel racks.
- LED ceiling lighting.
- Neutral storage colors.
- Organized shelving below.
Expert Tip
Avoid storing frequently used items overhead. Reserve this space for belongings you only access a few times each year.
Overhead ceiling storage transforms unused space into an efficient organization solution while giving your garage a clean, open, and modern appearance.
6. Sleek Epoxy Flooring with Coordinated Storage
Modern garage organization isn’t just about cabinets and shelves—the floor also plays a major role in creating a polished, high-end appearance. Epoxy flooring instantly upgrades an ordinary concrete floor into a durable, stain-resistant surface that’s easy to clean and visually impressive. Combined with coordinated storage systems, this creates a garage that feels more like a luxury showroom than a basic utility space.
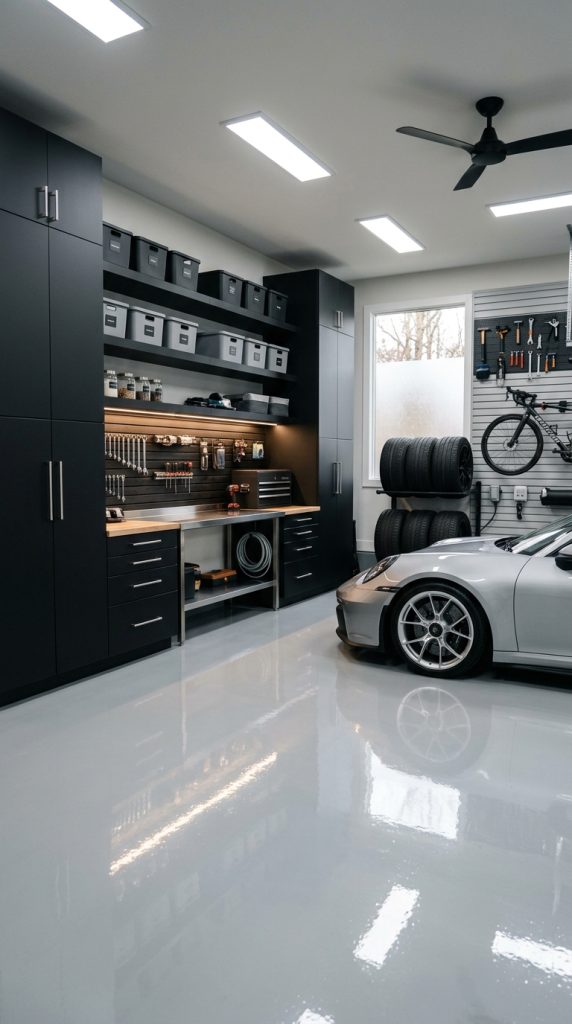
Pinterest garages frequently feature glossy gray, white, or charcoal epoxy floors because they reflect light beautifully while making the room appear brighter and larger. These floors resist oil stains, chemicals, moisture, and heavy vehicle traffic, making them an excellent long-term investment. Matching storage cabinets, organized shelving, and minimalist color palettes further enhance the clean, modern aesthetic.
Bright lighting paired with reflective flooring also improves visibility during DIY projects, vehicle maintenance, or everyday tasks, making the garage both beautiful and practical.
Why Epoxy Floors Improve Garage Design
They combine durability with a clean, premium appearance.
Benefits include:
- Easy to clean.
- Resists stains and chemicals.
- Brightens the garage.
- Long-lasting durability.
- Professional showroom look.
- Highly Pinterest-worthy.
Materials You’ll Need
Gather:
- Epoxy floor coating
- Concrete cleaner
- Floor degreaser
- Paint roller
- Mixing bucket
- Protective gloves
- Painter’s tape
- Floor scraper
- Garage cabinets
- Storage bins
- LED lighting
- Floor mats
Step-by-Step Organization Guide
Step 1: Prepare the Floor
Clean and repair any cracks in the concrete.
Step 2: Apply the Epoxy
Follow the manufacturer’s instructions carefully.
Step 3: Allow Proper Curing
Wait the recommended drying time before use.
Step 4: Install Storage Systems
Position cabinets and shelving after the floor has cured.
Step 5: Organize the Garage
Arrange storage zones for tools, sports equipment, and supplies.
Step 6: Maintain the Finish
Sweep regularly and clean spills immediately.
Styling Ideas
Complete the space with:
- Gray epoxy flooring.
- Matte black cabinets.
- Stainless steel accents.
- LED ceiling lights.
- Matching storage containers.
- Minimalist wall décor.
Expert Tip
Select a light gray epoxy finish if you want the garage to feel larger and brighter while hiding dust better than pure white flooring.
A sleek epoxy floor paired with coordinated storage creates a modern garage that’s clean, durable, highly functional, and worthy of any Pinterest inspiration board.
7. Wall-Mounted Bike Storage Display
Bicycles often take up valuable floor space, making the garage feel crowded and disorganized. A wall-mounted bike storage system is a smart and stylish solution that keeps bicycles secure while turning them into part of the garage’s overall design. Instead of leaning bikes against walls or stacking them in corners, modern wall racks display them neatly, creating a clean, organized appearance while freeing up floor space for vehicles, workbenches, or storage cabinets.
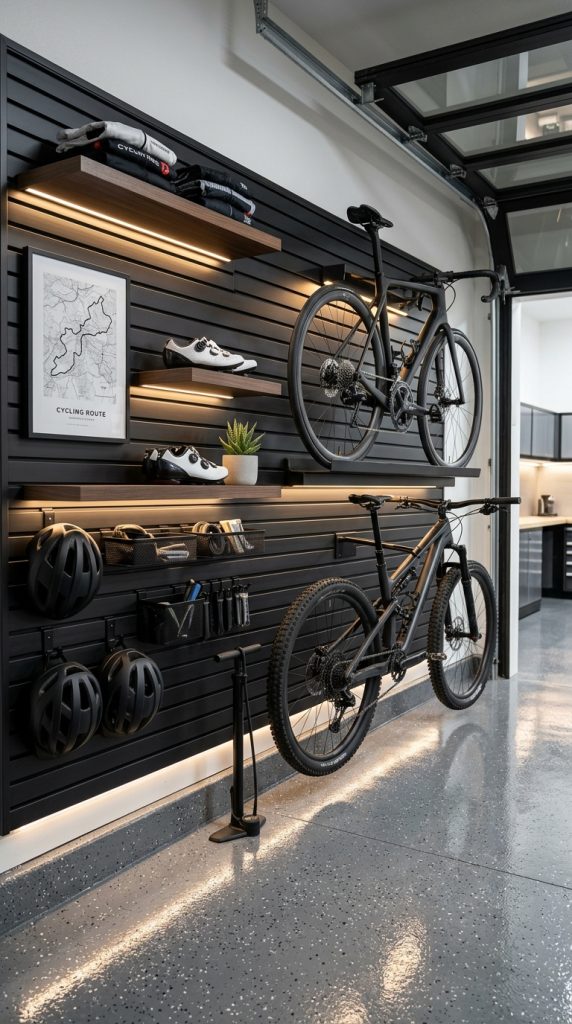
Pinterest is full of aesthetic garages where bicycles are displayed like artwork against clean walls with coordinated storage systems. Vertical or horizontal bike racks work equally well depending on your available wall space and ceiling height. Pair the bike display with slatwall panels, floating shelves, or storage cabinets to create a cohesive organization system that looks intentional rather than purely functional.
This setup is ideal for families with multiple bicycles, cycling enthusiasts, or homeowners who simply want a clutter-free garage with a modern, organized look.
Why Wall-Mounted Bike Storage Works
Wall-mounted storage keeps bikes protected while maximizing floor space.
Benefits include:
- Frees valuable floor space.
- Protects bicycles from damage.
- Creates an organized display.
- Easy daily access.
- Modern garage appearance.
- Highly Pinterest-worthy.
Materials You’ll Need
Gather:
- Wall-mounted bike racks
- Mounting brackets
- Power drill
- Wall anchors
- Stud finder
- Measuring tape
- Level
- Protective wheel pads
- Storage hooks
- Helmet holders
- LED wall lights
- Cleaning cloth
Step-by-Step Organization Guide
Step 1: Measure the Wall
Determine how many bicycles the wall can accommodate.
Step 2: Locate Wall Studs
Mark secure mounting points.
Step 3: Install the Bike Racks
Secure each rack according to the manufacturer’s instructions.
Step 4: Hang the Bicycles
Arrange them evenly with enough clearance between each bike.
Step 5: Organize Accessories
Install hooks for helmets, pumps, and cycling gear.
Step 6: Keep the Area Clean
Regularly wipe down both the bikes and surrounding wall.
Styling Ideas
Complete the display with:
- Matte black bike racks.
- LED accent lighting.
- Minimalist wall clock.
- Floating shelves.
- Coordinated storage bins.
- Neutral color palette.
Expert Tip
Install bike racks at staggered heights if you’re storing multiple bicycles. This prevents handlebars from overlapping and makes the display look cleaner.
A wall-mounted bike storage display creates a functional, space-saving garage that feels organized, modern, and visually impressive.
8. Dedicated Sports Equipment Storage Zone
Sports equipment can quickly become one of the biggest sources of garage clutter if every ball, helmet, racket, and bag is left scattered across the floor. Creating a dedicated sports storage zone keeps everything organized while making it easier for every family member to find and return equipment after use. By giving each category its own designated location, your garage instantly becomes more functional and aesthetically pleasing.
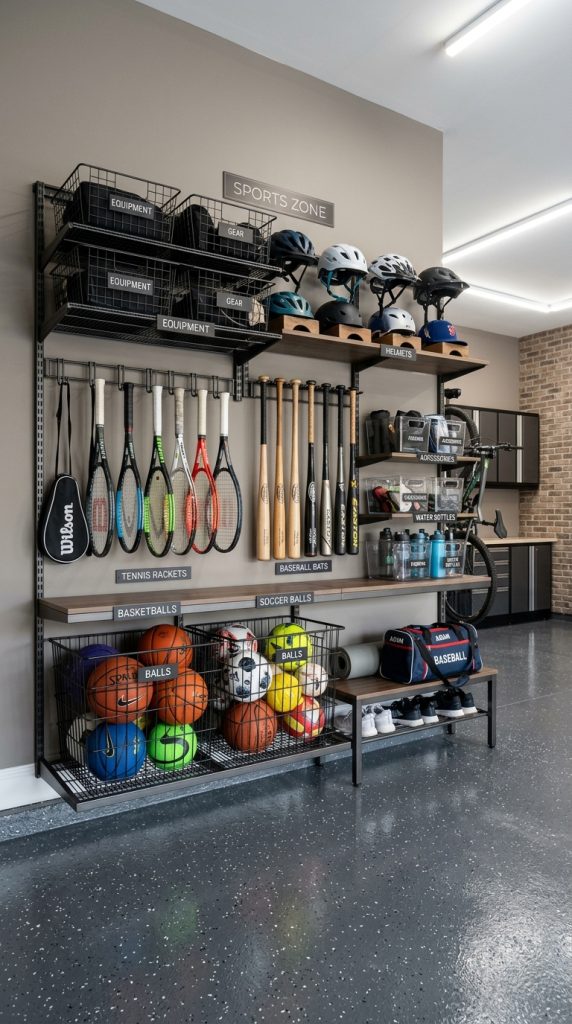
Pinterest-inspired garages often include stylish storage racks, wire baskets, labeled bins, and vertical organizers specifically designed for sports gear. Large baskets can hold basketballs, soccer balls, and footballs, while wall hooks keep tennis rackets, baseball bats, and hockey sticks neatly displayed. Open shelving provides space for helmets, athletic shoes, and training equipment, ensuring every item remains visible and accessible.
A well-designed sports organization area also encourages children to return equipment after practice, helping maintain the garage’s clean appearance year-round.
Why Sports Zones Improve Organization
Dedicated storage prevents equipment from creating unnecessary clutter.
Benefits include:
- Easy equipment access.
- Keeps floors clear.
- Encourages family organization.
- Protects expensive gear.
- Simplifies cleanup.
- Highly Pinterest-worthy.
Materials You’ll Need
Prepare:
- Wire storage baskets
- Ball organizer
- Wall hooks
- Open shelving
- Clear storage bins
- Labels
- Shoe rack
- Helmet holders
- Storage bench
- Measuring tape
- Drill
- Wall anchors
Step-by-Step Organization Guide
Step 1: Sort Equipment
Separate gear by sport or family member.
Step 2: Install Shelving
Create storage at different heights.
Step 3: Mount Wall Hooks
Hang larger items like bats and rackets.
Step 4: Add Ball Storage
Use baskets or rolling organizers.
Step 5: Label Every Section
Clearly identify each storage area.
Step 6: Maintain Weekly
Return equipment after every practice or game.
Styling Ideas
Organize with:
- Black wire baskets.
- Wooden storage bench.
- Matching labels.
- Open shelving.
- Neutral storage bins.
- LED ceiling lights.
Expert Tip
Store children’s equipment on lower shelves so they can easily put everything away without assistance.
A dedicated sports equipment zone creates an organized, family-friendly garage that’s both practical and visually appealing.
9. Minimalist Floating Shelves for Decorative Storage
Floating shelves aren’t just for living rooms—they can also add style and functionality to a modern garage. Unlike bulky shelving units, floating shelves provide storage while maintaining an open, uncluttered appearance. They offer the perfect place for frequently used supplies, decorative storage baskets, small tools, manuals, plants, or framed artwork that personalizes the garage without sacrificing organization.
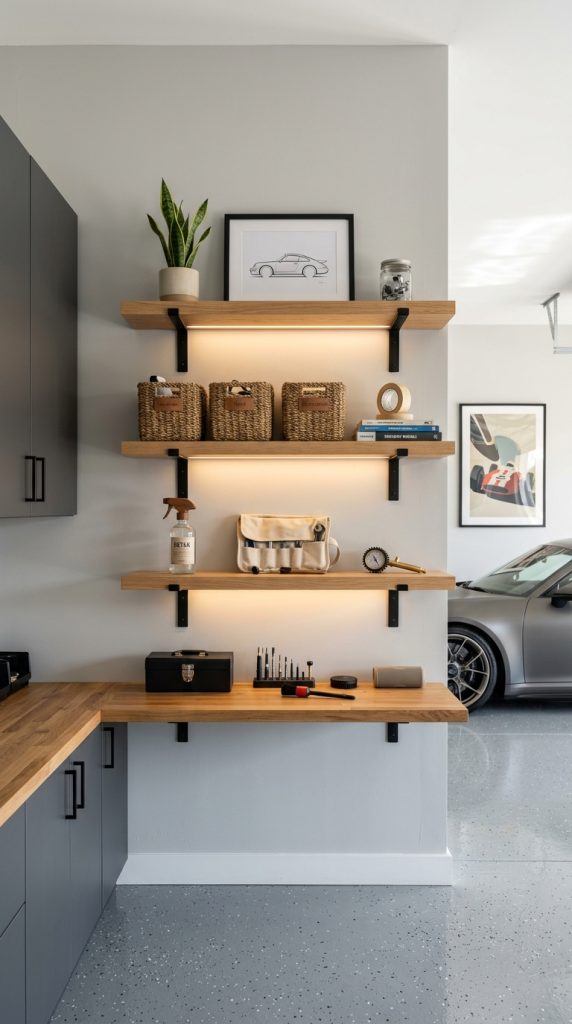
Pinterest garages often combine floating wood shelves with matte black brackets, coordinated storage bins, and soft LED lighting to create an upscale workshop aesthetic. Mixing functional storage with subtle decorative elements transforms the garage from a purely practical space into one that feels thoughtfully designed. Small potted plants, framed automotive prints, vintage signs, or neatly arranged tool collections can all become part of the décor.
Choosing shelves that match the garage cabinets or workbench creates a cohesive appearance that ties the entire organization system together.
Why Floating Shelves Look So Modern
They provide practical storage while maintaining a clean architectural appearance.
Benefits include:
- Saves floor space.
- Modern minimalist style.
- Easy access to essentials.
- Customizable layout.
- Enhances garage décor.
- Perfect Pinterest aesthetic.
Materials You’ll Need
Gather:
- Floating shelves
- Heavy-duty brackets
- Power drill
- Wall anchors
- Level
- Measuring tape
- Storage baskets
- Decorative containers
- Small plants
- Picture frames
- LED strip lights
- Labels
Step-by-Step Organization Guide
Step 1: Plan the Layout
Mark shelf positions before drilling.
Step 2: Install the Shelves
Secure each shelf evenly using heavy-duty hardware.
Step 3: Add Storage Containers
Use matching baskets for a cohesive look.
Step 4: Organize Essentials
Display frequently used items neatly.
Step 5: Add Decorative Touches
Include framed prints, plants, or vintage accessories.
Step 6: Keep It Balanced
Avoid overcrowding the shelves to preserve the minimalist aesthetic.
Styling Ideas
Complete the display with:
- Oak floating shelves.
- Matte black brackets.
- Woven baskets.
- Small indoor plants.
- Vintage garage signs.
- Soft LED shelf lighting.
Expert Tip
Leave some open space between decorative objects instead of filling every shelf completely. Negative space creates the clean, high-end look commonly seen in Pinterest-inspired garages.
Minimalist floating shelves combine smart organization with stylish design, creating a garage that’s functional, attractive, and effortlessly organized.
10. Rolling Utility Cart Organization Station
A rolling utility cart is one of the most versatile additions to a modern garage. Unlike fixed storage, a mobile cart allows you to bring your tools, cleaning supplies, gardening equipment, or DIY materials directly to wherever you’re working. This flexibility saves time, reduces unnecessary trips across the garage, and helps keep projects organized from start to finish. Once you’re finished, simply roll the cart back into its designated storage area, keeping the garage looking neat and uncluttered.
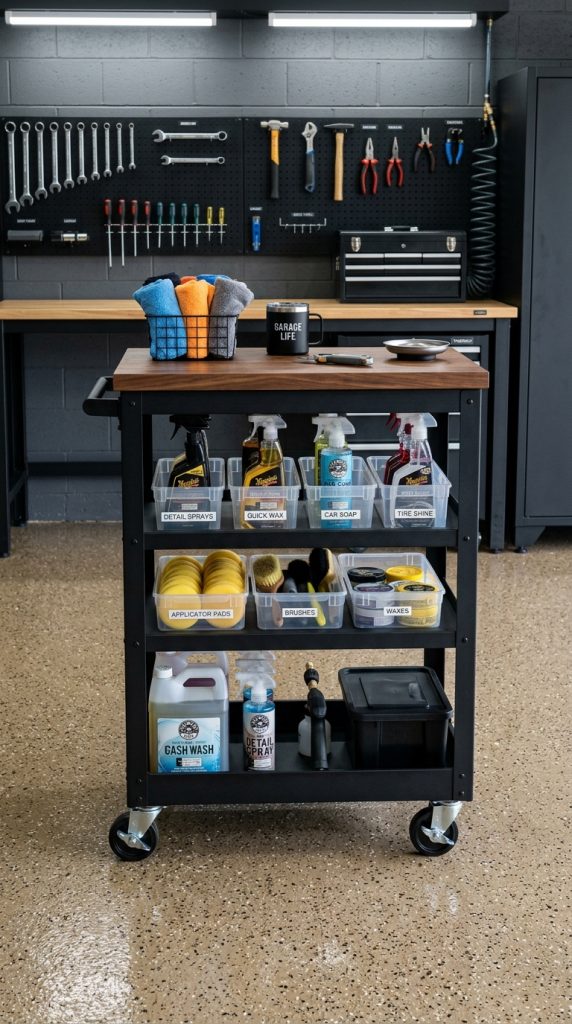
Pinterest-inspired garages often feature sleek black or metal utility carts with matching storage bins, labeled drawers, and wooden tops that double as mini workstations. A three-tier cart can hold everything from screwdrivers and drills to paint brushes, spray bottles, microfiber cloths, and extension cords. Organizing each shelf by category creates an efficient system where every item is visible and easy to access.
For larger garages, consider using separate carts for different purposes—one for automotive maintenance, another for gardening supplies, and another for home repair tools. This organized approach increases efficiency while maintaining the clean, modern aesthetic that’s popular across Pinterest.
Why Rolling Utility Carts Are So Useful
Mobile storage keeps essential tools organized while allowing maximum flexibility.
Benefits include:
- Easy to move around.
- Saves time during projects.
- Keeps tools organized.
- Fits small or large garages.
- Multi-purpose storage solution.
- Highly Pinterest-worthy.
Materials You’ll Need
Gather:
- Rolling utility cart
- Drawer organizers
- Storage bins
- Labels
- Tool trays
- Cleaning supplies
- Microfiber cloths
- Magnetic holders
- Hooks
- Utility containers
- Measuring tape
- LED task light
Step-by-Step Organization Guide
Step 1: Assemble the Cart
Build and tighten all components securely.
Step 2: Assign Each Shelf
Separate cleaning supplies, tools, and accessories.
Step 3: Install Organizers
Use trays and dividers to prevent clutter.
Step 4: Label Storage Areas
Clearly identify each section.
Step 5: Park the Cart
Store it beside your workbench when not in use.
Step 6: Restock Regularly
Replace used supplies and return tools after every project.
Styling Ideas
Complete the setup with:
- Matte black utility cart.
- Wooden work surface.
- Matching storage bins.
- Minimalist labels.
- Magnetic tool holders.
- LED work light.
Expert Tip
Choose a utility cart with lockable wheels so it remains stable while you’re working but moves easily whenever needed.
A rolling utility cart keeps your garage efficient, organized, and flexible while adding a clean industrial look that complements modern garage aesthetics.
11. LED Lighting and Smart Workspace Organization
Lighting is one of the most overlooked aspects of garage organization, yet it has a dramatic impact on both functionality and appearance. Bright LED lighting instantly transforms a dark garage into a clean, welcoming workspace while making tools, storage areas, and workbenches easier to use. Proper illumination also enhances the appearance of cabinets, flooring, and shelving, giving the garage a premium showroom-quality finish.
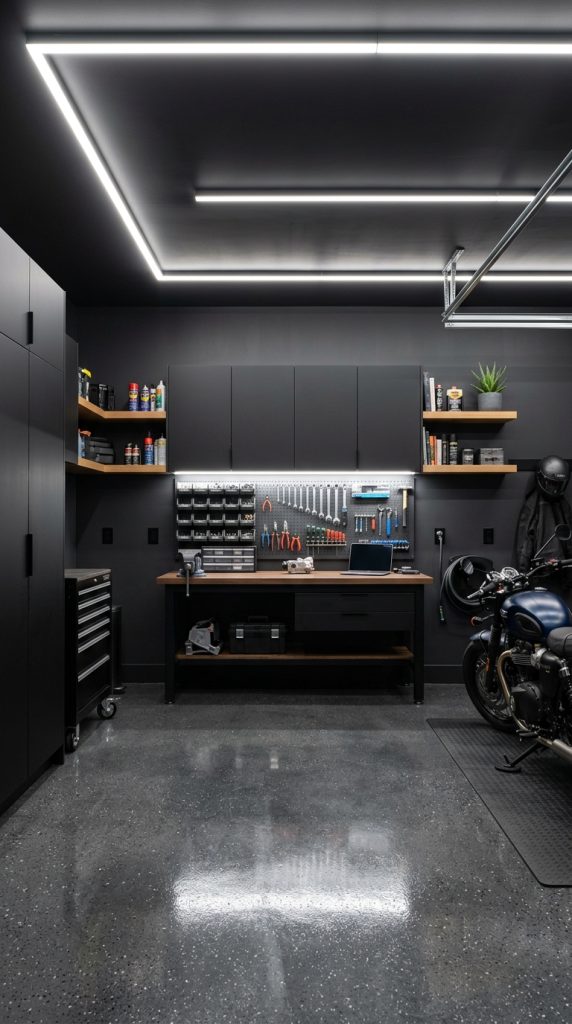
Pinterest garages frequently feature bright daylight LED ceiling fixtures paired with under-cabinet lighting, wall-mounted task lights, and illuminated shelving. These layered lighting solutions eliminate shadows and improve visibility during repairs, woodworking, detailing vehicles, or organizing storage. Smart lighting systems can even be controlled with a smartphone or voice assistant, making the garage more convenient and energy-efficient.
Combining bright lighting with organized storage creates a workspace that’s not only highly practical but also visually striking. Clean lines, evenly illuminated shelves, and coordinated storage containers make every part of the garage feel intentional and professionally designed.
Why LED Lighting Improves Every Garage
Quality lighting enhances safety, organization, and overall aesthetics.
Benefits include:
- Brighter work environment.
- Reduces shadows.
- Energy-efficient operation.
- Modern premium appearance.
- Improves visibility.
- Perfect Pinterest aesthetic.
Materials You’ll Need
Prepare:
- LED ceiling lights
- LED strip lights
- Motion sensors
- Smart light switches
- Extension cables
- Mounting clips
- Ladder
- Screwdriver
- Power drill
- Cable organizers
- Timer controls
- Workbench lighting
Step-by-Step Organization Guide
Step 1: Evaluate Existing Lighting
Identify dark areas needing additional illumination.
Step 2: Install Ceiling Fixtures
Position lights evenly across the garage.
Step 3: Add Task Lighting
Install LEDs above workbenches and storage cabinets.
Step 4: Hide Wiring
Use cable organizers for a clean finish.
Step 5: Test Brightness
Adjust placement until the entire garage is evenly lit.
Step 6: Maintain the System
Clean fixtures regularly to preserve maximum brightness.
Styling Ideas
Enhance the garage with:
- Linear LED fixtures.
- Under-cabinet lighting.
- Smart switches.
- Illuminated shelves.
- Matte black fixtures.
- Clean cable management.
Expert Tip
Choose daylight-balanced LEDs between 5000K and 6500K for the brightest, clearest lighting that’s ideal for detailed garage work.
A well-lit garage feels larger, cleaner, and more professional while making every organization system easier to use.
12. Complete Garage Zones for a Clean and Functional Layout
One of the biggest secrets behind beautifully organized Pinterest garages is zoning. Instead of storing everything wherever space is available, divide the garage into clearly defined sections based on function. This creates an intuitive layout where every item has a permanent home, making cleanup faster and preventing clutter from building up over time.
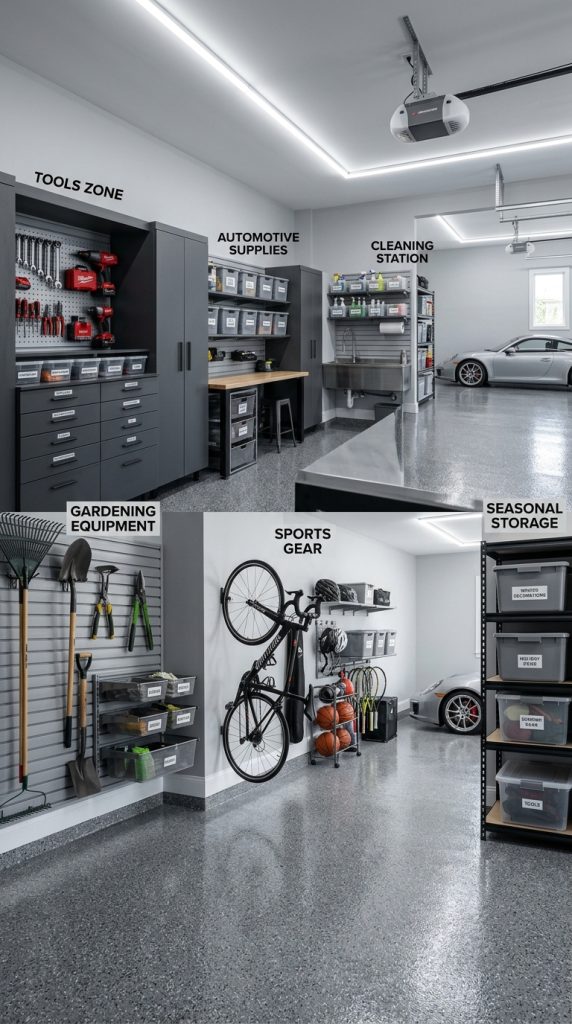
A modern garage might include a tool zone, gardening station, sports equipment area, automotive maintenance corner, recycling section, seasonal storage wall, cleaning supply cabinet, and DIY workspace. Each zone should contain only the items related to its purpose, with matching storage containers and clear labels to maintain consistency throughout the garage.
Color coordination also enhances the aesthetic. Neutral cabinets, black shelving, wood accents, and matching containers create a cohesive appearance while making the garage feel spacious and uncluttered. Even small garages benefit from zoning because it maximizes efficiency without requiring additional square footage.
Why Garage Zoning Works So Well
Organized zones simplify storage while improving daily efficiency.
Benefits include:
- Every item has a place.
- Faster cleanup.
- Easier to find belongings.
- Prevents clutter.
- Maximizes available space.
- Highly Pinterest-worthy.
Materials You’ll Need
Gather:
- Garage cabinets
- Metal shelving
- Storage bins
- Labels
- Slatwall panels
- Tool organizers
- Sports equipment rack
- Cleaning cabinet
- Workbench
- Wall hooks
- Overhead storage racks
- Floor mats
Step-by-Step Organization Guide
Step 1: Empty the Garage
Start with a completely clear space.
Step 2: Divide into Zones
Assign dedicated areas for every category.
Step 3: Install Storage Systems
Place cabinets, shelving, and hooks within each zone.
Step 4: Organize by Function
Store similar items together.
Step 5: Label Everything
Use consistent labels across every storage area.
Step 6: Maintain Regularly
Perform seasonal decluttering to keep each zone functional.
Styling Ideas
Complete the layout with:
- Matching gray cabinets.
- Black shelving.
- Clear labeled bins.
- Epoxy flooring.
- Bright LED lighting.
- Wooden workbench accents.
Expert Tip
Leave open floor space between zones instead of filling every corner with storage. This creates better traffic flow and gives the garage the clean, spacious appearance seen in professionally designed Pinterest garages.
A fully zoned garage combines efficiency, organization, and modern aesthetics, creating a beautiful space that’s easy to maintain and enjoyable to use every day.