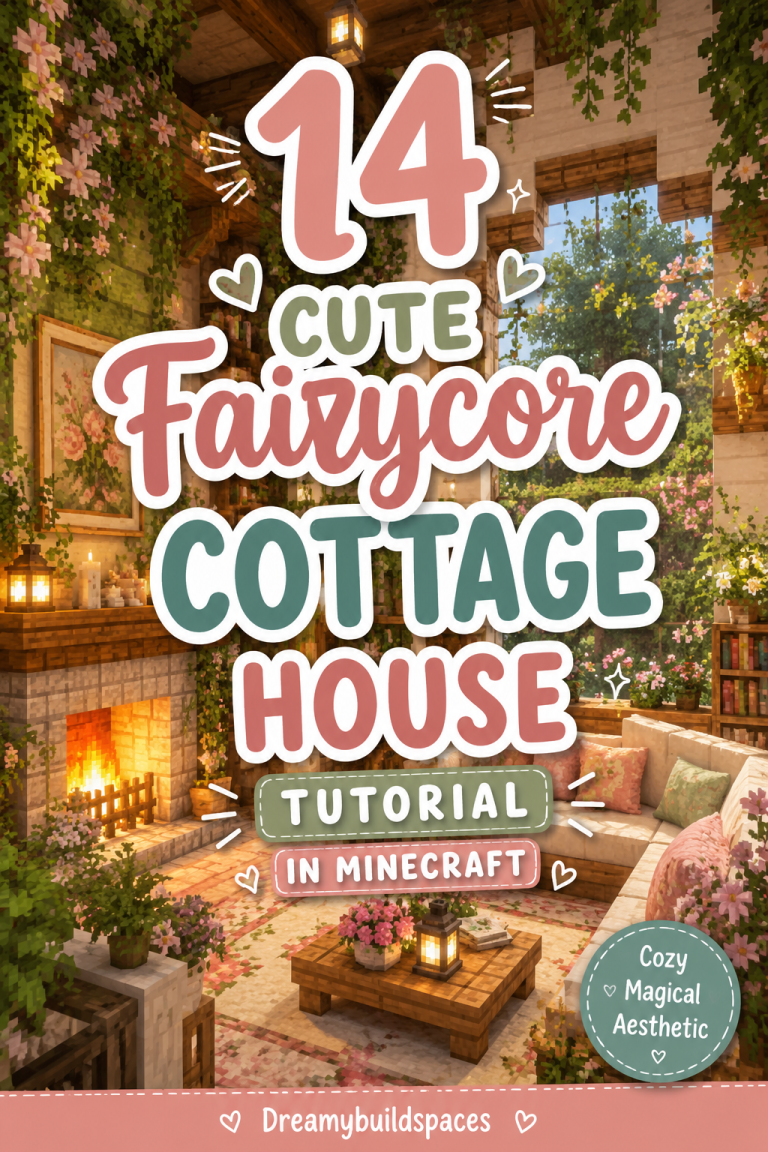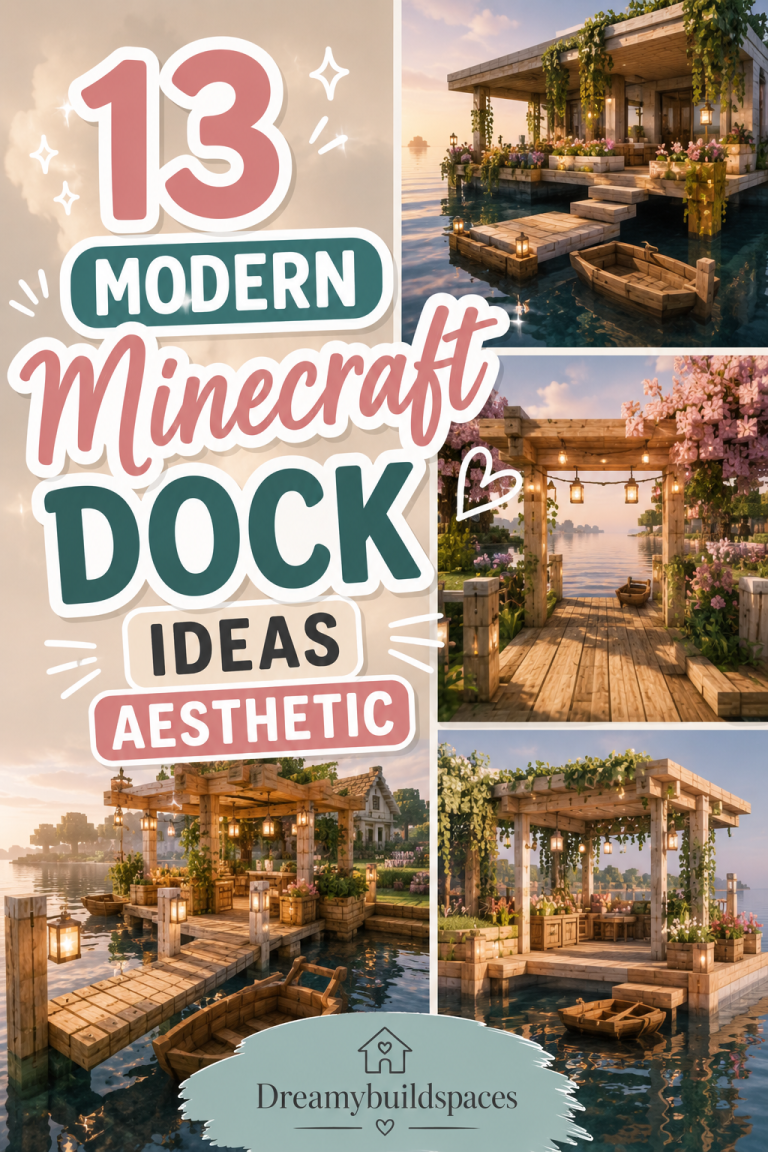
13 Minecraft Cottage Houses Ideas
The humble cottage house is one of the most beloved, timeless, and universally shared build styles across the entire global Minecraft community. Unlike cold, massive modern mansions or rigid stone fortresses, a well-built cottage relies heavily on organic shapes, warm textures, and an intense harmony with the surrounding natural biome. Transforming a simple survival shelter into a breathtaking aesthetic cottage requires a deep understanding of block gradients, texturing, roofing depth, and exterior detailing. When a player approaches your custom cottage, the structure should feel seamlessly embedded into the landscape, looking cozy, inviting, and deeply storytelling-focused.
Achieving a high-click aesthetic on visual platforms like Pinterest requires looking beyond just the front wall of your house and designing a complete, living ecosystem. Many beginner builders make the mistake of constructing flat, boxy shapes using only one or two block types, which results in a boring, uninspired silhouette that scrolls past unnoticed. A truly save-worthy cottage layout balances raw building materials like stripped oak logs and muddy paths with vibrant floral gradients, custom leafy canopies, and broken glass details. By prioritizing asymmetrical lines and adding plenty of depth to your walls, you create a beautiful visual anchor that captures the imagination of viewers.
The Architecture of a High-Impact Fairy-Core Build
To convert a standard cluster of blocks into a breathtaking fairy-core masterpiece, your foundational structural frame must be completely flawless from day one. Visual appeal on discovery platforms is driven by depth and overlapping shapes, which means your rooflines should always extend at least one block past your exterior walls. Utilizing a contrasting block palette—such as deep dark oak stairs along the roof borders paired with a soft white diorite or calcite wall base—allows your build to look incredibly structured and dimensional. Incorporating a slight curve or a gentle sag into your roof shapes creates an instant whimsical, fairy-tale fantasy silhouette.
The ideal premium cottage ecosystem balances extreme detailing with an organized, functional layout, ensuring the build looks beautiful while remaining perfectly playable in survival mode. Viewers want to know how to texture flat walls, blend different block variants together, and choose complementary colors that match the surrounding flora. By utilizing decorative blocks like campfires for smoking chimneys, trapdoors for functional window shutters, and buttons for fallen pebbles, you can add intense detail without cluttering the build. This balance of extreme structural depth and organic detailing is the secret behind designs that get pinned thousands of times.
Optimizing Exterior Landscapes and Block Gradients
Landscaping design is the single most critical element when it comes to capturing that elusive, magical cottage-core atmosphere in a survival world. A beautiful cottage placed on a completely flat, plain green grass grid will always look unfinished and detached from its environment. Replacing the native grass around your build with an intricate gradient of coarse dirt, path blocks, rooted dirt, and gravel completely transforms the grounding of your house. This strategic texturing creates an authentic, weathered path that tells a silent story of long-term use, footprints, and cozy rustic living.
Furthermore, choosing the correct block texturing mix for your walls is a non-negotiable step toward achieving realistic texture depth and aged character. Solid, single-block walls look incredibly flat and synthetic under standard Minecraft lighting engines, which ruins the historic, rustic feel of a cottage. Implementing a mixed block palette—such as blending mossy cobblestone, standard cobblestone, and moss blocks into a stone foundation—creates a beautiful, weathered appearance that mimics age and decay. This advanced texturing style not only catches the shadows beautifully but also enhances the organic feel of the entire build.
Crafting Charming and Beginner-Friendly Build Ecosystems
One of the biggest misconceptions in the Minecraft building community is that creating a premium luxury cottage requires advanced technical redstone or elite mechanical layout skills. The most successful aesthetic cottage upgrades are built on simple, highly practical design principles that any beginner can master with patience. Whether you are adding simple spruce trapdoors to windows, placing lanterns on fence posts, or texturing a flat roof with slabs, focus on neat block placement.
By understanding the purpose behind every material choice, mapping out your floor plan asymmetrical lines carefully, and prioritizing natural clutter, you can transform your build safely. Taking the time to coordinate your color finishes, add custom texturing, and introduce outdoor detailing like custom trees elevates the space entirely. In the following sections, we will explore thirteen comprehensive, incredibly detailed design concepts specifically tailored to maximize your Minecraft cottage building potential.
1. The Classic Mossy Oak Starter Cottage
Embracing Traditional Survival Warmth and Textured Stone Bases
The Classic Mossy Oak Starter Cottage is a beautiful tribute to traditional survival base designs, utilizing easily accessible materials found right inside standard forest biomes. This build pairs a sturdy, weathered cobblestone and mossy cobblestone foundation wall with a warm, cozy frame made of stripped oak logs.
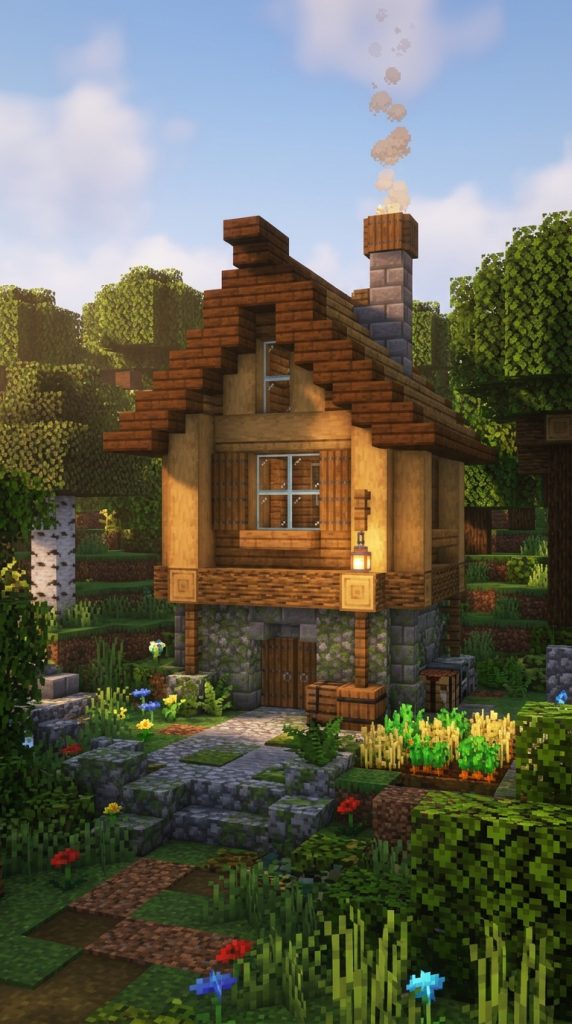
The roof features rich spruce wood stairs that overhang the walls by one block, providing a deep, protective shadow line that frames the entire house. This layout acts as an incredible, highly practical survival base that blends smoothly into any forest landscape.
Understanding Forest Biome Architecture
Forest cottage architecture relies heavily on utilizing warm, natural tones that mimic the surrounding tree canopies and forest floor environments. Instead of constructing flat, plain wood walls, this style breaks up the texture by embedding oak trapdoors around window frames to serve as shutters.
The integration of campfires hidden inside stone brick chimneys provides a continuous, realistic smoke trail rising up into the sky, giving the house a cozy, lived-in feel.
Step-by-Step Starter Cottage Installation Guide
- Lay a Randomly Textured Cobblestone Base Grid: Outline a six-by-eight block foundation using a mixed palette of standard cobblestone, mossy cobblestone, and moss blocks.
- Erect Four-Block High Stripped Oak Log Pillars: Place vertical pillars of stripped oak logs on the corners of your foundation, connecting them at the top with horizontal logs.
- Construct an Overhanging Spruce Wood Stair Roof: Build a classic A-frame roof using spruce wood stairs, ensuring you place an upside-down stair beneath every overhanging edge.
- Detail Windows with Spruce Trapdoors and Lanterns: Punch out two-by-one window openings, place clear glass panes inside, and flank them with oak trapdoors for functional shutters.
Materials Needed for a Mossy Oak Cottage
To get started on this look, you will need a few key survival supplies. Gather three stacks of stripped oak logs to construct the primary structural framework and wall outlines. You will also want a generous collection of cobblestone and mossy cobblestone blocks, a stack of spruce wood stairs for the roof, and several glowing lanterns to provide warm exterior lighting.
2. The Enchanted Birch Fairy Mushroom House
Infusing Whimsical Fantasy Energy with Vibrant Crimson Roofs
The Enchanted Birch Fairy Mushroom House flips traditional color schemes upside down by embracing bright, playful, and deeply whimsical fantasy aesthetics. Walls are constructed using clean, smooth stripped birch logs and white calcite to create a pale, clean canvas across the body of the home.
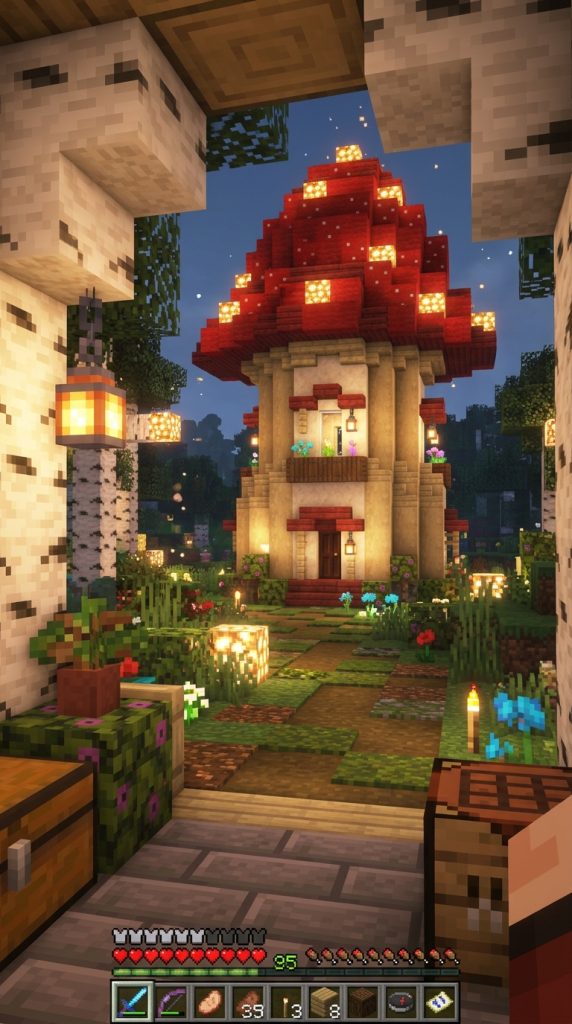
The roof is brought to life using custom-configured slopes made of vibrant crimson nylon blocks and red wool, mimicking the look of a giant forest mushroom. This high-contrast setup looks incredibly magical when nestled deep inside a dark oak forest biome.
Analyzing the Whimsical Mushroom Aesthetic
This design layout thrives on the stark contrast between pale, smooth wall textures and intensely bright, curved organic roof shapes. By choosing stripped birch logs for the walls, you create a soft texture that allows your vibrant red mushroom roof to stand out as a major design piece.
The landscaping features custom-built giant fungi, glowing spore paths made of glowstone hidden under moss carpers, and delicate chains holding lanterns hanging from the roof edges.
How to Build a Fantasy Mushroom House
- Construct a Circular Calcite and Birch Base Wall: Build a rounded, organic tower base using an alternating mix of calcite blocks and stripped birch logs.
- Flare the Roof Outward Using Crimson Stairs: Extend your roof outline outwards dramatically at the fourth block layer, creating a wide, bell-shaped mushroom cap.
- Texture the Cap with Red Wool and Mangrove Slabs: Mix red wool, crimson blocks, and mangrove slabs across the roof to create a natural, organic gradient.
- Place White Concrete Powder Dots on the Roof: Embed random white concrete powder blocks into the red roof cap to mimic the white spots of a toadstool mushroom.
Tools for a Fantasy Mushroom Setup
Achieving this whimsical fantasy vibe requires a healthy supply of crimson wood stairs and red wool blocks to construct the curved mushroom cap roof. You will also want stripped birch logs for the pale walls, calcite blocks for added stone texturing, and several spore-like shroomlights to provide hidden organic lighting around the base.
3. The Overgrown Spruce Swamp Witch Hut
Combining Dark Weathered Mud Blocks and Vines
The Overgrown Spruce Swamp Witch Hut transforms your marshy survival biome into a moody, deeply atmospheric outpost that feels completely embedded in nature. This aesthetic celebrates dark, unrefined textures by pairing weathered mud bricks and dark oak wood logs with slime-green moss blocks.
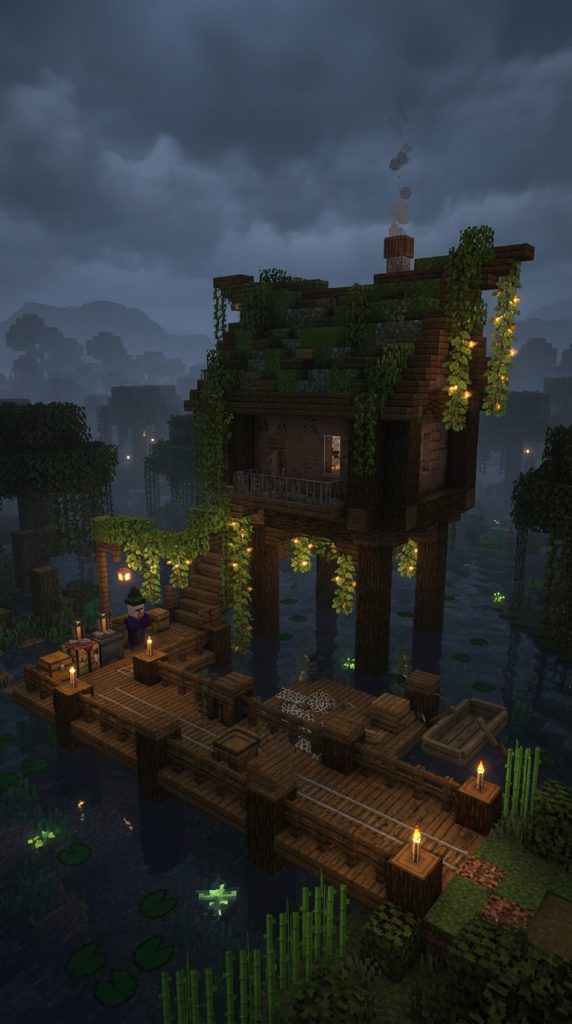
Adding an abundance of hanging weeping vines and lily pads across a custom-built wrap-around wooden dock turns the hut into a perfect swamp hideaway.
The Mechanics of Swamp Showroom Design
Swamp cottage design balances dark, waterlogged textures with vibrant, overgrown flora to create an inviting, historic, and slightly mysterious atmosphere. Instead of building on dry land, this style lifts the entire structure up on stilts made of dark oak fences and oak logs.
The roof utilizes a chaotic mix of spruce slabs, moss blocks, and dark oak stairs to create a weathered, decaying roofline that sags naturally in the middle.
Step-by-Step Swamp Hut Blueprint
- Drive Dark Oak Log Stilts Into Water Basins: Place vertical dark oak logs down into the swamp water, extending them three blocks above the surface level.
- Build a Weathered Mud Brick Wall Frame: Construct your main exterior living space walls using an alternating mix of mud bricks, packed mud, and brown concrete powder.
- Assemble a Sagging Mossy Spruce Roof Structure: Lay your roof stairs in a gradual curve, placing moss blocks and green carpets randomly along the top ridges.
- Drape Weeping Vines and Glow Berries Around Docks: Hang long vines from the roof overhangs and place glow berries beneath the floorboards for atmospheric under-lighting.
Essential Decor for a Swamp Cottage
To nail this dark marshy look, secure several stacks of dark oak logs and mud brick variants to create an authentic weathered foundation. You will also need plenty of moss blocks to texture the roof space, a stack of weeping vines for organic draping, and several glowing glow berry strands to provide soft natural illumination.
4. The Snowy Tundra Spruce Cabin
Celebrating Winter Warmth with Deep Cozy Fireplaces
The Snowy Tundra Spruce Cabin is designed specifically to capture the safe, warm, and highly insulating atmosphere of a remote mountain lodge hidden in a snowstorm. This aesthetic utilizes a dark, high-contrast color scheme, featuring dark oak logs broken up by warm, glowing orange froglights hidden inside window bays.

The centerpiece of the cottage is a massive, multi-tiered stone brick fireplace that chimney-smokes continuously, keeping the surrounding snow layers melted naturally.
Inside a Winter Tundra Survival Cabin
Winter tundra cabins prioritize absolute protection from the cold elements, utilizing thick, heavy materials that feel warm and secure in survival mode. The roofing system utilizes wide, sweeping spruce wood slabs that catch natural snow layers on top, making the cabin look instantly rustic and tucked into the mountain.
Storage is handled by compact barrel walls and heavy dark oak chests, keeping survival gear organized while maximizing the indoor floor plan space.
How to Style a Snowy Tundra Cabin
- Construct a Thick Dark Oak Structural Log Skeleton: Build a sturdy three-dimensional frame using raw dark oak logs with the bark fully intact.
- Fill Wall Cavities with Spruce Wood Planks: Build your interior wall partitions using warm spruce planks, embedding iron bars into small window slots.
- Build a Wide Sweeping Gable Roof System: Lay spruce wood slabs at a low angle across the top, leaving flat spots for natural snow block accumulation.
- Construct a Massive Stone Brick Chimney Column: Run a column of stone bricks from the floor through the roof, topping it with a campfire and trapdoors.
Supplies for a Snowy Tundra Cabin
Transforming your winter cabin requires a substantial supply of raw dark oak logs to build the heavy, insulating outer skeleton. You will also want warm spruce wood planks for the walling, a collection of stone bricks for the central fireplace chimney, and a campfire block to generate continuous smoking particles.
5. The Mangrove Jungle Canopy Treehouse
Creating an Elevated Jungle Sanctuary Hidden in the Leaves
The Mangrove Jungle Canopy Treehouse concept is built specifically for explorers who want to live entirely elevated above the dangerous jungle floor. This design mimics high-end tropical treehouses, utilizing a massive, custom-built jungle tree trunk as the primary structural anchor for the home.
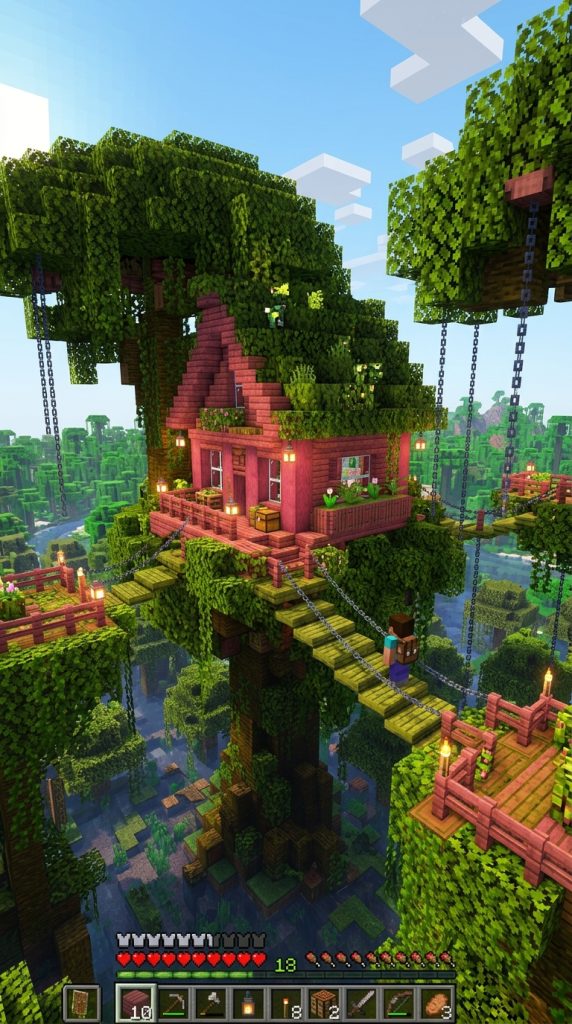
The cottage walls are lined with vibrant mangrove wood planks, while dedicated wrap-around hanging bridges connect the main house to surrounding viewing platforms.
The Science of an Elevated Canopy Treehouse
An elite treehouse relies on exceptional integration with the surrounding natural foliage and advanced vertical space management to keep the build feeling light and organic. This style utilizes specialized jungle leaf blocks and moss block clusters that wrap completely around the roof, disguising the structure within the canopy.
The floor features a custom suspension design made of spruce fences and chains, allowing the house to hang elegantly over branches.
Step-by-Step Canopy Treehouse Installation
- Construct a Custom Giant Jungle Tree Trunk Base: Build a thick, organic tree trunk using raw jungle logs, extending roots deep into the ground.
- Build a Suspended Mangrove Wood Floor Platform: Construct a wide circular platform using mangrove planks and slabs, anchoring it with iron chains.
- Erect Vibrant Mangrove Walls with Open Windows: Build cozy walls using a mix of mangrove wood, pink concrete powder, and open fence window slots.
- Weave an Overgrown Leafy Canopy Roof Pattern: Layer jungle leaves and moss blocks over a spruce wood roof frame, letting vines hang down naturally.
Essential Gear for a Jungle Treehouse
To create this elevated tropical environment, choose a substantial quantity of raw jungle logs to form your master tree trunk anchor. You will also need vibrant mangrove wood planks for the cottage structure, several stacks of jungle leaf blocks for canopy texturing, and iron chains to suspend the hanging bridges securely.
6. The Desert Oasis Sandstone Cottage
Honoring Ancient Warmth with Smooth Terracotta and Cactus Gardens
The Desert Oasis Sandstone Cottage is a beautiful, warm tribute to desert architecture, utilizing smooth, sun-baked textures that stay perfectly cool under a harsh desert sun. This design features smooth sandstone and cut sandstone walls adorned with rich acacia wood accents, orange terracotta borders, and delicate chiseled patterns.
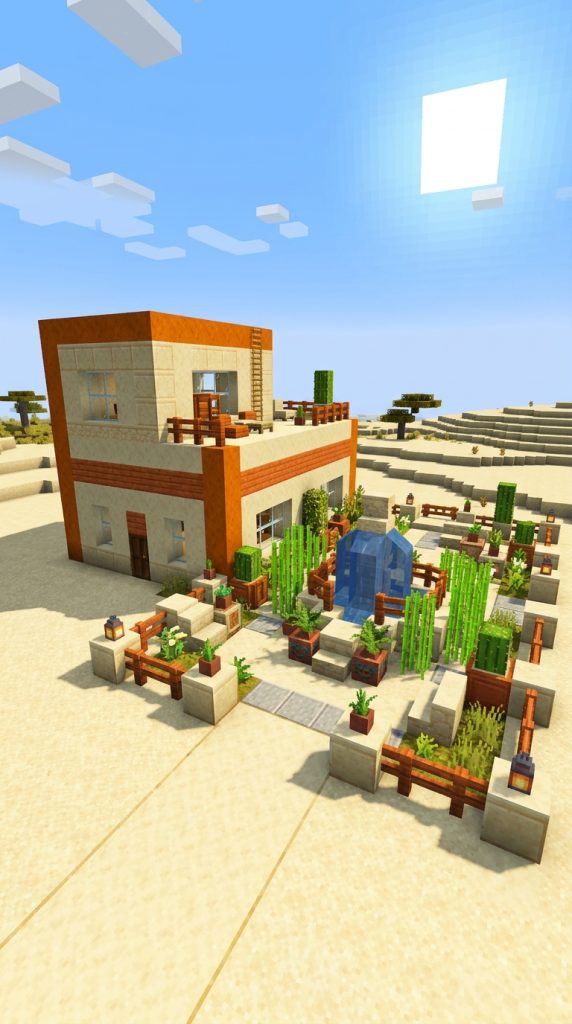
The flooring features a vibrant, polished yellow terracotta and smooth sand pattern that instantly injects energy and timeless desert charm into the home.
The Architecture of an Oasis Desert Base
This design concept balances clean geometric lines with warm organic desert textures, creating a refreshing base that feels like a private desert resort. Instead of cold stones, this look embraces warm acacia wood supports, smooth terracotta plastering, and glowing redstone lamps.
A dedicated outdoor courtyard featuring a central water fountain, lush sugar cane stalks, and potted cacti enhances the welcoming feel of this desert oasis.
How to Build a Desert Oasis Cottage
- Erect Clean Smooth Sandstone Structural Walls: Build a flat, minimalist square foundation using smooth sandstone and cut sandstone blocks.
- Install Acacia Wood Support Beams and Trim: Place horizontal acacia logs along the top edges of the walls to serve as bright accent borders.
- Construct a Flat Terracotta Roof Style Lounge: Build a flat roof using orange terracotta, wrapping the perimeter with acacia fences to create a balcony.
- Dig a Custom Desert Courtyard Water Oasis: Excavate a small pool outside, framing the water with sand, sugar cane, and glowing sea lanterns.
Decorative Pieces for a Desert Cottage
To cultivate this sun-baked look, source several stacks of smooth sandstone and cut sandstone blocks to build your primary wall structures. You will also need warm acacia wood planks for accents, a collection of orange terracotta blocks for roofing trim, and sugar cane stalks to plant outside.
7. The Ultra-Cozy Cherry Blossom Petal Cottage
Achieving Fairy-Tale Perfection with Soft Pink Gradients
The Ultra-Cozy Cherry Blossom Petal Cottage treats your survival world as an elite magical dreamland, utilizing a soft, harmonious palette of pink, white, and pastel tones. The walls feature smooth, white diorite and polished calcite block textures, while the roof features a sweeping, curved design made entirely of cherry wood stairs.
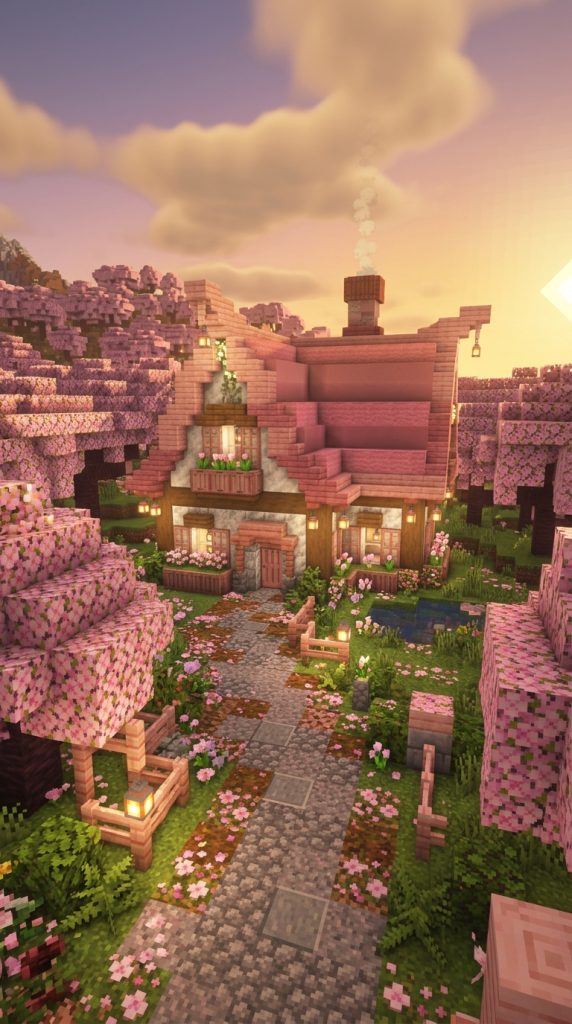
This design completely eliminates harsh dark blocks, creating a soft, high-end fairy-tale cottage space where your house sits beautifully inside a blooming cherry grove.
Understanding Cherry Grove Fairy Architecture
Cherry grove architecture focuses on maximizing soft lighting and pastel textures, forcing the observer’s attention to lock entirely onto the gentle lines of the build. This aesthetic utilizes cherry wood trapdoors, pink stained glass panes, and custom-placed pink petal layers along the floor to create a continuous visual loop.
The surrounding landscape is decorated with custom weeping cherry trees that shed delicate pink particles continuously over the cottage roof.
Step-by-Step Cherry Cottage Blueprint
- Build a Soft White Polished Calcite Foundation: Lay your base walls using an alternating mix of calcite blocks, polished diorite, and white wool.
- Shape a Curved Swooping Cherry Wood Roofline: Place cherry wood stairs in a gradual upward curve, extending the tips into elegant, pointed eaves.
- Texture the Roof with Pink Wool and Slabs: Blend cherry wood slabs, pink wool, and pink concrete powder across the roof to create a soft color gradient.
- Scatter Pink Petals and Spore Blossoms Around Entry: Place multiple layers of pink cherry petals along your pathway, hanging a spore blossom from the ceiling inside.
Essential Elements for a Cherry Cottage
Creating this magical pastel home requires a large supply of cherry wood stairs and slabs to construct the sweeping pink roofline. You will also want polished calcite blocks for the clean white walls, pink stained glass panes for cozy windows, and multiple pink cherry petal layers to scatter along the ground.
8. The Deep Ocean Prismarine Mermaid Cottage
Designing a Built-to-Last Hub for Aquatic Exploration
The Deep Ocean Prismarine Mermaid Cottage is designed specifically for aquatic adventurers, ocean explorers, and conduit-powered builders who want a stunning base underwater. This aesthetic utilizes beautiful, ocean-inspired prismarine bricks and dark prismarine blocks paired with glowing sea lanterns and smooth quartz pillars.
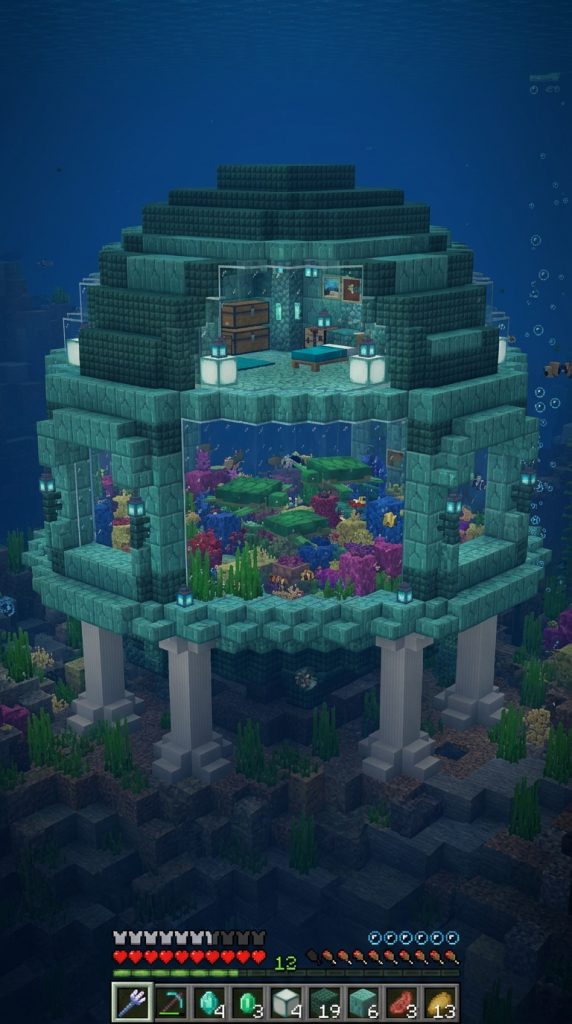
The space features custom glass dome viewports built to display colorful coral reefs, swimming sea turtles, and glowing axolotls clearly.
The Functionality of an Underwater Base
An underwater cottage prioritizes absolute water-tight durability, vibrant marine material choices, and immediate ocean access to ensure you can explore deep sea trenches efficiently. This style utilizes deep sea lanterns hidden behind prismarine stairs to create a soft, ethereal turquoise glow that illuminates your rooms perfectly.
Tools and trident weaponry are displayed openly on armor stands inside glass bays, allowing you to grab essential gear instantly.
How to Construct an Underwater Cottage
- Clear an Underwater Sub-Aquatic Foundation Site: Excavate a flat area on the ocean floor, anchoring your corners with smooth quartz pillars.
- Construct Prismarine Brick and Dark Prismarine Walls: Build your exterior cottage shell using a vibrant mix of teal prismarine bricks and dark prismarine.
- Install Large Seamless Glass Viewport Domes: Replace entire wall sections with clear glass blocks to create panoramic views of the surrounding ocean life.
- Light Rooms Internally with Glowing Sea Lanterns: Place sea lanterns into the floor and ceiling corners, covering them with light blue carpets for soft glow.
Supplies for an Underwater Ocean Cottage
To build this vibrant aquatic outpost, choose several stacks of prismarine bricks and dark prismarine blocks to form your ocean-proof shell. You will also want clear glass blocks to build the viewing domes, glowing sea lanterns for internal room lighting, and smooth quartz pillars to anchor the corners.
9. The Nether Warped Fungus Neo-Gothic Cottage
Blending Ethereal Blue Nether Textures with Dark Blackstone Spires
The Nether Warped Fungus Neo-Gothic Cottage captures the ultra-bizarre, high-contrast spirit of modern nether underworld building and dark fantasy engineering. This aesthetic utilizes a sophisticated combination of weave-textured polished blackstone bricks, glowing warped nylium, and custom vertical twisted vines.
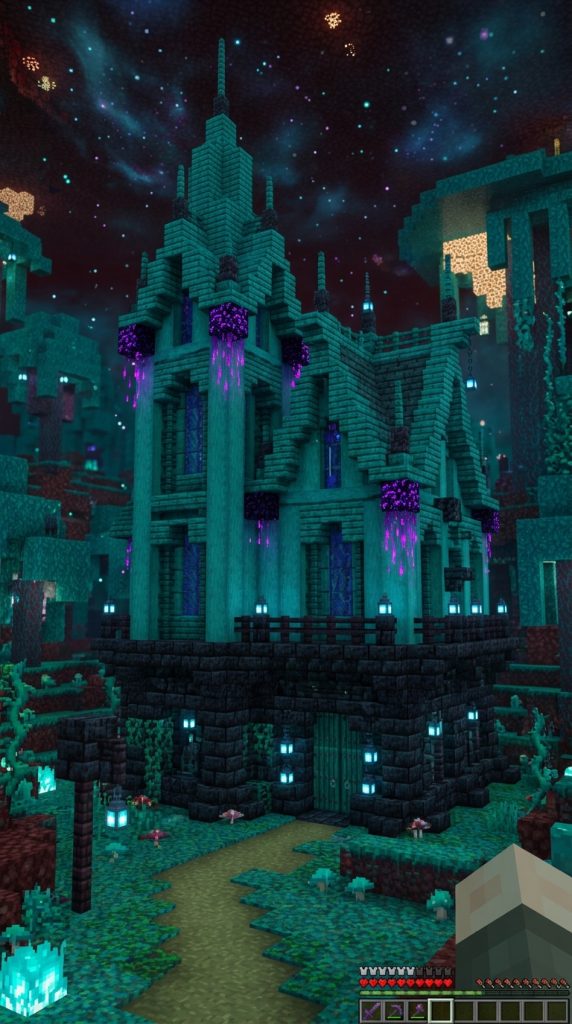
Integrating a sleek, modern nether portal room inside the cottage allows you to travel back to the overworld safely from your comfortable, fire-proof fortress.
Inside a Dark Fantasy Nether Outpost
This design concept relies heavily on advanced nether materials, sharp vertical lines, and premium architectural elements to cultivate a striking underworld home space. By wrapping focal roof spires in a vibrant, cyan-colored warped hyphae wood, you create an intricate pattern that reacts beautifully to nether fog.
The wall system features a deep obsidian and crying obsidian base layer, delivering a dark purple neon light particle effect across the floors.
Step-by-Step Nether Cottage Blueprint
- Erect a Polished Blackstone Brick Foundation Column: Build a heavy, medieval-style stone base using polished blackstone bricks and cracked blackstone.
- Construct Tall Vertical Warped Wood Roof Spires: Build high-pitched, sharp gothic roof cones using cyan warped wood stairs and warped slabs.
- Embed Crying Obsidian Into Corner Highlights: Place crying obsidian blocks into the wall corners to generate purple dripping particles naturally.
- Hang Cyan Soul Lanterns from Blackstone Fences: Suspend blue soul lanterns from the roof eaves to provide high-contrast, fire-resistant exterior lighting.
Materials for a Nether Gothic Cottage
Achieving this dark underworld look requires plenty of polished blackstone bricks to build your heavy, fire-proof foundation walls. You will also need vibrant cyan warped hyphae wood stairs for the roof spires, crying obsidian blocks for purple particle effects, and glowing blue soul lanterns to illuminate the entryway.
10. The Mountain Cliffside Stone Stone-Brick Chalet
Bringing Majestic Alpine Lodge Elements into Your High-Altitude World
The Mountain Cliffside Stone-Brick Chalet offers a bold, deeply inviting, and rustic environment that feels like a secluded alpine ski lodge hanging off a high-altitude peak. This design steps completely away from basic plain dirt huts, lining your entire mountain foundation with heavy stone bricks and polished andesite blocks.
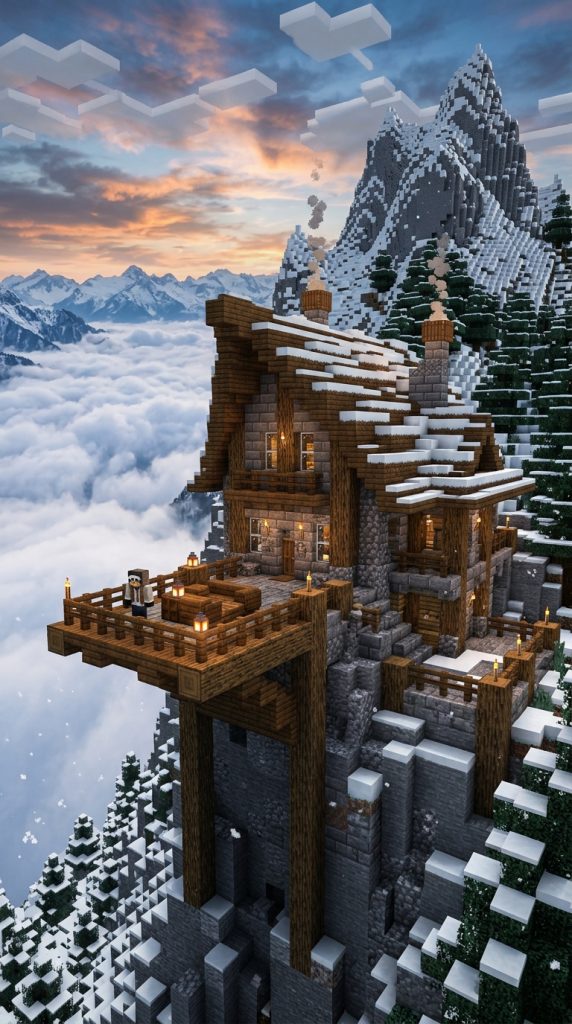
The space features a dramatic, extended balcony platform made of dark oak fences, allowing you to overlook the clouds safely from your home.
The Architecture of a High-Altitude Alpine Base
This aesthetic concept focuses on creating a secure workspace that honors traditional stone craftsmanship, rugged materials, and slow-paced survival projects. The flooring utilizes a durable, heavy-duty dark oak wood plank system that provides the rich visual texture of an expensive lodge while offering complete contrast to the stone walls.
Lighting is kept warm and atmospheric, using iron chains holding hanging lanterns paired with a roaring campfire fireplace indoors.
How to Style a Cliffside Stone Chalet
- Anchor Your Frame Directly Into a Cliffside Wall: Carve an opening into a mountain cliff, placing raw spruce logs as heavy support columns underneath.
- Build Exterior Walls with Textured Stone Bricks: Construct your outer walls using a beautiful mix of stone bricks, cracked stone bricks, and andesite.
- Extend an Outdoor Dark Oak Viewing Balcony: Build a platform extending three blocks past the cliffside edge, wrapping it with dark oak fences.
- Construct an Asymmetrical Slanted Spruce Wood Roof: Build a steep, one-sided roof slant using spruce wood stairs to shed potential mountain snow blocks.
Rustic Elements for a Mountain Chalet
To build this alpine cliffside chalet, source several stacks of stone bricks and polished andesite blocks to texture your mountain walls beautifully. You will also need dark oak fences to construct the viewing balcony, raw spruce logs for heavy structural supports, and iron chains to hang your lighting.
11. The Plains Sunflower Meadow Apiary Cottage
Stepping Into a Sun-Drenched Paradise of Honey and Bees
The Plains Sunflower Meadow Apiary Cottage is an incredibly bright, joyful, and deeply functional survival design built around honey production and automated bee farming. This design utilizes a clean, warm oak wood wall foundation wrapped in a continuous, golden-colored roof line made entirely of honeycomb blocks and yellow concrete.
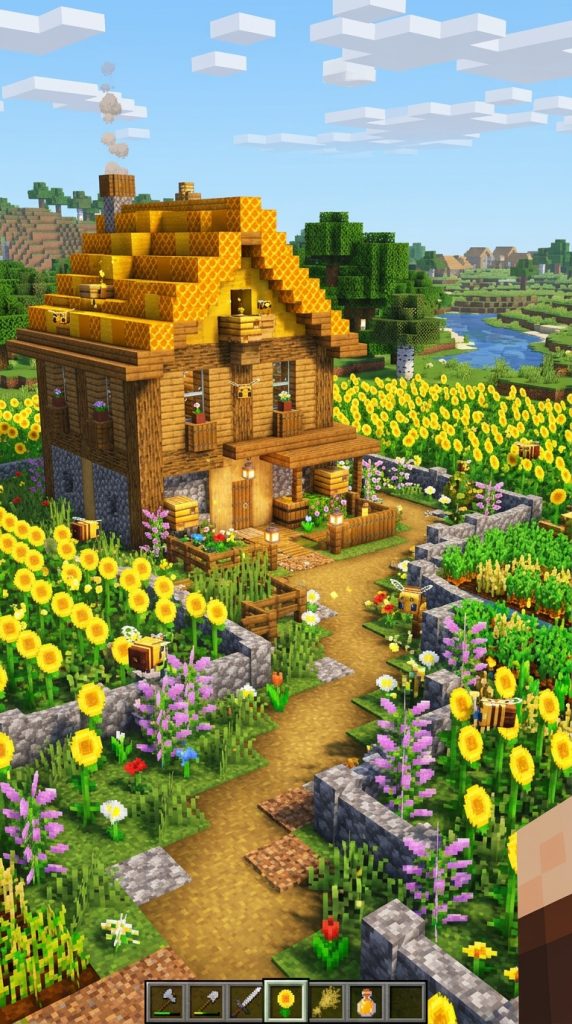
The landscaping features dozens of custom-placed sunflowers, blooming lilacs, and active beehives that fill the air with buzzing particles.
The Visual Layout of an Aesthetic Apiary Base
This style utilizes golden block alignments and high-contrast yellow tones to create a highly stylized space that looks incredible from a distance. The flooring features a rich, polished mud brick base wrapped in a custom-designed honey block floor window that lets you peer down into your automated honey bottles storage room below.
A custom-built giant wooden bee statue resting over your entrance adds an authentic touch of playful personality to this sunny farm build.
Step-by-Step Apiary Cottage Assembly
- Build a Sunny Oak and Striped Oak Wall Base: Construct your primary walls using horizontal stripped oak logs and clean oak wood planks.
- Shape a Golden Roof Using Honeycomb Blocks: Lay an A-frame roof using a rich, textured mix of honeycomb blocks, yellow concrete, and honey blocks.
- Integrate Automated Beehives Into Wall Slots: Place functional bee nests directly into your exterior walls, backing them with glass hoppers for honey collection.
- Plant a High-Density Sunflower Meadow Pathway: Surround your stone pathway with rows of sunflowers, poppy flowers, and scattered oak leaf hedges.
Supplies for a Plains Apiary Cottage
Transforming your base into a sunny apiary requires a large supply of honeycomb blocks and yellow concrete to construct the unique golden roof. You will also want horizontal stripped oak logs for the warm walls, multiple functional bee nests to produce honey, and stacks of sunflowers to plant outside.
12. The Ancient Dark Forest Redstone Alchemist Hut
Honoring Mystical Potion Brewing with Deep Copper Accents
The Ancient Dark Forest Redstone Alchemist Hut is a deeply sophisticated, mysterious design tailored for potion brewing masters, enchanted item collectors, and secret basement redstone engineers. This aesthetic features deep, rich dark oak wood log walls paired with elegant weathered cut copper stairs and traditional brewing stand accents.
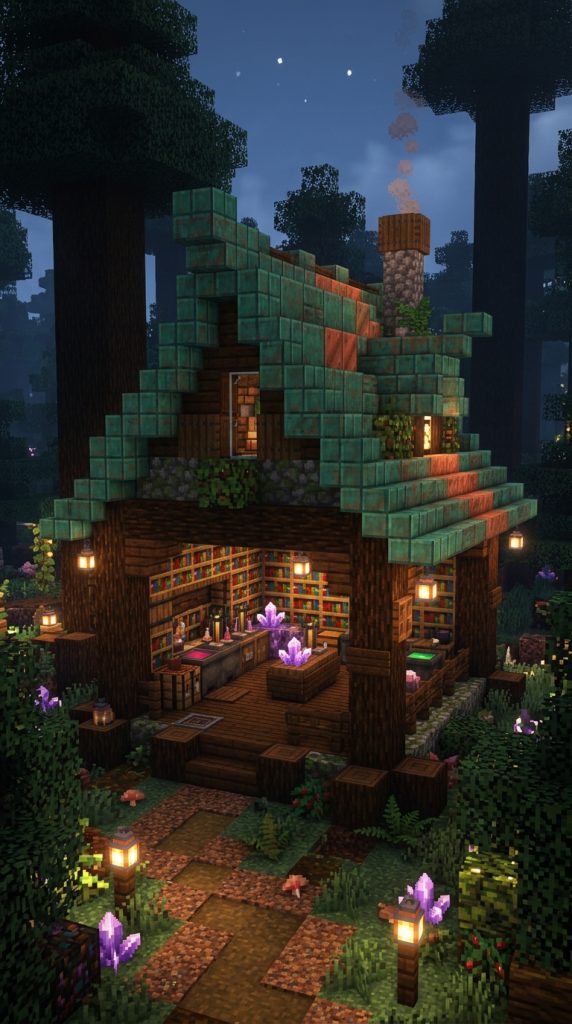
The floor features a classic, premium dark-slate tile configuration that evokes the feel of a hidden, historic medieval wizard laboratory.
The Refined Anatomy of an Alchemist Base
This mystical concept focuses on ancient arcane legacy, utilizing traditional materials like glowing brewing stations, packed bookshelves, and oxidizing copper details. Instead of standard plain lighting, this look features glowing amethyst clusters, framed potion charts, and custom cauldrons filled with colored water.
A dedicated secret basement room hidden behind a moving piston bookshelf door completes this deeply refined, wizarding workspace.
How to Construct an Alchemist Hut Garage
- Erect Heavy Dark Oak Raw Log Corner Pillars: Build a massive, sturdy structural frame using unstripped dark oak logs to match the deep woods.
- Install a Weathered Cut Copper Roof Grid: Construct a high-pitched roof using cut copper stairs, letting them naturally oxidize over time into green shades.
- Texture Walls with Dark Oak Planks and Bookshelves: Build your interior partitions using dark oak, embedding functional bookshelves into the corners.
- Set Up a Piston Bookshelf Hidden Door Mechanism: Build a simple redstone circuit behind your wall that slides a bookshelf over when a lever is pulled.
Decor Pieces for an Alchemist Cottage
To capture this ancient wizarding essence, secure several stacks of raw dark oak logs to establish your deep forest color theme. You will also want cut copper stairs to construct the oxidizing roof, plenty of functional bookshelf blocks to decorate the interior, and brewing stands to place along your counters.
13. The Coastal Island Spruce Fisherman Cottage
Creating a Serene Seaside Outpost Over a Coral Pier
The Coastal Island Spruce Fisherman Cottage is designed perfectly for lakeside survival bases, tropical island outposts, and fishing enthusiasts who love living right along the water’s edge. This design features a weathered cobblestone base that transitions into a cozy, ocean-sprayed spruce plank house built directly on top of a custom wooden pier.
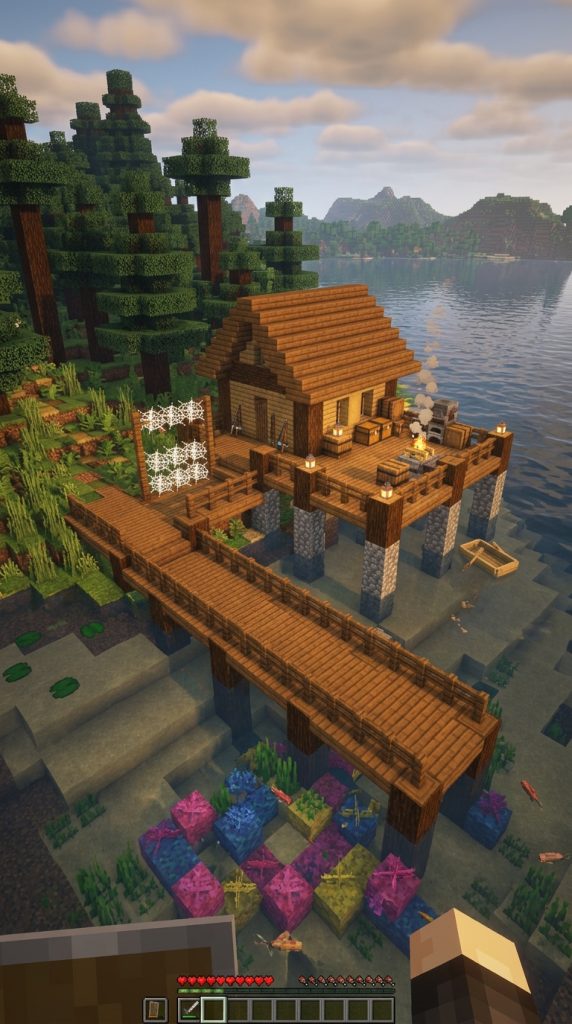
The dock extends out over a vibrant coral reef, featuring hung fishing nets made of cobwebs and racks of item-framed raw fish drying under the sun.
The Nautical Blueprint of a Seaside Fisherman Base
Seaside cottage building centers entirely around water accessibility, maritime detailing, and weather-resistant wood choices like dark spruce and oak. This style utilizes spruce fences and oak slabs to construct long, winding docks that wrap completely around your boats and turtle breeding pens.
The inclusion of an outdoor campfire cooking area featuring a smoker block allows you to cook your daily fish catches immediately on the dockside.
Step-by-Step Fisherman Cottage Assembly
- Construct a Sunken Cobblestone Pier Foundation: Place cobblestone blocks down into the shallow ocean floor, extending them one block above water level.
- Build an Extended Spruce Wood Plank Dock System: Lay spruce slabs and planks horizontally over the stone foundation to form your fishing deck.
- Erect a Cozy Spruce Plank House Frame: Build your main living quarters on the deck using spruce planks, oak logs, and clear glass window panes.
- Decorate Docks with Cobweb Nets and Smoker Blocks: Place cobwebs randomly along your fences to mimic drying nets, embedding a smoker block into the floor.
Essential Gear for a Coastal Fisherman Cottage
To master this nautical ocean-side layout, you will want to choose several stacks of warm spruce planks and slabs to build your primary fishing docks. You will also need weathered cobblestone blocks for the underwater foundation supports, cobweb blocks to serve as decorative nets, and a functional smoker block to cook your catches.