
21 Chic Homemade Gothic Decor Crafts to Save for 2026
Modern gothic home decor has entirely transcended the seasonal clichés of plastic skeletons, purple glitter, and cheap synthetic cobwebs. Entering 2026, the interior design landscape embraces “Refined Dark Romanticism”—a sophisticated synthesis of Victorian mourning traditions, dark academia, cabinet-of-curiosities taxidermy, and wabi-sabi telluric decay.

The goal of elevated gothic crafting is not to make a home feel like a commercial haunted house, but rather to curate spaces reminiscent of a centuries-old European salon: contemplative, romantic, and steeped in sensory mystery. By working with genuine organic specimens, heavy antiqued metals, rich textiles, and architectural framing, you can handcraft statement pieces that look completely designer-curated.
Below are twenty-one original, deeply detailed home decor craft tutorials engineered for maximum visual allure, high durability, and dark elegance.
1. The Gilded Taxidermy Cicada Shadow Box
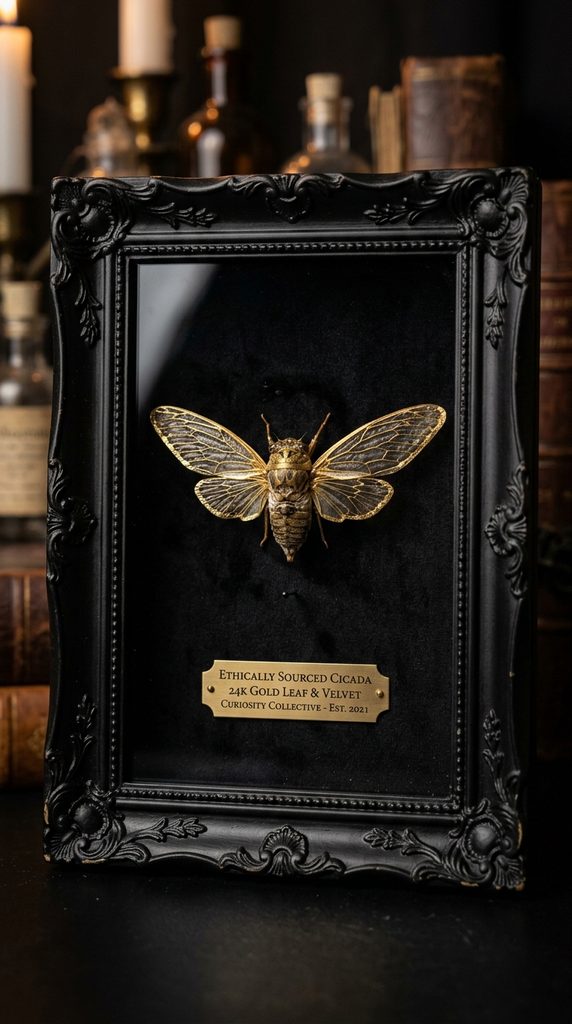
Victorian Entomology with Haute Joaillerie Accents
Celebrate the poetic rhythm of natural metamorphosis and silent forest depths with a fine-art insect display. This project elevates naturally expired specimens—specifically large annual or periodical cicadas—by transforming their papery, translucent wings into gilded works of jewelry art. Enclosed within a deep, velvet-lined rococo shadow box, it bridges the gap between historical cabinet of curiosities and modern luxury.
- Difficulty Level: Intermediate
- Core Palette: Obsidian black, 24k gold leaf, iridescent jade, and dusty charcoal.
- Display Location: Library bookshelf, gallery wall cluster, or entryway console.
Materials You Will Need
- 1 Deep wooden shadow box frame (8×10 inch) with an ornate or stepped black molding
- 1 Sheet of heavyweight black cotton velvet or archival matte board
- 1 Ethically sourced, dried intact cicada specimen (or large death’s-head moth)
- Genuine loose gold leaf sheets (or high-pigment liquid gold leaf lacquer)
- Gilding size (adhesive) and fine-tipped sable detail brushes
- Microscopic insect mounting pins (black enameled steel, size 00)
- Hot glue or archival E6000 craft adhesive
- Fine brass tweezers
Step-by-Step Construction Guide
- Specimen Preparation: Ensure your ethically sourced specimen is fully dried and relaxed. If the wings are stiff, place the insect inside a relaxing chamber (an airtight container lined with damp paper towels and a splash of isopropyl alcohol to prevent mold) for 24 hours until joints are flexible.
- Wing Spreading and Gilding: Pin the insect flat onto a foam spreading board, positioning the forewings gracefully outward. Using a micro-detail brush, paint an ultra-fine border of water-based gilding size along the outer edges of the wing veins. Allow the size to become tacky (roughly 10 minutes), then delicately press flakes of gold leaf onto the veins using a dry mop brush. Burnish gently to remove excess foil, leaving luminous golden tracery along the delicate wing tips.
- Mounting the Velvet Backing: Cut the black velvet precisely to fit the inner wooden backing board of your shadow box. Secure it using spray adhesive or double-sided carpet tape, ensuring the fabric is pulled completely taut without wrinkles.
- Final Assembly: Pierce a black enameled insect pin straight through the insect’s thorax, leaving half an inch of pin beneath. Dab a drop of E6000 onto the pin tip and press it into the center of the velvet backing board so the gilded cicada hovers slightly above the velvet, casting a real shadow. Seal the glass frame tightly to keep dust out.
2. The Bleached Bone & Obsidian Shard Wind Bell
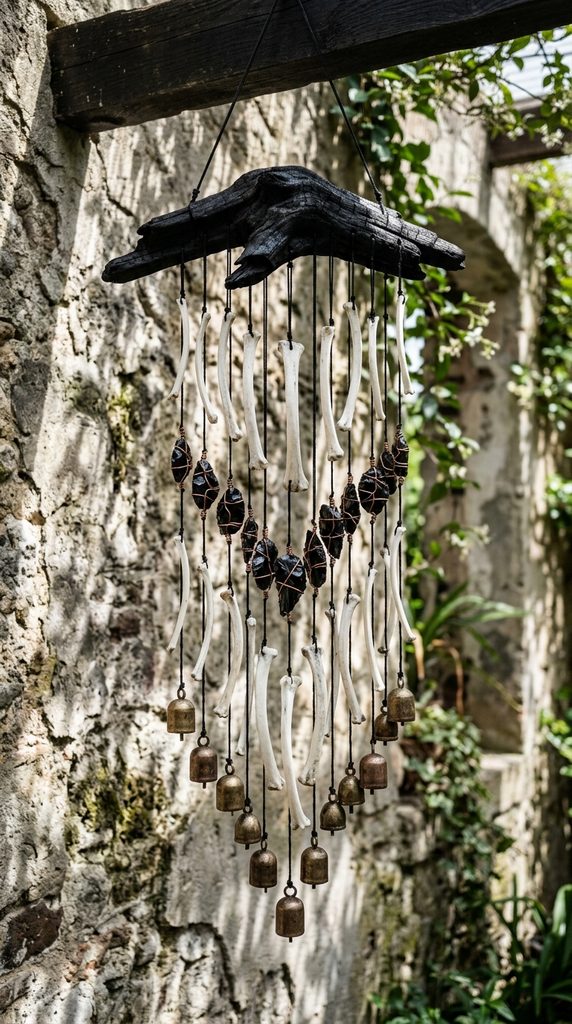
Telluric Kinetic Sculpture for Porches and Solariums
Wind chimes often skew bright and nautical, but this kinetic mobile introduces the austere beauty of desert badlands and ancient burial sites. Strung with sanitized, wind-fallen bones (such as clean avian or small mammal rib bones), chunks of raw black obsidian, and tarnished iron bells, it produces a deep, dry percussive chime that sounds completely unlike metal or glass.
- Difficulty Level: Easy to Intermediate
- Core Palette: Bleached bone white, pitch black obsidian, and rusted iron.
- Display Location: Covered front veranda, sunroom window, or sheltered garden tree.
Materials You Will Need
- 1 Naturally weathered, sculptural piece of drift oak or blackened root wood (12 inches)
- 6 to 8 Sanitized animal rib bones or delicate bone replicas
- 4 to 6 Chunks of raw black obsidian with drilled holes (or wrapped with wire)
- 3 Vintage rustic Tibetan-style raw iron or tin bells
- 20 lb test waxed black linen thread or braided black fishing line
- 20-gauge tarnished brass or oxidized copper jewelry wire
- Matte clear polyurethane spray
Step-by-Step Construction Guide
- Wood Preparation: Clean the sculptural piece of driftwood or root wood thoroughly with a stiff brush. Lightly char the surface using a culinary torch or heat gun to highlight the wood grain, then seal it with a coat of matte clear spray.
- Wiring the Stones: If your obsidian stones do not have pre-drilled holes, wrap each raw chunk tightly in an asymmetrical cage using the 20-gauge oxidized wire, finishing with a small closed loop at the top for suspension.
- Threading the Bones: Using a miniature drill bit, carefully drill a 1mm hole near the articular head of each sanitized bone. Thread waxed black linen cord through the hole, tying it off with a secure fisherman’s knot.
- Balancing the Chime: Drill five evenly spaced holes along the underside of the wood branch. Suspend the components in alternating drop lengths: place heavier obsidian chunks in the center flanked by bone segments, with small rustic iron bells hanging low enough so the swinging bones tap against their metal sides.
- Finishing: Gather the top cords into a central heavy brass ring. Hang the mobile in a spot with a gentle cross-breeze where the bones and obsidian gently collide.
3. The Antiqued Mercury Glass Poison Decanter Set
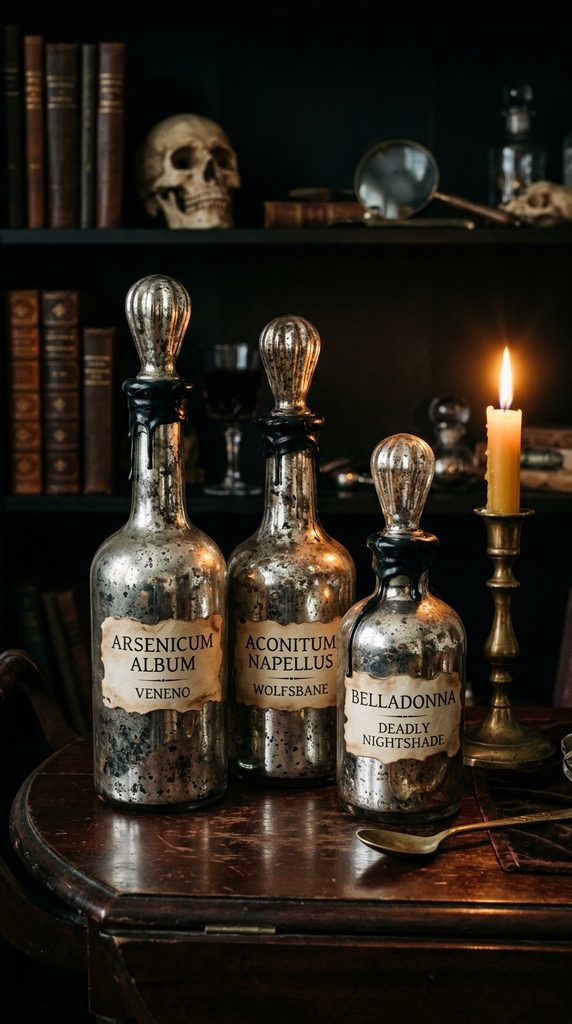
Alchemical Tabletop Glassware for Dining and Bars
Transform ordinary thrifted glass decanters and cordial bottles into a sinister, nineteenth-century apothecary bar cart collection. By utilizing the classic “mirror-effect” silver spray paint combined with a vinegar-water spritz, the interior glass develops the flaky, corroded look of antique mercury glass. Finished with custom handwritten Latin apothecary labels, it turns beverage storage into functional art.
- Difficulty Level: Easy
- Core Palette: Tarnished silver, antique pewter, sepia, and cork tan.
- Display Location: Bar cart, dining room sideboard, or kitchen open shelving.
Materials You Will Need
- 3 Vintage glass decanters or cordial bottles with ornate stoppers (sourced from thrift shops)
- 1 Can of mirror-effect reflective silver spray paint (Looking Glass spray)
- White distilled vinegar and tap water mixed 50/50 in a fine misting spray bottle
- Black acrylic craft paint and a sponge
- Heavy cotton parchment paper or tea-stained paper
- Brown iron-gall ink or calligraphy pen
- Natural beeswax or black paraffin for sealing stoppers
Step-by-Step Construction Guide
- Stripping the Glass: Wash the glass decanters thoroughly with rubbing alcohol to remove grease and fingerprints. Ensure the interiors are completely dry.
- The Faux Mercury Wash: Spray a light mist of the 50/50 vinegar-water solution into the inside of the bottle. Immediately spray a light, even coat of the mirror spray paint directly inside. The vinegar droplets prevent the silver paint from adhering in specific spots. Wait one minute, then gently swirl a soft paper towel or sponge inside to lift the wet vinegar pools, creating corroded, antiqued mirror patches.
- Shadow Layering: Dab a small amount of thinned black acrylic paint inside the bottle, swirling it around to back the clear spots created by the vinegar. This gives the reflective silver an authentic, dark, tarnished patina.
- Parchment Labeling: Cut strips of tea-stained parchment paper with torn, deckled edges. Inscribe authentic historical poisons or herbal sedatives in calligraphy (e.g., Atropa Belladonna, Conium Maculatum, Arsenicum). Adhere the labels using Mod Podge, distressing the paper edges with a touch of dark brown wax.
- Stopper Detailing: Clean the glass stoppers, dip their neck joints in melted black sealing wax, and seat them loosely in the bottle openings.
4. The Charred Shou Sugi Ban & Lace Table Runner
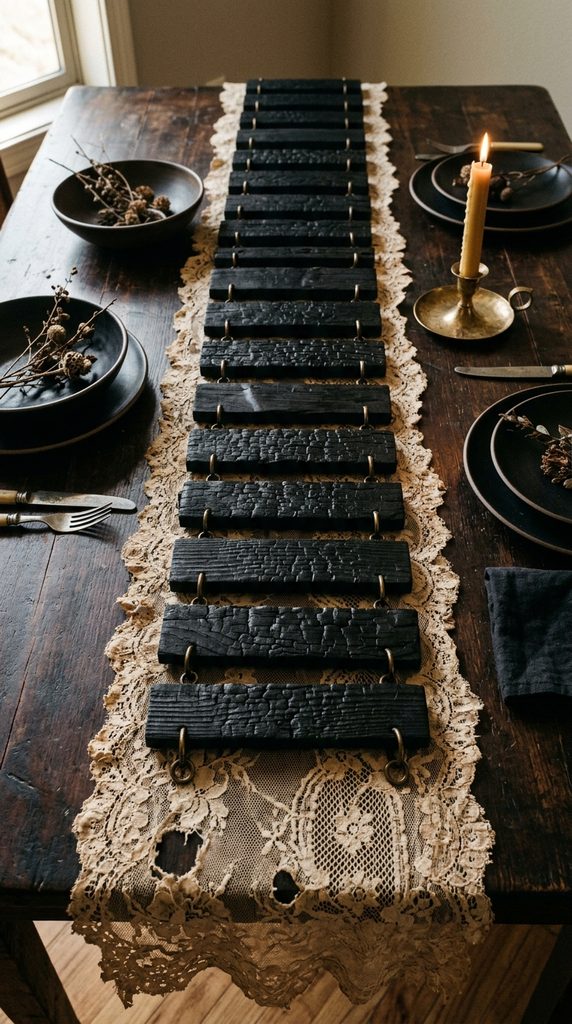
Textural Contrast of Incinerated Cedar and Victorian Openwork
Traditional fabric table runners can feel lightweight and fragile; this concept merges the ancient Japanese elemental technique of wood charring with antique textile heritage. Thin, flexible laths of cedar wood are scorched to a deep, cracked obsidian alligator finish, then linked together using brass jump rings and laid over an underlayer of torn, coffee-dyed Victorian floral lace.
- Difficulty Level: Intermediate
- Core Palette: Carbon black, antique cream, and brushed bronze.
- Display Location: Dining table center, fireplace hearth runner, or piano top.
Materials You Will Need
- 10 to 12 Thin cedar laths or craft wood slats (3×10 inches, 1/4-inch thick)
- 1 Propane blowtorch or heavy-duty culinary kitchen torch
- 1 Stiff wire bristle brush
- 1 Yard of wide, open-weave antique cotton lace fabric
- Strong black coffee or black tea (for textile staining)
- 40 Large antique brass jewelry jump rings (8mm)
- Hand drill with a 2mm wood drill bit
- Matte water-based wood polycrylic sealant
Step-by-Step Construction Guide
- Charring the Wood: In a safe outdoor space on concrete, use the torch to thoroughly scorch the surface of all cedar laths until an opaque, blackened alligator-scale pattern develops.
- Brushing and Sealing: Once cool, brush the slats vigorously with the wire brush to remove loose soot while leaving the deep, structural carbon ridges behind. Wipe clean with a damp rag, then coat the wood with two layers of matte polycrylic sealant to lock the carbon in and prevent black soot transfer to your furniture.
- Drilling Link Holes: Drill small 2mm holes in each of the four corners of every cedar slat, spaced roughly 5mm in from the edges.
- Linking the Slats: Use pliers to open the brass jump rings, connecting the short ends of the slats together sequentially. This creates an articulated, flexible wooden runner that rolls up effortlessly.
- Dyeing the Lace: Soak your white cotton lace in hot, strong black coffee for thirty minutes to strip the bright bleach tone, transforming it into an antique parchment cream. Dry and iron flat, then lay the lace down the center of your table, placing the charred, articulated wood runner directly over it for an unmatched juxtaposition of soft openwork and charred timber.
5. The Wax-Dipped Dripping Botanical Wall Sconce
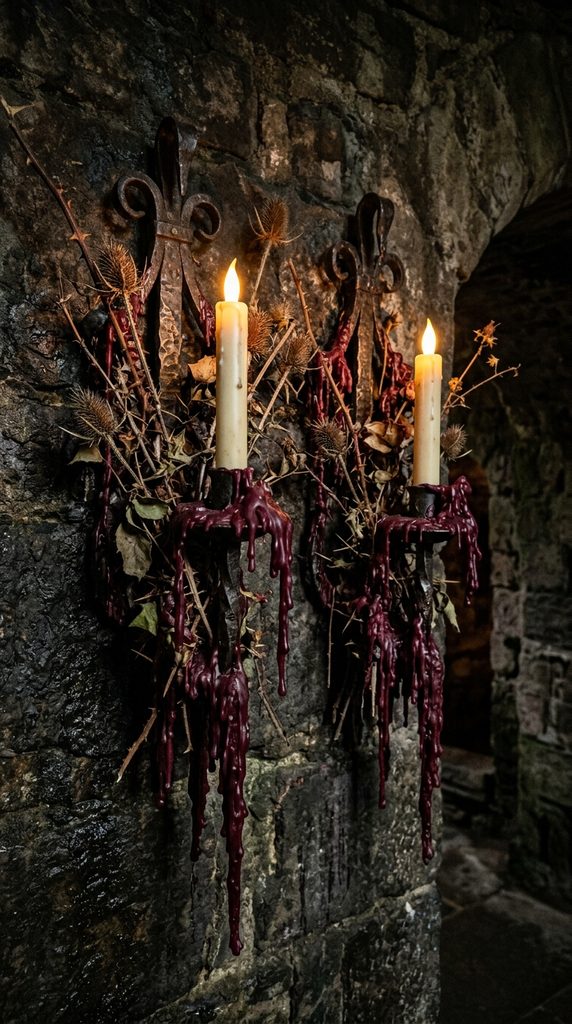
Sculptural Lighting with Faded Autumn Florals
Electric wall sconces often look too modern or industrial. This DIY craft retrofits basic wrought-iron or black wire sconce frames by encasing real, dried floral elements in heavy coats of cascading, blood-burgundy or ivory wax. The result is a piece of living architectural candle-sculpture that looks like it was plucked from a forgotten cathedral crypt.
- Difficulty Level: Intermediate
- Core Palette: Deep oxblood burgundy, ivory wax cream, and wrought iron black.
- Display Location: Hallway entryway, flanking a bathroom vanity, or framing a bedroom headboard.
Materials You Will Need
- 1 Pair of simple black metal or wrought-iron single-candle wall sconces
- Assorted dried florals (dried hydrangeas, thistles, and rose stems with thorns)
- 2 Pounds of paraffin wax or microcrystalline dipping wax
- Candle dye block (deep burgundy or slate charcoal)
- 2 High-quality battery-operated LED wax taper candles with realistic flickering wicks
- Brown floral wire and hot glue gun
- Deep metal dipping pitcher or double boiler
Step-by-Step Construction Guide
- Arranging the Botanicals: Position your dried rose stems and spiky thistles along the back spine of the metal wall sconce, securing them firmly against the iron armature using brown floral wire. Let some stems curl outward to create an organic, climbing silhouette.
- Melting the Wax: In a double boiler setup, melt the wax completely, adding the dye block until you achieve a rich, opaque blood-burgundy or deep charcoal color. Maintain the temperature around 160°F (71°C) to ensure smooth dipping.
- Drip Coating: Carefully ladle melted wax over the dried florals attached to the sconce, allowing it to coat the petals and run down the iron rods in natural drips. Repeat in thin layers, pausing between coats so the wax solidifies into heavy, frozen stalactite formations.
- Aging the Finish: Once the wax has completely cooled and cured, take a soft rag dipped in dark brown shoe polish or asphaltum glaze and gently buff the high points of the wax to emphasize the botanical textures and aged crevices.
- Candle Installation: Insert your realistic LED flicker taper candle into the sconce cup, running a few warm wax drips down the candle body to seamlessly meld it into the sconce framework.
6. The Embroidered Anatomical Heart Linen Pillow
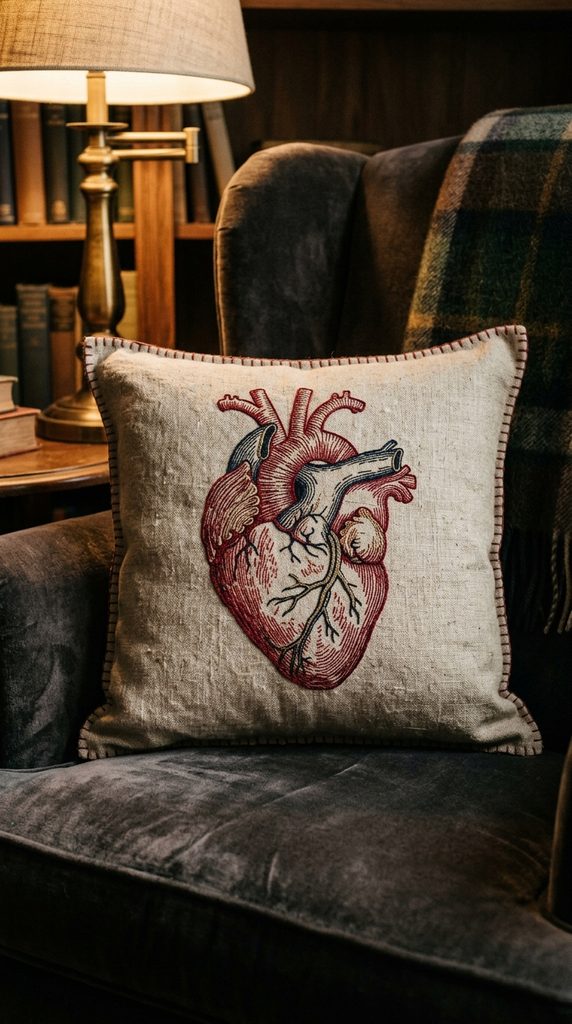
Renaissance Medical Illustration Meets Domestic Comfort
Gothic textiles frequently lean into velvet, but crisp, heavyweight raw linen provides a monastic, historical contrast. This craft combines traditional hand embroidery techniques with seventeenth-century anatomical medical sketches. Using red, charcoal, and metallic brass embroidery floss on raw unbleached flax linen, you create an heirloom-quality accent pillow that celebrates mortality and cardiovascular wonder.
- Difficulty Level: Intermediate to Advanced
- Core Palette: Unbleached flax oatmeal, crimson red, vein blue, and antique brass.
- Display Location: Reading armchair, dark sofa, or bed layering setup.
Materials You Will Need
- 1 Yard of heavyweight, rough-textured unbleached 100% flax linen
- Water-soluble embroidery transfer stabilizer paper
- 6-strand cotton embroidery floss (crimson, deep garnet, navy blue, and black)
- 1 Skein of metallic brass or gold embroidery thread
- Wooden embroidery hoop (8 or 10 inch)
- Embroidery needles (size 5 to 7)
- 1 18×18 inch down-alternative pillow insert
- Sewing machine or hand sewing needle
Step-by-Step Construction Guide
- Pattern Transfer: Print a vintage, open-source anatomical heart illustration (such as those from Leonardo da Vinci or Andreas Vesalius) onto water-soluble embroidery transfer paper. Peel the backing and stick the adhesive pattern directly onto the center of an 19×19 inch square of linen.
- Hooping the Fabric: Mount the linen into your wooden embroidery hoop, pulling it drum-tight to prevent puckering during stitching.
- Stitching the Vessels: Use a two-strand split stitch with deep garnet and crimson floss to outline the muscular ventricles. Stitch the ascending aorta and pulmonary arteries using a combination of satin stitch and stem stitch in navy and deep teal.
- Adding Gilded Accents: Incorporate metallic brass thread to outline the major coronary sulcus lines and delicate fatty deposits, giving the medical sketch the luminous quality of an illuminated manuscript.
- Dissolving the Stabilizer: Remove the linen from the hoop and submerge it in warm water for five minutes. The transfer paper dissolves away cleanly, leaving only your thread work on the raw linen. Air dry and press flat with an iron from the reverse side.
- Sewing the Pillow Cover: Pin your embroidered linen front to a matching back panel, right sides together, sewing around three edges with a 1/2-inch seam allowance. Insert your plush pillow form and hand-stitch the bottom seam closed using an invisible slip stitch.
7. The Victorian Specimen Dome with Foraged Bracket Fungi
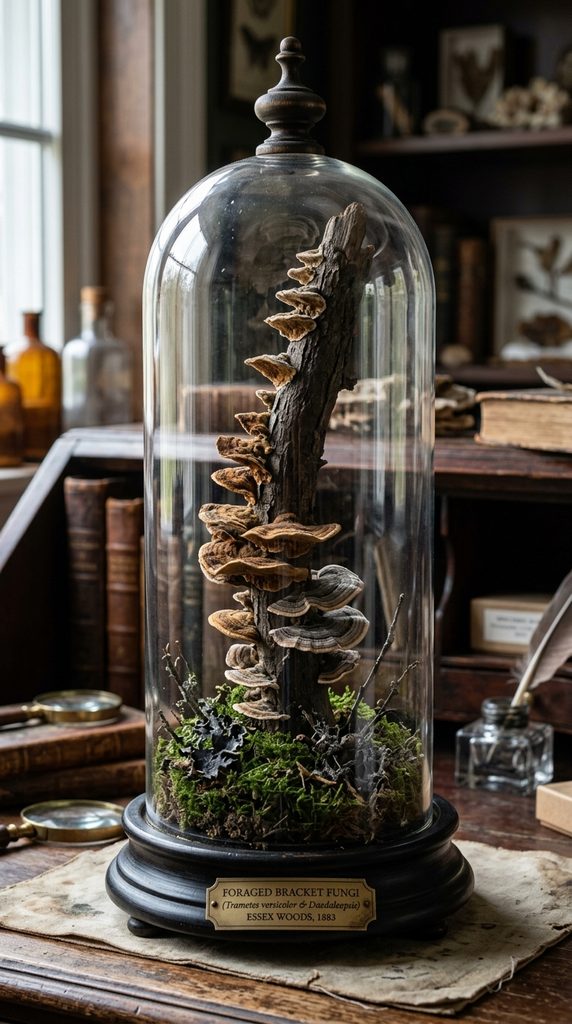
Architectural Still Life Celebrating Forest Decomposition
Glass display domes (bell cloches) are quintessentially Victorian, historically used to house pocket watches, taxidermy birds, and funeral wreaths. This modern project turns the focal point toward the quiet architecture of wood-decay fungi. By mounting stepped shelf mushrooms against a weathered oak branch, you create an enchanting miniature woodland installation that feels solemn and museum-worthy.
- Difficulty Level: Easy
- Core Palette: Faded lichen gray, deep mahogany, moss green, and dark ebony.
- Display Location: Coffee table centerpiece, mantelpiece, or desk study.
Materials You Will Need
- 1 Glass bell cloche with a grooved dark wooden base (approx. 10 to 12 inches tall)
- 3 to 5 Dried shelf bracket fungi (Artist’s Conk or Ganoderma applanatum) in ascending sizes
- 1 Gnarly, dried branch segment that fits comfortably under the dome
- Preserved dark reindeer moss and dried sheet moss
- Matte black acrylic paint or dark walnut wood stain
- High-strength clear epoxy glue or hot glue gun
- Micro-fairy lights (optional, warm copper wire)
Step-by-Step Construction Guide
- Preparing the Base: If your cloche wooden base has a bright varnish, sand it down lightly and apply a coat of matte black paint or dark walnut stain to give it an aged, ebony appearance.
- Anchor Branch Placement: Cut the bottom of your sculptural branch flat so it stands upright on the base. Secure the branch to the center of the wooden base using two-part epoxy or a screw driven up from the underside of the baseboard.
- Attaching the Fungi: Arrange the dried bracket mushrooms along the vertical branch in a stepped, spiral pattern, mimicking how they grow up dying tree trunks in the forest. Cut a small slot into the back of each mushroom using a craft razor, apply glue, and anchor them firmly against the branch bark.
- Grounding the Floor: Glue clumps of preserved dark green sheet moss and charcoal lichen around the base of the branch to hide all adhesive points and mimic the forest floor.
- Enclosing the World: Ensure the interior of the glass dome is completely free of dust and fingerprints. Carefully lower the cloche over the fungi sculpture into the base groove, securing it permanently with a tiny dot of clear silicone if desired.
8. The Antiqued Book-Spine Hidden Concealment Box
Secret Grimoire Storage for Dark Academia Shelves
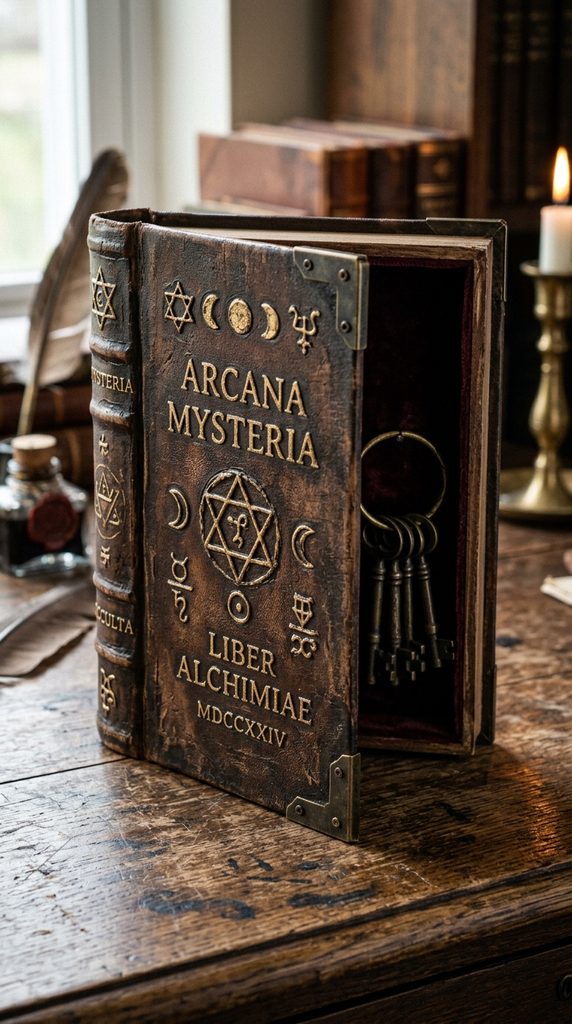
Disguising practical clutter is an art form. This project takes damaged, discarded vintage hardcover encyclopedias and transforms them into a secret, hollowed-out book safe adorned with an embossed faux-leather leather grimoire cover. Complete with antique brass corner brackets and an alchemical sigil, it keeps modern remotes, jewelry, or keys entirely invisible.
- Difficulty Level: Intermediate
- Core Palette: Aged oxblood leather, gilded brass, and yellowed parchment.
- Display Location: Bookshelf tucked between novels or bedside nightstand.
Materials You Will Need
- 1 Large vintage hardcover book (at least 2 inches thick, sourced from library discard bins)
- Mod Podge (matte finish) and utility craft knife with fresh blades
- Steel ruler and pencil
- Air-dry modeling clay or hot glue detailing gun
- Acrylic craft paint (raw umber, burnt sienna, and lamp black)
- 4 Antique brass metal book corners
- Rub ‘n Buff metallic gold wax
- Wax paper
Step-by-Step Construction Guide
- Sealing the Outer Pages: Open the book’s front cover and place a sheet of wax paper between the cover and the first page to protect it. Using a flat brush, paint a generous coat of Mod Podge all along the exterior edges of the closed pages, pressing the book down with a heavy weight until the block dries solid (roughly 2 hours).
- Hollowing the Chamber: Using a pencil and steel ruler, draw a rectangle on the top face of the page block, leaving an interior border of 3/4 inch on all sides. Using your utility knife, carefully cut along the ruler lines. Remove pages layer by layer, working your way down until you are half an inch from the back cover.
- Solidifying the Interior: Paint the interior cavity walls and floor with multiple thick coats of Mod Podge to cement the cut edges into a solid, wooden-like box structure.
- Embossing the Cover: To give the book an ancient grimoire look, draw alchemical circles or a gothic cross on the front fabric cover using hot glue, creating raised relief lines. Paint the entire cover with brown and black acrylic paint to mimic mottled, centuries-old calfskin leather.
- Gilded Detailing: Buff gold wax onto the raised glue lines with your fingertip to make the embossed artwork pop. Finally, hammer the four antique brass metal corners onto the edges of the book cover.
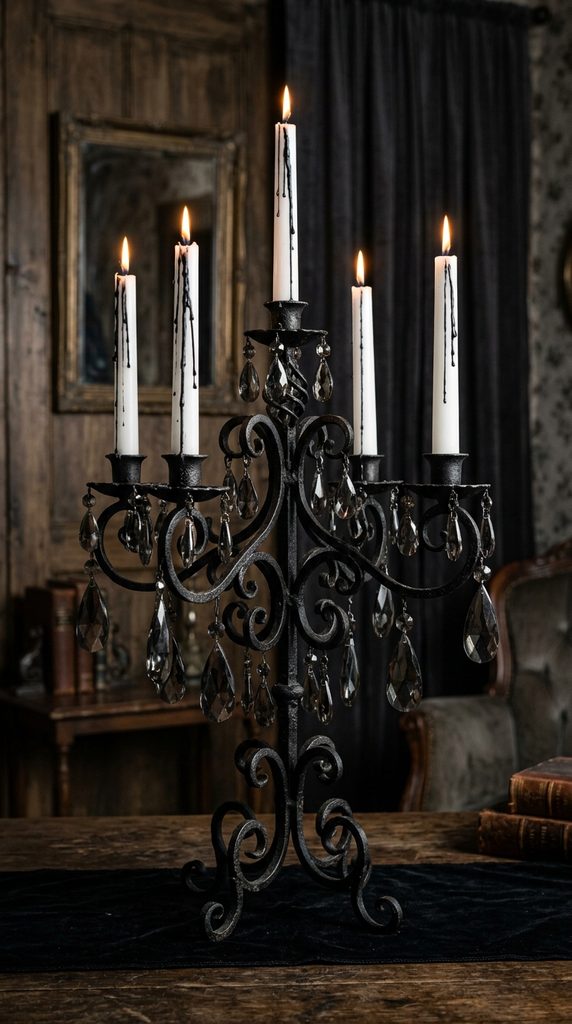
9. The Blackened Iron & Crystal Prism Candelabra
Reclaimed Gothic Cathedral Lighting
Chandeliers and candelabras often look either excessively modern or overly sparkly. This upcycling craft takes thrifted, garish brass candelabras, strips their shine with matte wrought-iron paint, and hangs vintage cut-glass crystals that have been subtly smoke-tinted. The finished piece captures the solemn beauty of an abandoned French cathedral chapel.
- Difficulty Level: Easy
- Core Palette: Matte wrought-iron black, smoky charcoal glass, and dripping white wax.
- Display Location: Dining table centerpiece or entryway buffet console.
Materials You Will Need
- 1 Multi-arm brass or plated metal candelabra (thrifted)
- 1 Can of textured or ultra-matte black spray paint
- 6 to 10 Cut-glass chandelier drop crystals (with wire pins attached)
- Black glass stain (or alcohol inks in pitch black and deep purple)
- Fine-grit sandpaper (220-grit)
- Hand-dipped white or charcoal taper candles
Step-by-Step Construction Guide
- Surface Prep: Lightly scuff the shiny surface of your metal candelabra with 220-grit sandpaper to give the paint mechanical teeth. Wipe away all metal dust with rubbing alcohol.
- Applying the Iron Coat: Spray the candelabra with two light coats of ultra-matte black paint, holding the can 10 inches away to build an even, stone-like texture without drips. Let dry fully.
- Tinting the Prisms: Take clear cut-glass crystals and clean them with glass cleaner. Using a foam brush, apply a sheer wash of black alcohol ink or translucent glass stain over the facets. This transforms the bright, dazzling rainbow refractions into dark, smoky shadows that still catch candlelight.
- Hanging the Crystals: Thread oxidized brass wire through the crystal holes and loop them through the drip pans or decorative scrolls beneath each candle cup.
- Wax Dressing: Insert your taper candles. Light them for ten minutes before your gathering, letting the melted wax stream down the matte black arms to create permanent, dramatic wax icicles.
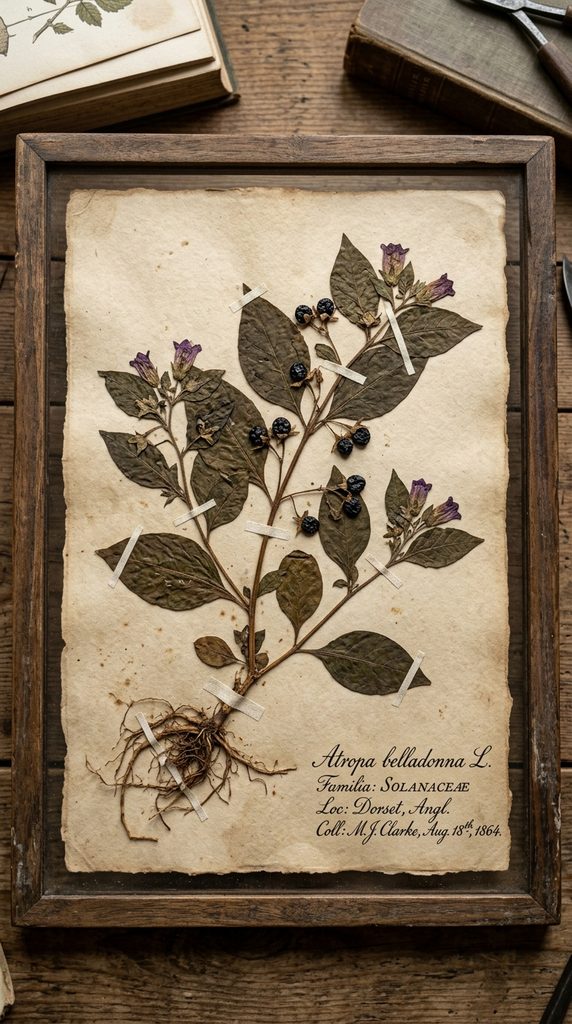
10. The Pressed Deadly Nightshade Herbarium Sheet
Authentic Botanical Taxonomy for Dark Naturalists
Pay homage to historical toxicology and medicinal botanical history. This project involves collecting and pressing toxic or protective plants (such as Belladonna, Datura, Wormwood, or wild Ferns), mounting them on heavy archival cotton rag paper, and annotating them with hand-calligraphed Latin taxonomy and historical folklore notes. Framed in weathered wood, it looks straight from an eighteenth-century apothecary’s study.
- Difficulty Level: Easy
- Core Palette: Faded botanical green, warm parchment cream, and iron-gall black.
- Display Location: Home office, library gallery wall, or powder room.
Materials You Will Need
- Assorted pressed, dried botanical specimens (leaves, flowers, and root segments)
- 1 Sheet of heavy 300gsm cold-press watercolor paper (cotton rag)
- Gummed archival linen mounting tape (or narrow brown paper tape)
- Calligraphy dip pen and waterproof black drawing ink
- Light watercolor wash (raw umber or brewed black tea)
- Distressed vintage wooden picture frame with glass
Step-by-Step Construction Guide
- Botanical Pressing: Press your selected botanical specimens between sheets of blotting paper inside a heavy wooden plant press or telephone book for two weeks until bone-dry and flat.
- Paper Aging: Lightly brush the edges of your heavy watercolor paper with a dilute wash of brewed black tea or raw umber watercolor paint. Allow it to air-dry naturally to form authentic water stains and a warm parchment tone.
- Mounting the Plant: Lay the dried plant centrally on the paper. Use narrow, 2mm strips of gummed linen tape to secure the main stem, root cluster, and leaf petioles to the paper, mimicking the exact mounting methods used by the Linnean Society.
- Calligraphy Inscriptions: In the bottom right corner of the sheet, draw a rectangular taxonomy box using a pencil. Inscribe the binomial nomenclature (e.g., Atropa belladonna L.), family (Solanaceae), collection location, and medical folklore using your calligraphy dip pen.
- Framing: Place the finished herbarium sheet inside an aged wooden frame without a mat board, letting the deckled paper edges rest directly against the glass.
11. The Carved Raven-Skull Drawer Pulls & Knobs
Subtle Cabinet Hardware Transformation
Updating furniture hardware is the single fastest way to alter the mood of a room. This project replaces generic brushed-nickel or ceramic dresser knobs with hand-cast, matte-black resin raven skulls. Perfect for an antique nightstand, desk drawers, or apothecary cabinets, they inject tactile gothic drama into daily life.
- Difficulty Level: Intermediate
- Core Palette: Matte bone white or obsidian black with pewter highlights.
- Display Location: Bedroom dressers, nightstand drawers, or bathroom vanity cabinets.
Materials You Will Need
- 1 Food-grade silicone mold of miniature raven or bird skulls (approx. 2 inches long)
- Fast-curing two-part polyurethane casting resin
- Black liquid resin pigment
- Cabinet knob machine screws (8-32 thread, 1.5 inches long)
- 8-32 threaded brass inserts (or matching nuts)
- Fine black sandpaper and silver gilding wax (Rub ‘n Buff)
Step-by-Step Construction Guide
- Prepping the Hardware: Thread a nut onto the end of your machine screw, leaving the head exposed. This screw assembly will be suspended into the wet resin so the finished skull has a permanently embedded mounting stud.
- Mixing the Resin: In a plastic mixing cup, combine equal parts A and B of your polyurethane resin, stirring slowly to avoid whipping air bubbles into the mixture. Add four drops of black liquid pigment until completely opaque.
- Pouring the Mold: Pour the mixed resin smoothly into the raven skull silicone cavities. Immediately submerge the head of the screw assembly into the back of the skull’s cranium, using a craft stick resting across the mold opening to hold the screw perfectly perpendicular as the resin cures.
- Demolding and Trimming: After thirty minutes, demold the cast skulls. Sand the flat back of the skull cranium with sandpaper to ensure it sits flush against your wooden drawer face.
- Surface Patina: Lightly dab silver or pewter gilding wax onto your fingertip and gently rub it over the raised nasal ridges and beak sutures to highlight the anatomical bone structure. Screw the finished pulls into your furniture drawers.
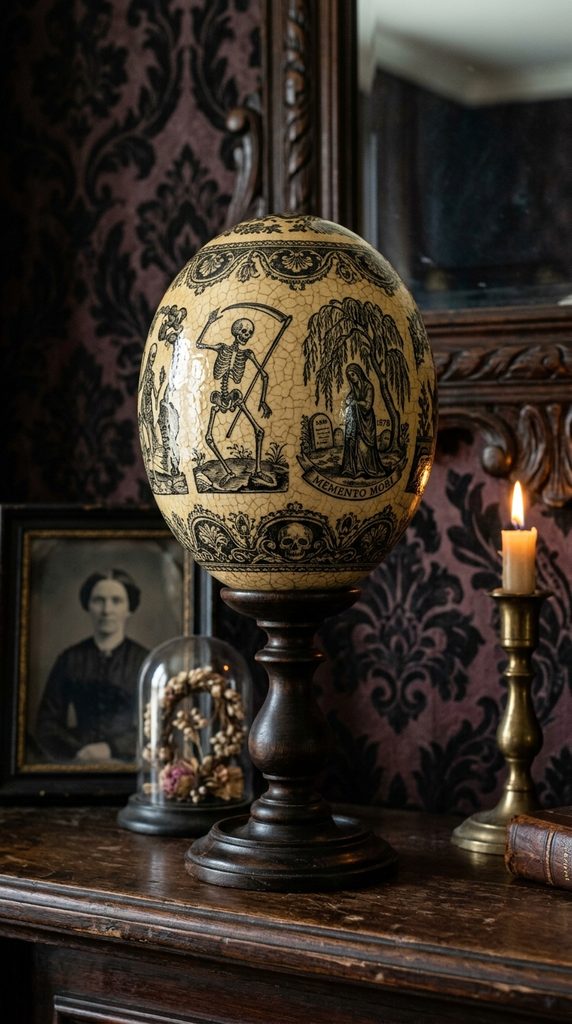
12. The Decoupage Victorian Ostrich Egg Memento Mori
High-Society Victorian Mourning Curiosities
Victorian drawing rooms were famous for decorated egg curios, often displaying intricate hand-painted heraldry or mourning scenes. This craft takes a large real or ceramic hollow ostrich or goose egg and applies nineteenth-century engravings of anatomical skeletons, weeping willows, and hourglasses via decoupage. Mounted on a turned wooden candlestick, it serves as a stunning memento mori mantel sculpture.
- Difficulty Level: Easy to Intermediate
- Core Palette: Bone eggshell cream, charcoal line art, and antique mahogany.
- Display Location: Fireplace mantel, curio cabinet, or dining room buffet.
Materials You Will Need
- 1 Real blown ceramic or craft goose/ostrich egg (available at craft supply stores)
- Printed black-and-white nineteenth-century woodcut prints (skeletons, hourglasses, tombstones)
- Matte Mod Podge or decoupage glue
- Small soft bristle decoupage brush
- 1 Turned wooden candlestick holder (6 to 8 inches tall)
- Black walnut wood stain or matte black lacquer
- Amber shellac or aging wax
Step-by-Step Construction Guide
- Preparing the Stand: Sand your wooden candlestick and stain it in deep black walnut or paint it in matte ebony. This acts as the pedestal base for the egg.
- Trimming the Art: Print your chosen historical woodcuts on thin 20lb paper. Carefully cut out the engravings using curved precision scissors, making tiny horizontal relief cuts along the outer edges of the paper so the flat prints can curve around the spherical surface of the egg without wrinkling.
- Decoupage Application: Brush a thin layer of Mod Podge onto the egg surface. Press the paper prints down firmly, working from the center outward using a damp sponge to smooth away air bubbles. Apply a second coat of Mod Podge directly over the top to seal the paper into the eggshell.
- Aging the Egg: Once dry, wipe a thin coat of amber shellac or dark brown wax over the entire egg. The shellac settles into the microscopic pores of the eggshell, lending it the yellowed, century-old patina of genuine bone china.
- Final Mounting: Use a ring of heavy epoxy or museum putty to seat the decorated egg permanently on top of the wooden candlestick pedestal.
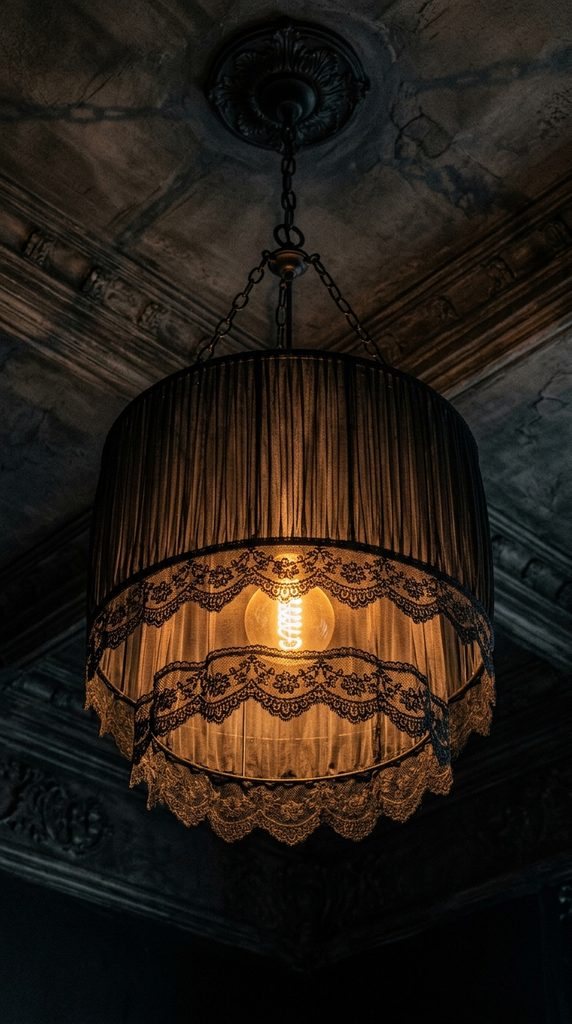
13. The Mourning Veil Ruffled Chandelier Drum Shade
Victorian Funeral Drapery for Overhead Fixtures
Modern drum ceiling fixtures often cast flat, harsh overhead light. By wrapping a basic lampshade or metal drum frame in sweeping layers of sheer black pleated chiffon, crêpe, and gathered mourning veil lace, you diffuse standard lighting into an intimate, dramatic glow. The light filters through the sheer textile tiers like moonlight through weeping willow branches.
- Difficulty Level: Intermediate
- Core Palette: Midnight black, smoky sheer charcoal, and antique pewter.
- Display Location: Dining room ceiling pendant, bedroom chandelier, or floor lamp.
Materials You Will Need
- 1 Basic wire drum lampshade frame (14 to 18 inch diameter)
- 4 Yards of lightweight sheer black chiffon or tulle
- 2 Yards of gathered black floral mourning lace trim (4 inches wide)
- Fabric glue or hot glue gun
- Black satin bias tape
- Scissors and fabric measuring tape
Step-by-Step Construction Guide
- Lining the Frame: Wrap the top and bottom wire rings of your drum frame with black satin bias tape, securing the ends with glue to create an anchor surface for your fabric.
- Pleating the Chiffon: Cut the black chiffon into long strips twice the height of your drum shade. Beginning on one side, fold the chiffon into tight, half-inch accordion pleats, gluing the top and bottom of each pleat to the frame rings as you wrap around the cylinder.
- Layering the Ruffles: Cut the black floral lace trim into lengths that wrap around the circumference of the shade. Glue the first tier of lace along the bottom rim, letting it overhang the edge by two inches. Glue a second tier of lace halfway up the drum shade so the scalloped lace edges cascade in overlapping flounces.
- Finishing the Top Rim: Cover the raw glued edges along the top rim of the shade by wrapping a clean layer of black satin ribbon all the way around.
- Lighting Safety: Always install this shade over low-heat, warm LED Edison bulbs (2200K to 2700K) to ensure the delicate fabrics stay completely cool while casting an amber, shadowy ambiance.
14. The Obsidian & Black Wax Altar Pillar Candles
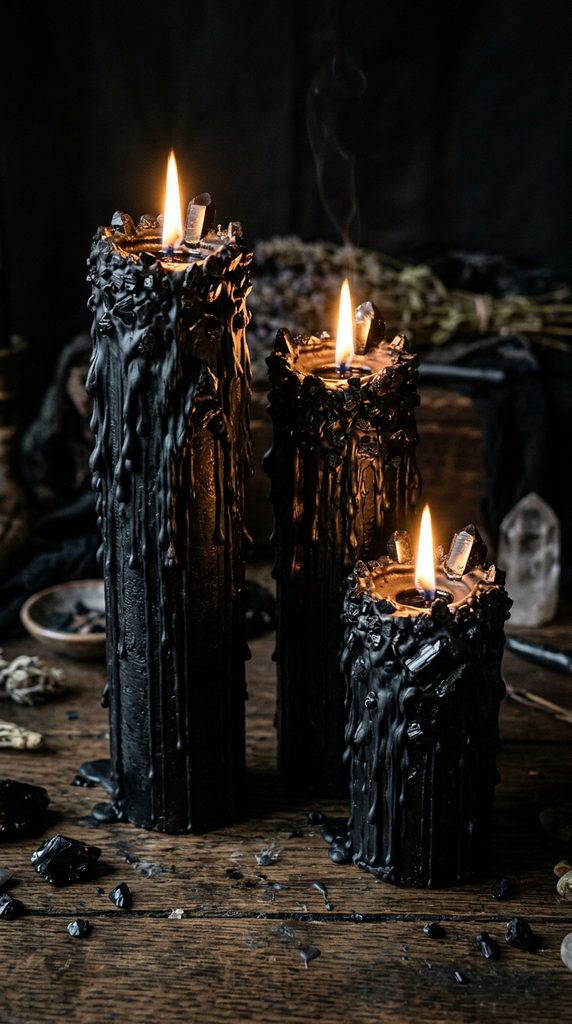
Organic Asymmetrical Hearth Illumination
Store-bought candles often lack the dramatic, weeping, irregular character of historic altar lights. This craft involves sculpting your own layered pillar candles by casting a core of soy wax and hand-applying cascading layers of pitch-black beeswax and crushed raw black tourmaline or obsidian sand. The irregular, weeping drips look centuries old even before the candle is lit.
- Difficulty Level: Easy
- Core Palette: Matte carbon black, volcanic obsidian glass, and beeswax honey.
- Display Location: Fireplace hearth floor, dining table runner, or bathtub ledge.
Materials You Will Need
- 3 Plain white or cream pillar candles in varying heights (4, 6, and 8 inches)
- 1 Pound of black beeswax pellets
- Black liquid candle dye (for maximum opacity)
- Coarse crushed obsidian chips or raw black tourmaline gravel
- Metal basting spoon or heat-proof pouring pitcher
- Heat gun
Step-by-Step Construction Guide
- Melting the Black Wax: Melt the black beeswax in a double boiler, adding black liquid dye until a drop cooled on white paper looks solid obsidian rather than purple or green.
- Building the First Layer: Hold a plain pillar candle horizontally over a sheet of parchment paper. Slowly ladle the molten black wax along the sides, rotating the candle so an uneven, textured black skin builds up over the lighter wax core.
- Embedding the Crystals: While the black wax is warm and tacky, press chunks of coarse crushed obsidian and tourmaline around the top shoulder and base of the candle.
- Creating Stalactite Drips: Stand the candle upright. Spoon melted black wax directly around the top rim, letting it flow naturally down the sides in thick, uneven streams that solidify halfway down the candle body.
- Texturing with Heat: Use a heat gun on low power to gently soften specific drips, causing them to pool and fuse organically over the embedded crystals. When burned, the flame casts shimmering reflections off the glossy obsidian stones.
15. The Preserved Withered Rose & Thorn Chandelier
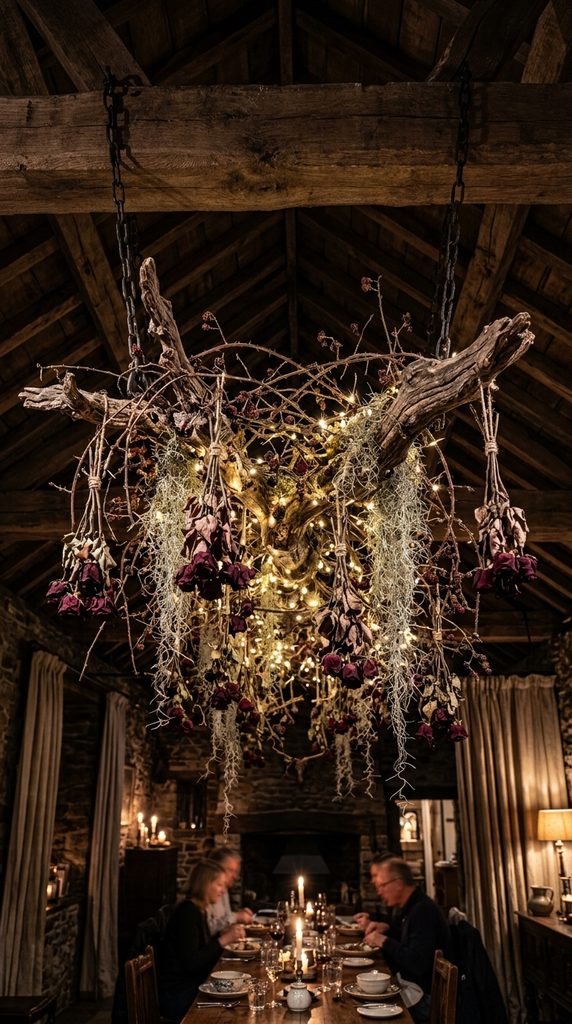
Suspended Botanical Sculptures for Ceilings
Draw the eye upward by constructing a horizontal, floating floral chandelier made entirely of dried, desiccated botanicals. Using a fallen birch or oak limb stripped of bark, bundle upside-down clusters of deep oxblood dried roses, thorny blackberry canes, and weeping Spanish moss. It forms a dramatic, floating botanical canopy that captures the essence of a sleeping briar patch.
- Difficulty Level: Intermediate
- Core Palette: Dried oxblood red, dried parchment tan, and dark bark brown.
- Display Location: Suspended directly above a dining room table or library reading nook.
Materials You Will Need
- 1 Sturdy fallen tree branch (approx. 4 feet long, 2 to 3 inches thick)
- 2 Dozen deeply dried, dark red or black roses (air-dried for 3 weeks)
- Dried wild blackberry vines or thorny rose canes
- Natural gray Spanish moss
- Heavy natural jute twine or tarnished iron ceiling chains
- Screw-in heavy ceiling eye hooks
- Brown floral tape and wire cutters
Step-by-Step Construction Guide
- Preparing the Anchor Limb: Clean your branch with a wire brush to remove dirt. Sand down any sharp protrusions while preserving the sculptural bends and natural bark texture.
- Ceiling Anchors: Screw two heavy iron eye hooks into ceiling joists directly above your table. Attach lengths of tarnished iron chain to the hooks, looping the lower ends around both sides of the branch to hang it perfectly level horizontally.
- Wiring the Roses: Gather your dried roses into bundles of three. Tie them upside-down along the underside of the hanging branch using brown floral wire, allowing them to hang at staggered lengths.
- Weaving the Thorns: Take long, dried thorny vines and wind them tightly around the wood limb, bridging the gaps between the rose stems and hiding the suspension chains.
- Draping the Moss: Tuck tufts of wild Spanish moss into the crevices of the wood, letting wispy, cobweb-like gray tendrils drift downward over the dried roses. Weave thin, battery-operated copper-wire micro-fairy lights through the branches for an ethereal evening glow.
16. The Faux-Antique Funeral Cast-Iron Plaque
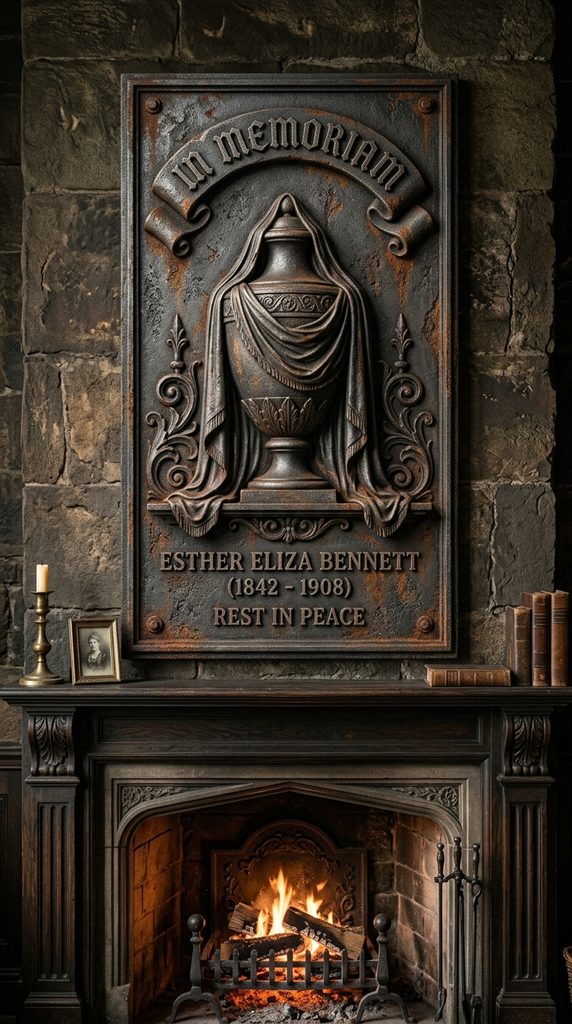
Architectural Relief Sculpture for Mantels and Walls
Historic Victorian cemeteries boast incredible, poignant cast-iron grave markers and door pediments decorated with weeping willows, inverted torches, and classical urns. By using lightweight high-density foam, modeling paste, and iron-reactive oxidizing paints, you can create a convincing, heavy “cast iron” plaque that weighs less than two pounds.
- Difficulty Level: Intermediate
- Core Palette: Oxidized cast-iron black, rust orange, and weathered graphite.
- Display Location: Above a doorway, centered on a fireplace mantel, or on a gallery wall.
Materials You Will Need
- 1 Piece of high-density insulation foam board (12×18 inches, 1 inch thick)
- Heavy acrylic modeling paste or air-dry clay
- Flexible silicone mold of classical relief motifs (weeping willow, urn, or cherub)
- Iron-reactive paint kit (containing real iron metal particle paint and rust-activator acid)
- Craft utility knife and sandpaper
- Black acrylic gesso
Step-by-Step Construction Guide
- Carving the Plaque Base: Cut your foam board into an arch or classical pediment shape using a fresh utility blade. Bevel the front edges with sandpaper to give the perimeter a molded stone or metal rim.
- Creating the Bas-Relief: Press modeling clay into your silicone molds to cast classical mourning emblems (such as an urn draped in a shroud). Press the damp casts directly onto the center of the foam plaque, smoothing the clay borders into the foam base with water.
- Texturing the Surface: Coat the entire plaque with black acrylic gesso mixed with a tablespoon of fine sand, stippling it with a coarse brush to mimic the rough, pitted surface texture of molten sand-cast iron.
- Applying Iron Paint: Paint two generous coats of the iron metal particle paint over the entire piece, allowing it to dry thoroughly.
- Rust Oxidation: Spray or dab the rust-activator solution onto the crevices, lower borders, and around the relief details. Over the next four hours, real chemical rust blooms across the surface, giving you an authentic, weathered Victorian iron artifact.
17. The Tarnished Mercury Glass Vanity Tray
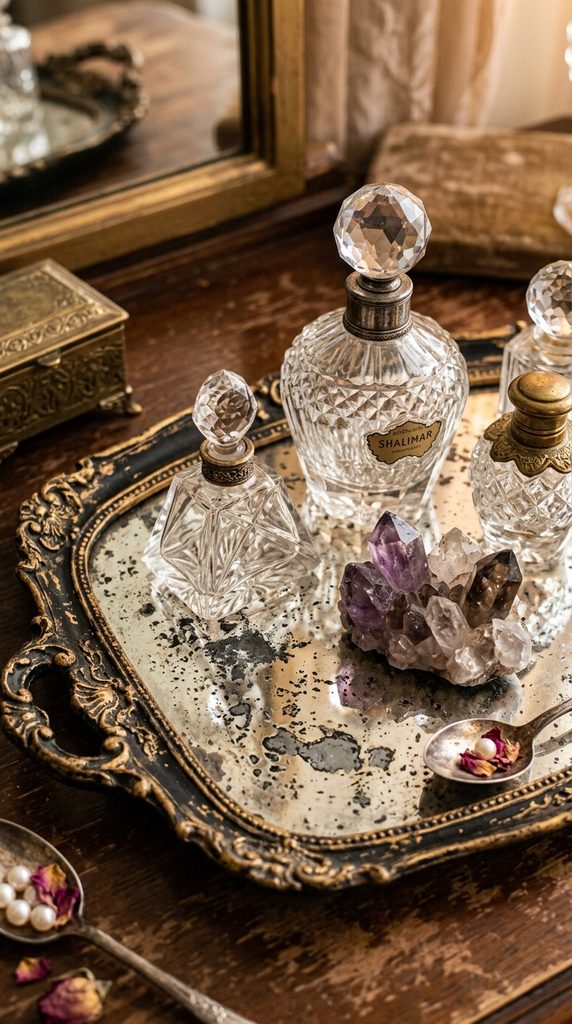
Antiqued Distressed Mirror for Perfumes and Curios
Store everyday jewelry, perfume bottles, and crystals on a vanity tray that looks like an artifact discovered in an abandoned Parisian townhouse. Using a cheap, ornate thrifted picture frame, you can distress the backing glass using paint stripper and silver leaf, producing an authentic, flaky “foxed” mirror effect that reflects warm vanity lighting gorgeously.
- Difficulty Level: Easy to Intermediate
- Core Palette: Tarnished silver leaf, aged gold, and distressed charcoal.
- Display Location: Bedroom vanity table, bathroom counter, or cocktail bar.
Materials You Will Need
- 1 Vintage picture frame with ornate resin or wood scrollwork (approx. 11×14 inches) with intact glass
- Mirror-effect silver spray paint or genuine loose silver leaf sheets
- Household bleach and white vinegar mixed in a spray bottle
- Dark gray and gold acrylic craft paint
- 4 Small wooden ball feet or brass drawer knobs (for tray feet)
- Strong glass-to-wood epoxy glue
Step-by-Step Construction Guide
- Glass Cleaning: Remove the glass panel from the frame and clean both sides with rubbing alcohol. Mark one side as the “back”—all antiquing work will occur on this reverse surface.
- Distressing with Acid: Lightly spritz the back of the glass with your bleach-vinegar mixture in tiny, irregular droplets. Immediately spray a light mist of mirror-effect paint over the wet droplets. The reaction will eat through the silver paint, creating natural dark spots and corroded speckles.
- Layering Dark Paint: Once the silver paint is dry, paint over the entire back of the glass with matte dark charcoal gray acrylic paint. When viewed from the front, this dark paint shows through the corroded silver spots, perfectly mimicking the silver nitrate degradation of centuries-old mirrors.
- Frame Refinishing: Paint your thrifted frame with black paint, buffing the ornate raised scrolls with antique gold wax. Glue the four small wooden feet onto the bottom corners of the frame.
- Assembly: Glue the antiqued glass panel securely into the frame with the smooth, untreated glass side facing upward, providing an easy-to-clean, chemical-resistant vanity tray surface.
18. The Gilded Skeleton Key & Black Velvet Shadow Cascade
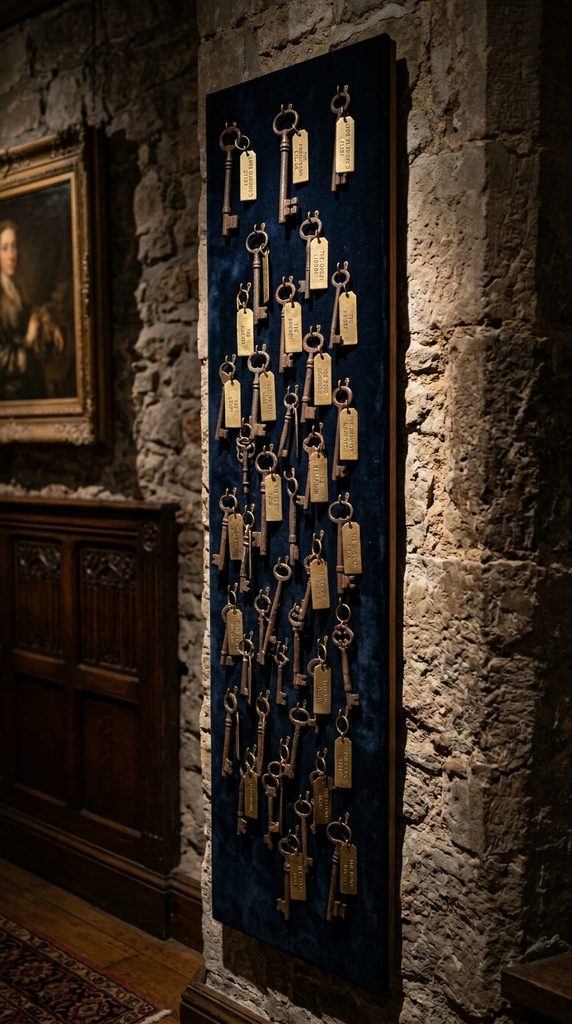
Hanging Architectural Hardware Installations
Antique architectural keys represent access to secret knowledge, locked doors, and forgotten chambers. Rather than storing collected iron keys in a drawer, mount them in an asymmetrical vertical cascade down a slender, black velvet panel. Each key is paired with a hand-written brass taxonomy tag identifying fictional or historical manor doors.
- Difficulty Level: Easy
- Core Palette: Tarnished wrought iron, raw brass, and deep ink-black velvet.
- Display Location: Slender wall between windows, hallway nook, or bookcase flank.
Materials You Will Need
- 7 to 9 Assorted vintage iron skeleton keys (differing in size and bit design)
- 1 Long, narrow wooden plank (approx. 6 inches wide by 30 inches tall)
- 1 Yard of deep black cotton velvet fabric
- Heavy brass cup hooks (small)
- Stamped brass jewelry blank tags and metal letter stamping kit
- Brass jewelry wire
- Staple gun
Step-by-Step Construction Guide
- Upholstering the Plank: Cut your wooden plank to size. Wrap the front face in deep black velvet, pulling the fabric taut around the sides and stapling it neatly along the back.
- Stamping the Brass Tags: Use your metal letter stamping kit and a hammer to stamp fictional, mysterious room names onto your small brass tags (e.g., Crypt II, The North Solarium, Library Archives, Cellar Vault). Darken the stamped letters by rubbing them with black acrylic paint and wiping the surface clean.
- Positioning the Hooks: Screw the small brass cup hooks into the velvet board in an irregular, descending vertical arrangement.
- Hanging the Keys: Tie a stamped brass tag to each vintage skeleton key using a loop of oxidized brass wire. Hang each key from its designated brass hook.
- Wall Mounting: Install a heavy sawtooth hanger on the back of the panel and hang it vertically in an entryway or beside a bookshelf.
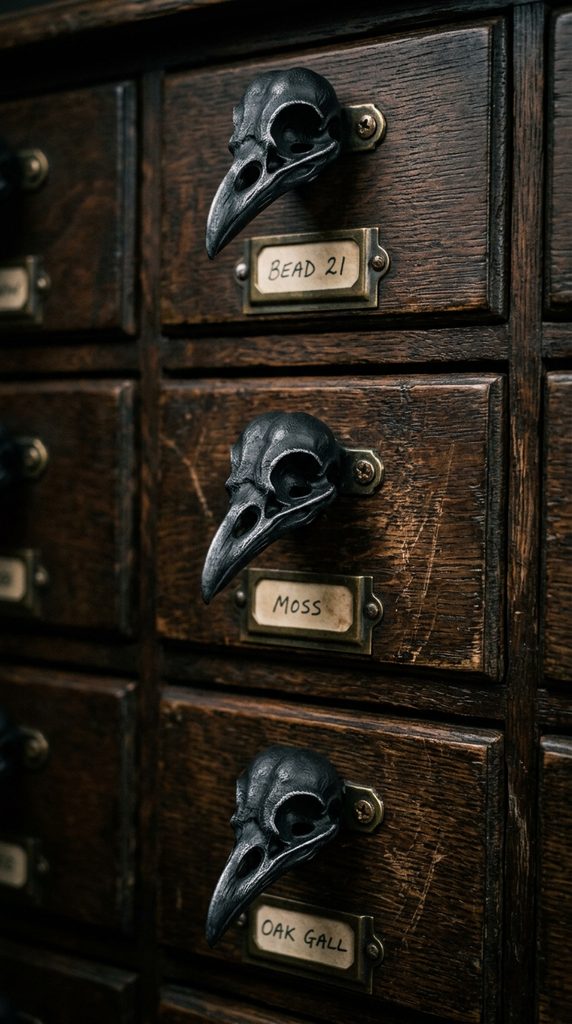
19. The Distressed Apothecary Drawer Desktop Chest
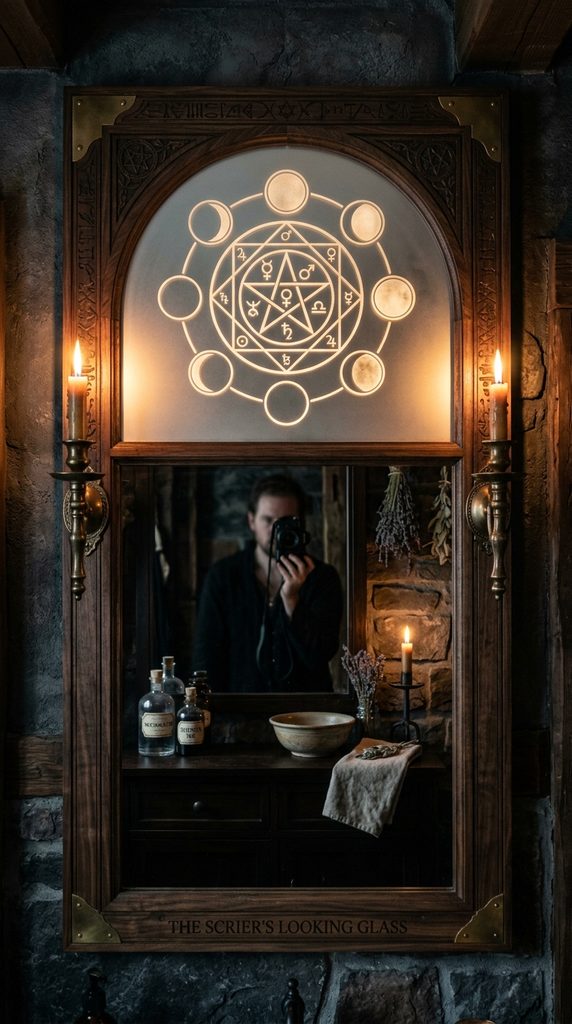
Desktop Storage with Apothecary Charm
Small desktop drawer units from big-box craft stores typically feature plain, unfinished pine wood. With simple hand tools, vinegar-steel wool stain, and antique brass label pulls, you can turn a modern nine-drawer craft cube into an authentic, eighteenth-century apothecary seed chest that holds art supplies, tea bags, or jewelry.
- Difficulty Level: Intermediate
- Core Palette: Weathered gray-brown walnut, oxidized bronze, and aged paper.
- Display Location: Home office desk, vanity tabletop, or craft workstation.
Materials You Will Need
- 1 Unfinished pine 6-drawer or 9-drawer mini craft storage chest
- Homemade iron-acetate stain (steel wool soaked in white vinegar for 48 hours)
- Wire brush, hammer, and awl (for distressing wood)
- Mini antique brass label-pull handles with screws
- Tea-stained cardstock paper
- Calligraphy pen and brown ink
- Dark finishing wax (such as Briwax or dark paste wax)
Step-by-Step Construction Guide
- Distressing the Wood: Remove all drawers. Take a hammer, awl, and coarse wire brush to beat, scratch, and gouge the edges of the pine wood box and drawer fronts. Soften sharp factory corners to mimic two hundred years of daily friction.
- Chemical Staining: Brush your homemade iron-acetate solution generously over all exterior wood surfaces. The iron reacts chemically with the natural tannins in the pine wood, instantly turning the bright yellow lumber a deep, weathered slate-gray and driftwood brown.
- Waxing and Buffing: Once dry, buff a layer of dark paste wax into the wood grain using a clean cotton rag. The wax settles into the hammer dents and scratches, imparting a silky, heirloom furniture feel.
- Installing Hardware: Center an antique brass label-pull handle on each drawer front, securing them with miniature wood screws.
- Inscribing Drawer Tags: Cut strips of tea-stained cardstock to slide into the label slots. Inscribe them with Latin botanical names, minerals, or curious supplies (e.g., Obsidian, Belladonna, Caeleste, Ignis) using brown calligraphy ink.
20. The Alchemical Sigil Etched Glass Mirror
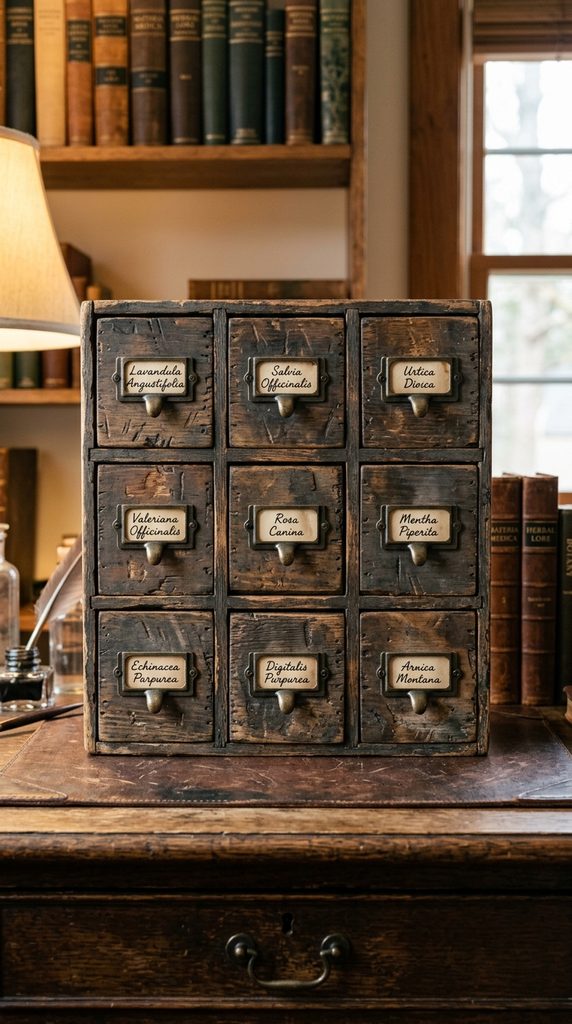
Surface Etching for Mood-Lit Bathrooms and Entryways
Transform a plain thrifted wall mirror into a ceremonial scrying portal. By applying an intricate alchemical constellation or celestial moon-phase motif using glass etching cream, the surface of the mirror permanently turns frosty and translucent. When illuminated by ambient candlelight, the etched lines glow brightly while maintaining the functional reflection beneath.
- Difficulty Level: Easy to Intermediate
- Core Palette: Frosted white glass, silver reflection, and dark walnut framing.
- Display Location: Powder room, above an entryway console, or flanking a bedroom dresser.
Materials You Will Need
- 1 Framed wall mirror with clean, unblemished glass
- Adhesive vinyl stencil (cut using a craft vinyl machine or hand-cut with a craft razor)
- Armour Etch glass etching cream
- Wide, flat synthetic bristle brush
- Blue painter’s tape and plastic scraper
- Rubber gloves and protective eyewear
Step-by-Step Construction Guide
- Designing the Stencil: Create or download an intricate alchemical sigil, sacred geometry diagram, or vintage astrological star chart. Cut the design from adhesive craft vinyl.
- Transferring to Glass: Clean the mirror glass with rubbing alcohol. Use transfer tape to press the vinyl stencil firmly onto the center or upper arch of the mirror, using a plastic scraper to burnish away all air bubbles along the cut edges. Tape off the surrounding glass and frame using blue painter’s tape to prevent accidental chemical contact.
- Applying the Etching Cream: Wearing rubber gloves and eye protection, use a synthetic brush to apply a thick, even layer of Armour Etch cream over the exposed stencil openings. The cream must be layered heavily (like cake frosting) rather than painted thinly.
- Processing Time: Allow the etching cream to sit on the glass for a full five to ten minutes, brushing it lightly every few minutes to displace tiny air pockets.
- Rinsing and Peeling: Rinse the mirror thoroughly under cold running water (or wipe down repeatedly with wet sponges over a bucket) until all chemical cream is washed away. Peel away the vinyl stencil and dry the glass. The frosted design is permanent, dishwasher-safe, and catches candlelight with a stunning, soft white glow.
21. The Victorian Mourning Ribbon Rosette Curtain Tiebacks
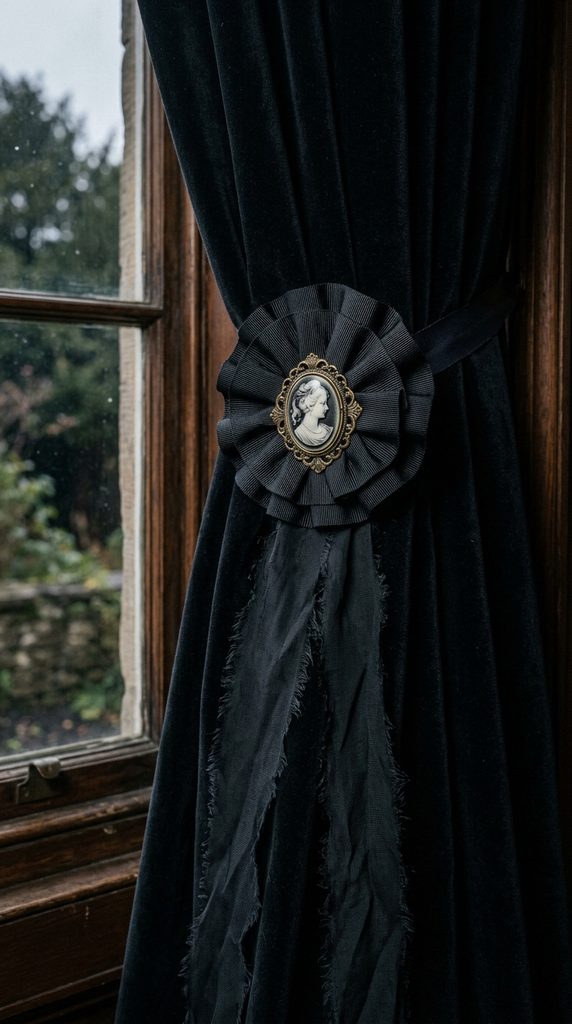
Haute-Couture Textile Accents for Velvet Draperies
Elevate your curtains from ordinary window coverings into theatrical, salon-worthy drapery. Inspired by Victorian military cockades and mourning rosettes, these tiebacks are hand-folded from wide black pleated grosgrain ribbon, anchored by an antique brass mourning button or glass cameo at the center, and trail long, frayed silk ribbons down to the floor.
- Difficulty Level: Easy
- Core Palette: Ink black, gunmetal, and tarnished brass.
- Display Location: Flanking velvet living room or bedroom window draperies.
Materials You Will Need
- 3 Yards of 2-inch wide black pleated grosgrain or satin ribbon
- 2 Antique metal buttons, vintage mourning brooches, or resin black cameos
- 2 Yards of raw-edged 1-inch black silk chiffon ribbon
- Heavy craft felt (black)
- Hot glue gun and fabric needle with heavy black thread
- 2 Small brass drapery rings
Step-by-Step Construction Guide
- Folding the Rosette: Take a 24-inch length of pleated black grosgrain ribbon. Hand-stitch a running basting stitch along the inner edge of the ribbon, then pull the thread tight to gather the ribbon into a tight, circular ruffled wheel (a rosette). Knot the thread securely.
- Backing the Flower: Cut a 2.5-inch circle of heavy black craft felt. Hot glue the felt circle to the back of the gathered ribbon rosette to give the structure stability and prevent it from sagging.
- Mounting the Focal Cameo: Secure an antique brass mourning button or glass skull cameo directly into the center of the rosette using heavy craft adhesive.
- Adding the Streamers: Cut your raw-edged black silk chiffon ribbon into four 18-inch tails. Glue them beneath the felt backing board so they cascade gracefully downward beneath the rosette.
- Attaching the Hardware: Sew a small brass drapery ring to the back of the felt disc. When hooked onto a simple brass wall hook, the rosette loops around your velvet curtain panel, cinching the heavy drapery back with dramatic Victorian elegance.
Master Material & Tool Guide for Elevated Gothic Crafts
Keep this reference table handy when sourcing materials for your crafting studio:
| Craft Category | Essential Raw Materials | Best Antiquing / Distressing Agent | Recommended Display Location |
| Entomology & Bone | Sanitized bones, raw obsidian, real cicadas | Clear matte polycrylic, gold leaf sizing | Bookshelf nooks, curio cabinets |
| Glass & Apothecary | Thrifted decanters, bevel mirrors, cloches | Vinegar + Looking Glass spray, alcohol ink | Bar carts, bathroom vanities |
| Charred Wood | Cedar laths, pine mini chests, drift oak | Propane blowtorch, iron-acetate solution | Dining tables, fireplace mantels |
| Textiles & Mourning | Unbleached linen, pleated grosgrain, lace | Strong black coffee bath, dark textile dye | Sofas, curtain draperies, beds |
| Sculptural Lighting | Wrought-iron sconces, beeswax, taper LEDs | Blood-burgundy paraffin, dark shoe polish | Hallways, bed flanking, dining tables |
| Metals & Hardware | Casting resin, raw brass tags, skeleton keys | Rub ‘n Buff gold wax, chemical rust activator | Dresser drawers, desks, wall plaques |