
17 Scary Halloween Decorations Ideas That Look Insanely Haunting
Transforming your home into a truly terrifying haunted estate requires thoughtful atmosphere and cinematic techniques. Furthermore, genuinely chilling Halloween displays avoid bright plastic novelties in favor of organic, shadowed realism. Thoughtful placement of lifelike silhouettes, tactile tattered fabrics, and eerie lighting produces deep psychological dread. A haunting porch display stops neighborhood trick-or-treaters dead in their tracks before they even knock. Therefore, curating high-impact scares creates an unforgettable holiday environment for horror enthusiasts.

Elevating High-Impact Horror Beyond Cheap Novelties
Ordinary department store monsters often look cartoonish and break the suspension of disbelief instantly. In contrast, professional haunt designers rely heavily on texture, silhouette, and subtle movement. Grimy cheesecloth, weathered wood, antiqued rust, and anatomical details elevate DIY props into museum pieces. In addition, sound design and directional fog play critical roles in building chilling suspense. Strategic environmental storytelling convinces neighborhood passersby that real supernatural entities inhabit your front yard.
Mastering Moody Cinematic Illumination
Lighting choices make or break your scary holiday presentation across long October nights. Flooding a lawn with harsh white spotlights flattens textures and exposes mechanical wiring. Instead, low-angle uplighting with deep monochromatic washes like spectral blue, blood red, or amber creates terror. Harsh, long shadows cast onto exterior walls make ordinary skeletons appear towering and menacing. Directional lighting guides viewer eyes toward focal scares while leaving unsettling corners in total darkness.
Selecting Weather-Resistant Construction Materials
Outdoor yard props face punishing seasonal elements like whipping autumn winds and rainstorms. For that reason, using heavy-duty construction armatures guarantees your haunting setups stay grounded securely. Exterior silicone sealants, waterproof adhesives, and outdoor-rated extension cords prevent catastrophic electrical shorts. Furthermore, weighting internal frames with gravel bags stops expensive lifelike figures from toppling over. Investing in rugged foundational supplies ensures your terrifying creations terrorize the block for many years.
1. Life-Sized Hovering Cemetery Wraith

A towering, faceless specter hovering above foggy ground induces immediate visceral panic in onlookers. Furthermore, using sheer, multi-layered tattered textiles creates the illusion of supernatural weightlessness on windy nights. The absence of a visible human face forces viewers’ imaginations to fill the void. Placing this haunting phantom near damp lawn borders enhances the eerie abandoned-graveyard narrative. Consequently, neighbors will marvel at the uncanny optical trick creating the floating apparition.
Engineering Weightless Specter Frames
Building this figure requires an ultralight internal skeleton anchored to a hidden base. Sturdy steel conduit piping drives deep into your lawn to resist heavy wind gusts. Meanwhile, flexible chicken wire sculpts an expansive, menacing torso without adding excessive dead weight. Layering shredded black and charcoal cheesecloth creates hypnotic rippling movement as autumn breezes blow. This ghastly, faceless monument turns ordinary suburban lawns into misty Victorian churchyards.
Wraith Prop Materials
- Ten-foot section of half-inch metal electrical conduit pipe
- Four rolls of galvanized poultry chicken wire
- Twenty yards of loose-weave natural cotton cheesecloth
- Black, grey, and brown fabric dye baths
- Lightweight styrofoam mannequin head core
- Ground-mounted rebar stake for sturdy anchoring
Step-by-Step Construction Guide
- Pound a four-foot steel rebar stake deep into the turf.
- Slide hollow conduit pipe over the rebar to form a vertical spine.
- Mold chicken wire into curved, imposing ribcage and shoulder armatures.
- Mount the styrofoam head securely atop the conduit using construction adhesive.
- Soak cut cheesecloth panels in dark, uneven textile dye mixtures thoroughly.
- Shred cloth hems aggressively using utility wire brushes and fabric shears.
- Drape damp, weathered cloth over wire shoulders in layered, flowing waves.
- Conceal pipe bases beneath low, creeping fog from a hidden chiller.
2. Realistic Dilapidated Boarded-Up Windows
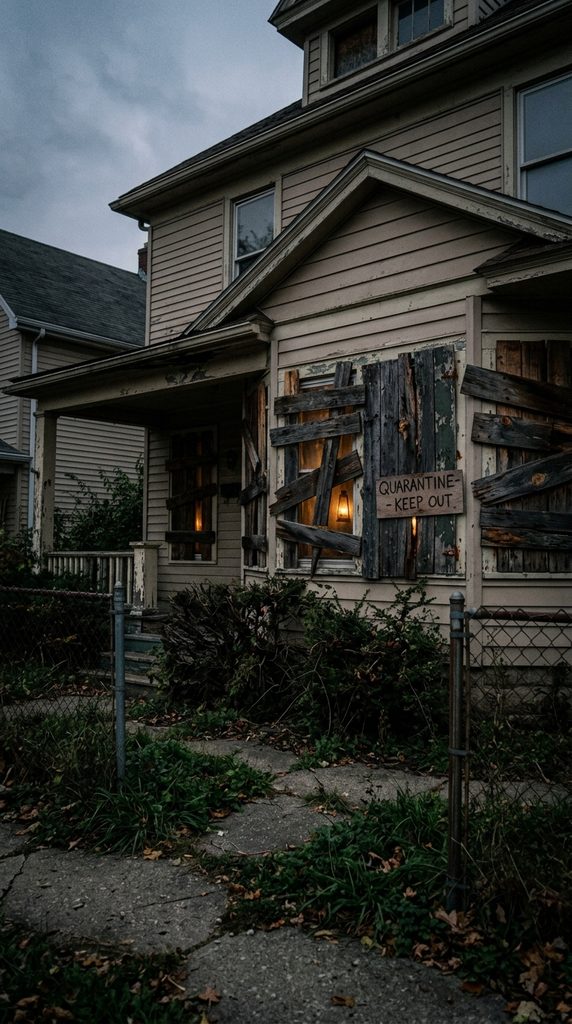
Boarding up your home’s exterior windows suggests an aggressive quarantine or zombie apocalypse scenario. Furthermore, realistic distressed wood textures make your everyday dwelling look like a condemned asylum. The contrast between familiar suburban architecture and sudden urban decay unsettles casual neighborhood strollers. Backlighting these faux barricades with flickering amber bulbs simulates dying lanterns inside abandoned ruins. Best of all, lightweight high-density foam boards achieve this terrifying look without damaging home framing.
Fabricating Lifelike Weathered Lumber
Authentic aged wood features deep, jagged grain lines, splitting knots, and chipped paint. Carving high-density insulation foam replicates these splintered textures with razor-sharp realism and zero heavy weight. Furthermore, a heat gun instantly raises wood grain and puckers foam edges realistically. Layered acrylic washes of deep umber, slate grey, and mossy olive simulate centuries of rot. These believable weathered planks easily mount over glass panes using damage-free exterior suction clamps.
Faux Board Crafting Supplies
- Four-by-eight sheets of one-inch pink XPS insulation foam
- Precision craft hobby knife with fresh razor blades
- Adjustable electric crafting heat gun for grain texturing
- Water-based acrylic craft paints in raw umber and grey
- Matte exterior waterproofing spray sealant
- Heavy-duty window suction cups with threaded screw bolts
Step-by-Step Window Barricade Installation
- Measure your exterior window dimensions accurately using a metal tape measure.
- Slice XPS foam sheets into irregular, uneven plank lengths with hobby knives.
- Carve jagged grain lines, knots, and split ends into plank surfaces.
- Run heat gun lightly over cut lines to expand realistic wood crevices.
- Basecoat carved planks with charcoal latex paint to establish shadow depth.
- Dry-brush lighter tan and driftwood grey acrylics across raised foam surfaces.
- Affix heavy-duty suction cups to window glass at strategic anchor corners.
- Screw foam planks directly onto suction bolts to create barricaded crisscrosses.
3. Terrifying Crawling Ground Breaker Ghoul

Monsters erupting directly from the earth trigger primal fears of desecrated graves and reanimated corpses. Furthermore, low-profile ground props catch visitors off guard because they sit below natural eye lines. Placing this muddy, reaching horror near walkways forces approaching trick-or-treaters to step uncomfortably close. Gnarled, reaching skeletal fingers clawing at real turf make the horror feel grounded and immediate. It transforms well-manicured front lawns into active, restless zombie outbreak zones.
Sculpting Mud-Caked Skeletal Forms
Posing standard plastic skeleton torsos at dynamic forward-leaning angles creates dramatic aggressive motion. Furthermore, coating bare plastic bones in liquid latex and tissue paper creates rotting, decaying skin. Sprinkling real potting soil and dried moss over tacky latex binds believable cemetery debris. In addition, carving the jaw agape in a silent shriek heightens the horrific storytelling. This terrifying crawler looks as though it clawed through six feet of hard earth.
Zombie Ground Breaker Essentials
- Inexpensive plastic skeleton torso with skull and arms
- One gallon of liquid vulcanized casting latex
- Several rolls of unbleached single-ply toilet tissue
- Dark walnut wood stain and charcoal acrylic paint
- Potting soil, peat moss, and shredded dead lawn leaves
- Two twenty-inch threaded steel garden landscaping stakes
Step-by-Step Prop Assembly
- Sever plastic skeleton legs cleanly at the pelvic bone using shears.
- Drive steel stakes into your lawn at sharp forty-five-degree forward angles.
- Secure the skeleton pelvis and spine to stakes using zip ties.
- Brush tacky liquid latex generously across smooth skull and rib bones.
- Layer crinkled tissue paper onto latex, building stringy, rotting flesh textures.
- Coat damp tissue with dark walnut stain to mimic aged, putrid gore.
- Press real soil and dead leaves firmly into tacky, drying surfaces.
- Position extended arms forward with claws digging directly into fresh sod.
4. Glowing Silhouette Haunted Window Projections
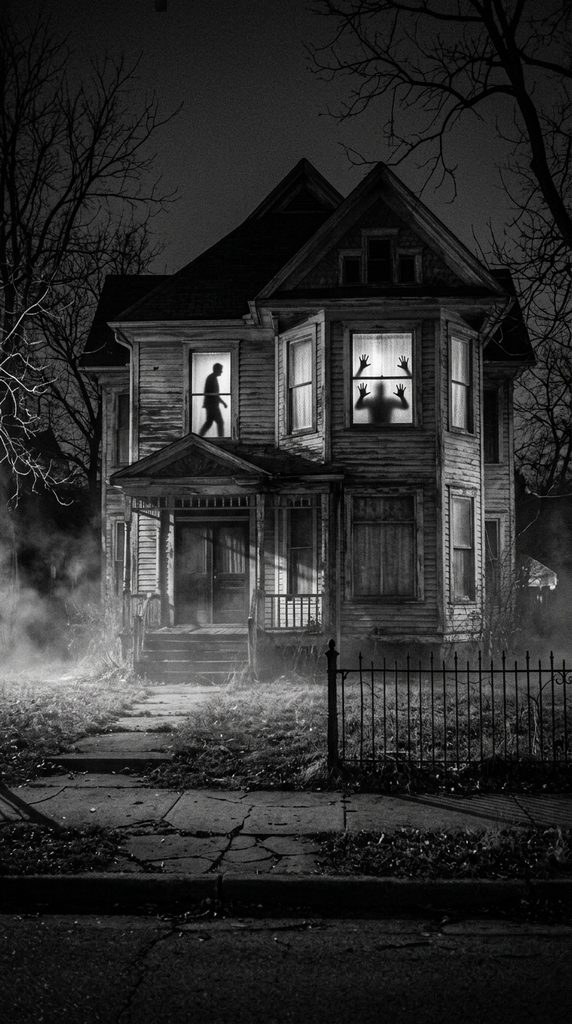
Lifelike movement visible behind upstairs windowpanes creates eerie domestic horror without cluttering your front yard. Furthermore, high-contrast silhouette animations make it appear that violent apparitions roam private living quarters. Passersby naturally glance upward, only to freeze when a dark figure presses against glass. Combining frosted diffusion sheets with compact digital projectors yields sharp, terrifyingly convincing optical illusions. It delivers Hollywood-caliber special effects that elevate whole neighborhood displays into terrifying interactive cinema.
Calibrating Projection Illusions for Realism
Achieving sharp projections requires blocking ambient spill light within the darkened upstairs staging room. Stretching sheer white shower curtain liners or professional projection screens prevents distorted, blurry imagery. Furthermore, aligning the projector at a flat ninety-degree angle ensures the ghastly shadow proportions match human scale. Looping sequences of pacing ghosts, scratching hands, or slashing figures keeps onlookers spellbound. This high-tech haunting method works flawlessly regardless of rainy, windy outdoor weather conditions.
Projection Rigging Supplies
- 1080p high-lumen compact LED home theater projector
- Semi-sheer white fabric diffusion screen or vinyl shower liner
- Heavy-duty painter tape or tension rod curtain mounts
- Video files featuring high-contrast horror window silhouettes
- Extension cords and smart outlet timers for automated playback
- Blackout curtain panels to seal off adjacent room light
Step-by-Step Window Projection Setup
- Measure your target upstairs window glass frame carefully and precisely.
- Cut semi-sheer white diffusion material to match glass dimensions exactly.
- Tape diffusion screen tautly against interior window framing without visible wrinkles.
- Position your digital projector centrally on a sturdy elevated table indoors.
- Align projected silhouette beams so edges fill the masked window area.
- Seal surrounding room doorways with blackout curtains to stop ambient light.
- Load looping silhouette video clips via USB stick or media player.
- Test exterior visibility from your sidewalk to verify terrifying shadow contrast.
5. Menacing Pumpkin-Headed Scarecrow Fiend

Twisted agricultural horror taps into ancient harvest traditions and creepy, isolated rural nightmares. Furthermore, replacing friendly burlap smiles with rotting, monstrous carved jack-o’-lantern grimaces creates instant unease. An imposing ten-foot cross-timber armature looms menacingly over autumn flowerbeds and cornstalk bundles. Draped in filthy, shredded flannel and real straw, this beast appears ready to step off its stake. Placing it among dried agricultural stalks delivers authentic rural American folklore terror.
Framing Towering Rustic Scares
A rigid timber cross-frame provides the structural backbone necessary to support heavy, oversized props. Sculpting a massive, monstrous pumpkin head from expanding insulation foam allows exaggerated fangs and snarling expressions. In addition, embedding a flickering green or orange LED inside casts sinister light through eye sockets. Weathering shredded work clothing with spray paint and dirt makes the creature look abandoned in fields. This towering harvest fiend dominates the yard with imposing, menacing presence.
Field Fiend Construction Materials
- Two sturdy eight-foot two-by-four construction timber boards
- Heavy-duty exterior wood screws and metal bracing brackets
- Large hollow craft pumpkin or carved expanding foam block
- Thrifted oversized plaid flannel shirt and distressed work trousers
- Bales of natural wheat straw and dried decorative cornstalks
- Flickering battery-powered high-output LED jack-o’-lantern spotlight
Step-by-Step Scarecrow Framing
- Join two-by-four timbers into an asymmetric cross using metal structural brackets.
- Drive vertical timber post deeply into the ground, bracing with hidden stakes.
- Carve a snarling, predatory monster face into your dense craft pumpkin.
- Paint carved facial recesses with matte black, accentuating jagged teeth details.
- Thread worn flannel shirt and pants over horizontal timber crossbars securely.
- Pack arm sleeves and chest cavities with dense clumps of straw.
- Mount carved pumpkin head firmly onto the vertical timber neck spike.
- Install battery-powered flickering LED internally to illuminate the terrifying grimace.
6. Victorian Casket Burial Ground Scene

Recreating a freshly unearthed Victorian grave introduces unsettling historical realism to spooky front yards. Furthermore, leaning an antique wood-grain coffin against mounds of dark soil tells an ominous story. Peeking out from inside the rotting satin interior, a skeletal corpse clutches rusted antique hardware. This elaborate scene avoids cheap plastic props, opting for moody cemetery landscaping instead. Adding authentic wrought-iron fencing completes the illusion of an overgrown, neglected family graveyard.
Aging Wood and Crafting Coffins
Constructing a classic six-sided toe-pincher coffin requires simple diagonal timber cuts and budget plywood. Furthermore, burning the raw pine boards with a propane torch highlights natural grain patterns beautifully. Scraping charred surfaces with wire brushes produces weathered, centuries-old wood grain textures within minutes. Lining the interior with shredded purple satin adds macabre historical elegance to the open casket. This theatrical cemetery centerpiece invites visitors to peer into eternity.
Cemetery Casket Essentials
- Two sheets of half-inch exterior CDX construction plywood
- Eight-foot lengths of one-by-two pine framing furring strips
- Propane weed-torch or handheld plumbing blowtorch for distressing
- Steel wire stripping brushes and dark walnut wood stains
- Two yards of rich plum or burgundy crushed satin fabric
- Several bags of rich, black potting soil for gravesite mounds
Coffin Assembly and Staging
- Draft a classic hexagonal toe-pincher outline onto your plywood sheet.
- Cut base and angled side walls carefully using a sharp circular saw.
- Join sidewalls around the base perimeter utilizing wood screws and framing blocks.
- Scorch exterior wood boards thoroughly using a blowtorch to char grain lines.
- Scrape away loose ash with wire brushes to reveal blackened, antique wood.
- Staple tattered purple satin fabric loosely inside the casket interior bed.
- Position finished coffin outdoors, tipping it slightly inside freshly mounded dirt.
- Pose a weathered skeleton halfway emerging from the dirt-stained satin lining.
7. Swarming Arachnid Nest Porch Infestation
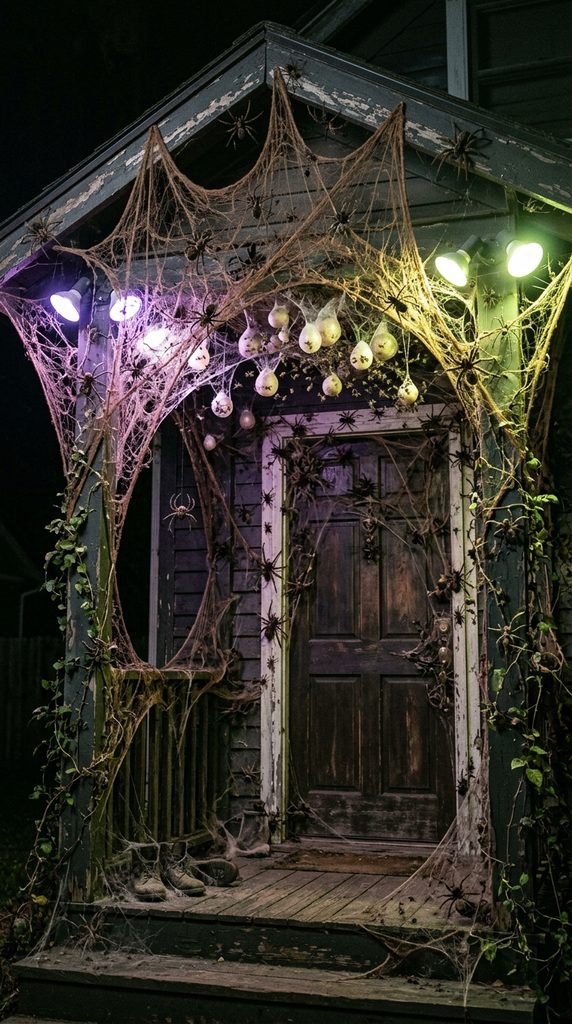
Arachnophobia remains one of humanity’s most potent, widespread psychological fears during Halloween. Furthermore, transforming your welcoming front entryway into an active spider hatching ground creates intense physical hesitation. Guests must brave sticky webbing and hundreds of crawling pests just to ring your doorbell. Incorporating massive, hairy mothers alongside swarming baby spiders makes the invasion feel uncontrollable. This immersive porch takeover turns familiar domestic architecture into a nightmarish, abandoned hive.
Crafting Volumetric Webbing and Egg Sacs
Flat, poorly stretched store webs look artificial and instantly ruin scary decorative setups. Instead, aggressively stretching dense beef netting creates architectural, three-dimensional web tunnels that mimic real spider silk. Hanging translucent, glowing egg sacs stuffed with batting and baby spiders intensifies the creepiness. In addition, uplighting the porch with sickly chartreuse or violet floodlights accentuates every silken strand. Visitors will instinctively wipe imaginary creeping insects off their arms and clothing.
Spider Infestation Supplies
- Polyester beef netting tubing cut and slit into sheets
- Bulk packs of miniature plastic realistic black spiders
- White baseball-sized styrofoam spheres and white sheer pantyhose
- Polyester craft batting for bulking out translucent egg sacs
- High-tack hot glue gun with several clear glue sticks
- Green or violet exterior 50-watt LED floodlighting fixtures
Step-by-Step Porch Webbing Process
- Cut beef netting tubes open along one edge to form wide rectangular panels.
- Anchor netting corners high along porch eaves using small utility cup hooks.
- Snip tiny holes into netting and stretch outward aggressively to form organic webs.
- Wrap styrofoam balls in polyester batting to create bulbous, irregular shapes.
- Insert padded shapes into white pantyhose legs, tying ends to form hanging sacs.
- Hot-glue dozens of tiny plastic spiders crawling across exterior egg sac surfaces.
- Suspend finished egg sacs beneath webs, allowing them to graze visitors’ hair.
- Scatter hundreds of individual plastic spiders along doorframes, railings, and siding.
8. Creepy Backlit Cellar Dweller Grate

Subterranean monsters lurking beneath ground grates exploit human fears of the dark unknown. Furthermore, glowing red eyes peering up through sewer bars suggest something dangerous has escaped containment. Positioning this compact prop directly beside entrance pathways guarantees trick-or-treaters look straight down into danger. Whispering audio loops played from hidden subterranean speakers make passing guests jump backward in terror. It turns flat concrete walkways into portals leading straight down to terrifying underground dungeons.
Fabricating Heavy Iron Sewer Grates
Authentic iron grates are far too heavy and dangerous to handle as decorative props. Fortunately, lightweight PVC electrical conduit pipes and rigid foam form believable heavy metal bars. Spraying the assembled frame with textured stone paint and rusty orange accents creates an antique cast-iron look. Beneath the grate, a shallow pit lined with blackout fabric conceals electronics and sound equipment. This low-cost prop delivers high-impact, spine-tingling fright right at visitors’ feet.
Subterranean Grate Materials
- Ten-foot lengths of half-inch hollow PVC conduit pipe
- Two-inch thick sheets of rigid extruded polystyrene foam
- Textured coarse spray paint in matte black and rust brown
- Low-profile battery-powered blinking red LED monster eyes
- Compact waterproof Bluetooth speaker for subterranean sound effects
- Heavy-duty matte black landscape fabric for ground pits
Building the Sewer Monster Grate
- Cut rigid foam into an exterior rectangular frame mimicking concrete curbs.
- Drill evenly spaced half-inch holes along interior edges of the foam frame.
- Insert pre-cut PVC pipes into drilled holes to create iron grate bars.
- Coat entire assembly with textured black stone spray paint for metal finish.
- Sponge reddish-orange craft paint onto joints to simulate corrosive metal rust.
- Lay black landscape fabric over flat ground beside your front entrance pathway.
- Place blinking red LED eye units and Bluetooth speakers centrally on fabric.
- Rest painted sewer grate directly over pit, playing subterranean growls on loop.
9. Faceless Mourning Ghostly Gathering
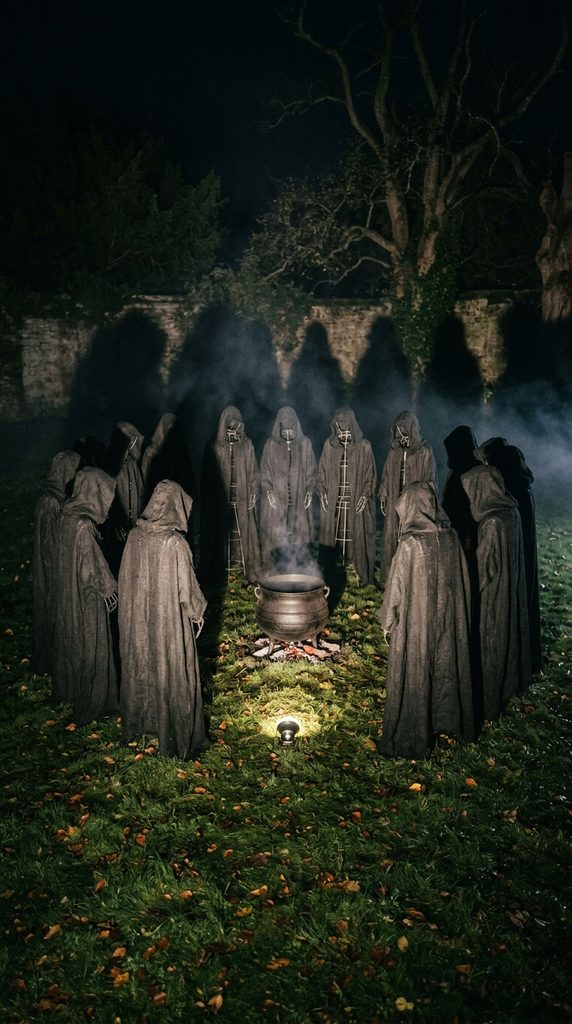
Silent, hooded figures standing motionless in ritual circles create profound, quiet psychological dread. Furthermore, the sheer lack of animated motion or noise unnerves onlookers more than jump scares. Hooded cloaks draped over faceless wire frames make figures seem like supernatural entities caught mid-séance. Placing them around an eerie, smoking cauldron or glowing sacrificial stone sparks disturbing dark folklore. This sophisticated outdoor installation looks like a scene pulled directly from chilling European supernatural cinema.
Assembling Lifelike Draped Phantom Rings
Human proportions are essential when constructing stationary figures to avoid awkward, comical postures. Building simple T-bar armatures from lightweight wooden tomato stakes establishes realistic adult shoulder widths. Draping stiffened black canvas or burlap over chicken-wire cowls preserves hollow, yawning hood shadows. In addition, soaking fabrics in fabric stiffener ensures robes hold flowing folds even during calm weather. This coven of faceless mourners casts terrifying long shadows across misty lawns.
Mourning Coven Supplies
- Sturdy four-foot wooden garden tomato stakes
- Stiff chicken wire for shaping hollow heads and broad shoulders
- Twenty yards of coarse, heavyweight black landscape burlap
- Liquid textile fabric stiffener or diluted white PVA wood glue
- Matte black exterior spray paint to coat wooden supports
- Centerpiece prop such as an antique stone birdbath or iron cauldron
Step-by-Step Coven Staging
- Pound wooden garden stakes into the lawn in a tight, inward-facing circle.
- Shape hollow, faceless head domes with connected shoulders using chicken wire.
- Staple wire headpieces firmly onto the tops of vertical wooden stakes.
- Soak wide black burlap panels thoroughly in diluted liquid fabric stiffener.
- Drape stiffened burlap over wire heads, arranging deep, shadowed hoods forward.
- Pin robe folds artfully around stakes to simulate heavy, floor-length drapery.
- Allow fabrics to dry completely for twenty-four hours until rock-hard and rigid.
- Install a low ground spotlight within the circle to cast giant outward shadows.
10. Chilling Anatomical Meat Locker Porch
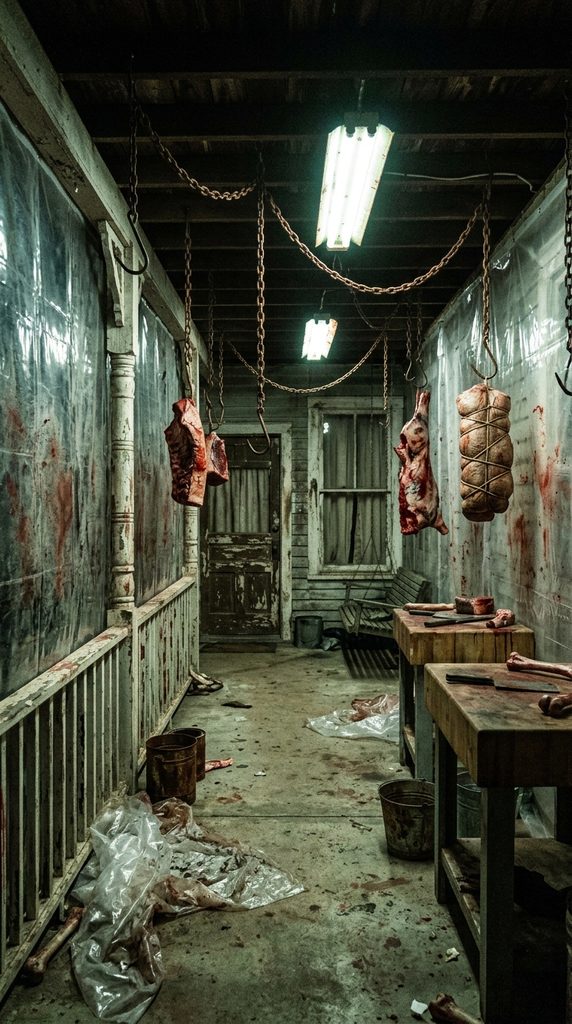
Turning your welcoming front porch into a gruesome butcher shop delivers shocking industrial horror. Furthermore, hanging realistic anatomical prop body parts inside translucent butcher plastic creates horrific slaughterhouse vibes. Passing trick-or-treaters must navigate narrow pathways lined with chilling specimens and rusty meat hooks. Flickering fluorescent utility lights enhance the grim, sterile atmosphere of a cinematic cannibal lair. This aggressive theme pushes Halloween boundaries, delivering genuine haunted-attraction fright to daring neighborhood visitors.
Creating Industrial Butcher Shop Aesthetics
Stretching clear vinyl drop cloths around porch railings seals the space into an unsettling slaughterhouse chamber. Smearing diluted crimson acrylics and brown distress washes across plastic walls suggests long, bloody use. Furthermore, hanging prop meat hooks from porch rafters using faux plastic chains creates convincing industrial framing. Inserting realistic foam body parts into vacuum-sealed food bags heightens the twisted domestic horror. This gruesome installation completely obscures your normal home exterior behind shocking industrial terror.
Slaughterhouse Prop Essentials
- Clear heavy-duty vinyl plastic sheeting rolls
- Red, brown, and black liquid acrylic pigments
- Lightweight plastic meat hooks and faux rusted chain links
- Inexpensive foam anatomical props like limbs, torsos, and organs
- Cold-toned flickering LED utility shop lights
- Wooden shipping pallets and industrial metal barrels for set dressing
Step-by-Step Meat Locker Execution
- Enclose front porch perimeter walls securely using heavy clear vinyl sheeting.
- Splatter thinned crimson and brown paints against plastic sheeting interior walls.
- Suspend plastic chains and meat hooks from porch ceiling joists at varying heights.
- Impale lightweight anatomical foam props onto hooks, securing them with wire.
- Coat hanging props in glossy polyurethane clear-coat to mimic fresh viscera.
- Stack weathered shipping pallets around doorway borders to restrict guest movement.
- Hang a cold, harsh fluorescent utility light that flickers erratically overhead.
- Broadcast industrial ambient drone sounds mixed with buzzing flies on hidden speakers.
11. Demonic Tree Sentinel with Glowing Bark

Gnarled, predatory tree faces seamlessly integrate terrifying horror directly into your natural lawn landscape. Furthermore, when the tree itself appears alive and hungry, visitors realize nowhere is safe. Crafting twisted demonic faces emerging from tree bark exploits ancient folklore of cursed woods. Illuminated glowing eyes and gaping fangs burning from within split timber produce heart-stopping night visuals. This clever woodland monster turns ordinary shade trees into terrifying, territorial yard bosses.
Sculpting Organic Bark Textures with Foam
Expanding spray foam provides the perfect medium for creating organic, wood-grain monster features on living trees. Spraying expanding foam onto heavy cardboard templates protects delicate tree bark from chemical adhesive damage. Once cured, carving deep creases, gaping jaws, and snarling brow ridges produces expressive wooden features. Coating carved surfaces with outdoor silicone tinted with brown and grey paints matches host tree bark. This seamless woodland integration shocks guests when eyes suddenly glow bright.
Living Tree Fiend Supplies
- Multiple cans of gap-filling polyurethane expanding foam
- Heavy cardboard sheets cut to wrap around tree trunks
- Carving tools including serrated bread knives and rasps
- Exterior paintable brown silicone caulk and brown spray paint
- Battery-powered high-intensity amber LED light pods
- Heavy-duty ratchet straps to secure face to tree trunks safely
Step-by-Step Tree Fiend Sculpting
- Wrap flexible cardboard sheets around the chosen tree trunk at head height.
- Secure cardboard backing tightly using removable ratchet straps without damaging bark.
- Spray expanding foam across cardboard, building up heavy eyebrows, cheeks, and jaws.
- Allow polyurethane foam to cure fully for four hours into a rigid state.
- Carve snarling facial features, jagged bark fissures, and deep eye sockets with knives.
- Coat carved surfaces with exterior brown silicone caulk, sculpting bark ridges.
- Spray painted highlights using matte black, brown, and moss green paints.
- Mount amber LED pods deep within carved eye holes for an internal fire effect.
12. Haunted Swamp Bubbling Toxic Well
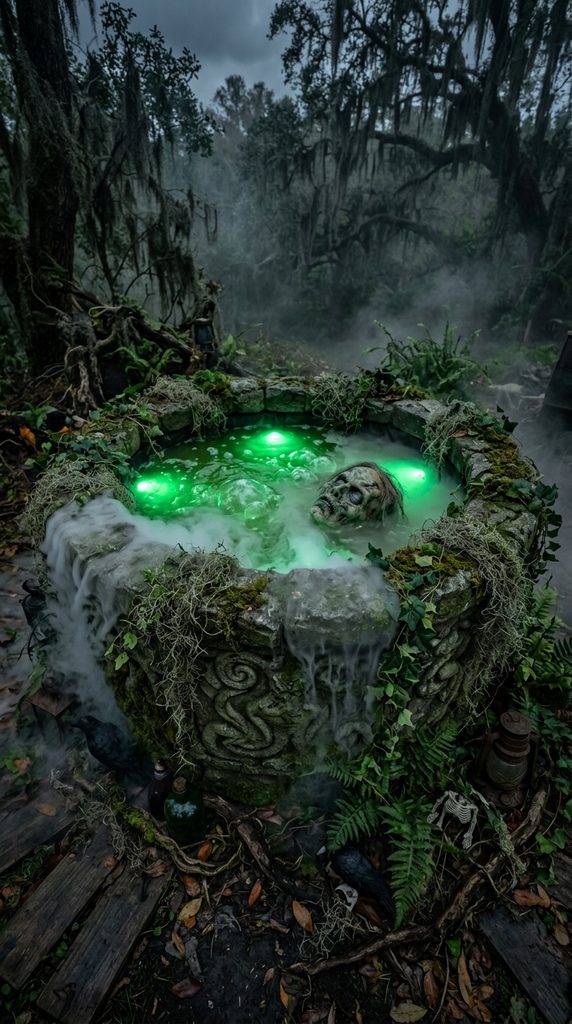
Swamp witches and contaminated toxic waste sites both evoke unsettling feelings of sickness and rot. Furthermore, an ancient bubbling stone well emitting dense green vapor creates mesmerizing environmental horror. The steady sound of gurgling water combined with low-creeping fog draws curious visitors closer. As they peer over the mossy rim, a submerged, rotting face floats right beneath the glowing surface. This multi-sensory prop relies on light, water, and fog to mesmerize terrified guests.
Engineering Safe Water and Fog Effects
Building an ancient stone well requires simple circular rings made of textured foam blocks. Inside the basin, a commercial water fountain pump creates bubbling movement across water reservoirs. In addition, routing low-lying fog output through the bubbling water basin produces dense, lingering ground mist. Submerging high-output green underwater LED pucks turns the bubbling pool into a glowing toxic brew. This spellbinding centerpiece anchors eerie bayou and swamp witch displays with hypnotic realism.
Bubbling Swamp Well Essentials
- Large round heavy-duty plastic agricultural feeding tub
- Foam stone facade sheets or carved insulation bricks
- Submersible aquarium fountain water pump and clear tubing
- Ultrasonic mist maker or low-lying theatrical fog chiller
- Waterproof submersible green LED accent lights
- Artificial pond foam, duckweed, and hanging Spanish moss
Well Construction and Staging
- Place the large plastic agricultural tub centrally on a level area of your lawn.
- Surround outer plastic tub walls with carved, painted faux stone foam blocks.
- Glue green floral moss and Spanish moss into stone joints to mimic ancient decay.
- Place submersible water pump on tub floor, aiming discharge nozzle upward for bubbling.
- Submerge waterproof green LED lights to illuminate rising water droplets from below.
- Direct theatrical fog machine output hoses into the tub through a rear hole.
- Fill tub with water, floating artificial duckweed and a severed prop face on top.
- Activate pump and fogger to create an illuminated, bubbling toxic swamp reservoir.
13. Terrifying Possessed levitating Doll Display
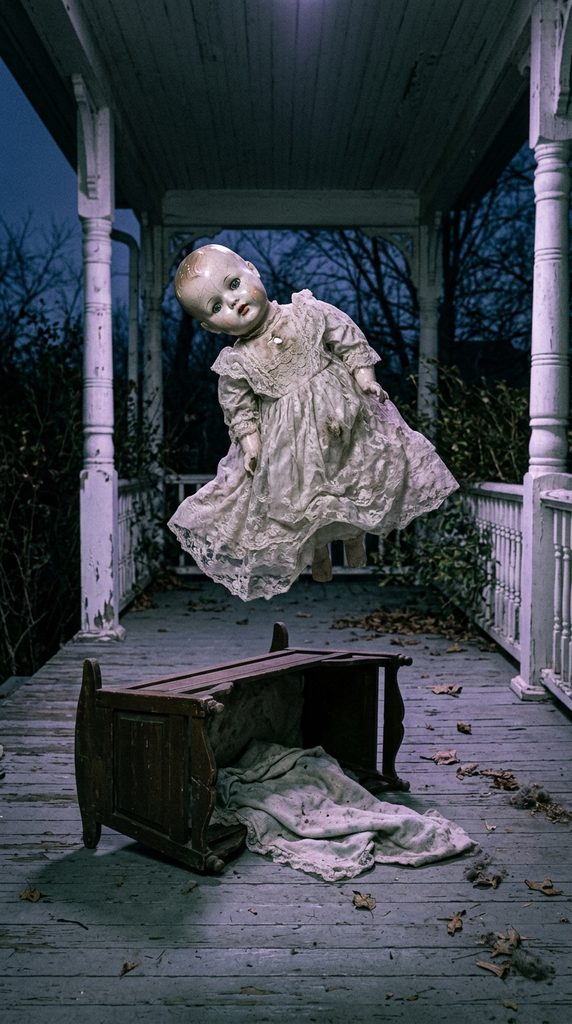
Creepy antique toys evoke unsettling childhood vulnerability and classic cinematic demonic possession fears. Furthermore, suspending a Victorian porcelain doll mid-air with zero visible support defies physical reality unnervingly. Cracked porcelain skin, stained lace gowns, and glassy, vacant eyes project sinister paranormal intelligence. Surrounding the floating child with dead flowers and broken playthings tells an ominous paranormal ghost story. This subtle psychological scare disturbs guests far more than loud, mechanized jump-scare monsters.
Hiding Invisible Aerial Suspensions
Suspending lightweight props seamlessly requires ultrathin monofilament fishing line anchored to high branches or eaves. Using dark sixty-pound test braided line prevents breakage while remaining completely invisible under low night lighting. Furthermore, tilting the doll’s head sharply backward and spreading twisted limbs suggests unnatural telekinetic elevation. Backlighting the floating figure with a faint lavender spotlight makes the stained lace dress glow like ectoplasm. This hair-raising paranormal installation lingers in visitors’ memories long after Halloween ends.
Levitating Doll Supplies
- Vintage-style porcelain doll with glass eyes and lace clothing
- Acrylic craft paints in charcoal, pale bone, and burgundy
- Sixty-pound clear or dark monofilament fishing suspension line
- Small screw-in eyebolts mounted into doll shoulder joints
- Sheer lavender or cold-blue low-wattage exterior LED spotlight
- Distressed vintage wooden cradle or rusty child wagon
Step-by-Step Levitation Rigging
- Distress the antique doll’s face using fine sandpaper and charcoal paint washes.
- Paint hairline fracture cracks across cheeks and forehead using a fine detail brush.
- Thread small steel eyebolts directly into doll shoulders and pelvic sockets.
- Tie heavy-duty monofilament line securely through eyebolts, checking knot strength.
- Rig monofilament lines to overhead porch rafters or sturdy tree branches above.
- Adjust line lengths so the doll hovers unnaturally three feet off the ground.
- Stage a broken, overturned wooden cradle directly beneath the hovering figure.
- Angle a dim lavender spotlight upward to illuminate the floating specter sharply.
14. Eerie Grim Reaper Silhouette Gatekeeper

Iron cemetery archways flanked by the Angel of Death establish ominous boundary markers for front walkways. Furthermore, an imposing eight-foot Reaper wielding a massive scythe warns visitors that they enter cursed ground. Backlighting the giant dark silhouette against exterior wall projections makes the figure seem impossibly tall. The crisp, geometric lines of towering scythes and hooded cloaks look stunning from passing vehicles. This classic horror icon creates a sophisticated, menacing threshold guarding your haunted property.
Welding Lightweight PVC Reaper Skeletons
Large-scale silhouettes require rigid, lightweight armatures that will not buckle under wind load. Lightweight PVC pipes join quickly with elbow fittings to establish towering broad-shouldered forms. Furthermore, carving a massive, realistic scythe blade from dense sheet foam avoids dangerous real steel edges. Coating flowing burlap vestments in waterproofing exterior black paints prevents water absorption during fall rains. This towering gatekeeper commands respect and strikes fear into approaching trick-or-treaters.
Reaper Gatekeeper Materials
- Ten-foot lengths of one-inch furniture-grade rigid PVC pipe
- Assorted PVC structural tees, elbows, and floor flange bases
- Quarter-inch thick high-density rigid plastic or foam sheeting
- Twenty yards of jet-black heavy outdoor marine canvas fabric
- Silver metallic spray paint and gunmetal weathering powders
- Two heavy concrete deck foundation blocks to secure bases
Step-by-Step Reaper Construction
- Assemble PVC pipes into a wide eight-foot tall human skeleton frame.
- Anchor pipe feet into concrete deck blocks buried flush beneath turf level.
- Carve a sweeping, four-foot curved scythe blade from rigid plastic foam sheets.
- Paint scythe blade metallic silver, dry-brushing charcoal grime along cutting edges.
- Mount foam scythe blade onto a long wooden pole held in the PVC hands.
- Drape heavy black marine canvas over PVC shoulders, fashioning an oversized hood.
- Pin robe hems outward into ground sod using tent stakes to create sweeping lines.
- Uplight the silhouette using a narrow-beam, blood-red spotlight from the walkway.
15. The Crawling Attic Ceiling Lurker
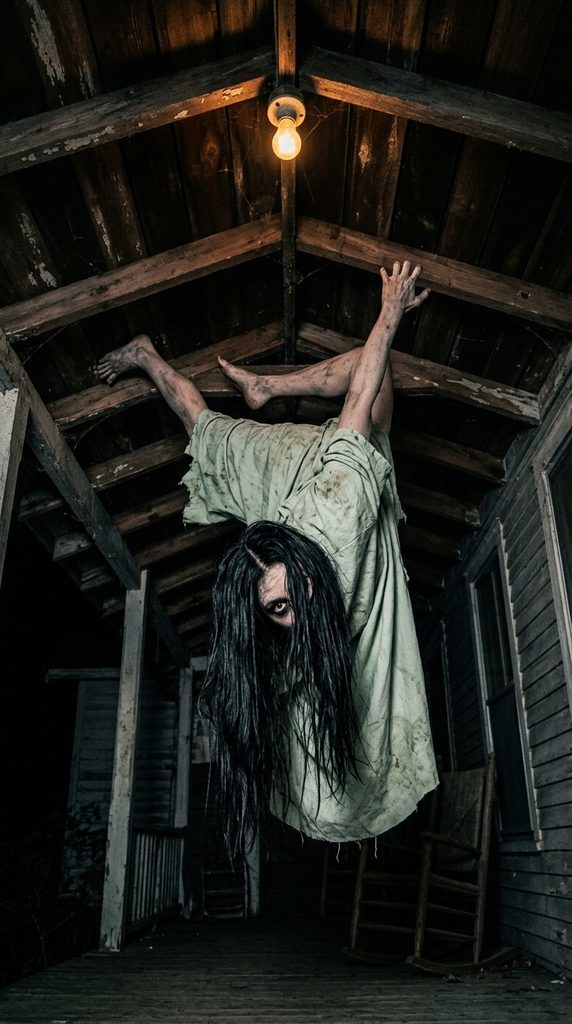
Ceiling-mounted terrors exploit the universal instinct that threats approach from eye level or below. Furthermore, seeing a twisted, contorted human figure crawling upside down across porch ceilings shocks visitors instantly. Looking up into the predatory, upside-down face of a pale demon triggers immediate flight responses. Strategically placed near porch lights, this inverted monster turns familiar architectural shelters into lethal traps. It breaks spatial expectations and delivers intense haunted-house scares.
Inverted Ceiling Rigging Mechanics
Securing heavy props overhead requires fail-safe mechanical fasteners bolted directly into wooden ceiling joists. Fashioning the contorted body from lightweight flexible foam pool noodles keeps total weight under ten pounds. Furthermore, bending elbows and knees at impossible, backwards angles enhances the disturbing supernatural anatomy. Dressing the figure in dirty, tattered nightwear makes it look like an escaped asylum patient. Visitors will gasp and duck instinctively as they pass beneath this ceiling nightmare.
Ceiling Lurker Supplies
- High-density lightweight foam pool noodles and floral armature wire
- Spooky mannequin head featuring long, disheveled black hair
- Distressed vintage child pajamas or stained hospital nightgown
- Heavy-duty steel utility ceiling hooks rated for fifty pounds
- Black industrial zip ties and heavy-gauge picture hanging wire
- Dim downward-facing amber porch fixture bulb
Step-by-Step Ceiling Installation
- Form inverted limbs and arched spine using pool noodles wired together securely.
- Bend knee and elbow joints backward at disturbing, unnatural anatomical angles.
- Affix mannequin head facing backward relative to the inverted torso alignment.
- Dress twisted foam armature in distressed, tea-stained hospital nightgowns.
- Thread heavy-gauge picture wire through internal noodle armatures at hip and chest.
- Screw rated utility hooks directly into solid wooden porch ceiling joists.
- Hoist prop upward, securing structural wires to ceiling hooks with double safety loops.
- Let long, greasy black hair drape straight downward toward passing visitors’ heads.
16. The Rotting Pumpkin Rot-Grave Mound

Traditional jack-o’-lanterns look cheery, but a rotting, mold-covered pumpkin grave mound introduces visceral disgust. Furthermore, sculpting sickening decay, oozing pumpkin guts, and putrid grins subverts beloved holiday icons. Grouping dozens of rotting carved pumpkins over a fresh grave mound tells a story of twisted harvest paganism. Low-lying amber lights pulsing from within collapsing rinds make the pile feel like a breathing, decomposing organism. This unique aesthetic delivers gruesome harvest horror without relying on blood or gore.
Simulating Putrid Gourd Decay
Creating hyper-realistic rotting pumpkins involves melting, carving, and texturing artificial foam jack-o’-lanterns. Blasting craft foam pumpkins with heat guns causes walls to sag, blister, and collapse believably. Furthermore, coating sunken features with expanding foam replicates bursting, stringy interior pumpkin guts. Painting decayed crevices with glossy olive, mustard yellow, and muddy brown creates nauseating wet textures. This festering autumn mound creates an unforgettably grotesque visual anchor for front lawns.
Rotten Pumpkin Mound Materials
- Assorted hollow carvable craft pumpkins of varied sizes
- Adjustable heat gun to melt and warp plastic pumpkin walls
- Cans of expanding polyurethane spray foam for oozing guts
- Heavy-body acrylic paints in mustard, deep olive, and sludge brown
- Gloss clear acrylic varnish to create slimy, wet surface sheens
- Several bales of damp straw and bags of black garden topsoil
Step-by-Step Pumpkin Sculpting
- Carve grotesque, uneven faces into assorted hollow craft pumpkins.
- Apply heat gun to pumpkin brows, cheeks, and chins to cause plastic sagging.
- Spray expanding foam inside mouths and eyes so “guts” erupt from openings.
- Trim expanding foam bubbles once cured to look like stringy fibrous pulp.
- Paint rotting areas with mottled blends of olive green, sludge brown, and black.
- Coat dripping foam guts with high-gloss clear varnish to simulate wet rot.
- Mound damp topsoil and straw in your yard to resemble a neglected mass grave.
- Pile warped, decomposing pumpkins across the mound, illuminated with orange LEDs.
17. The Whispering Shadow Window Maze
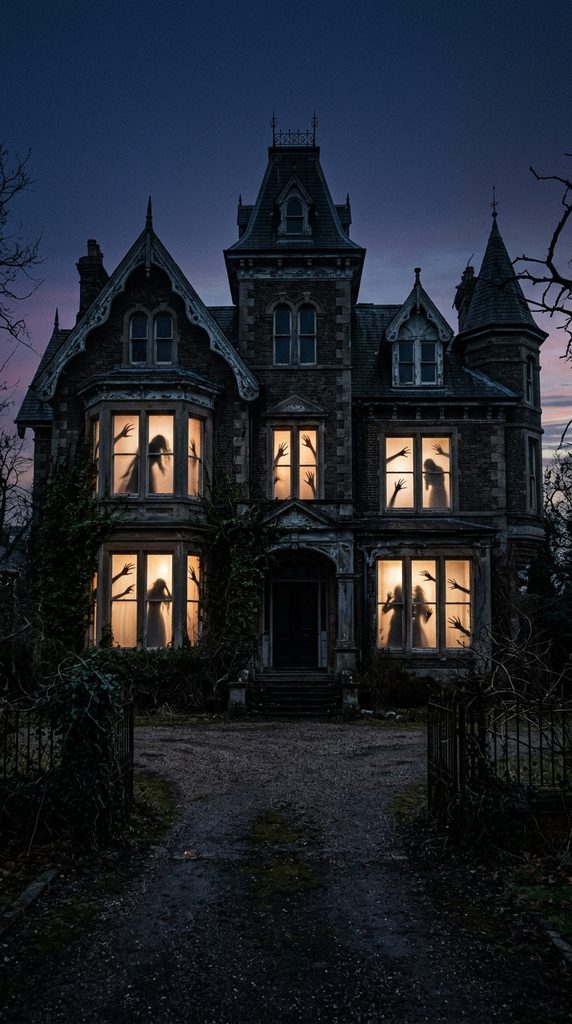
Transforming exterior windows into dynamic shadow-play canvases turns your home into an ominous asylum facade. Furthermore, moving silhouette shadows suggest hundreds of restless, trapped spirits trying to claw their way through the glass. Layering motorized shadow-caster wheels behind frosted window screens creates organic, chaotic movement that never repeats predictably. Onlookers watching from sidewalks become hypnotized by the fluid, restless choreography of dark silhouettes. This artistic approach relies on psychological tension rather than startling jump scares.
Constructing Kinetic Shadow Mechanisms
Building dynamic shadow effects requires simple slow-RPM display motors and cut paper silhouettes. Mounting silhouette arms, grasping claws, and weeping figures onto motorized spinning wheels casts moving shadows continuously. Furthermore, positioning a warm halogen or LED point-source light behind the mechanism casts crisp, elongated figures against screens. Frosted vinyl glass film softens outlines, making apparitions look like they roam deep within interior hallways. This cinematic display gives your home the unmistakable aura of a deeply haunted estate.
Shadow Mechanism Supplies
- Continuous low-RPM (5-10 RPM) motorized display turntables
- Rigid black cardboard or heavy corrugated plastic sheeting
- Sharp hobby knives and cutting mats for silhouette tracing
- Warm white high-output single-point LED spot lights
- Frosted static-cling glass privacy film for window diffusion
- Adjustable metal mounting clamps to secure motor units
Step-by-Step Shadow Rigging
- Apply frosted static-cling privacy film smoothly across targeted window glass panes.
- Cut detailed silhouette arms, screaming faces, and reaching claws from black cardboard.
- Affix cutout silhouettes around edges of the motorized rotating turntable disc.
- Mount motorized disc vertically several feet behind frosted window pane glass.
- Position intense LED point-light directly behind rotating silhouettes, facing the window.
- Power on the motor so rotating silhouettes pass continuously through light beams.
- Seal surrounding window boundaries using blackout fabric to maximize projection contrast.
- Step outside to observe terrifying, fluid ghost shadows clawing continuously at the glass.