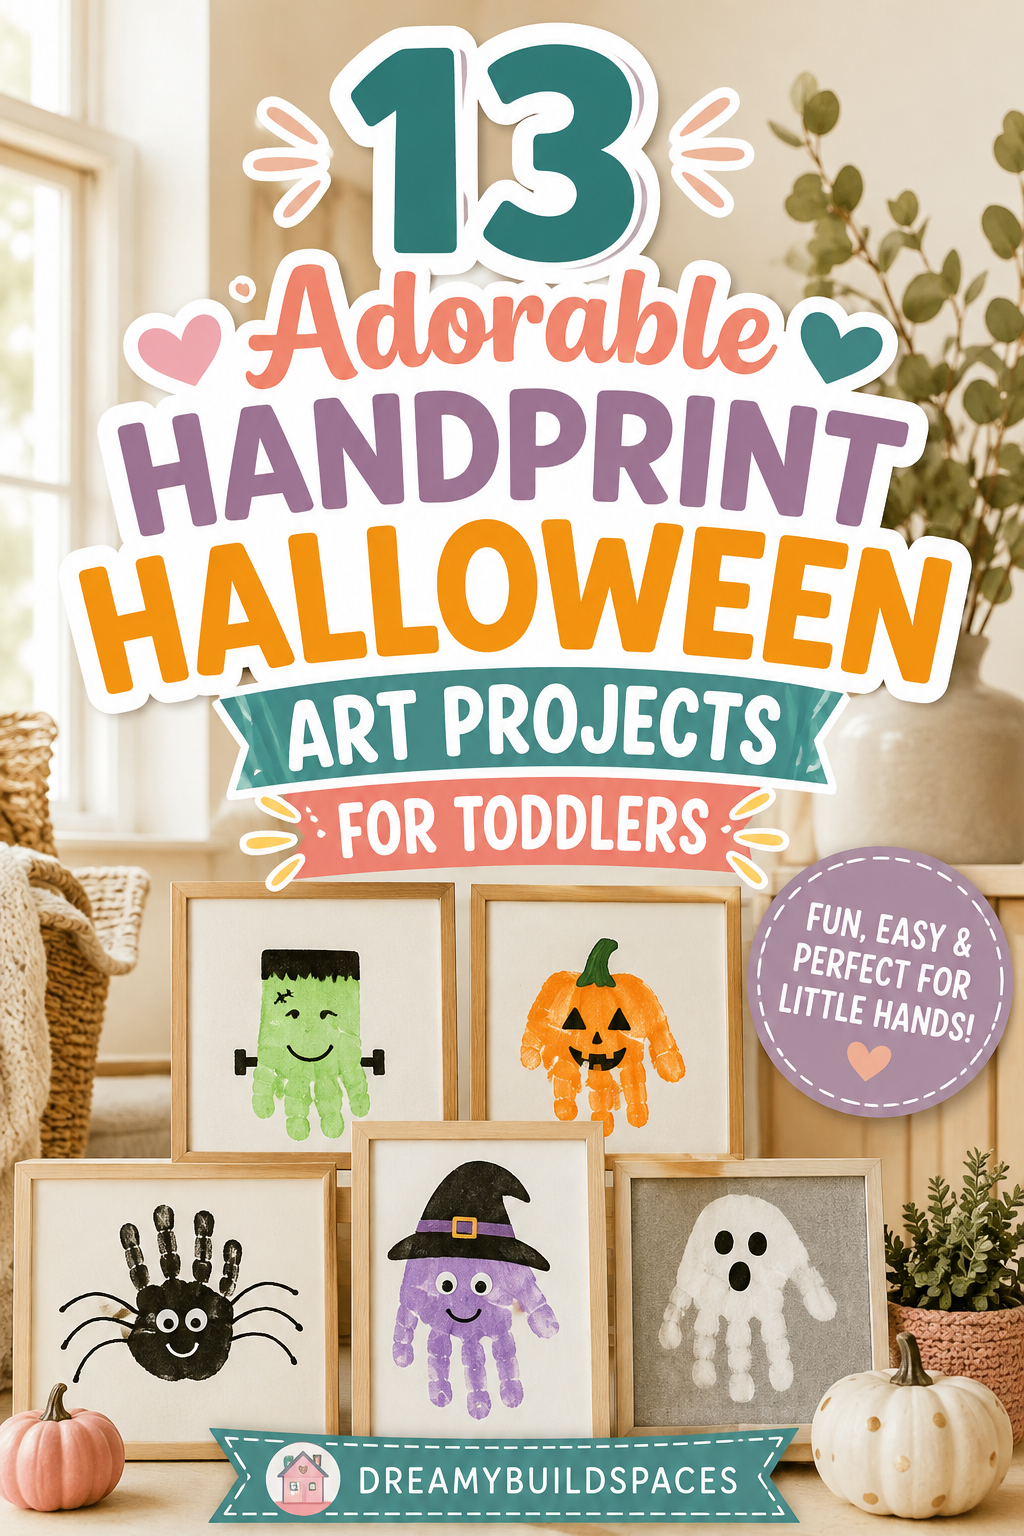
13 Adorable Handprint Halloween Art Projects for Toddlers
Toddlerhood is a fleeting, magical stage of rapid growth and discovery. Every autumn brings new milestones, giggles, and messy art adventures. Handprint art projects offer a timeless way to freeze these tiny fingers in time. When October arrives, transforming little handprints into spooky characters creates unforgettable keepsakes.
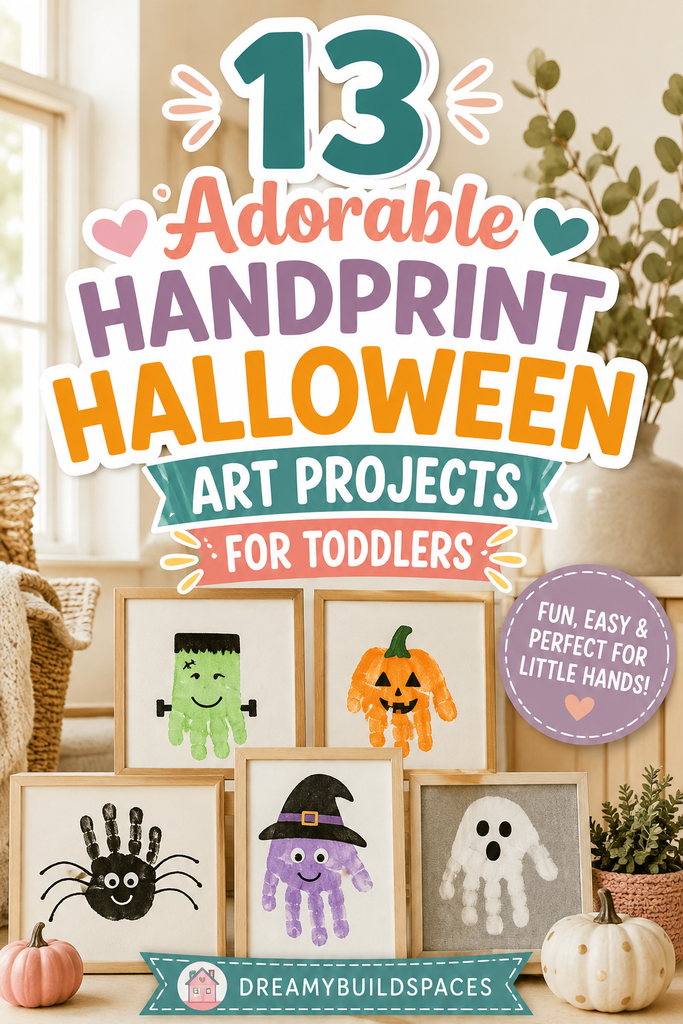
Furthermore, these tactile crafts support fine motor skill development naturally. Toddlers love feeling cool, squishy paint between their fingers. These thirteen adorable handprint art ideas guarantee high-energy festive fun. Grandparents and parents will cherish these handmade memory boards for years.
Why Handprint Art Captivates Parents and Toddlers
Handprint keepsakes hold immense emotional value for families everywhere. Years from now, looking back at miniature ghost prints brings instant joy. In addition, sensory painting encourages expressive creativity and tactile confidence. Toddlers beam with pride seeing their own body parts transform into friendly monsters.
Therefore, creating handprint Halloween art builds deep emotional connection through shared play. You can easily display these framed keepsakes across living room walls every autumn. Moreover, handprint crafts require very few specialized tools or expensive supplies. Simple washable paints and heavy paper yield museum-worthy family treasures.
Practical Tips for Mess-Free Toddler Painting Sessions
Painting with energetic toddlers can sometimes feel chaotic and overwhelming. Fortunately, a few simple preparations keep your crafting space spotless. First, cover your table with inexpensive plastic tablecloths or trash bags. Keep damp washcloths and baby wipes within arm’s reach.
Additionally, pour washable paints into shallow paper plates for easy dipping. This smart step prevents accidental bottle spills and makes hand-inking fast. Choose non-toxic, washable toddler paints always to protect sensitive skin. When preparation is seamless, painting stays relaxing and completely fun.
Selecting Safe, Washable Materials for Little Hands
Tender toddler skin requires gentle, certified non-toxic art supplies. Always look for water-based, washable tempera paints labeled child-safe. Heavy cardstock or canvas boards prevent buckling under wet paint layers.
In addition, keep fine-tip black markers handy for drawing cute facial features. Having supplies organized and ready eliminates last-minute holiday stress. Your little artists will have everything needed for creative success. Let us dive into these thirteen exciting, budget-friendly handprint projects.
Turning Simple Handprints into Holiday Decorations
Handmade handprint crafts make the most charming holiday home decorations. You can hang ghostly handprint garlands across living room windows. Similarly, frame friendly witch prints along your hallway gallery walls.
These cheerful decorations add warm festive spirit to every room. Children beam with excitement seeing their art actively celebrated daily. Furthermore, handmade decorations create a cozy, whimsical holiday environment. You build a beloved family tradition that returns every October. Gather your inexpensive supplies and let the autumn creativity flow.
Essential Toddler Crafting Stash Checklist
Before starting, build a versatile budget-friendly craft supply kit. Pick up multi-packs of washable paints, googly eyes, and cardstock. Also, grab washable school glue, craft sticks, and construction paper.
Foam brushes, tissue paper squares, and pipe cleaners work wonders. These basic essentials form the backbone of countless festive projects. Having supplies organized and ready eliminates last-minute holiday shopping runs. Your little artists will have everything needed for creative success. Let us dive into these thirteen exciting, budget-friendly projects.
1. Friendly Spooky Ghost Handprints
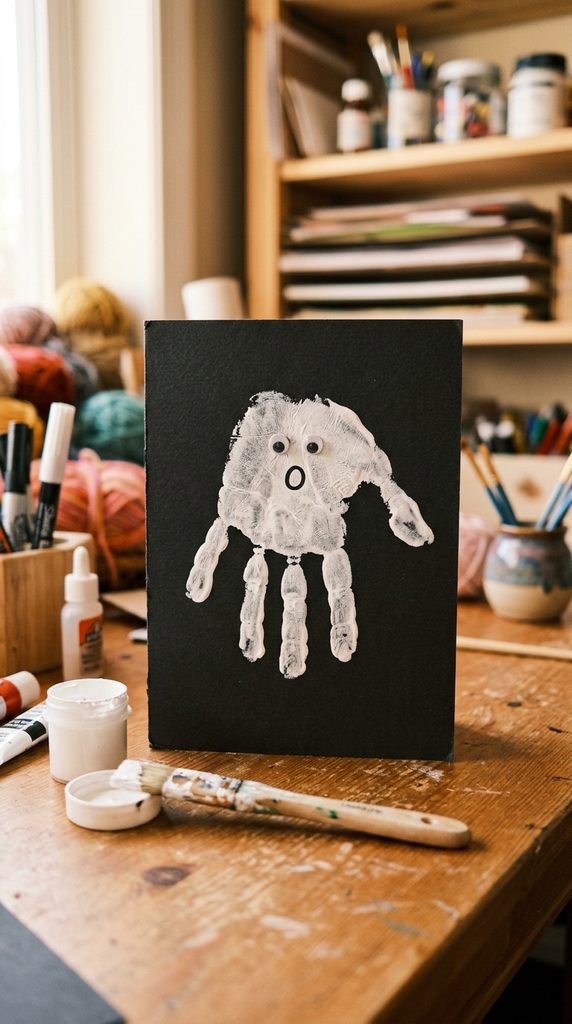
The Classic White Phantom Made with Tiny Finger Rays
Friendly ghosts are an essential staple of festive Halloween decor. However, white handprint ghosts emphasize pure toddler sweetness over spookiness. Pressing painted white hands upside down creates the ghostly body.
Furthermore, the soft finger trails look like billowy floating fabric robes. Adding googly eyes gives the tiny phantom an irresistible expression. It makes a delightful refrigerator display or sweet handmade greeting card. Toddlers will love how fast this minimal-mess project comes together.
How to Create Ghost Handprints Step-by-Step
First, paint your toddler’s palm and fingers with washable white paint. Next, press their painted hand upside down onto black cardstock. Ensure fingers point downward to form the ghostly cloak base.
Then, lift the hand gently to reveal clean print shapes. Allow the white paint layer to dry completely for thirty minutes. Afterward, glue two small plastic googly eyes onto the palm. Use a black marker to draw a tiny surprised mouth. Finally, write your toddler’s name and the year below.
Required Materials for Ghost Handprints
- Washable non-toxic white tempera paint
- Heavyweight black cardstock or construction paper
- Small plastic adhesive wiggle googly eyes
- Fine-tip black permanent marker or paint pen
- Foam sponge paintbrushes for applying paint
- Baby wipes for instant hand cleanup
2. Fluttering Black Cat Handprint Silhouettes
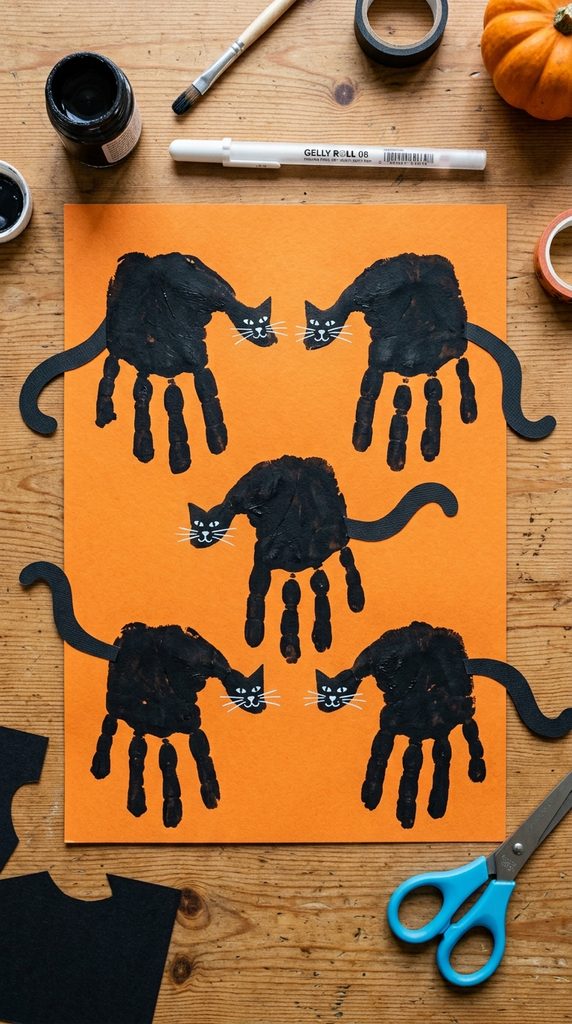
Arched Feline Friends with Curled Paper Tails
Black cats represent timeless Halloween folklore and cozy companionship. This handprint cat features an upside-down palm forming rounded backs. Pointing fingers outward mimics playful cat ears and arched tails.
Moreover, this pattern is wonderful for practicing simple silhouette painting. The monochrome black body works up exceptionally fast with basic strokes. It makes a sophisticated, charming keepsake for cat-loving families. Your handmade feline art will look darling hanging on any wall.
How to Create Cat Handprints Step-by-Step
Start by painting your toddler’s palm and fingers with black paint. Next, press the painted hand sideways onto orange cardstock paper. Position the thumb downward to form the cat’s resting head.
Then, lift the hand cleanly and let the black paint dry. Use a fine-tip white paint pen to draw whiskers and eyes. Cut a curved tail from scrap black paper and glue it on. Afterward, add a tiny pink triangle nose beneath the eyes. Finally, write the date on the bottom corner.
Required Materials for Cat Handprints
- Washable jet-black tempera paint
- Bright orange or textured yellow cardstock paper
- Fine-tip white opaque paint pen
- Black construction paper scraps for tails
- Pink paper scraps for tiny cat noses
- Child-safe glue sticks and safety scissors
3. Silly Orange Pumpkin Patch Hands
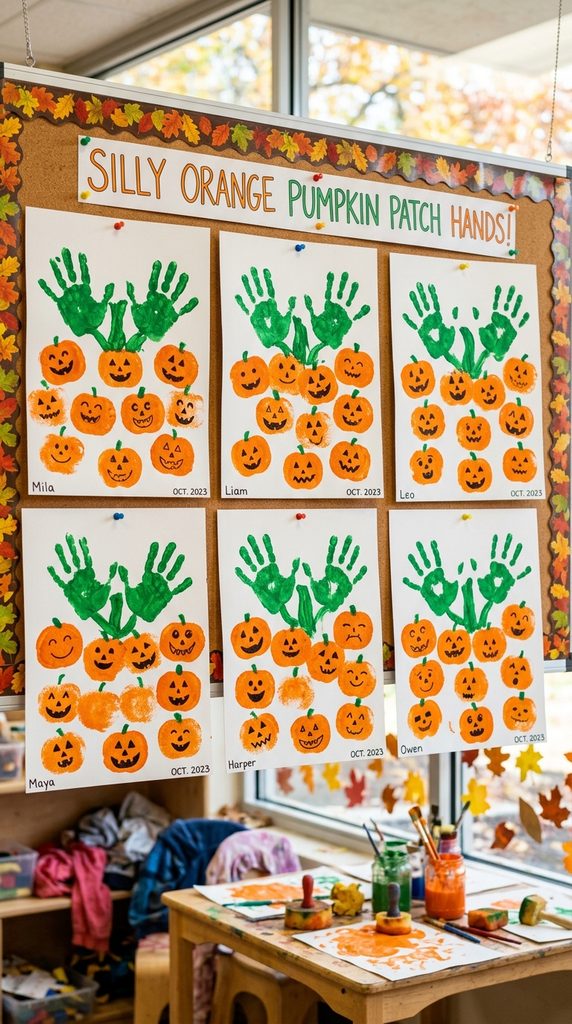
Plump Round Gourds Topped with Green Handprint Stems
Pumpkin patches bring instant autumn nostalgia to seasonal home displays. This clever craft turns handprints into leafy green pumpkin stems. Stamping orange sponge circles below completes plump little pumpkins.
Additionally, this quick pattern encourages sensory exploration with sponge stamping. The bright orange and green contrast pops gorgeously against dark backgrounds. It makes fantastic framed wall art or autumn greeting cards. You will want to create a whole patch of little prints.
How to Create Pumpkin Handprints Step-by-Step
First, paint your toddler’s hand with bright green washable paint. Next, press the hand upside down near the top of paper. The fingers act as leafy green pumpkin stems and vines.
Then, let the green handprint dry completely before painting circles. Dip a round sponge into orange paint and stamp pumpkins below. Press orange pumpkins directly beneath the green handprint stems. Afterward, use a black marker to draw silly jack-o’-lantern faces. Finally, frame your finished pumpkin patch artwork proudly.
Required Materials for Pumpkin Handprints
- Washable green and orange tempera paints
- Heavyweight white or cream drawing paper
- Round foam sponge daubers for stamping pumpkins
- Broad-tip black washable coloring markers
- Paper plates for pouring paint colors
- Wet paper towels for easy hand cleanup
4. Spooky Friendly Frankenstein Handprint Monsters
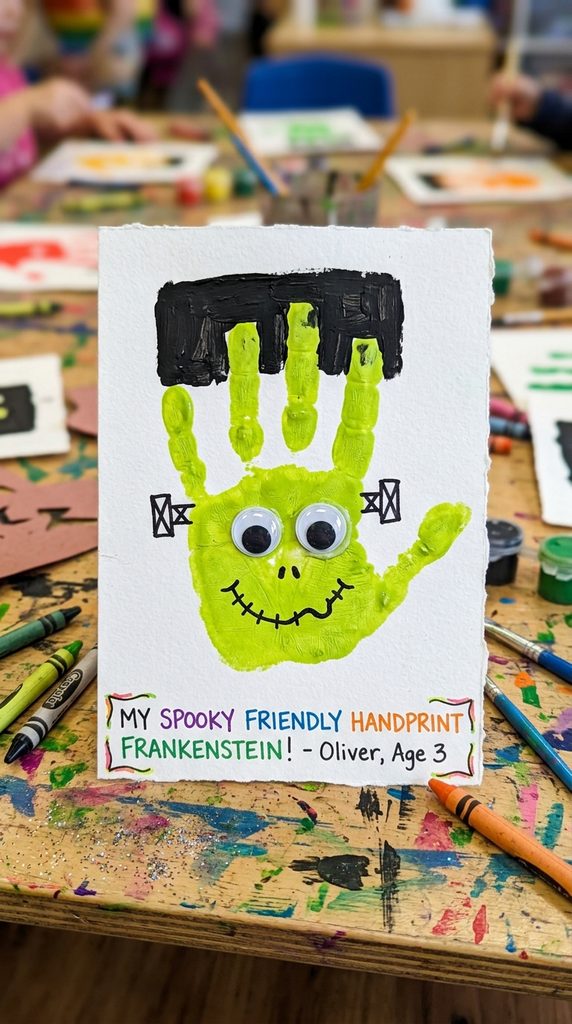
Green Monster Pals with Bolt Accents and Stitched Hair
Frankenstein’s monster gets an adorable, friendly makeover in this handprint art. Pointing fingers upward creates the monster’s flat-topped hair silhouette. Adding painted black hair and bolts completes the character.
Furthermore, this beginner-friendly project requires minimal cleanup steps. The bright green proportions give this gentle monster tons of quirky personality. Toddlers will love seeing their handprint turn into a monster. It proves that classic Halloween monsters can be delightfully sweet.
How to Create Frankenstein Handprints Step-by-Step
First, paint your toddler’s palm and fingers vibrant lime green. Next, press their painted hand upright onto white cardstock paper. Lift the hand carefully and let the green paint dry.
Then, paint a black rectangular block across the fingertips. This black block forms Frankenstein’s signature flat-topped hairstyle. Afterward, glue two medium googly eyes onto the palm center. Use a black marker to draw a stitched scar and smile. Finally, draw two grey bolts on the sides.
Required Materials for Frankenstein Handprints
- Washable bright lime green tempera paint
- Black and silver acrylic craft paints
- Heavyweight white cardstock paper sheets
- Medium plastic adhesive wiggle googly eyes
- Fine-tip black permanent marker pens
- Flat synthetic foam brushes for painting
5. Wise Little Handprint Hoot Owls
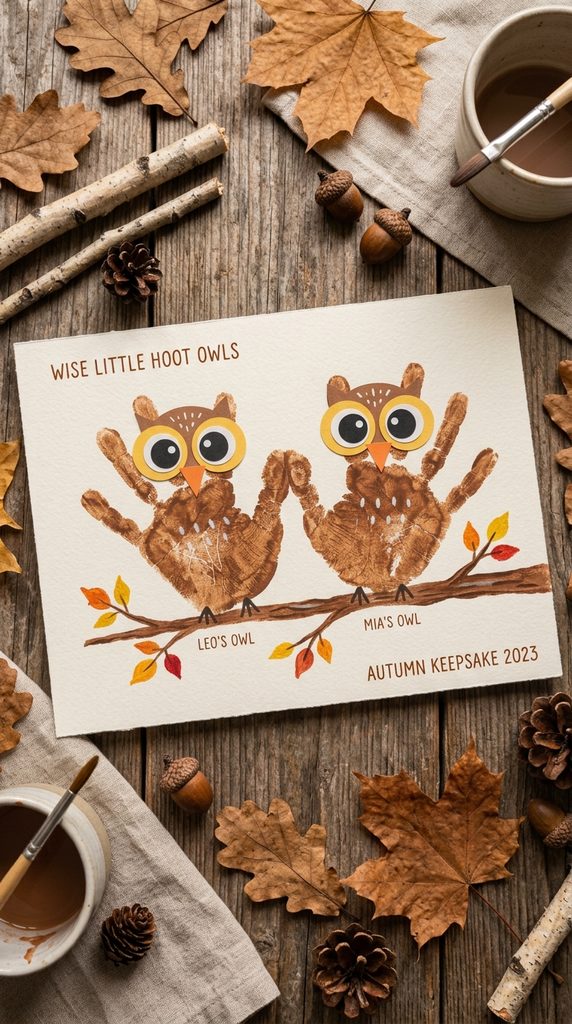
Feathered Night Creatures Nesting on Sturdy Tree Branches
Wise owls bring mysterious woodland charm to autumn art collections. Pressing two hands side by side creates plump feathered bodies. Dipping thumbs outward forms adorable feathered owl ears.
Moreover, this charming project teaches children about nocturnal forest animals. The rich brown and gold tones evoke crisp autumn evenings. It makes a stunning seasonal keepsake for nature-loving households. Your little artist will hoot with joy seeing their finished owl.
How to Create Owl Handprints Step-by-Step
Start by painting your toddler’s hands in warm brown paint. Next, press both hands side by side with thumbs overlapping. Lift the hands gently to reveal a double-handprint owl body.
Then, let the brown paint dry completely on cardstock paper. Glue large yellow paper circles onto the palms for eyes. Paste smaller black circles inside the yellow paper eye bases. Afterward, glue an orange paper triangle beak between the eyes. Finally, paint a brown tree branch beneath the sitting owl.
Required Materials for Owl Handprints
- Washable warm brown and golden-yellow paints
- Heavyweight dark blue or night-sky cardstock
- Yellow and black construction paper scrap sheets
- Orange paper scraps for cutting pointy beaks
- Child-safe school glue and safety scissors
- Wet washcloths for quick toddler hand cleanup
6. Swooping Finger-Painted Vampire Bat Wings
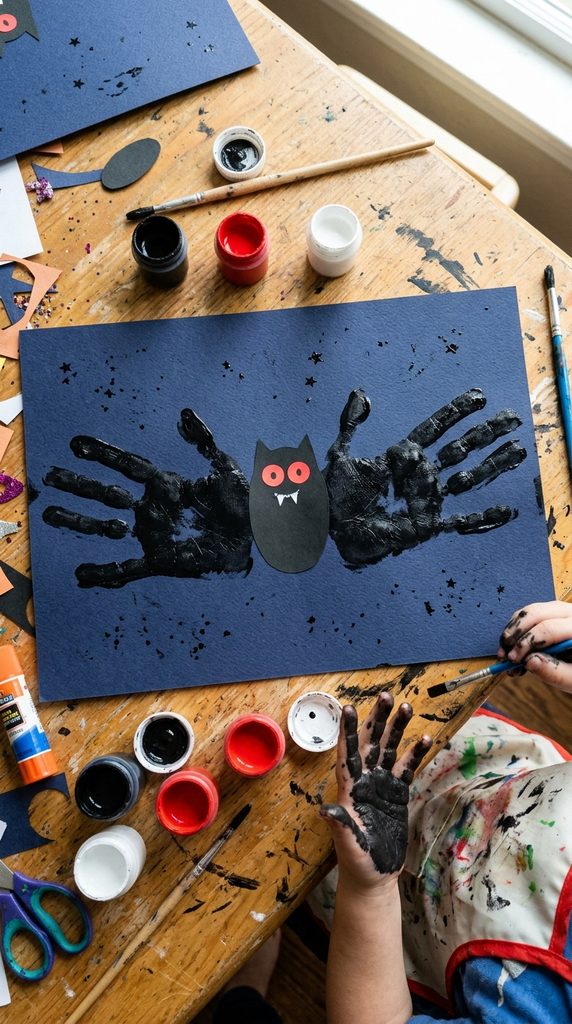
Dark Winged Creatures Spread Wide Across the Night Sky
Bats swoop silently across crisp autumn evening skies during October. Tracing and printing handprints creates sweeping, symmetrical bat wings. Stamping a central paper body completes the nocturnal creature.
Additionally, this clever folding technique teaches kids about mirror symmetry. Hanging these bats across windows creates playful Halloween shadows. It requires zero expensive hardware and takes mere minutes. This high-impact craft brings instant festive cheer to homes.
How to Create Bat Handprints Step-by-Step
Begin by painting both of your toddler’s hands black. Next, press their left hand on the left side of paper. Press their right hand on the right side, fingers angled.
Then, let the black handprint wings dry fully on paper. Cut an oval black paper body and glue between wings. Paste two shiny red eyes onto the black paper head. Afterward, draw tiny white fangs beneath the red eyes. Finally, hang your completed handprint bat from string.
Required Materials for Bat Handprints
- Washable jet-black tempera paint
- Heavyweight purple or dark navy cardstock paper
- Black construction paper scraps for round bodies
- Red paper circles for glowing vampire eyes
- White paint pen for drawing tiny pointy fangs
- Child-safe school glue and craft scissors
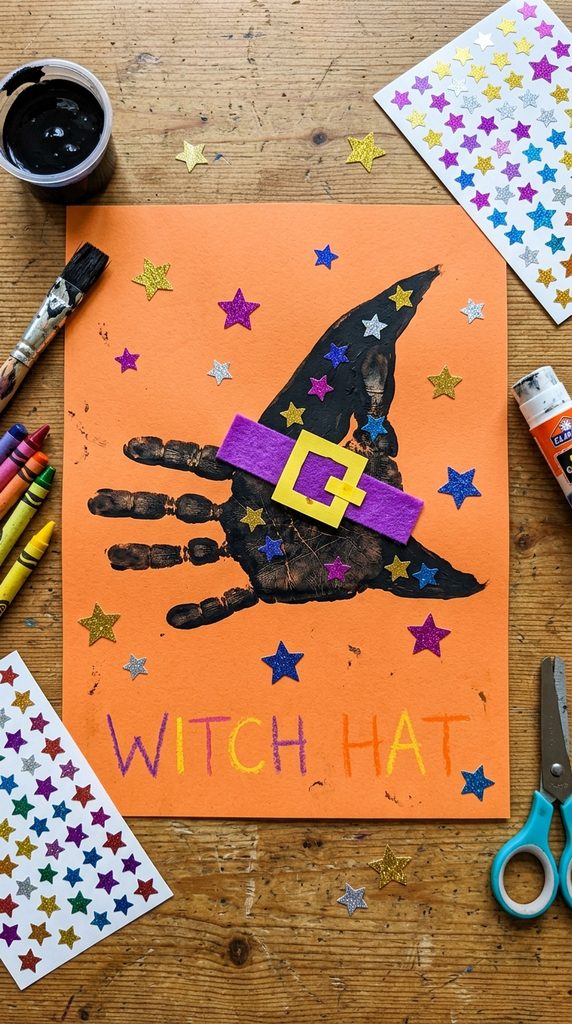
7. Magical Flying Witch Handprint Hats
Pointy Chapeaux Hovering Over Bright Orange Moonlit Skies
Witches fly across glowing full moons on broomsticks in folklore. By stamping a handprint sideways, toddlers create pointed witch hat brims. Painting a cone shape above completes the magical costume.
Additionally, adding glitter and bright buckles sparks endless imagination. Children can display their magical hats proudly across bedroom walls. It blends artistic painting with festive holiday storytelling. This dual-purpose craft keeps children engaged and proud.
How to Create Witch Hat Handprints Step-by-Step
Start by painting your toddler’s hand with black paint. Next, press their hand sideways onto bright orange paper. The thumb forms the pointed tip of the witch hat.
Then, lift the hand cleanly and let the black dry. Paint a vibrant purple band across the hat base area. Glue a shiny yellow paper buckle directly onto the purple band. Afterward, let toddlers add sparkling star stickers all around. Finally, write a fun magical phrase on the bottom.
Required Materials for Witch Hat Handprints
- Washable black and purple tempera paints
- Bright orange cardstock or textured yellow paper
- Yellow craft foam sheets for cutting buckles
- Sparkling adhesive star stickers or loose glitter
- Child-safe school glue and safety scissors
- Wet washcloths for fast hand cleanup
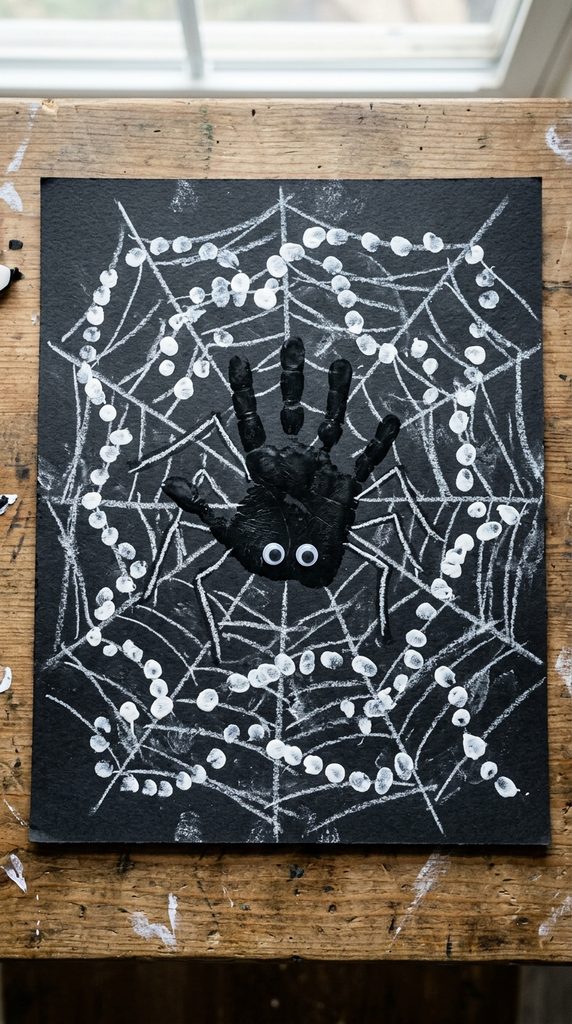
8. Tangled Spider Web Fingerprint Trails
Creepy-Crawly Arachnids Weaving Silk Across Paper
Spiders weave intricate silk webs in dark corner rafters. Stamping little fingerprints in circular patterns creates realistic webs. Adding a tiny handprint spider completes the creepy scene.
Furthermore, this fine motor activity improves finger placement precision. Kids love stamping multiple fingerprint dots across geometric lines. It delivers high visual satisfaction using very basic supplies. Your refrigerator will look like a spooky spider grotto.
How to Create Spider Web Handprints Step-by-Step
First, draw intersecting white lines across black paper with chalk. Next, have toddlers stamp white fingerprint dots connecting the lines. This creates a delicate woven spider web pattern.
Then, paint your toddler’s palm black to make the spider. Press the black palm in the center of the white web. Lift the hand gently and let the black paint dry. Afterward, glue two small plastic googly eyes onto the spider. Finally, draw eight curved legs extending from the black palm.
Required Materials for Spider Web Handprints
- Washable white and black tempera paints
- Heavyweight black cardstock paper sheets
- White chalk pencil for drawing web frameworks
- Small plastic adhesive wiggle googly eyes
- Fine-tip white permanent paint marker pens
- Foam sponge paintbrushes for hand painting
9. Sweet Candy Corn Handprint Cones
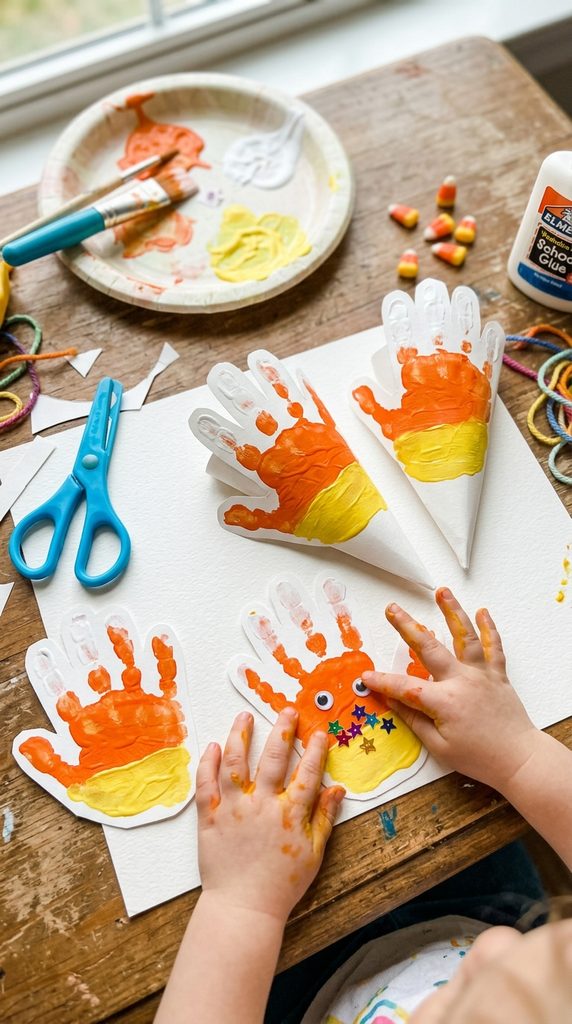
Layered Yellow, Orange, and White Tri-Color Keepsakes
Candy corn brings instant retro autumn nostalgia to seasonal crafting. This handprint craft captures the iconic tri-color gradient perfectly. Painting fingers in three colored stripes builds color-matching skills.
Moreover, this quick pattern requires minimal drying time and mess. The simple handprint shape works up in less than thirty minutes. It makes fantastic festive bowl fillers or cute greeting cards. You will want to create a whole batch of candies.
How to Create Candy Corn Handprints Step-by-Step
Start by painting your toddler’s fingertips white, palms orange. Paint the wrist base in bright sunny yellow tempera paint. Next, press the tri-color painted hand onto heavy paper.
Then, lift the hand cleanly to reveal layered candy colors. Let the painted candy corn print dry completely flat. Use a fine black marker to draw a sweet smiling face. Afterward, cut around the handprint shape with safety scissors. Finally, display your sweet candy corn handprints on doors.
Required Materials for Candy Corn Handprints
- Washable white, orange, and yellow tempera paints
- Heavyweight cream or white drawing cardstock
- Fine-tip black permanent marker coloring pens
- Foam sponge paintbrushes for striping colors
- Child-safe craft safety scissors for trimming
- Wet washcloths for instant hand sanitizing
10. Glowing Jar Handprints Full of Fireflies
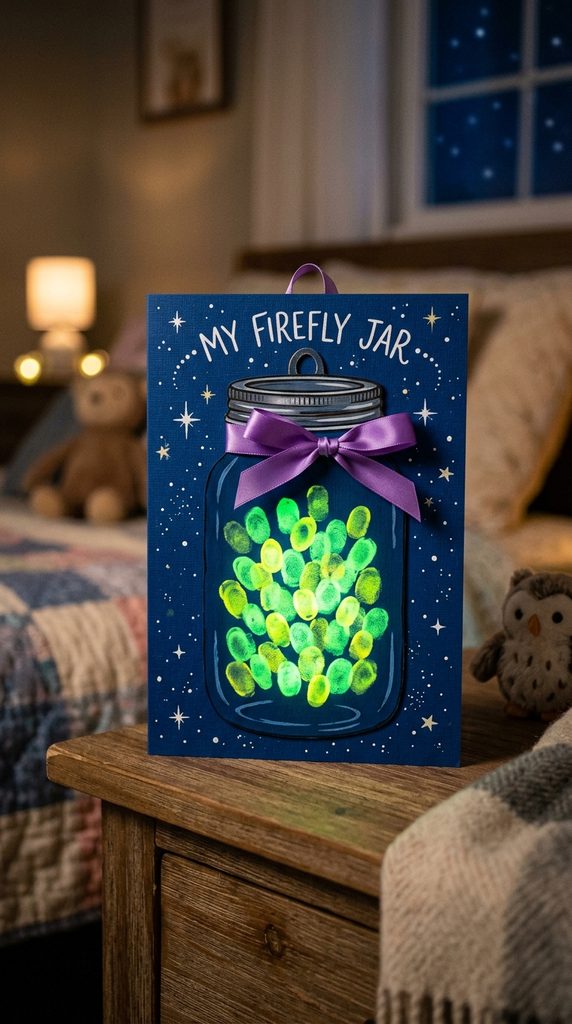
Mason Jars Trapping Spooky Green Magical Spirits
Glass jars from discount aisles make magical glowing potion containers. Stamping green fingerprints inside a painted jar creates glowing lights. When children view their glowing jar, it feels enchanting.
Furthermore, this craft teaches children about color layering and light. It serves as a comforting, friendly seasonal keepsake for bedrooms. Kids will adore watching their handmade glowing jar sparkle. It is an affordable, mess-free project perfect for toddlers.
How to Create Glowing Jar Handprints Step-by-Step
First, paint a mason jar silhouette on blue cardstock paper. Next, paint your toddler’s fingertips with bright neon green paint. Press little glowing green fingerprints inside the painted jar outline.
Then, let the glowing green fingerprints dry for twenty minutes. Use a white paint pen to draw sparkling starlight around jars. Afterward, tie a purple ribbon bow around the jar neck. Finally, write “Spooky Magic” across the glass top border.
Required Materials for Glowing Jar Handprints
- Washable neon green and grey tempera paints
- Deep blue or midnight black cardstock paper
- Opaque white fine-tip permanent paint pen
- Purple satin ribbon scraps for jar bows
- Foam sponge brushes for painting jar outlines
- Wet paper towels for easy toddler hand cleanup
11. Creepy-Cute Handprint Mummy Wraps
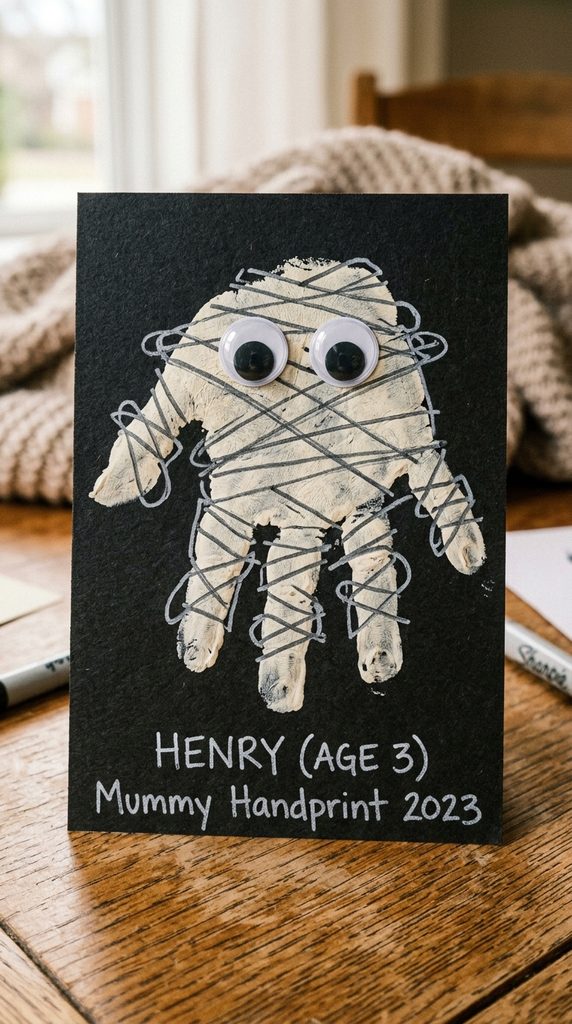
Wrapped Bandage Phantoms with Peeking Googly Eyes
Ancient mummies get a delightfully cozy, lovable update in handprint art. Stamping a white handprint provides a base for wrapped bandages. Drawing criss-cross lines across fingers creates authentic gauze wraps.
Moreover, having big googly eyes peeking out between lines looks charming. It eliminates complex painting while creating rich tactile depth. Beginners will enjoy the playful, freeform drawing technique used here. It makes a fantastic holiday party keepsake for families.
How to Create Mummy Handprints Step-by-Step
Start by painting your toddler’s hand with off-white paint. Next, press their painted hand firmly onto black cardstock paper. Lift the hand gently and let the white paint dry.
Then, use a fine black marker to draw bandage lines. Draw criss-cross diagonal lines across the palm and fingers. Glue two large plastic googly eyes near the palm top. Allow the glue to dry completely for fifteen minutes. Afterward, write your toddler’s name and age below. Finally, frame your spooky mummy keepsake on walls.
Required Materials for Mummy Handprints
- Washable antique off-white tempera paint
- Heavyweight black construction paper sheets
- Large plastic adhesive wiggle googly eyes
- Fine-tip black permanent marker drawing pens
- Foam sponge brushes for applying white paint
- Wet washcloths for quick toddler hand cleanup
12. Spooky Skeleton Handprint Bone X-Rays
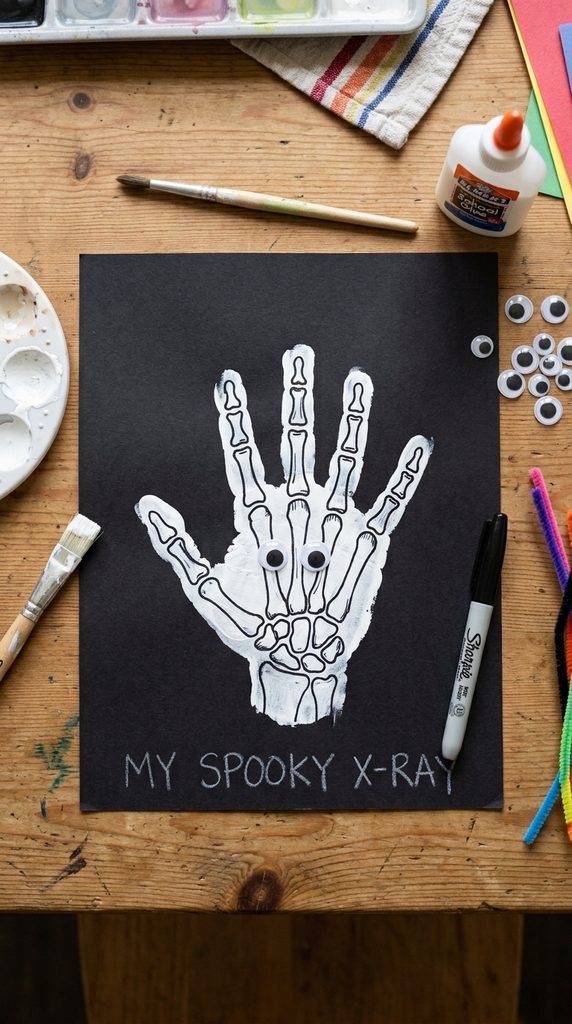
Eerie White Hand Bones Glowing on Dark Backgrounds
Skeleton hands offer an eerie, scientific X-ray aesthetic for kids. Stamping white handprints onto black paper creates glowing bone art. Adding painted finger bone segments completes the spooky illusion.
Additionally, this anatomy-inspired craft sparks giggles and storytelling. Kids can study their own hand bones while making art. It uses basic supplies you likely already have in cupboards. This classic craft delivers huge creative entertainment value.
How to Create Skeleton Handprints Step-by-Step
First, paint your toddler’s entire hand and wrist with white paint. Next, press the hand firmly onto black cardstock paper. Lift the hand carefully to reveal a bright white print.
Then, let the white handprint dry fully on paper. Use a fine black marker to draw horizontal bone joints. Draw short lines across each finger to show knuckle bones. Afterward, glue two small plastic googly eyes in the palm. Finally, write “Spooky X-Ray” across the bottom margin.
Required Materials for Skeleton Handprints
- Washable bright white tempera paint
- Heavyweight black construction paper sheets
- Fine-tip black permanent marker pens
- Small plastic adhesive wiggle googly eyes
- Foam sponge brushes for smooth paint coverage
- Wet washcloths for instant toddler hand cleanup
13. Happy Harvest Corn Handprint Cobs
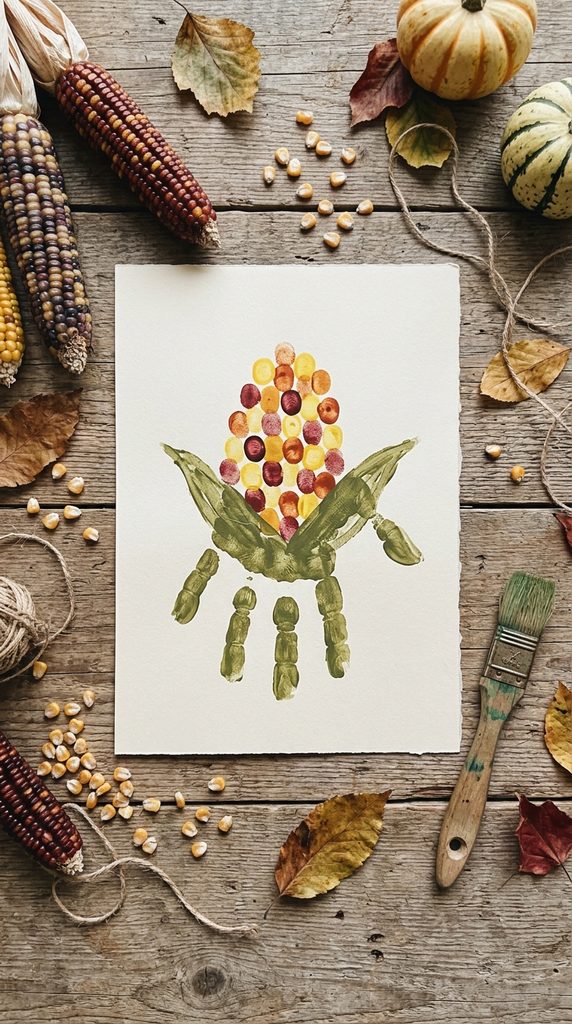
Golden Autumn Kernels Stacked on Husks
Field corn brings rustic harvest beauty to autumn art projects. Stamping colorful fingerprint kernels over handprint husks creates cobs. Using yellow, red, and orange paint mimics heirloom corn.
Furthermore, this multi-colored fingerprint activity improves fine motor dexterity. Kids love pressing varied colored dots across cardstock paper. It turns simple finger stamping into lasting festive keepsakes. This durable craft celebrates natural autumn harvest bounty wonderfully.
How to Create Corn Handprints Step-by-Step
Begin by painting your toddler’s hand with olive green paint. Next, press their hand upside down onto cream cardstock paper. This green handprint forms the corn husk leaves.
Then, let the green husk handprint dry completely flat. Have toddlers dip fingertips into yellow, red, and orange paint. Stamp colorful fingerprint kernels in rows down the center. Afterward, let the kernel fingerprints dry for twenty minutes. Finally, frame your finished harvest corn keepsake proudly.
Required Materials for Harvest Corn Handprints
- Washable olive green, yellow, red, and orange paints
- Heavyweight cream or off-white drawing cardstock
- Foam sponge paintbrushes for painting green husks
- Paper plates for pouring multi-colored paint dots
- Wet washcloths for easy toddler hand sanitizing
- Child-safe school glue and safety scissors