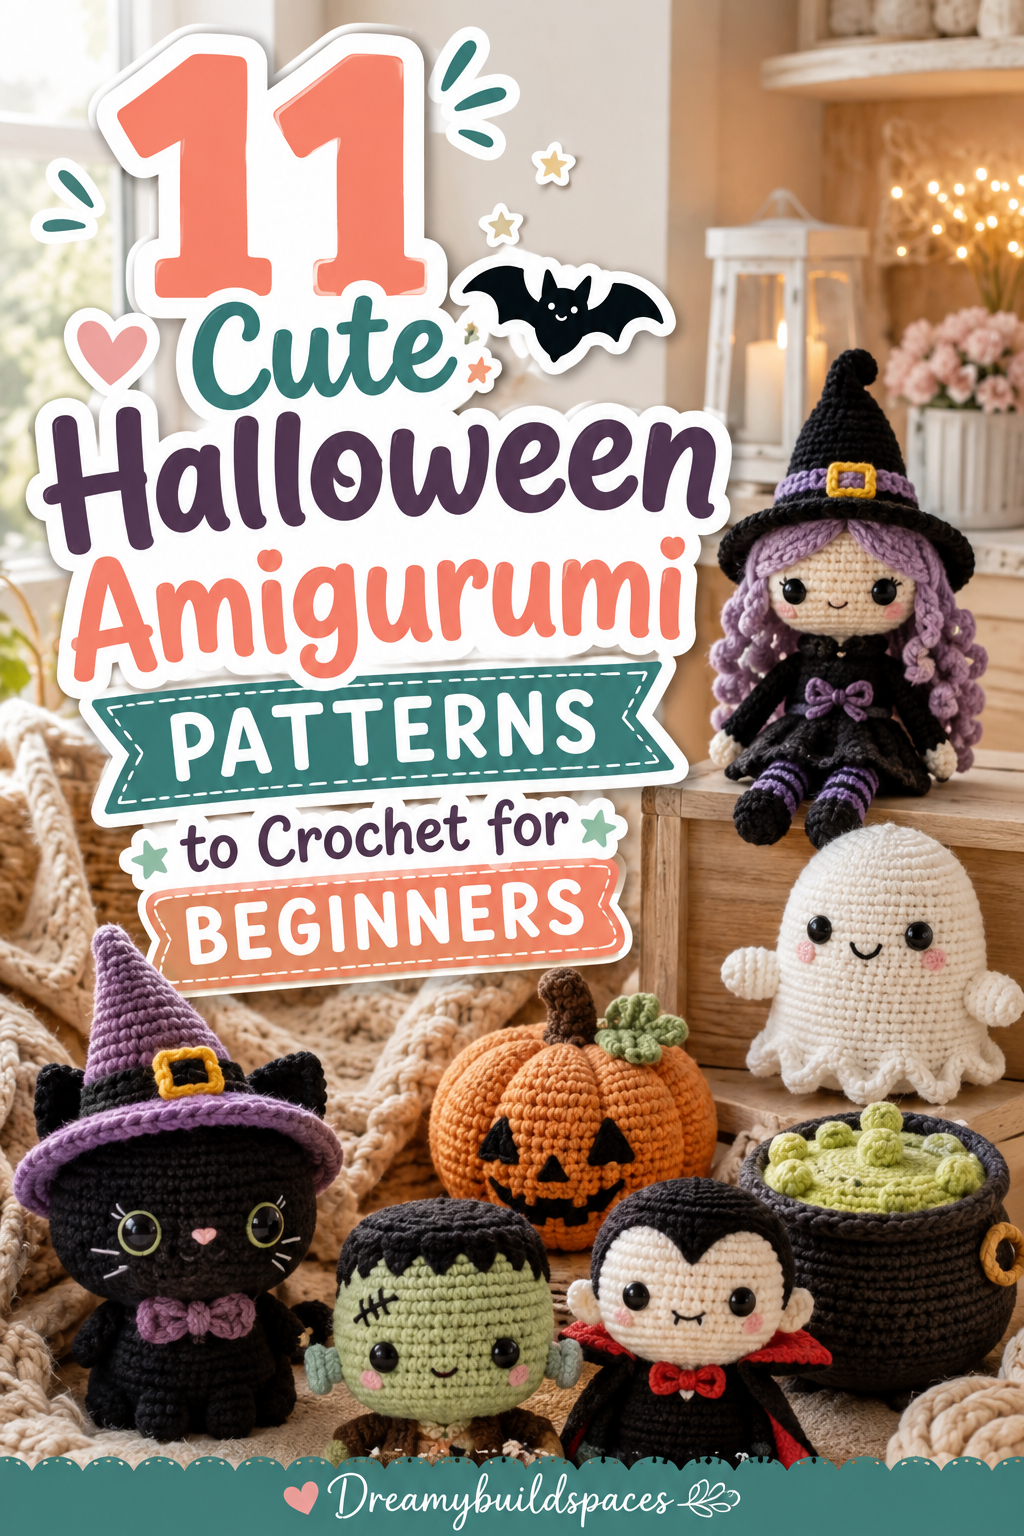
11 Cute Halloween Amigurumi Patterns to Crochet for Beginners
Autumn crafting brings an incredible sense of creative warmth to fiber artists everywhere. When chilly October evenings arrive, crocheters love curling up with colorful yarn bundles. However, complex multi-piece crochet patterns often overwhelm ambitious beginners. Detailed garment construction or difficult shaping techniques can cause frustration fast. Fortunately, adorable Halloween amigurumi patterns offer the perfect relaxing creative solution.
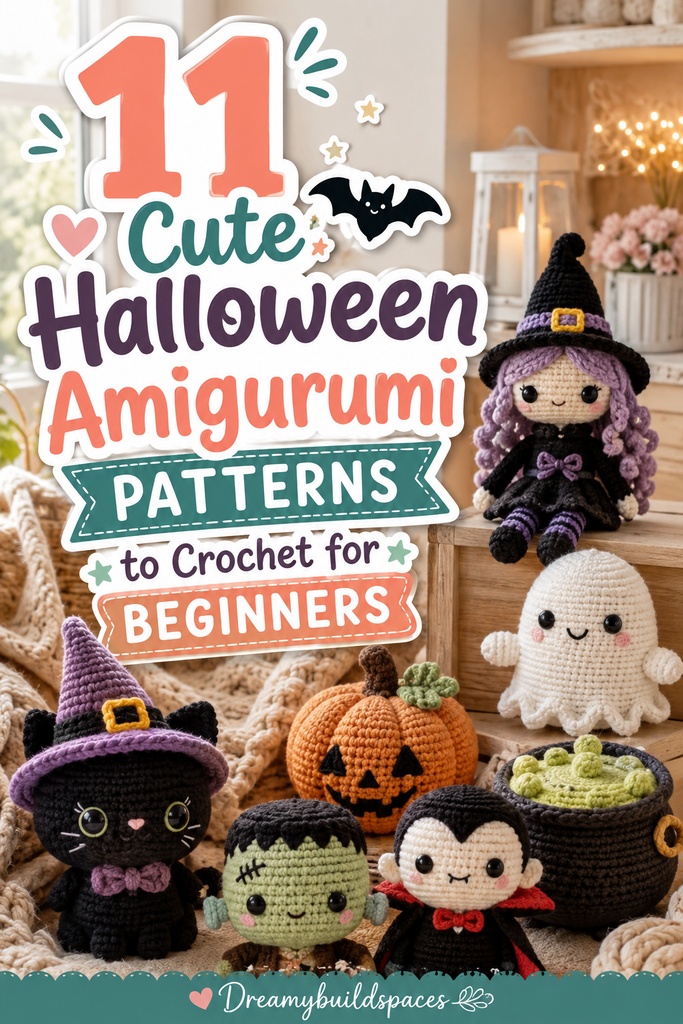
Furthermore, these quick miniature projects deliver instant artistic satisfaction without stress. You can easily craft charming festive plushies in just a single sitting. These eleven beginner-friendly ideas focus on simple stitches and cute shapes. Consequently, your handmade seasonal collection will look completely professional, sweet, and store-bought.
Why Cute Halloween Amigurumi Goes Viral on Pinterest
Social media feeds thrive on cute, aesthetic crochet projects every autumn. Crafters constantly share heartwarming photos of miniature plushies styled on desks. In addition, pastel color palettes and chubby proportions captivate audiences worldwide. Soft plush chenille yarns and safety eyes give characters instant personality.
Therefore, creating cohesive miniature Halloween amigurumi collections guarantees huge online engagement. You can effortlessly share your crafting journey while celebrating festive folklore. Moreover, handmade plushies make cherished seasonal gifts for friends and children. They also sell exceptionally well at autumn craft fairs and boutique markets. Your handmade crochet art brings joyful smiles to everyone who sees it.
Essential Foundation Skills for Beginner Amigurumi Success
Starting your first three-dimensional crochet project requires mastering basic techniques. Luckily, amigurumi relies primarily on one fundamental stitch: the single crochet. Once you master working in continuous spiral rounds, possibilities become endless. In addition, learning the magic ring technique creates flawless, closed center tops.
Using invisible decrease stitches prevents unsightly gaps where white stuffing shows. Furthermore, placing locking stitch markers ensures you never lose count of rounds. These approachable foundational skills build confidence quickly with every row completed. You will discover that shaping miniature spheres and cones feels delightfully intuitive. Soon, you will breeze through cute seasonal characters with absolute ease.
Choosing the Best Yarns and Hooks for Amigurumi
Selecting the right yarn fibers determines the finished plushie texture greatly. For smooth, defined stitch definition, standard worsted-weight acrylic yarn works wonders. It comes in countless vibrant autumn shades and stays wonderfully affordable. Alternatively, super-bulky plush chenille yarn creates ultra-soft, huggable giant plushies.
When choosing crochet hooks, always select a size smaller than labeled. This intentional hook downsizing creates tight, dense fabric without gaps. Consequently, your polyester fiberfill stuffing stays neatly concealed inside the toy. High-contrast plastic safety eyes add that signature charming, expressive gaze. High-quality basic materials ensure your completed toys withstand years of cozy cuddles.
Stress-Free Tips for Assembly and Embroidered Details
Assembling multiple crochet pieces can sometimes feel intimidating for beginners. Fortunately, a few simple tricks make sewing parts together completely seamless. First, leave long yarn tails on all limbs when fastening off. Use a blunt metal tapestry needle to whip-stitch parts securely onto bodies.
Additionally, inserting pearl-head straight pins holds pieces in place while stitching. Embroidering sweet smiles with black embroidery floss brings characters to life. Pink powder blush brushed onto yarn cheeks adds irresistible warmth. Take your time enjoying the relaxing final assembly stage of every toy. Your finished amigurumi pieces will look remarkably polished and full of love.
Building Your Beginner Autumn Crochet Stash
Gathering your essential crochet supplies in advance ensures smooth, uninterrupted crafting. Pick up skeins of pumpkin orange, ghost white, lavender, and black yarn. Also, gather ergonomic crochet hooks, locking stitch markers, and sharp yarn snips.
Keep premium polyester fiberfill stuffing and black safety eyes within arm’s reach. A sturdy storage basket keeps all your active autumn projects tidy. Having supplies ready eliminates delays so you can crochet anytime inspiration strikes. Your hands will stay happily busy throughout the entire cozy autumn season. Now, let us explore eleven adorable Halloween amigurumi patterns for beginners.
1. Chubby Little Sheet Ghost with Blush Cheeks
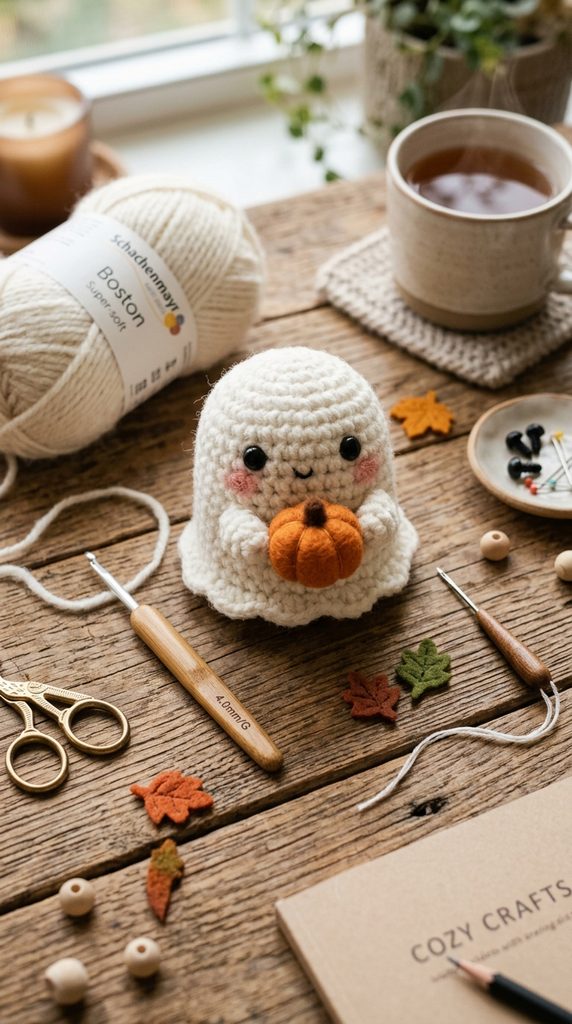
The Classic Floating Phantom with an Adorable Round Makeover
Ghosts are an essential staple of festive Halloween decor and folklore. However, this chubby miniature amigurumi ghost emphasizes pure sweetness over spookiness. It works up quickly using basic single crochet stitches in continuous rounds.
Furthermore, the soft bell-shaped base creates a self-standing, chubby silhouette. Adding rosy pink cheeks gives the tiny phantom an irresistible, friendly expression. It makes a delightful desk buddy or sweet handmade keychain charm. Beginners will love how fast this minimal-sewing project comes together smoothly.
How to Crochet the Chubby Ghost Step-by-Step
First, create a magic ring and work six single crochet stitches inside. Next, increase evenly in continuous spiral rounds until you reach thirty stitches. Work even rounds without increases to build the ghost’s rounded body height.
Then, insert two black plastic safety eyes between rounds eight and nine. Stuff the hollow head firmly with clean polyester fiberfill stuffing. Afterward, work a round of shell stitches into front loops for wavy skirts. Work invisible decreases into back loops to close the bottom base completely. Finally, brush pink powder blush beneath eyes and embroider a tiny smile.
Required Materials for Chubby Ghost
- Worsted weight soft white acrylic yarn (or plush chenille)
- Size 3.5mm (E/4) ergonomic crochet hook
- Pair of 8mm black plastic safety eyes with washers
- Polyester cluster fiberfill toy stuffing
- Blunt-tip steel yarn tapestry needle and stitch markers
- Pink makeup powder blush and cotton swab applicator
2. Miniature Ribbed Candy Corn Plush
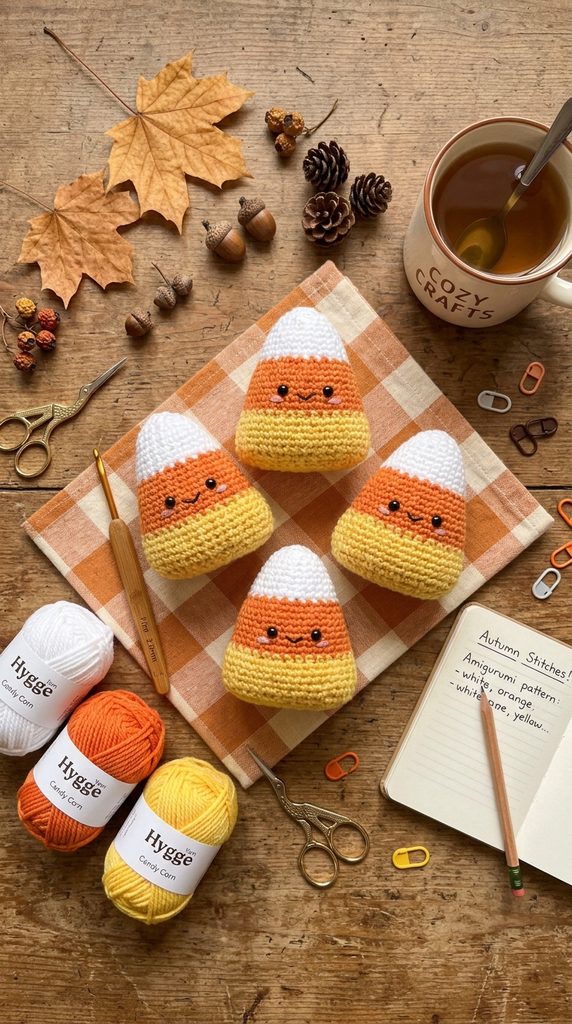
Nostalgic Tri-Color Autumn Treats with Sweet Smiling Faces
Candy corn brings instant retro autumn nostalgia to any seasonal display. This triangular amigurumi plushie captures the iconic tri-color gradient perfectly. Transitioning smoothly between yellow, orange, and white yarn builds color-changing skills.
Moreover, this quick pattern requires practically zero post-crochet sewing assembly. The simple conical shape works up in less than forty-five minutes. It makes fantastic festive bowl fillers or cute trick-or-treat bag charms. You will want to crochet a whole batch of these sweet candies.
How to Crochet the Candy Corn Step-by-Step
Start with white yarn, working four single crochet stitches into magic rings. Next, work increase rounds gradually to form a gentle cone point. Change colors cleanly to bright pumpkin orange yarn at round six.
Then, continue increasing stitches evenly to widen the conical candy shape. Switch to bright sunny yellow yarn for the final six base rounds. Insert safety eyes into the orange section and stuff firmly with fiberfill. Afterward, work rapid decrease rounds along the flat bottom yellow edge. Fasten off yarn, leaving an eight-inch tail, and weave ends through loops. Finally, embroider a tiny black mouth between the eyes using floss.
Required Materials for Candy Corn
- Worsted weight yarn in bright white, pumpkin orange, and yellow
- Size 3.75mm (F/5) crochet hook
- Pair of 6mm black safety eyes with backings
- Poly-fil premium polyester fiberfill stuffing
- Black cotton embroidery floss and sharp sewing needle
- Locking plastic stitch markers for tracking rounds
3. Tiny Witch’s Cauldron with Bubbling Brew
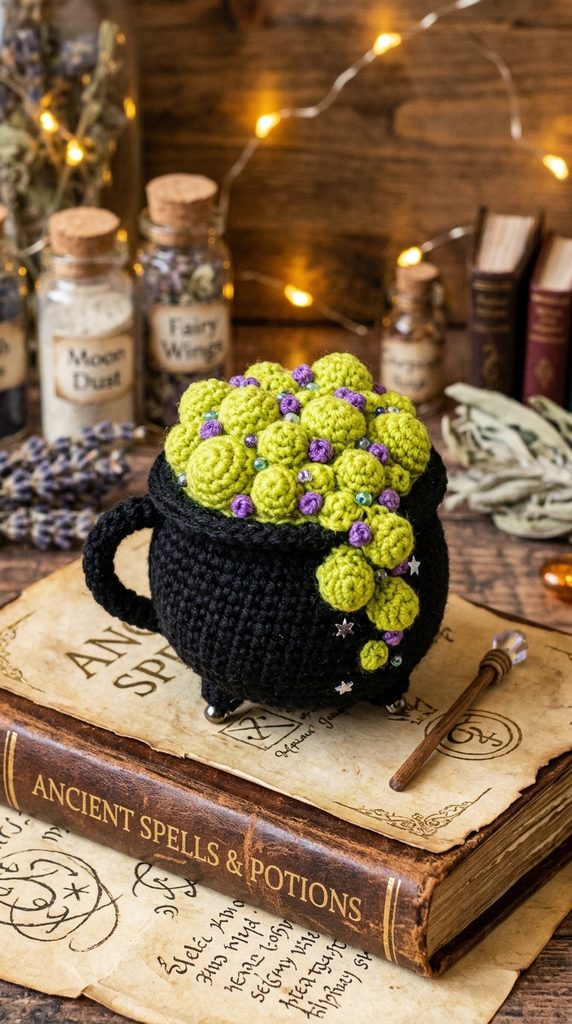
Miniature Spellcasting Kettles Overflowing with Bubbly Potion
Every cute amigurumi witch needs a magical bubbling cauldron for potions. This adorable pattern creates a sturdy, wide-bellied black kettle with handles. Filling the rim with bright lime-green bobble stitches mimics boiling brew.
Additionally, the structured flat base allows the tiny pot to sit upright. It makes an enchanting seasonal pincushion or whimsical holiday table trinket. Beginners get to practice creating textured bobble stitches and working back loops. It adds a wonderfully magical touch to your handmade autumn collection.
How to Crochet the Tiny Cauldron Step-by-Step
Begin with matte black yarn, working six single crochet into magic rings. Next, increase in rounds until reaching a flat base of thirty-six stitches. Work one round in back loops only to create a sharp bottom rim.
Then, build the rounded cauldron belly with several regular single crochet rounds. Work two decrease rounds near the neck, then flare out the top rim. Switch to vibrant lime-green yarn and crochet alternating bobble stitches inside. Stuff the cauldron firmly before finishing the green potion top circle. Afterward, crochet two small chain loops and sew onto cauldron sides for handles. Finally, embroider tiny purple French knots onto brew for magical bubbles.
Required Materials for Tiny Cauldron
- Worsted weight acrylic yarn in matte black and neon lime green
- Size 3.5mm crochet hook
- Polyester fiberfill stuffing for shaping
- Purple and orange cotton embroidery floss
- Yarn needle with large eye for attaching handles
- Handful of plastic weighting pellets for base stability
4. Pocket-Sized Frankenstein Monster
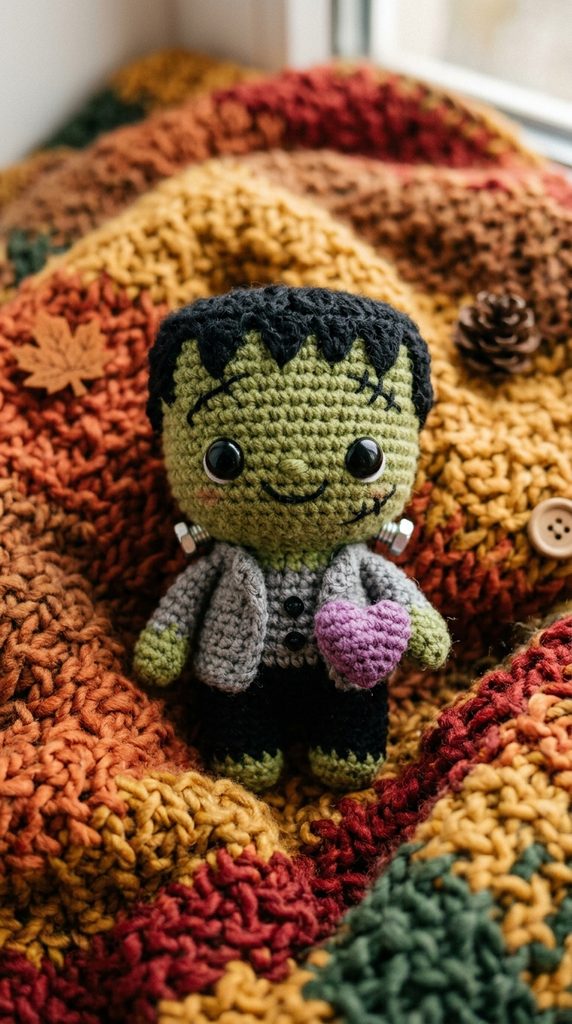
Gentle Green Giants with Cozy Stitched Details
Frankenstein’s monster gets an adorable, friendly makeover in this miniature pattern. The simple rectangular body makes crocheting the head and torso easy. Adding jagged black hair and embroidered facial stitches completes the look.
Furthermore, this beginner-friendly project requires minimal limb attachment steps. The charming square proportions give this gentle monster tons of quirky personality. Kids will love carrying this squishy little green pal in their pockets. It proves that classic Halloween monsters can be delightfully sweet and huggable.
How to Crochet Frankenstein Step-by-Step
First, use bright lime-green yarn to crochet an eight-stitch magic ring. Next, increase in corner spaces to form a soft square block head. Work even rounds downward with green yarn to build the head length.
Then, switch to matte black yarn to create the shirt and body. Insert safety eyes into the green face and stuff firmly with polyfill. Close the bottom of the body using standard single crochet decreases. Afterward, crochet a jagged black hair cap featuring alternating chain points. Sew the hair cap securely atop the green square head with black yarn. Finally, embroider a crooked smile and forehead stitches with black floss.
Required Materials for Pocket Frankenstein
- Worsted weight yarn in lime green, matte black, and dark grey
- Size 3.5mm (E/4) crochet hook
- Pair of 8mm black plastic craft safety eyes
- Premium polyester fiberfill toy stuffing
- Black embroidery thread and tapestry needle
- Two small silver buttons for neck bolts
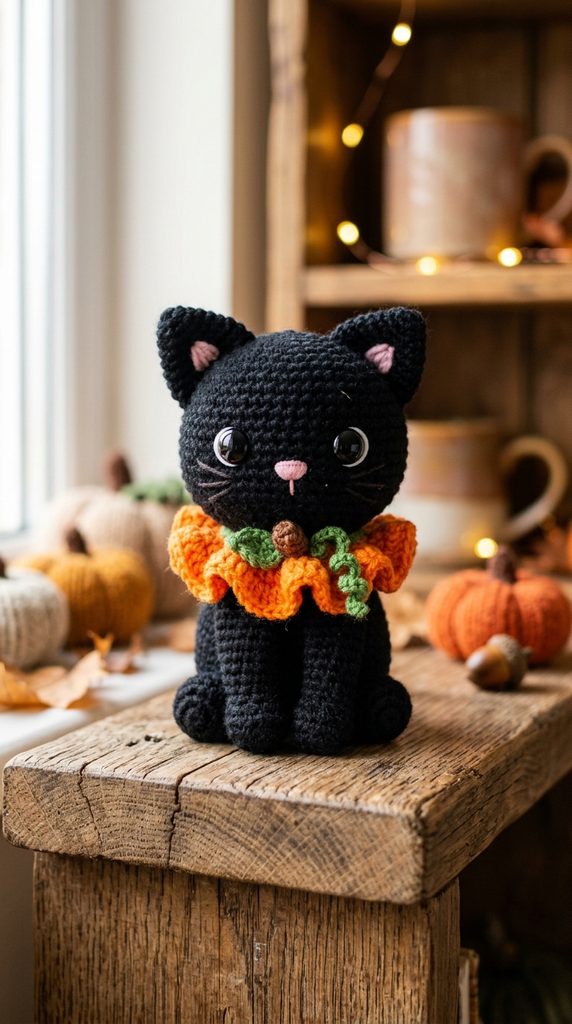
5. Petite Black Cat with Pumpkin Collar
Sleek Feline Companions Dressed in Festive Autumn Frills
Black cats represent timeless Halloween folklore, mystery, and cozy companionship. This petite amigurumi cat features a simple teardrop body and pointy ears. Adding a bright orange frilly pumpkin collar gives it festive seasonal charm.
Moreover, this pattern is wonderful for practicing seamless ear and tail attachments. The monochrome black body works up exceptionally fast with basic stitches. It makes a sophisticated, charming gift for cat lovers and crafters alike. Your handmade feline friend will look darling sitting upon any bookshelf.
How to Crochet the Petite Cat Step-by-Step
Start with jet-black yarn, working six single crochet into a magic ring. Next, increase in rounds to shape a rounded feline head and body. Stuff the body firmly with fiberfill as your crochet work progresses downward.
Then, close the bottom base and weave yarn ends in securely. Crochet two small triangular ear cones and sew onto the head top. Afterward, crochet a long skinny chain tail and attach to the lower back. Create a separate ruffled collar using bright orange yarn and double crochets. Tie the orange pumpkin collar snugly around the cat’s neck with yarn. Finally, use white embroidery floss to stitch delicate whiskers across the muzzle.
Required Materials for Petite Black Cat
- Worsted weight yarn in jet black and pumpkin orange
- Size 3.25mm (D/3) crochet hook
- Pair of 8mm green or gold plastic safety eyes
- Polyester cluster fiberfill stuffing
- White embroidery floss for delicate facial whiskers
- Stitch markers and steel tapestry sewing needle
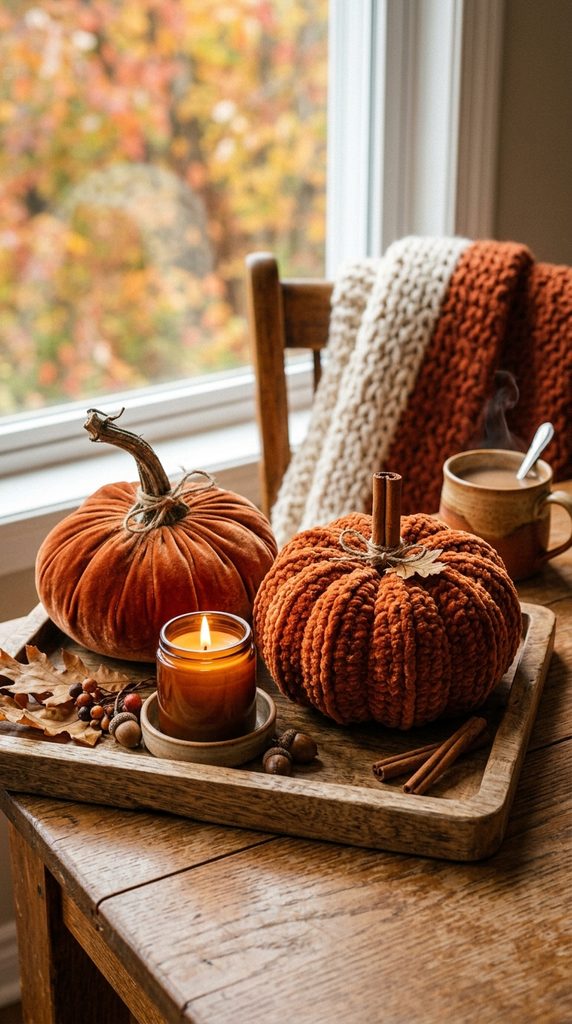
6. Squishy Velvet Heirloom Pumpkin
Luxurious Tactile Gourds with Organic Cinnamon Stick Stems
Crochet pumpkins are the ultimate autumn staple for every cozy home. Using plush velvet or chenille yarn elevates basic pumpkins into luxury decor. This beginner method uses a simple flat ribbed rectangle sewn into spheres.
Additionally, inserting a real natural cinnamon stick stem provides delightful fragrance. You do not even need to crochet in rounds to master this. It is the easiest, most relaxing project for complete crochet beginners. You can whip up an entire pumpkin patch in one cozy evening.
How to Crochet Velvet Pumpkins Step-by-Step
Begin by chaining twenty-five stitches using plush burnt-orange velvet yarn. Next, work single crochet stitches across the chain row in back loops. Continue working back-loop single crochets for roughly thirty-five rows.
Then, fold the ribbed crochet rectangle in half, matching short end edges. Slip-stitch the two ends together to form an open yarn cylinder tube. Use a tapestry needle to gather and cinch the bottom opening tightly. Stuff the hollow cylinder generously with soft polyester fiberfill stuffing. Gather the top opening tightly, pulling yarn through the center to shape ridges. Finally, hot-glue a natural cinnamon stick into the center top cavity.
Required Materials for Velvet Pumpkin
- Super bulky plush velvet or chenille yarn in burnt orange or cream
- Size 5.0mm (H/8) ergonomic crochet hook
- Real natural dried cinnamon sticks for stems
- Polyester fiberfill toy stuffing
- Heavy-duty craft hot glue gun and glue sticks
- Large-eye metal yarn tapestry needle
7. Cute Hanging Bat with Foldable Wings
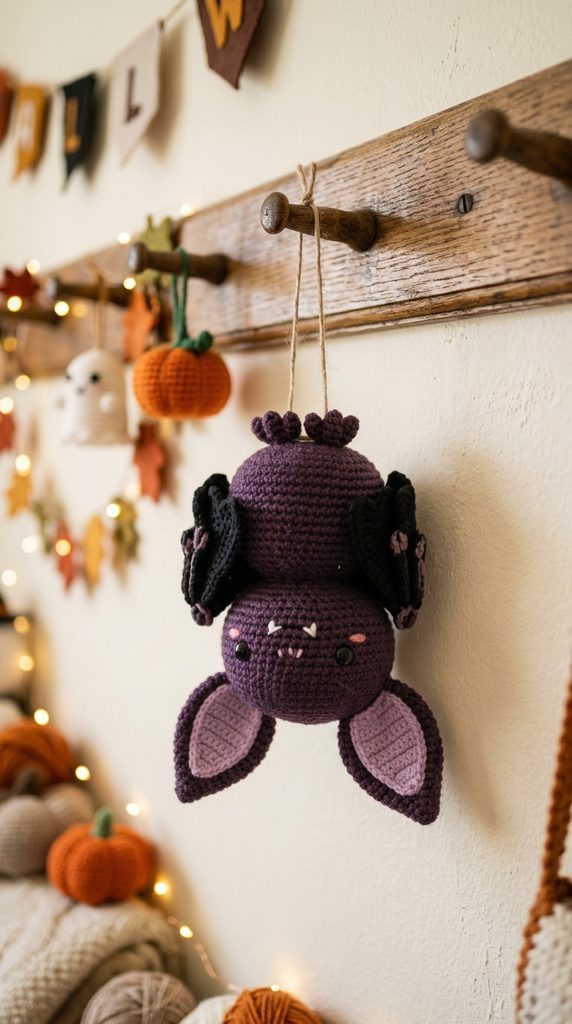
Adorable Nocturnal Pals Hanging Gently from Shelves
Bats are often depicted as scary, but this amigurumi bat is pure sweetness. Featuring a round chubby body, oversized ears, and scalloped wings, it charms everyone. You can easily pose the wings folded over the tummy or open.
Furthermore, crocheting the flat wings teaches beginners basic stitch height variations. Hanging this tiny bat upside-down from curtain rods adds playful holiday cheer. It uses very little yarn, making it an excellent stash-busting project. This friendly winged buddy will quickly become a favorite seasonal make.
How to Crochet the Hanging Bat Step-by-Step
First, work six single crochet stitches into a magic ring with purple yarn. Next, increase in rounds to create a round sphere for the body. Insert safety eyes between rounds seven and eight, stuffing the body firmly.
Then, decrease to close the body base and fasten off yarn neatly. Crochet two flat semi-circle wings using single, half-double, and double crochet stitches. Create scalloped wing points along bottom edges with picot stitches. Sew the wings securely to both sides of the chubby purple body. Afterward, crochet two large triangular ears and attach to the head top. Finally, stitch tiny white felt fangs beneath the safety eyes with glue.
Required Materials for Hanging Bat
- Worsted weight yarn in deep purple and dark grey
- Size 3.5mm crochet hook
- Pair of 8mm black plastic safety eyes
- Small scrap of white crafting felt for tiny fangs
- Poly-fil polyester fiberfill stuffing
- Craft glue and large blunt yarn needle
8. Sweet Mummy with Peek-a-Boo Eyes
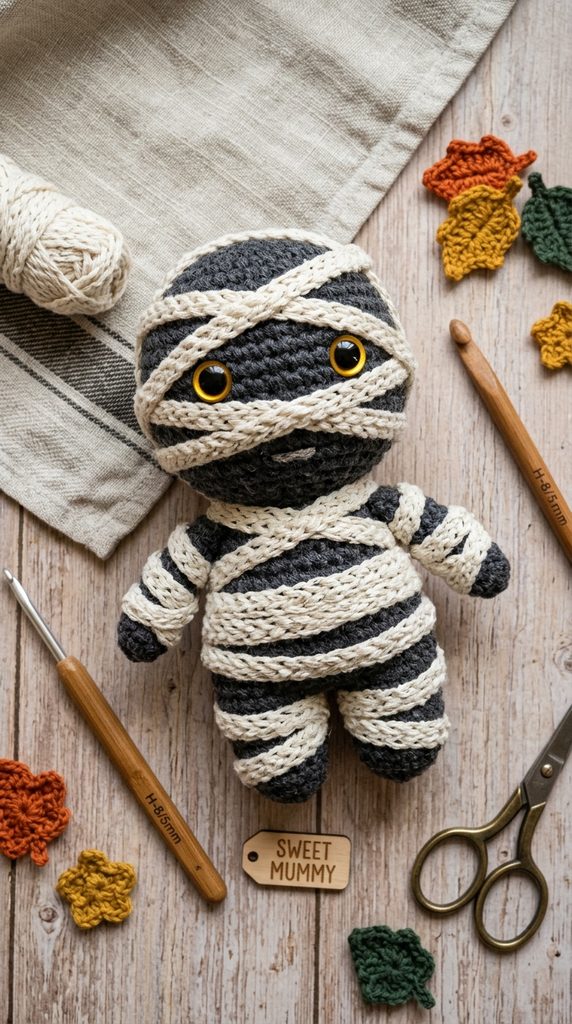
Cozy Bandage Wraps Concealing Golden Safety Eyes
Ancient mummies get a delightfully cozy, lovable update in this cute pattern. Crocheting a dark grey inner body provides a base for wrapped bandages. Wrapping textured off-white yarn chains around the body creates authentic layers.
Moreover, having big glowing safety eyes peeking out between wraps looks charming. It eliminates the need for complex colorwork while creating rich, tactile depth. Beginners will enjoy the playful, freeform wrapping technique used on bandages. It makes a fantastic holiday party favor or cute festive tabletop accent.
How to Crochet the Sweet Mummy Step-by-Step
Start with dark charcoal yarn, working six single crochet into magic rings. Next, increase in continuous spiral rounds to form a cylinder body shape. Work even rounds downward to build the mummy’s torso and legs.
Then, insert bright yellow or gold safety eyes into the upper charcoal section. Stuff the hollow body firmly with fiberfill and decrease to close bottoms. Afterward, use off-white textured yarn to crochet several long chain strings. Wrap the white chain ribbons criss-crossed around the charcoal body securely. Allow the golden safety eyes to peek playfully between the wrapped layers. Finally, tack the bandage ends down using matching thread and needles.
Required Materials for Sweet Mummy
- Worsted weight yarn in dark charcoal and antique off-white
- Size 3.5mm (E/4) crochet hook
- Pair of 10mm golden-yellow plastic safety eyes
- Polyester cluster fiberfill toy stuffing
- Blunt metal tapestry needle for stitching bandages
- Locking stitch markers for keeping place
9. Friendly Cyclops Monster Baby
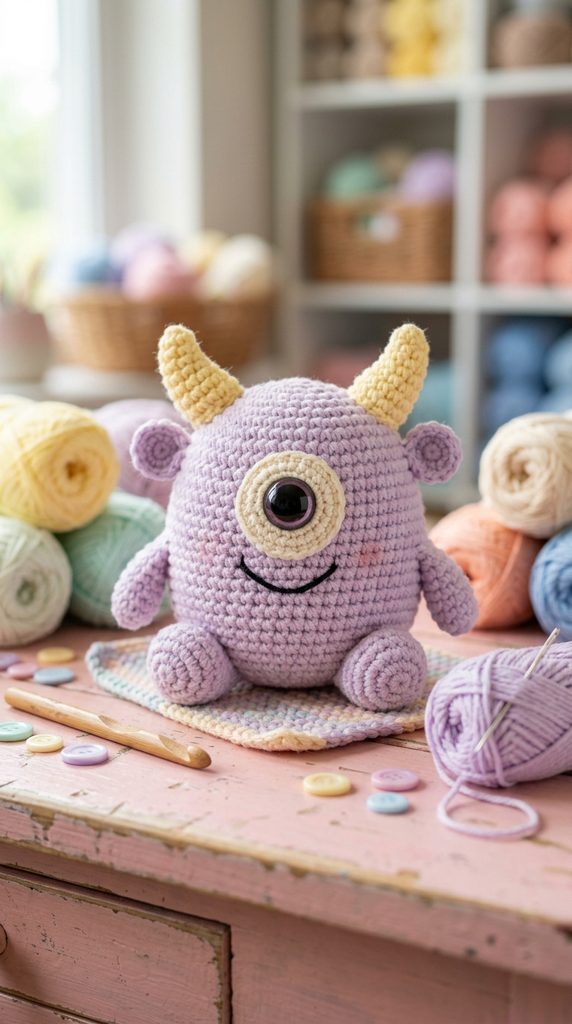
Charming One-Eyed Cuties in Bright Pastel Colors
Monster amigurumi allows for boundless creative freedom and playful color experimentation. This friendly cyclops baby features one oversized centered safety eye. Crocheting tiny horns and soft stubby arms gives it immense charm.
Additionally, working in bright pastels like mint green or lavender softens spooky themes. Beginners can practice shaping small curved horns and attaching tiny limbs cleanly. It is an approachable, cheerful project that works up in an afternoon. This lovable little monster will delight kids and monster fans alike.
How to Crochet the Cyclops Baby Step-by-Step
Begin with soft lavender yarn, working six single crochet into magic rings. Next, increase in rounds until reaching thirty stitches to shape heads. Work several even rounds to create a tall, rounded alien body.
Then, insert one giant 14mm plastic safety eye right in head centers. Stuff the body firmly with clean fiberfill before working decrease rounds. Close the bottom opening neatly and weave loose yarn tails inside. Afterward, crochet two tiny cone horns using soft pastel yellow yarn. Sew the horns atop the head and attach two small stubby arms. Finally, embroider a happy open-mouth smile beneath the giant eye with floss.
Required Materials for Cyclops Baby
- Worsted weight yarn in pastel lavender and buttercup yellow
- Size 3.75mm crochet hook
- Single 14mm large colored plastic safety eye
- Premium polyester fiberfill stuffing
- Black and pink cotton embroidery floss
- Steel yarn needle and locking stitch markers
10. Smiling Jack-o’-Lantern with Leafy Vine
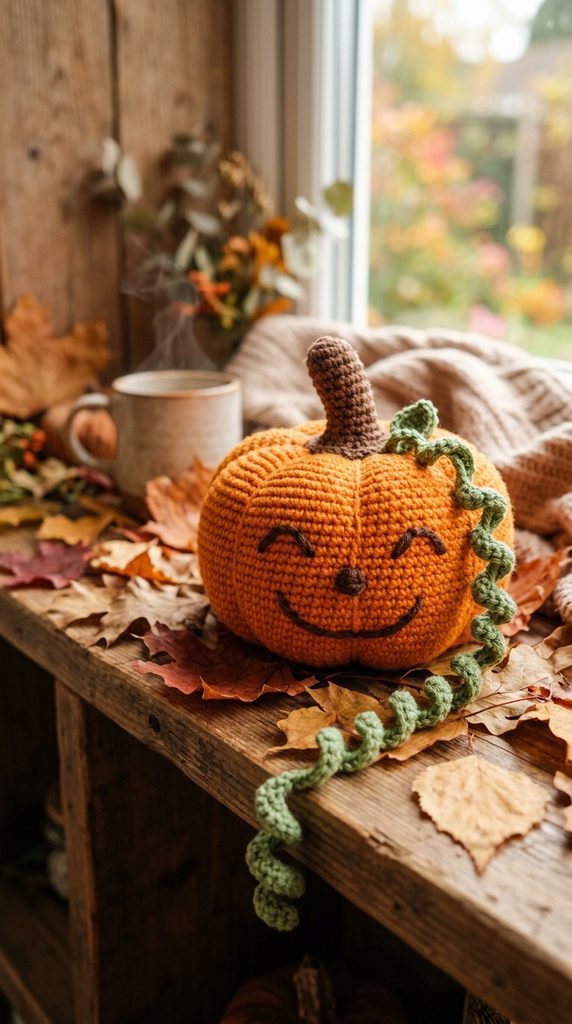
Cheerful Grinning Gourds with Playful Curly tendrils
Jack-o’-lanterns are the definitive glowing symbol of the autumn holiday season. This sweet amigurumi pumpkin features an embroidered cheerful face and green stem. Adding a spiraling curly vine tendril brings lively organic charm to tops.
Furthermore, pulling vertical yarn indentations creates authentic plump pumpkin ridges. This simple indentation technique teaches beginners how to sculpt plush toys easily. It looks wonderfully charming resting on mantles, desks, or tiered trays. You will enjoy making a whole patch of varied smiling faces.
How to Crochet the Smiling Pumpkin Step-by-Step
First, create an eight-stitch magic ring using vibrant pumpkin orange yarn. Next, increase evenly in rounds to build a wide spherical pumpkin shape. Work even rounds, then work gentle decreases while stuffing firmly with fiberfill.
Then, close the opening and leave an extra-long two-foot yarn tail. Thread the long tail through the center bottom to top repeatedly. Pull the yarn tight to create six deep, plump pumpkin segment ridges. Afterward, crochet a small brown stem and a curly green chain vine. Sew the stem and leafy vine securely onto the top center indent. Finally, embroider a cute smiling face using black yarn and straight stitches.
Required Materials for Smiling Pumpkin
- Worsted weight yarn in pumpkin orange, olive green, and warm brown
- Size 3.5mm crochet hook
- Polyester fiberfill toy stuffing
- Extra-long doll making needle for pulling center indentations
- Black acrylic yarn or embroidery floss for facial features
- Stitch markers and sharp yarn snips
11. Miniature Spider with Fluffy Striped Legs
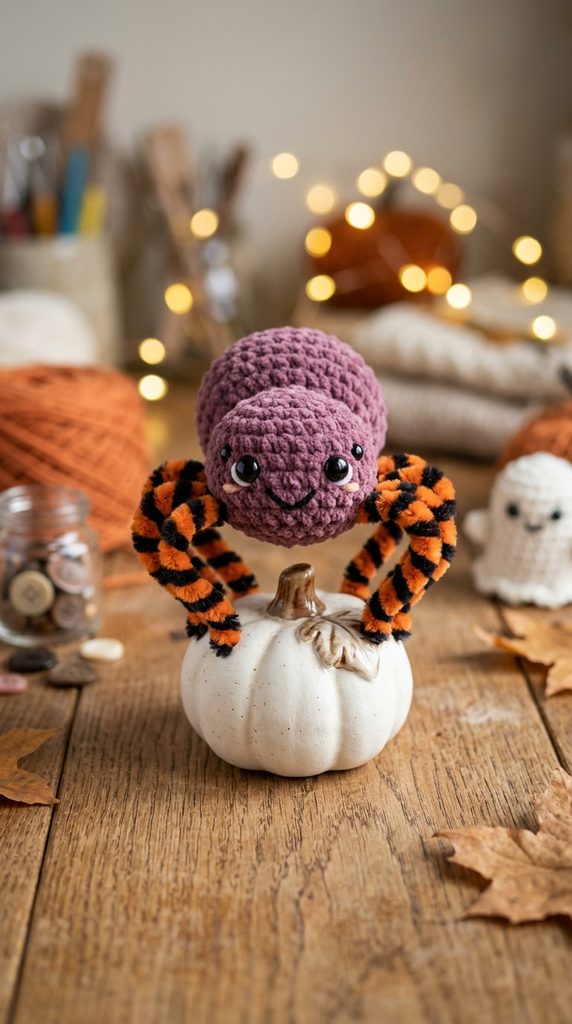
Lovable Eight-Legged Friends That Are Far from Creepy
Many people fear spiders, but this tiny amigurumi arachnid is purely lovable. Featuring a fuzzy round body and bendable striped legs, it wins hearts. It works up quickly using simple single crochets and basic pipe cleaners.
Moreover, inserting chenille stems into crochet legs makes them completely posable. You can pose your cute spider sitting on mini pumpkins or computer monitors. It delivers a fun, tactile crafting experience for crocheters of all levels. This adorable little creature makes Halloween decorating feel wonderfully whimsical and sweet.
How to Crochet the Mini Spider Step-by-Step
Start with deep plum or black yarn, working six single crochet into magic rings. Next, increase in continuous spiral rounds to shape a chubby round body. Insert two small safety eyes near the front, stuffing the body firmly.
Then, decrease rounds smoothly to seal the bottom and weave in tails. Crochet eight short, hollow leg tubes using alternating black and orange stripes. Slide a fuzzy chenille pipe cleaner into each crocheted leg tube. Afterward, sew four legs securely onto each side of the body. Bend the wired legs at angles to make the spider stand upright. Finally, brush a touch of pink blush beneath eyes for extra cuteness.
Required Materials for Mini Spider
- Worsted weight acrylic yarn in deep plum and bright orange
- Size 3.25mm (D/3) crochet hook
- Pair of 6mm black plastic safety eyes
- Four black fuzzy chenille pipe cleaners for leg wiring
- Poly-fil premium polyester fiberfill stuffing
- Tapestry sewing needle and wire-cutting craft pliers