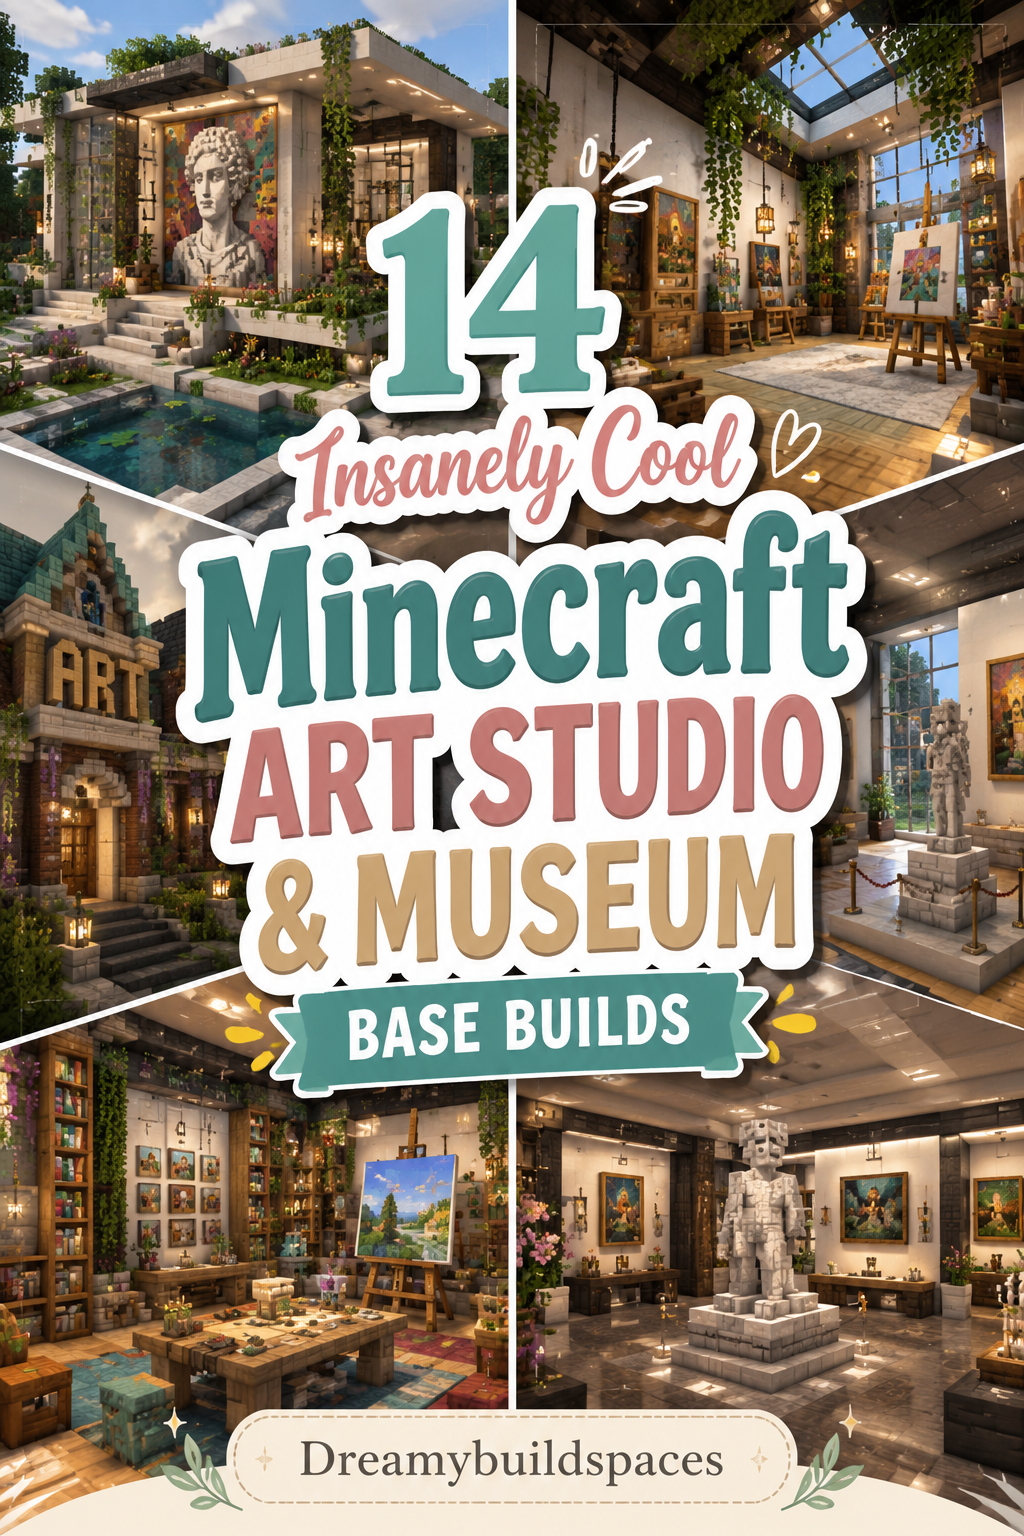
14 Insanely Cool Minecraft Art Studio & Museum Base Builds
Minecraft is far more than a simple game of mining and crafting blocks; it is a limitless digital canvas for architectural expression. While standard dirt huts and cobblestone boxes serve early-game survival needs, seasoned builders eventually crave sophisticated design challenges. Constructing an art studio, creative gallery, or grand museum base transforms your gameplay into a true cultural experience.

When you step inside a soaring marble atrium filled with custom pixel maps, glowing artifact displays, and natural skylights, your virtual world gains profound depth. These fourteen insanely cool Minecraft art studio and museum base builds provide the ultimate blueprint for turning raw blocks into breathtaking cultural landmarks.
Why Museum and Art Studio Builds Capture the Imagination
Gallery and museum structures demand meticulous attention to spatial flow, structural framing, and dramatic lighting. Unlike residential homes or farm bases, museums require grand exhibition halls, open-concept atriums, clear pathways, and specialized lighting zones.
Furthermore, designing a cultural hub allows you to showcase your accumulated survival treasures, rare mob heads, enchanted armor stands, and intricate item-frame paintings. Therefore, your museum functions as both a stunning architectural statement and a functional trophy room celebrating your entire Minecraft journey.
Mastering Natural and Artificial Lighting for Galleries
Proper illumination serves as the single most critical element in any successful Minecraft art gallery. Harsh overhead torch spam completely ruins the sophisticated, modern ambiance required for high-end artistic displays. Instead, elite builders rely heavily on concealed sea-lantern floor grids, tinted glass skylights, and amber glowstone hidden behind stair blocks.
Additionally, utilizing modern iron-bar track lighting and directional glow-lichen spotlights ensures every painting, statue, and artifact receives cinematic framing. Thoughtful lighting transforms simple wool blocks and item frames into priceless gallery masterpieces.
Essential Materials for High-End Museum Architecture
Building a convincing art museum or creative studio requires a curated, sophisticated material palette. Move away from bright primary colors and embrace architectural realism. Stock your chests with smooth quartz, polished deepslate, calcite, concrete powders, and terracotta blocks.
In addition, large panes of tinted and clear glass create breathtaking floor-to-ceiling exhibition windows. Keeping copper grates, iron blocks, and dark oak beams ready ensures you can easily execute both ultra-modern brutalist galleries and classical European museums.
Seamlessly Integrating Functionality into Museum Layouts
A truly elite Minecraft museum balances stunning exterior aesthetics with efficient, practical interior zoning. Dedicate your main ground-floor atrium to grand sculpture exhibits and welcoming reception desks. Upper mezzanine levels work wonderfully for private artist studios, canvas-painting crafting rooms, and redstone-powered item sorting vaults.
Moreover, incorporating outdoor sculpture gardens with custom leaf hedges and cobblestone paths seamlessly connects your indoor culture to the surrounding natural landscape. Let us explore fourteen of the coolest Minecraft art studio and museum builds.
1. The Modern Brutalist Concrete Art Gallery
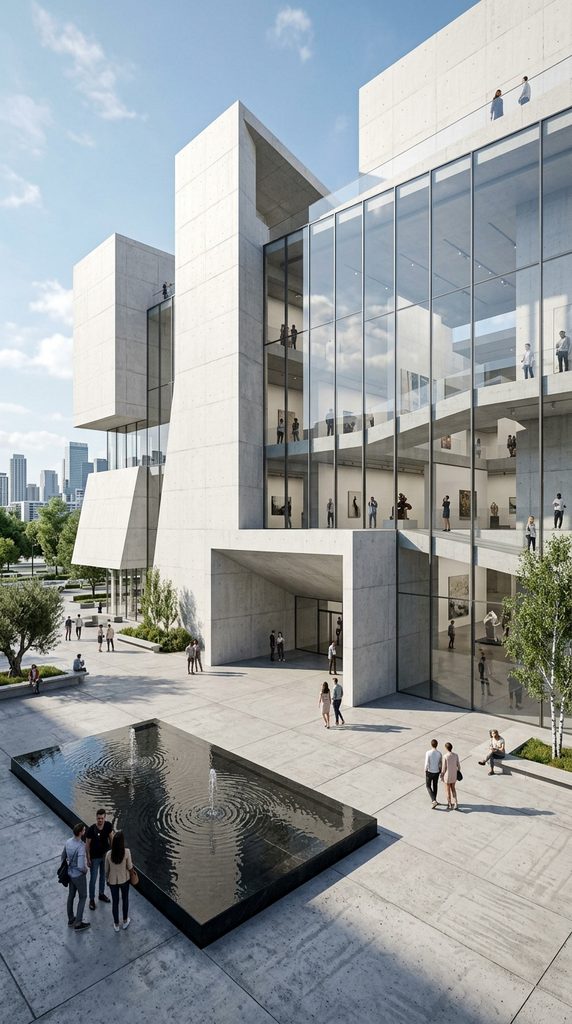
Raw Geometric Monoliths with Floor-to-Ceiling Glass Atriums
Brutalist architecture relies on massive geometric concrete forms, raw structural honesty, and dramatic monolithic scale. Building a stark white and light-gray concrete gallery creates an striking, avant-garde focal point in your world. The clean lines and sharp right angles establish a high-end contemporary art vibe.
Furthermore, expansive clear glass curtain walls flood the multi-level interior exhibition spaces with bright natural daylight. It stands as a breathtaking urban statement piece for creative players.
How to Build the Brutalist Gallery Step-by-Step
First, mark a sweeping rectangular foundation measuring twenty-four by sixteen blocks using smooth stone. Next, erect soaring exterior load-bearing walls using white concrete blocks and smooth quartz pillars.
Then, carve out massive front-facade window openings extending two stories high. Install clear glass panes flush with the exterior concrete frame. Afterward, construct interior floating cantilevered mezzanine floors using polished andesite slabs. Hang modern iron-chain pendant lamps over central sculpture display pedestals. Finally, landscape the surrounding concrete plaza with minimalist blackstone water fountains.
Required Survival Materials for Brutalist Gallery
- White concrete blocks and light-gray concrete
- Smooth quartz pillars and polished andesite slabs
- Clear glass panes and iron chain blocks
- Iron bars and blackstone blocks for water features
- Sea lanterns and daylight sensors for hidden lighting
2. The Classical Neo-Roman Fine Arts Museum

Majestic Corinthian Columns and Grand Domed Rotundas
For builders who appreciate timeless historic grandeur, a classical Neo-Roman museum offers unmatched elegance. Featuring soaring quartz pillar columns, sweeping front stone staircases, and a majestic central glass dome, this build exudes imperial prestige.
Additionally, the symmetrical facade frames your entrance like a historic European cultural institution. Stepping through heavy oak double doors leads visitors into a breathtaking circular rotunda filled with ancient marble statues.
How to Build the Neo-Roman Museum Step-by-Step
Begin by laying a grand symmetrical stone-brick foundation measuring thirty by twenty blocks. Next, erect towering rows of smooth quartz pillars across the front portico porch.
Then, construct a triangular pediment gable above the columns using smooth sandstone stairs. Build a massive glass-domed rotunda rising from the center of the flat roof. Afterward, pave interior exhibition hallways with checkered blackstone and white quartz tiles. Install armor stands dressed in golden armor on carved stone pedestals. Finally, light the grand exterior steps with hanging copper lanterns.
Required Materials for Neo-Roman Museum
- Smooth quartz blocks, pillars, and stairs
- Smooth sandstone and stone bricks
- Checkered blackstone and white quartz blocks
- Glass blocks and glass panes for the central dome
- Armor stands, gold armor sets, and copper lanterns
3. The Cliffside Minimalist Artist Studio Loft
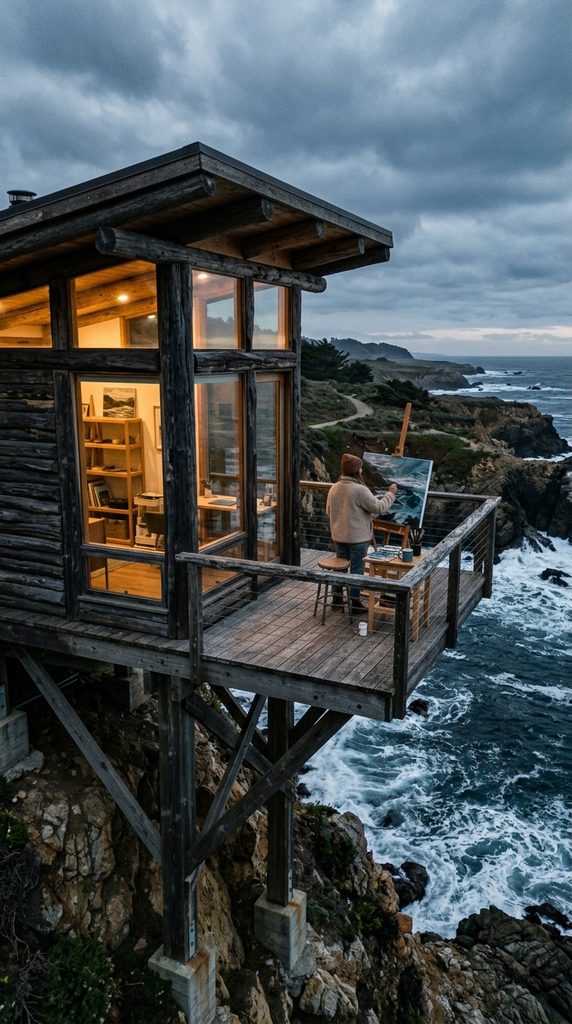
Cantilevered Wooden Studios Perched Over Crashing Ocean Waves
Creativity thrives in serene, secluded natural environments filled with sweeping inspiring views. This minimalist artist loft perches dramatically on wooden stilts over a rocky ocean cliff face. The structure combines stripped dark oak logs with expansive glass walls.
Furthermore, an outdoor easel deck allows virtual artists to paint while listening to ocean waves. The interior features a vaulted ceiling, cozy wood-burning fireplace, and organized canvas storage racks. It is the ultimate peaceful retreat for survival world artists.
How to Build the Cliffside Studio Step-by-Step
Start by anchoring sturdy stripped dark oak logs deep into a coastal cliff wall. Next, build an elevated wooden floor platform extending outward over open ocean water. Raise walls using stripped spruce logs and large glass panes.
Then, construct a sleek mono-pitch sloping roof using dark prismarine stairs. Build an outdoor viewing balcony equipped with an easel made from an armor stand and item frame. Afterward, furnish the interior loft with barrels, craft tables, and a brick fireplace chimney. Finally, hang climbing ivy and weeping vines down the exterior support stilts.
Required Materials for Cliffside Studio
- Stripped dark oak logs and stripped spruce wood
- Large clear glass panes and dark prismarine stairs
- Bricks and campfires for the fireplace chimney
- Armor stands, item frames, and paintings
- Vines, weeping vines, and oak fence railings
4. The Underground Deepslate Vault Museum

Mysterious Subterranean Galleries Carved into Ancient Stone Strata
Building deep underground beneath layer fifty provides an incredible moody, atmospheric gallery setting. Carving expansive exhibition halls directly into polished deepslate and tuff creates an underground vault aesthetic.
Moreover, dramatic lava waterfalls encased in reinforced tinted glass illuminate the cavernous stone chambers. Visitors descend via a long, winding stone staircase into a subterranean treasure trove of rare artifacts and glowing items. It offers a secure, monster-proof museum experience for hardcore survival worlds.
How to Build the Deepslate Vault Museum Step-by-Step
Begin by excavating a massive subterranean cavern spanning three vertical chunks deep underground. Next, line the raw excavated walls with polished deepslate blocks and chiseled stone bricks.
Then, construct tiered display balconies supported by heavy iron-chained pillars. Install vertical glass observation shafts enclosing glowing lava streams for ambient moody red lighting. Afterward, place item frames containing rare items, nether stars, and dragon eggs along secure glass vaults. Finally, illuminate dark corridor floors using sea lanterns hidden beneath carpets.
Required Materials for Deepslate Vault Museum
- Polished deepslate, deepslate bricks, and chiseled deepslate
- Tuff blocks and stone bricks
- Tinted glass blocks and clear glass panes
- Lava buckets and iron chains
- Item frames, rare items, and hidden sea lanterns
5. The Steampunk Copper & Brass Clockwork Gallery
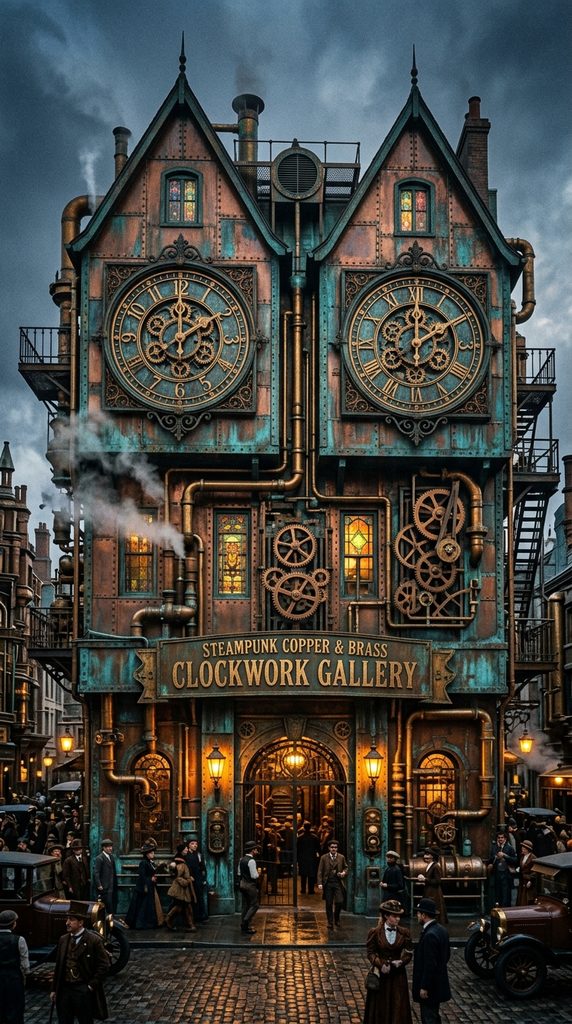
Oxidized Copper Patina Walls and Whimsical Gear Mechanics
Combine Victorian engineering aesthetics with fine art exhibition spaces in a steampunk gallery. The exterior utilizes weathered copper blocks displaying striking blue-green oxidized patinas. Exposed brass piping, spinning copper grates, and animated redstone gears accent the facade.
Additionally, large round clock faces built into gable walls give the museum a timeless, industrious character. Inside, mechanical art installations and glowing amber lighting celebrate the intersection of science and art.
How to Build the Steampunk Gallery Step-by-Step
Start by outlining a robust rectangular base using exposed and weathered copper blocks. Next, erect exterior walls mixing cut copper, tuff, and stripped oak wood beams.
Then, construct large decorative clock faces on the front gable using smooth quartz and blackstone. Build functional rotating gear wheels on exterior walls using copper grates and trapdoors. Afterward, pave interior floors with striped polished basalt and copper blocks. Install glowing amber shulker box pedestals holding rare artifacts. Finally, vent industrial brick chimneys upward through the slate roof.
Required Materials for Steampunk Gallery
- Weathered copper, exposed copper, and cut copper blocks
- Copper grates, stripped oak logs, and polished basalt
- Smooth quartz, blackstone, and redstone components
- Bricks, campfires, and iron bars
- Amber glass blocks and copper lanterns
6. The Floating Cherry Blossom Zen Garden Pavilion

Tranquil Pagoda Architecture Surrounded by Pastel Floating Islands
Art does not always require cold concrete walls; it can live within serene natural harmony. This floating zen garden museum floats high above the clouds on a sculpted landmass. Traditional Japanese pagoda architecture features sweeping curved roofs built from dark oak and cherry wood.
Furthermore, tranquil koi ponds, stone lanterns, and falling cherry blossom petals frame outdoor sculpture displays. It provides an utterly peaceful, meditative cultural sanctuary.
How to Build the Zen Garden Pavilion Step-by-Step
Begin by building a floating island landmass using dirt, grass blocks, and stone. Next, plant cherry trees across the floating terrain to generate falling petal particles. Construct a traditional multi-tiered pagoda building using cherry planks and dark oak stairs.
Then, curve the roof eave corners upward using polished blackstone stair overhangs. Build serene outdoor koi ponds filled with water and tropical fish. Afterward, place stone Japanese lanterns along winding gravel pathways. Finally, hang banners and item frames displaying traditional Japanese art patterns.
Required Materials for Zen Garden Pavilion
- Cherry wood planks, stairs, and cherry leaves
- Stripped dark oak logs and polished blackstone stairs
- Grass blocks, gravel, and water buckets
- Stone lanterns, bamboo, and hanging banners
- Item frames and tropical fish buckets
7. The Neon Cyberpunk Neo-Tokyo Art District

Vibrant Glowing Neon Signage Framing Gritty Futuristic Murals
Transport your Minecraft visitors to a high-tech, rain-slicked dystopian future with a cyberpunk art district. Stacking multicolored stained glass, glowing sea lanterns, and redstone lamps creates massive glowing holographic art murals across towering alleyway buildings.
Moreover, dark gray concrete and polished basalt walls provide a gritty industrial backdrop for vibrant neon pink and cyan lights. It is an absolute showstopper for multiplayer servers seeking high-energy urban creativity.
How to Build the Cyberpunk Art District Step-by-Step
Start by laying out narrow, winding city alleyways paved with polished basalt blocks. Next, erect multi-story studio buildings using smooth basalt and dark gray concrete.
Then, construct massive glowing pixel art murals across building facades using colorful stained glass and sea lanterns. Build overhead utility pipes and scaffolding bridges connecting opposing studios. Afterward, place armor stands wearing neon leather armor and glowing helmets as futuristic street artists. Finally, use water-logged slabs and tinted glass to simulate slick, rain-soaked pavement puddles.
Required Materials for Cyberpunk Art District
- Dark gray concrete, smooth basalt, and polished basalt
- Multicolored stained glass blocks and sea lanterns
- Redstone lamps, daylight sensors, and iron bars
- Scaffolding blocks and armor stands
- Dyed leather armor sets and item frames
8. The Ethereal Stained-Glass Cathedral Gallery

Soaring Gothic Arches Bathing Sacred Art in Rainbow Light
Gothic architecture provides an awe-inspiring framework for exhibiting fine art and religious iconography. Building soaring pointed arches and flying buttresses using smooth stone and deepslate creates vertical majesty.
Additionally, massive multi-story stained-glass rose windows cast vibrant, prismatic rainbow light across interior marble sculpture galleries. Walking down the central nave past rows of glowing art displays evokes a truly sacred, reverent atmosphere.
How to Build the Stained-Glass Cathedral Step-by-Step
Begin by marking a monumental cross-shaped basilica foundation measuring forty by twenty-five blocks. Next, erect towering pointed stone-brick arches and exterior flying buttresses.
Then, construct massive circular rose windows on the front and side facades using intricate patterns of colored stained glass. Vault the soaring interior ceilings using polished diorite and smooth stone stairs. Afterward, place marble statues and item-frame paintings between each nave pillar. Finally, install glowing soul lanterns along the vaulted rib vaults.
Required Materials for Stained-Glass Cathedral
- Stone bricks, cracked stone bricks, and smooth stone
- Polished diorite and smooth quartz blocks
- Extensive collection of colored stained glass blocks
- Soul lanterns, iron chains, and item frames
- Armor stands and carved pumpkin heads for statues
9. The Rustic Woodland Treehouse Pottery Studio

Organic Timber Architecture Intertwined with Ancient Living Trees
Merge creative craft studios directly into living nature with a magnificent woodland treehouse. Building around massive giant spruce or jungle trees creates an organic, winding multi-level platform structure.
Furthermore, ceramic pottery kilns, crafting tables, and wet clay storage bins fill the wooden balconies. Hanging flower pots, glowing glow berries, and leaf canopies shade the outdoor workspaces. It embodies the ultimate cozy, earthy artist cottage aesthetic.
How to Build the Woodland Pottery Studio Step-by-Step
Start by finding or growing a colossal 2×2 giant spruce tree in your world. Next, build spiraling wooden staircases winding securely around the thick trunk. Construct multi-level wooden platforms supported by sturdy diagonal log branches.
Then, build open-air rustic studio shelters using stripped spruce logs and fences. Install pottery sherds, flower pots, and stone masonry tables across work benches. Afterward, hang glowing berry vines and lanterns from overhead leaf canopies. Finally, connect neighboring tree platforms using swaying rope bridges.
Required Materials for Woodland Pottery Studio
- Giant spruce logs, spruce planks, and spruce stairs
- Stripped dark oak logs and oak fences
- Flower pots, pottery sherds, and masonry tables
- Glow berry vines, sweet berry bushes, and lanterns
- Scaffolding blocks and lead ropes
10. The Grand Neo-Classical Sculptural Sculpture Garden
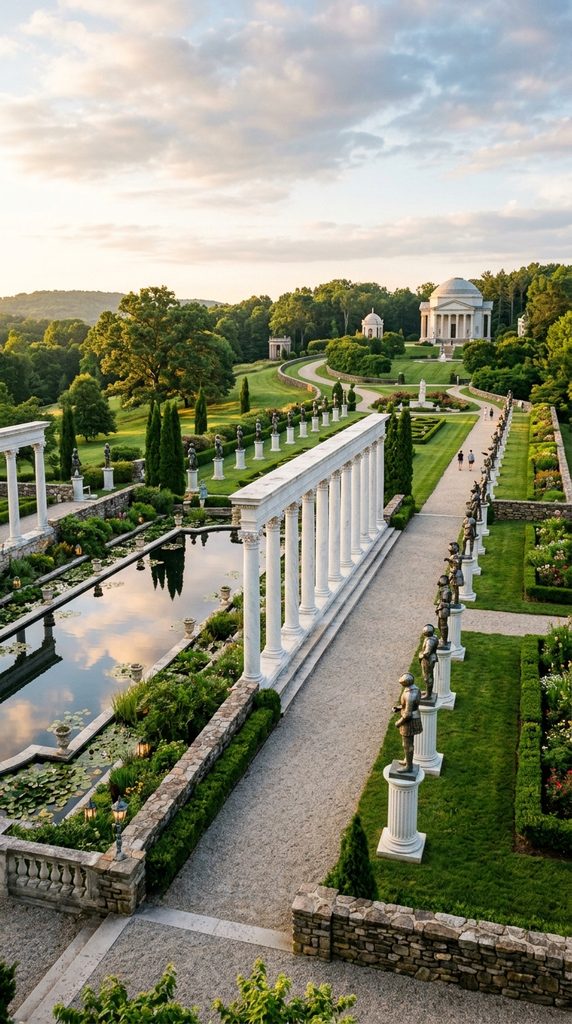
Open-Air Marble Colonnades Framing Classical Statuary
Sometimes art demands the fresh air and open sky of an outdoor landscape. This expansive neo-classical sculpture garden features sprawling stone hedges, reflecting pools, and heroic marble colonnades.
Additionally, posing custom armor stand statues in dynamic athletic poses across white quartz pedestals brings the garden to life. Glowing sea lanterns hidden beneath water lilies illuminate the reflecting pools at night. It serves as a breathtaking, park-like cultural attraction.
How to Build the Sculpture Garden Step-by-Step
Begin by leveling a vast sprawling outdoor plaza measuring fifty by fifty blocks. Next, pave the grounds using checkered stone-brick and smooth-stone slabs. Erect grand outdoor colonnade pavilions using smooth quartz pillars and stairs.
Then, excavate large rectangular reflecting pools in the center gardens. Build raised white quartz pedestals throughout the landscaping. Afterward, place armor stands equipped with white leather armor and carved heads on every pedestal. Finally, plant manicured oak leaf hedges and flower beds around perimeter walls.
Required Materials for Sculpture Garden
- Smooth quartz blocks, pillars, and stairs
- Stone-brick slabs, smooth stone, and polished granite
- White leather armor sets, armor stands, and carved heads
- Water buckets, lily pads, and hidden sea lanterns
- Oak leaves, rose bushes, and peony flowers
11. The Industrial Warehouse Pop-Art Loft

Exposed Red Brick Walls and Steel Beams Inspiring Modern Creativity
Industrial loft conversions offer raw, unpretentious energy ideal for modern pop-art studios. Utilizing weathered red bricks, exposed iron pillars, and large multi-pane factory windows creates authentic urban character.
Moreover, high ceilings provide ample vertical clearance for giant abstract pixel art canvases and hanging neon installations. A polished concrete floor reflects studio lights, enhancing the spacious warehouse feel.
How to Build the Industrial Warehouse Step-by-Step
Start by outlining a large rectangular warehouse footprint measuring twenty by thirty blocks. Next, build exterior walls using dark red bricks mixed with cracked stone bricks.
Then, install massive multi-pane factory windows using black iron bars and glass panes. Erect interior structural support beams using polished basalt and iron blocks. Afterward, hang large canvas art installations across the brick walls using item frames. Finally, set up artist workstations featuring cauldrons, banners, and crafting tables.
Required Materials for Industrial Warehouse
- Red bricks, cracked bricks, and stone bricks
- Polished basalt blocks and iron blocks
- Black iron bars and clear glass panes
- Item frames, wool banners, and armor stands
- Cauldrons, crafting tables, and lantern lights
12. The Pastel Kawaii Pink Creative Workshop

Whimsical Candy-Colored Architecture Inspiring Playful Design
Infuse pure joy and playful color into your world with a delightful pastel pink creative studio. Combining pink concrete, white wool, and smooth quartz creates a clean, sweet aesthetic.
Furthermore, giant wool sculptures of cats, flowers, and cupcakes decorate the roof and garden. Inside, bright pink workstations, glowing shulker boxes, and cheerful banners foster boundless imagination. It stands as a wonderfully refreshing, cheerful contrast to serious stone castles.
How to Build the Kawaii Workshop Step-by-Step
Begin by laying a compact rectangular foundation using smooth quartz blocks. Next, raise exterior walls using pink concrete powder and white wool blocks. Construct a charming gabled roof using pink terracotta stairs.
Then, cut large circular bay windows trimmed with white trapdoors. Build giant whimsical animal pixel art sculptures on the lawn using colored wool. Afterward, furnish the bright interior with pink shulker box storage cabinets. Finally, plant sprawling pink tulip fields surrounding the cheerful pastel cottage.
Required Materials for Kawaii Workshop
- Pink concrete, pink terracotta, and pink wool blocks
- White wool blocks, smooth quartz, and white trapdoors
- Assorted colored wool blocks for giant sculptures
- Pink shulker boxes and crafting tables
- Pink tulips, rose bushes, and lanterns
13. The Ancient Desert Sandstone Pyramid Museum
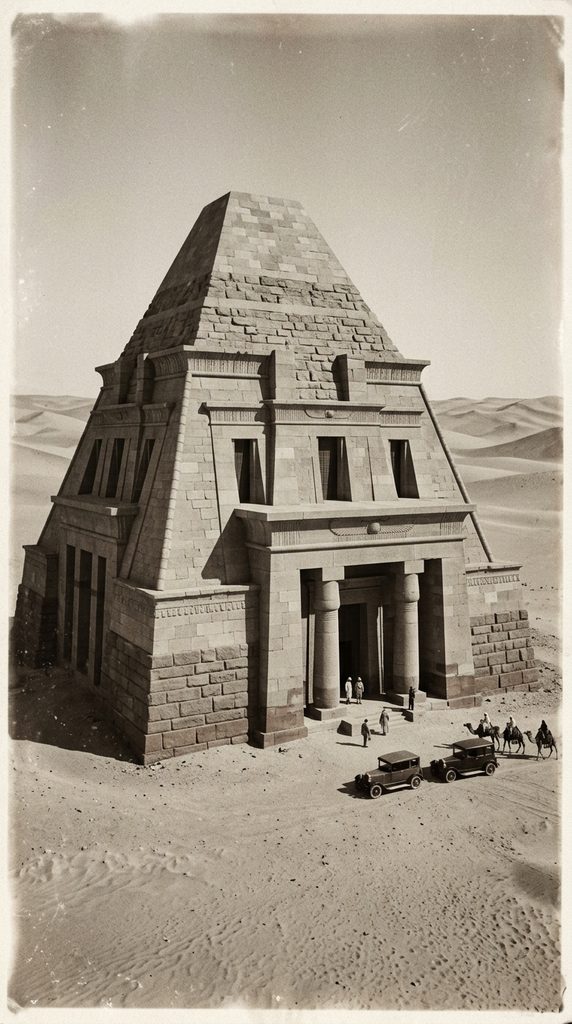
Hieroglyphic Stone Carvings Preserving Legendary Loot and Lore
Transport your museum deep into arid desert dunes with an imposing sandstone pyramid structure. Building with smooth sandstone, chiseled sandstone, and cut red sandstone creates authentic ancient Egyptian architectural weight.
Moreover, navigating winding interior labyrinth corridors lined with mysterious item-frame hieroglyphs and golden treasure vaults provides thrilling exploration. It serves as an incredible historical museum preserving ancient server lore.
How to Build the Sandstone Pyramid Step-by-Step
Start by marking a massive square foundation measuring thirty-one by thirty-one blocks in a desert. Next, step each successive layer inward by one block as you build upward to a point.
Then, carve a grand monumental entrance porch supported by chiseled sandstone pillars. Excavate interior labyrinth exhibition hallways lined with dark oak item-frame displays. Afterward, place golden blocks, nether stars, and rare artifacts inside central pharaoh vaults. Finally, illuminate the desert exterior using torches mounted on sandstone walls.
Required Materials for Sandstone Pyramid
- Smooth sandstone, chiseled sandstone, and cut sandstone
- Red sandstone and chiseled red sandstone
- Dark oak item frames and golden blocks
- Torches, iron bars, and campfires
- Sand blocks, dead bushes, and cacti
14. The Futuristic Sci-Fi Space Station Gallery

Suspended Anti-Gravity Exhibition Pods Floating in Endless Void
Push architectural boundaries to the absolute limit by constructing a futuristic sci-fi space station museum. Built high in the build limit sky dimension or in an empty void world, this base features sleek white quartz rings, tinted glass observation domes, and floating exhibition pods.
Additionally, glowing sea lanterns and end rods simulate high-tech spaceship thrusters and zero-gravity lighting. It represents the pinnacle of advanced Minecraft engineering and visionary art design.
How to Build the Space Station Gallery Step-by-Step
Start by building a massive central circular ring structure using smooth quartz and iron blocks in the sky. Next, extend spoke corridors outward connecting to floating spherical glass pods.
Then, encase exhibition galleries inside tinted glass spheres suspended in mid-air. Install end rods and sea lanterns along structural ribs to provide futuristic illumination. Afterward, place item frames displaying Elytras, Nether stars, and futuristic armor sets inside pods. Finally, add glowing beacon light beams shooting upward from the station core.
Required Materials for Space Station Gallery
- Smooth quartz blocks, pillars, and smooth quartz slabs
- Iron blocks, iron bars, and end rods
- Tinted glass blocks and clear glass panes
- Sea lanterns and beacon blocks with emerald/diamond pyramids
- Item frames, Elytras, and netherite armor sets