
14 Aesthetic Zombie Halloween Decor Ideas That Look Straight Out of a Film Set
Step into the post-apocalyptic world of high-concept cinema right at home. Zombie Halloween Traditional undead party decor often leans into bright plastic and cheap neon gore. However, cinematic film sets rely on nuanced decay, authentic weathering, and rich storytelling textures.
This design philosophy merges eerie abandonment with refined, moody gothic staging. Think weathered timber barricades, fog-drenched overgrown botanicals, rusted medical cabinets, and flickering amber lanterns. The atmosphere should feel genuinely immersive, spine-chilling, tactile, and completely realistic.

Moving Beyond Cheap Plastic
First impressions matter when transforming your porch, yard, or living room. Bright neon skeleton props and store-bought rubber limbs ruin organic cinematic realism instantly. Instead, professional set dressers prioritize muted earth tones, matte finishes, and authentic materials.
Layered ash-gray tones, charcoal stains, and dried blood pigments create immediate visual depth. Distressed burlap, oxidized metal finishes, and aged linen replace shiny synthetic fabrics. These grounded textures evoke a believable, harrowing world where catastrophe arrived long ago.
Establishing the Apocalyptic Timeline
Every compelling movie set clearly communicates how much time has passed quietly. A freshly breached outbreak site looks vastly different from an overgrown forgotten quarantine. Decide whether your aesthetic leans into chaotic immediate survival or slow reclamation.
Fresh emergency quarantine zones demand hazard tape, barricades, and scattered military supplies. Older timelines require thick climbing ivy, peeling wallpaper, settled dust, and shattered glass. Aligning every prop with your chosen narrative produces breathtaking photographic results.
Mastering the Art of Patina
Clean surfaces immediately break the cinematic illusion in haunted home styling. Professional aging techniques transform inexpensive modern items into believable relic props easily. Apply dark acrylic washes to dull bright wood, metal, and plaster pieces.
Crumple cheesecloth, then soak it in dark tea or black walnut stain. Spray water-diluted coffee across printed signs to mimic years of weather damage. These simple distress techniques create tactile authenticity that captivates party guests completely.
The Power of Directional Lighting
Harsh overhead floodlights destroy mystery by exposing every seam and prop edge. Cinematic lighting relies instead on high-contrast shadows, narrow spotlights, and low ambient glows. Conceal your light sources beneath fallen leaves, decayed crates, or rusted metal drums.
Use deep amber LEDs, cool misty blues, and flickering candle flames strategically. Backlighting silhouettes of approaching figures against sheer drapery heightens organic dread. These dramatic shadow play techniques turn simple domestic spaces into Hollywood soundstages.
Atmospheric Haze and Texture
Cinema directors use atmosphere to unify physical props and soften background details. Low-lying ground fog makes flat lawns feel like abandoned, disease-ridden city outskirts. Ground fog machines paired with fog chillers keep smoke hugging damp ground surfaces.
Scatter crunchy dried autumn leaves, shredded burlap, and dead branches across clean flooring. Mist outdoor foliage lightly with water to create glistening, cold post-apocalyptic moisture. The tactile layering convinces the human eye that the world ended yesterday.
Sensory Storytelling Elements
A truly unforgettable haunt experience engages senses far beyond mere visual decor. Sound design builds unbearable tension before guests even spot your undead figures. Play muffled distant sirens, radio static, droning emergency broadcasts, or vinyl scratch loops.
Infuse the air with earthy scents of damp soil, cedarwood, and smoke. The subtle combination of chilling audio, evocative scents, and tactile grime works magic. Your home transforms from a typical seasonal party into an unforgettable cinematic universe.
1. The Weathered Quarantine Barricade
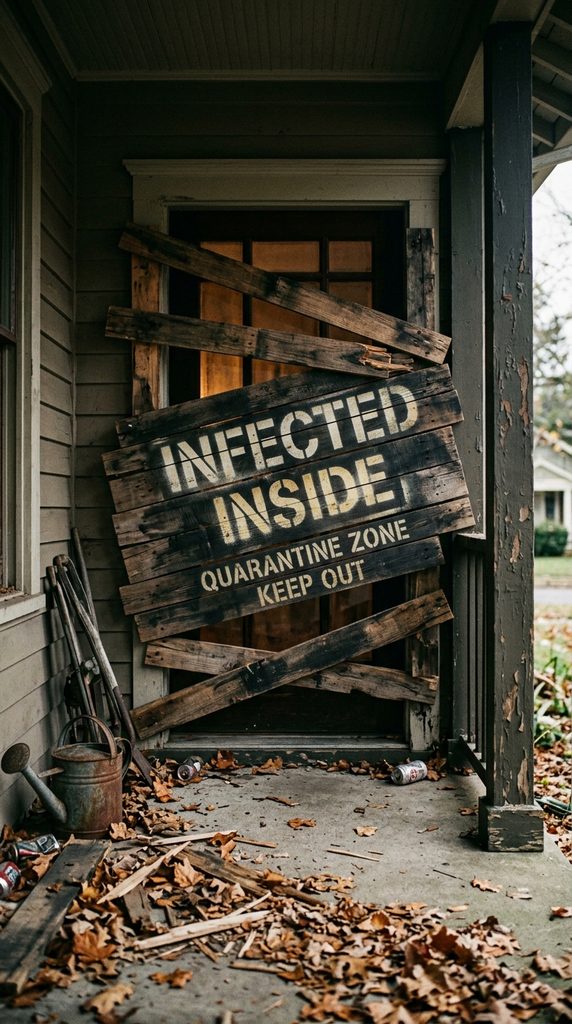
Fortified Front Porch Portal
Transform your cheerful front entrance into an urgently fortified survivor outpost door. Cross-planked timber barriers signal that inhabitants desperately fought off outside horrors. It establishes tension before guests even set foot across your threshold.
Weathered wood planks attached with exposed iron hardware look authentic and rugged. Pairing distressed timber with faded warning stencils elevates the set design immensely. It serves as an impressive, high-impact photo backdrop for arriving party visitors.
Materials You Will Need
- Reclaimed pallet boards or lightweight faux foam wood planks
- Matte charcoal and umber acrylic paint for wood weathering
- Red and black spray paint with cardboard letter stencils
- Industrial tension rods or heavy-duty removable mounting strips
- Distressed galvanized hardware nails or screws for visual detailing
How to Style It
Measure your front porch entryway, window frames, or interior hallway doors. Distress wooden pallet boards using wire brushes and watered-down black acrylic stain. Stencil bold warning phrases like “INFECTED INSIDE” using crimson spray paint.
Mount boards diagonally across entry frames using removable, wall-safe structural brackets. Leave narrow gaps between planks so glowing interior amber lights spill through. Scatter crushed wooden splinter fragments and dried oak leaves along the threshold base.
2. Fog-Drenched Cemetery Ground Breakers

Realistic Earth Crawlers
Move away from cartoonish plastic hands sticking straight out of manicured lawns. A cinematic ground breaker looks like an ancient corpse physically clawing free. The damp earth, tangled roots, and settling fog make it genuinely terrifying.
Using hyper-realistic foam or silicone hands painted with rotting hues is vital. Building actual soil mounds gives the illusion of freshly disturbed, sacred ground. When illuminated with low cool-blue lights, it mimics classic 1980s horror sets.
Materials You Will Need
- High-detail articulated foam skeleton hands and head busts
- Several bags of dark organic potting soil and shredded mulch
- Low-lying fog machine with integrated ice-chiller box
- Real tree root clusters, twisted twigs, and dried autumn moss
- Waterproof outdoor landscape LED spotlights with ice-blue filters
How to Style It
Mound rich black potting soil into irregular, freshly dug gravesite shapes outdoors. Bury skeleton busts halfway, angling faces upward toward the night sky. Position articulated skeletal hands gripping the surrounding dirt as if pulling upward.
Weave twisted gnarled roots and wet moss across the disturbed soil mounds. Conceal low-fog machine output nozzles directly behind the raised dirt piles. Angle blue spotlights low to skim across the undulating blanket of fog.
3. The Overgrown Greenhouse Outbreak
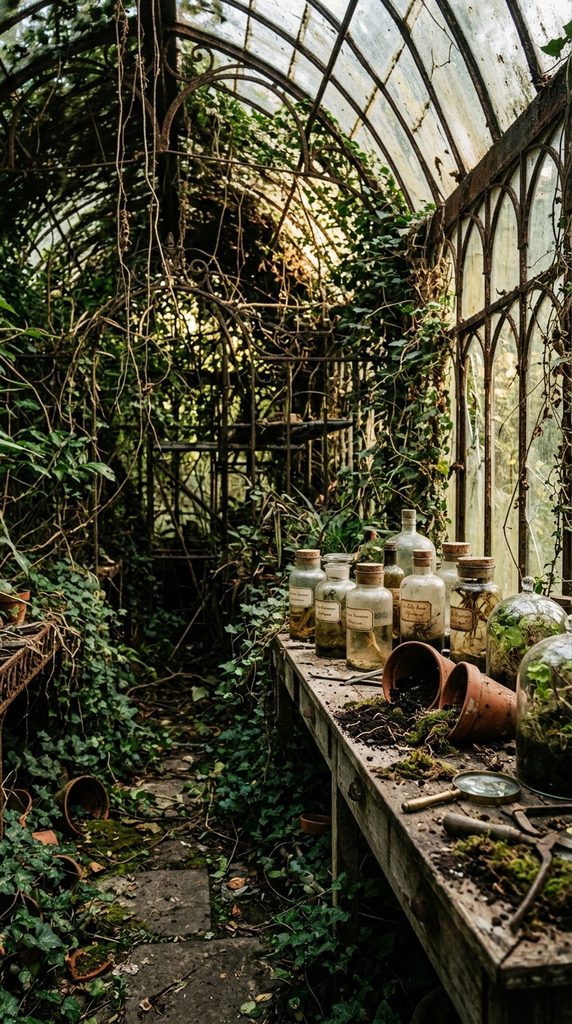
Botanical Laboratory Ruin
Envision an abandoned Victorian solarium where catastrophic infection experiments ran wild. Nature aggressively reclaims shattered glass terrariums, decaying worktables, and iron plant stands. It pairs refined antique aesthetics with eerie, rotting apocalyptic decay seamlessly.
Trailing ivy and overgrown ferns soften harsh industrial apocalypse tropes with beauty. Integrating aged botanical charts and cracked glass jars provides fascinating visual micro-stories. It creates a lush, decaying environment that feels distinctly moody and sophisticated.
Materials You Will Need
- Vintage metal glass terrariums or distressed wooden window frames
- Assorted faux creeping ivy, dead trailing vines, and ferns
- Antique terra cotta pots rubbed with powdered white garden lime
- Clear glass specimen jars filled with murky amber liquid
- Distressed medical botany prints framed in tarnished brass frames
How to Style It
Arrange vintage iron plant stands and distressed wooden tables in corners. Drape cascading artificial ivy and dead brown vines across the ironwork. Place cracked terracotta pots spilling over with black potting soil and weeds.
Fill glass apothecary jars with murky water and submerged rubber root specimens. Prop framed vintage botanical charts showing mutated fungal sketches against the wall. Thread subtle micro-fairy lights through dense leaves to create dappled, eerie shadows.
4. Distressed Field Hospital Screen
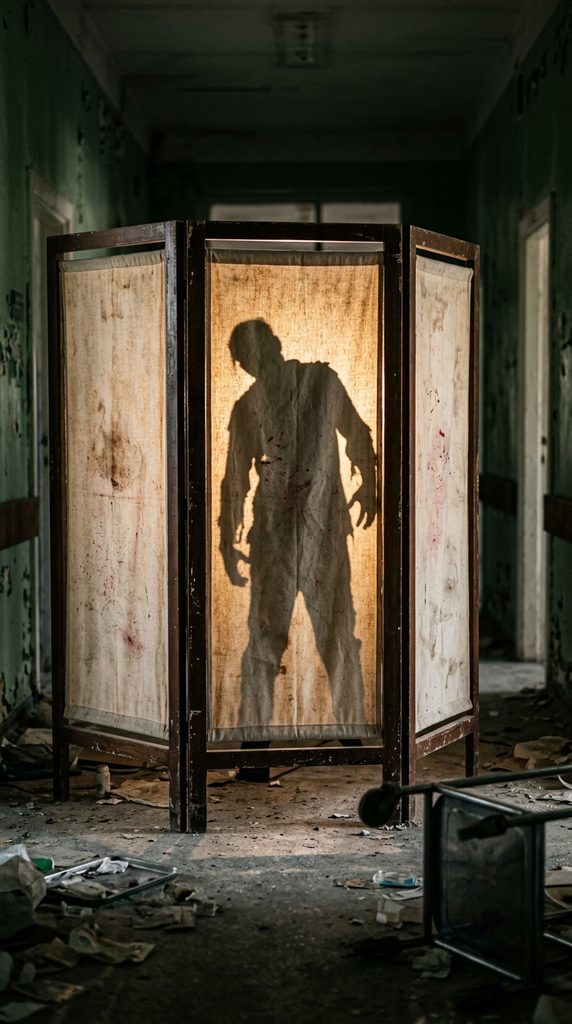
Forgotten Triage Ward
Recreate the chilling atmosphere of an overwhelmed, hastily abandoned military triage ward. Mobile folding partition screens immediately evoke crowded emergency disaster response facilities. The sheer, stained canvas panels suggest haunting procedures hidden behind fabric shadows.
Projecting dynamic shadows onto the back of the screen creates suspense. Guests glimpse creeping silhouettes of undead figures shuffling quietly just beyond reach. It delivers a deeply theatrical, narrative-driven element to darkened living room spaces.
Materials You Will Need
- Three-panel vintage wooden or iron folding room divider
- Natural unbleached cotton muslin or heavy linen fabric sheets
- Fabric aging spray made of brewed black tea and coffee
- Deep crimson fabric paint thinned down for splatter effects
- Powerful battery-operated warm work lamp for rear shadow projection
How to Style It
Stretch raw cotton muslin sheets tightly across the folding wooden divider frames. Spray the fabric heavily with concentrated tea stains to simulate historical griminess. Apply diluted crimson paint across panels to suggest hurried, chaotic triage procedures.
Position the finished screen across a dim corner or along a corridor. Place a life-size zombie silhouette or skeletal bust behind the divider panels. Aim a warm work lamp at the figure to cast sharp shadows.
5. Rusted Industrial Hazmat Station
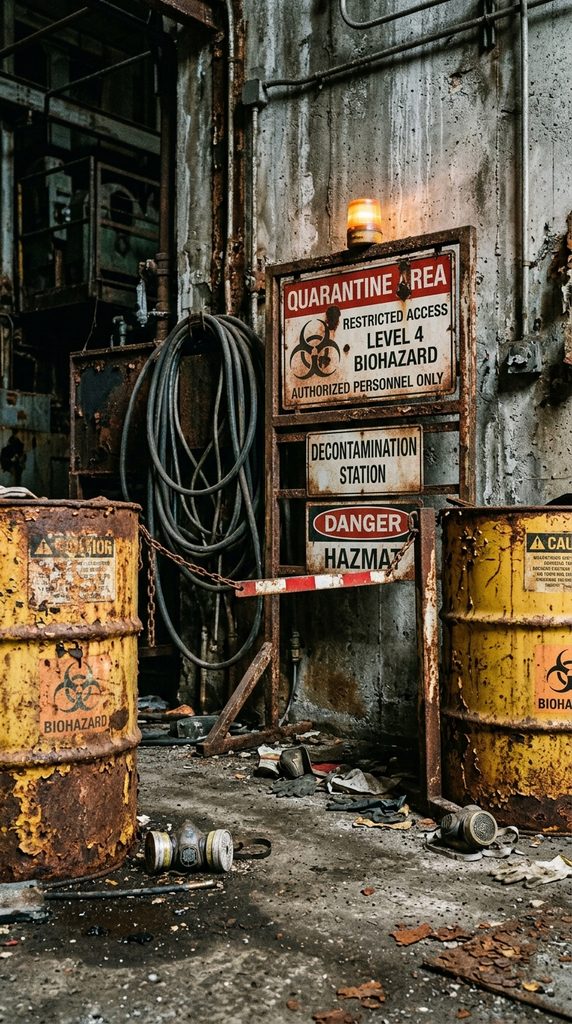
Chemical Decontamination Point
Set up a weathered containment checkpoint that failed to stop the contagion. Industrial metal drums, coiled hazard hoses, and warning signs add gritty realism. It transforms utilitarian garage or entryway spaces into cinematic biological defense stations.
Rusted iron finishes and flaking industrial yellow paint establish an authentic patina. Integrating emergency strobe lights introduces dynamic visual tension without looking tacky or cheap. It feels like an actual secure zone breached by unstoppable undead hordes.
Materials You Will Need
- Faux lightweight plastic chemical barrels painted industrial yellow or blue
- Rust-effect dimensional textured paint and coarse sea salt for patina
- Heavy black rubber tubing, industrial wire, and brass pipe fittings
- Stenciled metal biohazard warning placards weathered with dark glaze
- Low-intensity flashing amber safety beacon or industrial caged work light
How to Style It
Coat plastic barrels with industrial paint, applying rust texture across seams. Clutter the barrels with looped black rubber hoses and heavy metal chains. Mount weathered metal biohazard warning placards on the wall above the drums.
Drape tattered plastic sheeting behind the station, securing it with duct tape. Position a slowly rotating or pulsing amber safety light inside a caged fixture. Scatter rusted wrenches and spent respirator masks around the barrel base decoratively.
6. The Abandoned Ballroom Chandelier
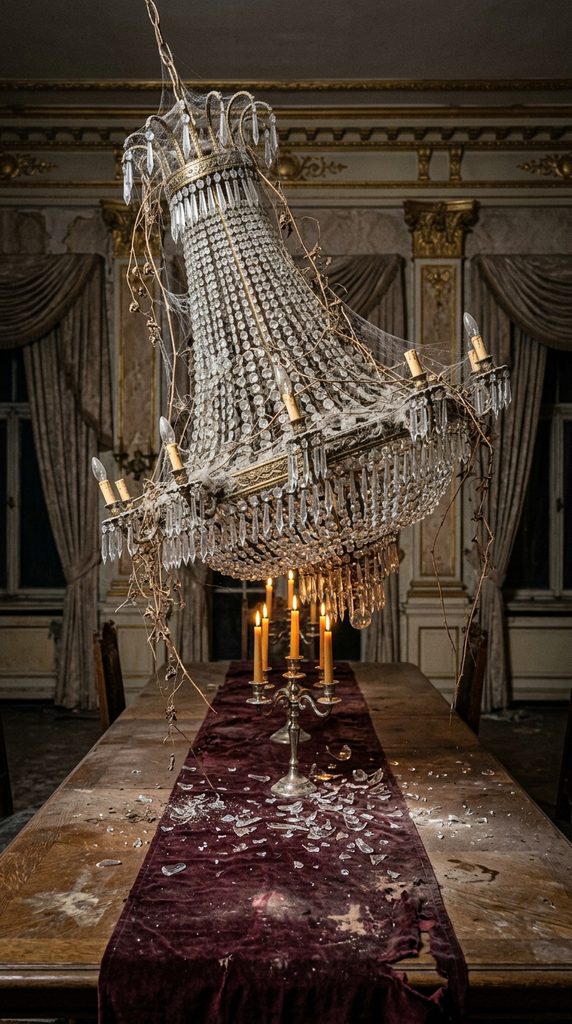
Decadent Gilded Collapse
Imagine a lavish ballroom where the outbreak interrupted a glamorous society gathering. A fallen or tilted crystal chandelier tangled with debris anchors this tragic design. It balances luxurious, glittering high-society romance with sudden, devastating apocalyptic violence.
The contrast between delicate crystal glass droplets and charred, decaying wood fascinates. Dusting crystals with faux cobwebs and fine powder dulls their pristine sparkle. It delivers an unforgettable, poetic centerpiece for elegant indoor dining tables or foyers.
Materials You Will Need
- Vintage crystal or faux acrylic multi-tier hanging chandelier
- Heavy black jute rope or tarnished iron ceiling suspension chain
- Gray textile aging powder or fine Fuller’s earth dust
- Realistic artificial cobweb threads and dried climbing vine tendrils
- Battery-powered flickering amber LED chandelier taper candle bulbs
How to Style It
Suspend the chandelier at an intentional, dramatic tilted angle over your table. Dust the crystal drops thoroughly with gray powder to mimic decades of abandonment. Weave intricate, delicate spiderwebs and dead dried vines through the crystal arms.
Insert low-flicker LED candle bulbs that cast faint, trembling amber reflections across rooms. Scatter shattered faux glass crystals and champagne flutes across the floor below. Drape a tattered, dust-covered velvet table runner beneath the tilted lighting centerpiece.
7. Specimen Jar Apothecary Shelves

Morbid Laboratory Archive
Turn open living room bookshelves into a dark, forgotten virology research repository. Rows of illuminated specimen jars contain preserved biological horrors and cellular mutations. It shifts your zombie theme from messy survival gore into high-concept scientific intrigue.
Backlighting amber and emerald liquids turns simple glass jars into glowing lanterns. Hand-written vintage laboratory tags add layers of believable historical research lore. It provides a fascinating, museum-quality curiosity cabinet display that guests inspect closely.
Materials You Will Need
- Assorted vintage mason jars, glass canning jars, and laboratory flasks
- Yellow, green, and red food coloring mixed with distilled water
- Realistic anatomical resin specimens like brains, eyeballs, and fungal forms
- Aged paper tags tied with rough jute twine for labeling
- Concealed waterproof LED puck lights for under-shelf jar illumination
How to Style It
Fill various glass jars with water tinted pale amber, murky green, or serum yellow. Submerge detailed resin biological specimens inside the liquid, sealing lids tightly with wax. Tie tea-stained parchment labels around jar necks detailing ominous specimen collection dates.
Arrange jars in ascending rows along dark wood or metal open shelving. Place small LED puck lights directly beneath or behind jars to make them glow. Tuck vintage microscopes and dusty leather reference books alongside the glass containers.
8. Boarded French Window Breaches
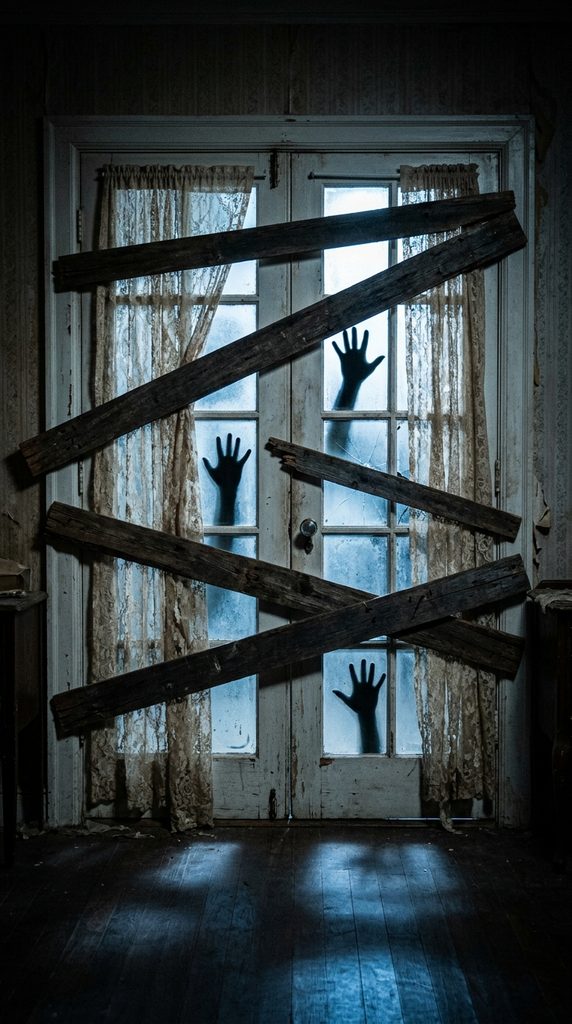
Shattered Architectural Boundaries
Create the illusion that undead hordes are actively pounding through exterior home windows. Tattered lace curtains contrasted with rough timber planks look breathtakingly cinematic and tragic. It makes interior living spaces feel like high-stakes refuge rooms during citywide sieges.
Adding realistic silhouette hands pressed against the outer window glass heightens panic. Soft backlighting illuminates reaching fingers through shattered, dusty window glass panes. It delivers incredible depth to blank walls without damaging your home’s structural framing.
Materials You Will Need
- Removable lightweight faux wood boards cut to window frame dimensions
- Antique lace curtain panels soaked in tea stain and torn
- Cut vinyl matte black silhouette decals of pressing zombie hands
- Removable crack-pattern window film or washable glass chalk markers
- Low-wattage cool white outdoor LED uplight to backlight window frames
How to Style It
Apply realistic glass fracture decals or sketch cracks using washable white markers. Mount black silhouette hand decals on the exterior surface of window glass panes. Hang distressed, shredded lace curtains loosely across the inside of the window frame.
Fasten lightweight faux wooden planks diagonally across interior window moldings with putty. Position a cool white light source outdoors aimed toward the window panes. The resulting silhouette of undead hands pushing through curtains looks chillingly lifelike.
9. Victorian Parlor Portrait Defacement
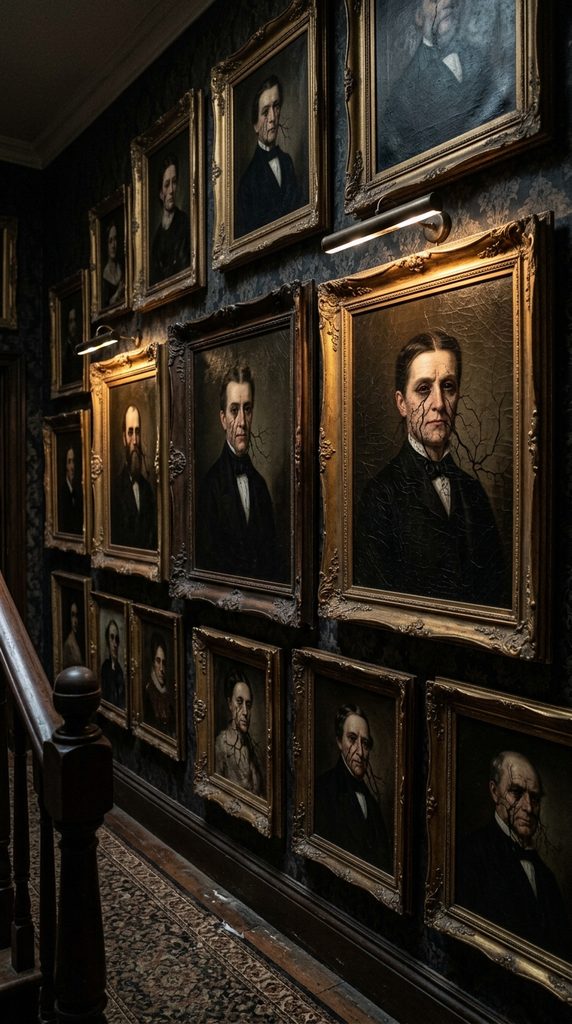
Corrupted Ancestral Gallery
Transform a refined antique portrait gallery into a haunting record of sudden infection. Classic oil portraits showing subtle signs of decay evoke high-end period horror films. It feels curated, artistic, and deeply unsettling without resorting to cheap plastic masks.
Distressing traditional Victorian portraits with dark glazes reveals creeping vascular infection lines. Displaying them in ornate, chipped gilded frames maintains an air of historical prestige. Guests will do double-takes as they notice the tragic corruption across refined faces.
Materials You Will Need
- Thrifted antique gilded and dark wood ornate portrait frames
- High-resolution canvas prints of classic Victorian gentleman and lady portraits
- Matte black, deep plum, and pale gray oil paints for detailing
- Clear craquelure glaze medium for realistic antique varnish cracking
- Black velvet ribbons for hanging frames in a salon-style gallery wall
How to Style It
Source reproduction digital canvas prints of elegant 19th-century oil portrait paintings. Paint fine, delicate black and purple infection veins spreading across porcelain skin areas. Apply craquelure glaze over portraits to create realistic webbed antique varnish cracks.
Mount finished portraits inside chipped gilded frames that have been darkened with wax. Hang the frames in a dense, asymmetric salon arrangement along a dimly lit hallway. Focus tiny picture spotlights downward to highlight the corrupted, decaying painted eyes.
10. The Survivor’s Radio Broadcast Nook

Analog Communications Hub
Set up a corner desk that looks like an abandoned pirate radio outpost. The setup tells the desperate story of an operator broadcasting survival coordinates until overrun. It injects rich character narrative into quiet, unused corners of your party floor.
Old tube radios, tangled microphone wires, and handwritten frequency maps look incredibly authentic. Looping a low, crackling emergency audio tape completes the illusion effortlessly. It delivers a tactile, interactive centerpiece that draws curious party guests in completely.
Materials You Will Need
- Vintage tabletop tube radio, CB transmitter, or antique record player
- Desktop vintage metal gooseneck microphone with weathered mesh casing
- Aged regional wall maps marked with red grease pencil survival routes
- Scattered empty tin cans, spent brass shell casings, and vintage notebooks
- Hidden micro Bluetooth speaker playing looped static emergency broadcasts
How to Style It
Place a battered wooden desk and industrial metal chair into an empty corner. Mount aged geographical maps on the wall, circling safe zones with red grease pencil. Set an antique radio and gooseneck microphone centrally on the wooden desk surface.
Scatter crumpled notebook pages containing frantic handwritten emergency coordinates and Morse code. Conceal a small wireless speaker inside the radio cabinet playing looped Morse static. Cast warm directional light across the desk using an adjustable green banker’s lamp.
11. Overturned Supply Cart Ruin
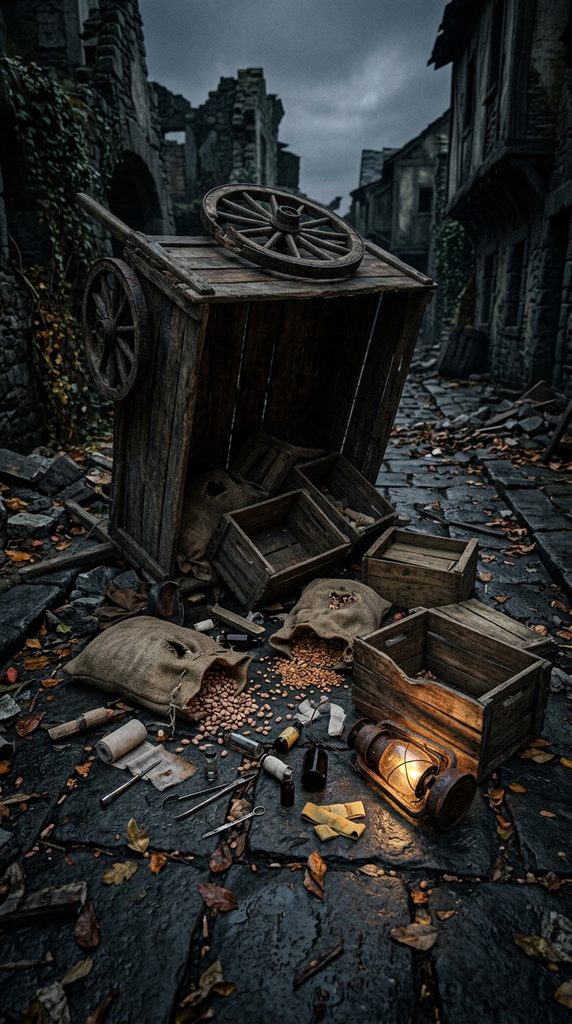
Scavenger’s Breached Stash
Style an antique wooden wagon or industrial pushcart tipped carelessly on its side. It looks like desperate scavengers dropped valuable medical rations while fleeing approaching hordes. The deliberate mess feels organic, chaotic, and ripped straight from an apocalypse film set.
Spilled supplies, rusted lanterns, and tattered canvas wraps provide endless visual storytelling details. The overturned wagon breaks up flat floor space, adding dramatic vertical and diagonal geometry. It functions as a brilliant, immersive barrier directing party foot traffic naturally.
Materials You Will Need
- Wooden garden handcart, wheelbarrow, or industrial metal stocking cart
- Wooden wooden crates branded with stenciled military survival logos
- Antique kerosene lanterns fitted with flickering battery LED flame bulbs
- Spilled burlap sacks filled with dried beans, rope, and vintage tools
- Damp autumn leaves and shredded canvas tarps for ground layering
How to Style It
Tip the wooden handcart onto its side along a primary garden walkway or hallway. Spill wooden crates outward from the cart bed, propping lids open with debris. Scatter vintage medical bottles, canvas pouches, and coiled jute rope across the floor.
Drape a tattered green canvas tarp across half of the overturned cart chassis. Hang a cold, rusted battery lantern from the wagon handle to illuminate spills. Surround the ground scatter with crunchy leaves to make the scene look undisturbed.
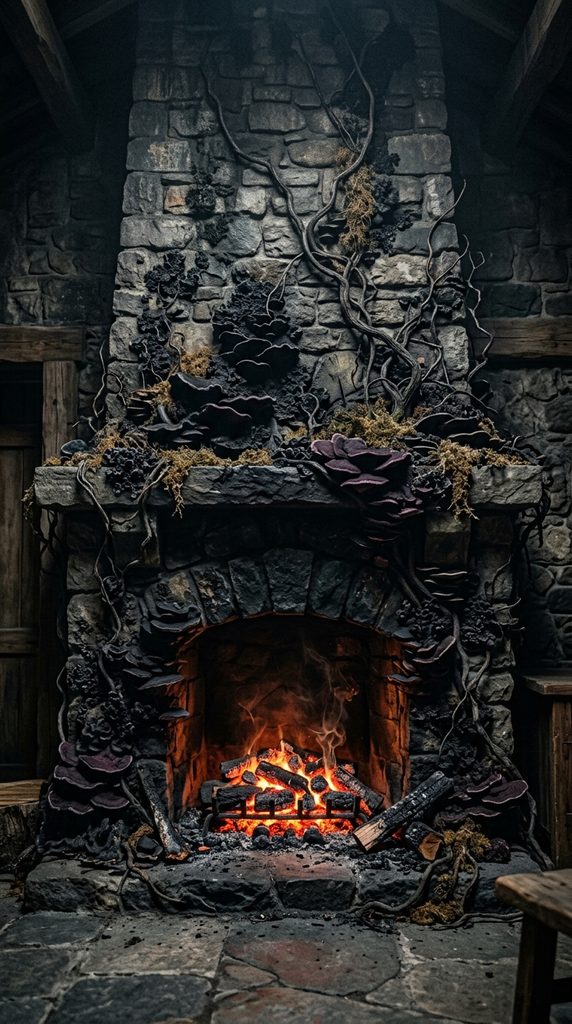
12. Creeping Black Lichen Fireplace
Biological Spore Infestation
Transform a traditional stone or brick fireplace into the ground-zero epicenter of infection. Tendrils of black lichen and creeping fungal spores spread outwards across the mantelpiece. It mimics modern post-apocalyptic settings where mysterious organisms transform living hosts into monsters.
Combining textured foam fungi with deep purple and matte black pigments looks extraordinary. Illuminated by glowing orange coals beneath, the fireplace feels actively dangerous and alive. It provides an impressive, non-traditional architectural statement piece for cozy autumn living rooms.
Materials You Will Need
- Expanding spray foam insulation to sculpt organic fungal shelf shapes
- Matte black, deep charcoal, and iridescent plum spray paints
- Real dried shelf fungus, preserved forest moss, and twisted vine twigs
- Battery-operated flickering red and orange embers or glowing coals
- Clear gloss varnish to give select fungal caps a wet, biological sheen
How to Style It
Spray expanding foam onto wax paper in overlapping, organic shelf-mushroom clusters. Once cured, carve foam edges with craft knives to produce natural mushroom textures. Paint the fungal shelves with matte black, dusting rims with deep plum pigments.
Affix the sculpted fungi climbing out from the fireplace hearth and up mantels. Weave dried forest moss and twisted twigs between the spreading biological fungal shelves. Place flickering red and orange coals inside the hearth to backlight the dark growth.
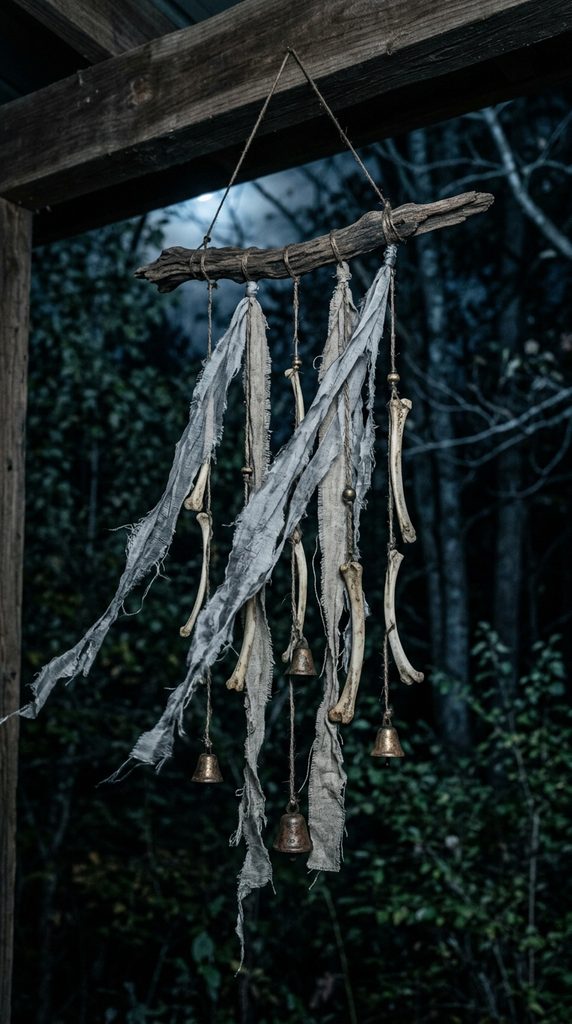
13. Tattered Silk and Bone Wind Chimes
Macabre Boundary Warnings
Hang eerie, tactile warning chimes along outdoor trees or porch overhang rafters. In cinema, wilderness survivors construct acoustic warning systems using scavenged scrap and skeletal remains. These fragile chimes sway gently in autumn drafts, producing delicate, bone-chilling acoustic clatter.
Combining delicate torn gray silk ribbons with bleached animal bone replicas creates poetry. The contrasting textures look stunning when backlit by a bright full moon outdoors. It introduces atmospheric kinetic movement and gentle, unsettling sounds to exterior entryway decor.
Materials You Will Need
- Cast resin replica animal bones, ribs, and small animal skulls
- Strips of torn gray raw silk, tattered linen, and black cheesecloth
- Heavy dark fishing line or weathered hemp twine for structural suspension
- Driftwood branches or rusted iron rings to act as the top chime hanger
- Small tarnished brass bells that chime faintly in soft outdoor breezes
How to Style It
Suspend a weathered driftwood branch horizontally from porch rafters using dark twine. Tie varied lengths of raw silk ribbons and shredded cheesecloth along the branch. Fasten resin bones, small ribs, and brass bells to the hanging textile ends.
Vary the lengths intentionally so bones brush together gently during autumn evening winds. Place an outdoor uplight beneath the hanging chimes to cast kinetic dancing shadows. The faint clattering bone sounds immediately alert arriving guests that danger lurks nearby.
14. Entombed Vault Breached Doorway
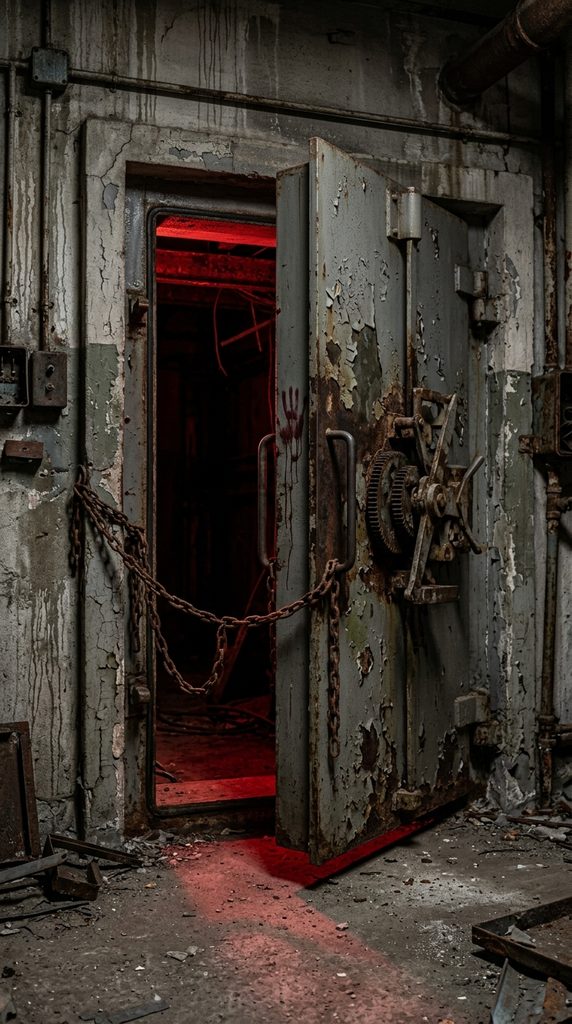
Subterranean Bunker Breach
Create the illusion that an underground concrete fallout bunker was forced open violently. Heavy steel vault doors with peeling gray paint suggest high-security containment failed miserably. Claw marks and bent metal bars tell the terrifying story of what escaped.
Using lightweight insulation foam panels carved to look like poured industrial concrete works wonders. Metallic graphite powders rubbed over foam edges mimic cold, heavy structural blast steel. It turns any ordinary basement staircase or garage doorway into a secure facility ruin.
Materials You Will Need
- Large rigid insulation foam boards from home improvement stores
- Stone-texture gray spray paint and metallic graphite finishing wax
- Large plastic structural gear wheels and faux valve turn handles
- Heavy iron chains wrapped around doorframes with large padlocks
- Deep crimson acrylic wash for dried bloody hand drags across gray metal
How to Style It
Cut rigid foam boards to frame your doorway, carving simulated concrete seams. Spray foam panels with stone-textured gray paint, highlighting edges with metallic graphite wax. Mount a central plastic valve wheel on the door to mimic a blast vault.
Hang heavy rusted chains loosely across the doorframe, leaving the door cracked open. Paint faint, dried bloody hand drag marks scraping outward from the dark interior. Place a low red warning beacon glowing inside the cracked room beyond sight.