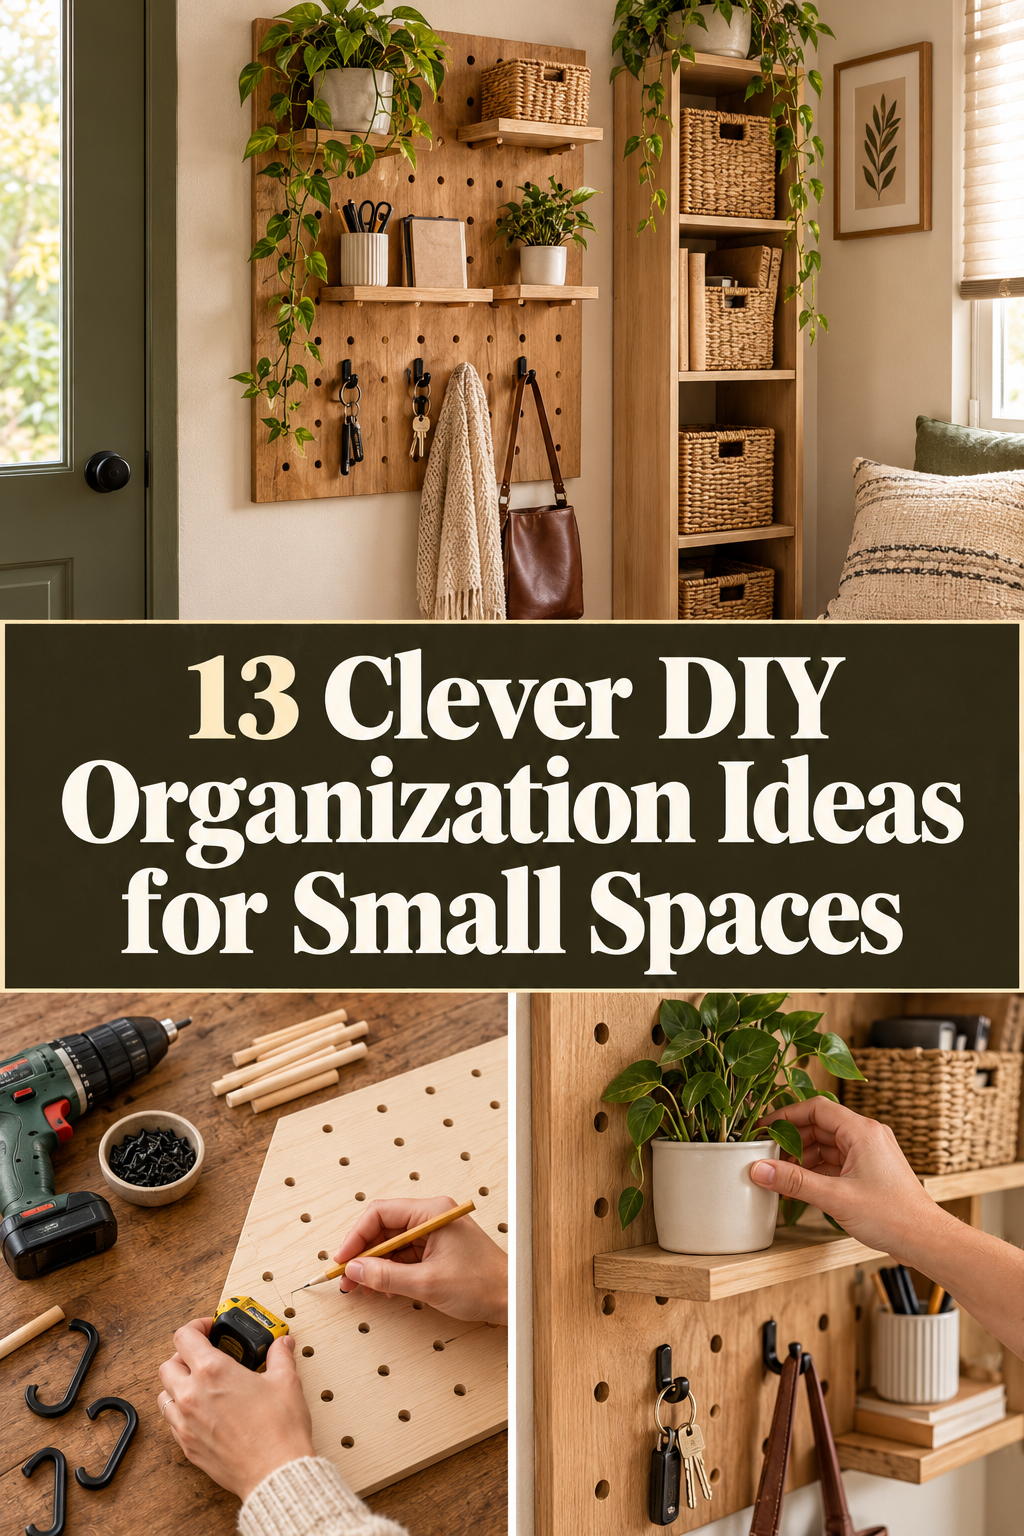
13 Clever DIY Organization Ideas for Small Spaces
Living in a compact space does not mean you must endure overwhelming household clutter. Many people believe organizing small apartments requires purchasing expensive custom-built closet systems. However, smart DIY organization ideas unlock massive functional potential using everyday, budget-friendly materials. Pinterest feeds are continually filled with brilliant, accessible hacks that maximize tiny living quarters. You can easily recreate viral storage solutions using affordable thrift items and hardware staples. Simple weekend organizational projects immediately eliminate daily clutter while boosting overall home functionality. Maximizing compact living areas combines clever vertical thinking with intentional, clean design aesthetics.
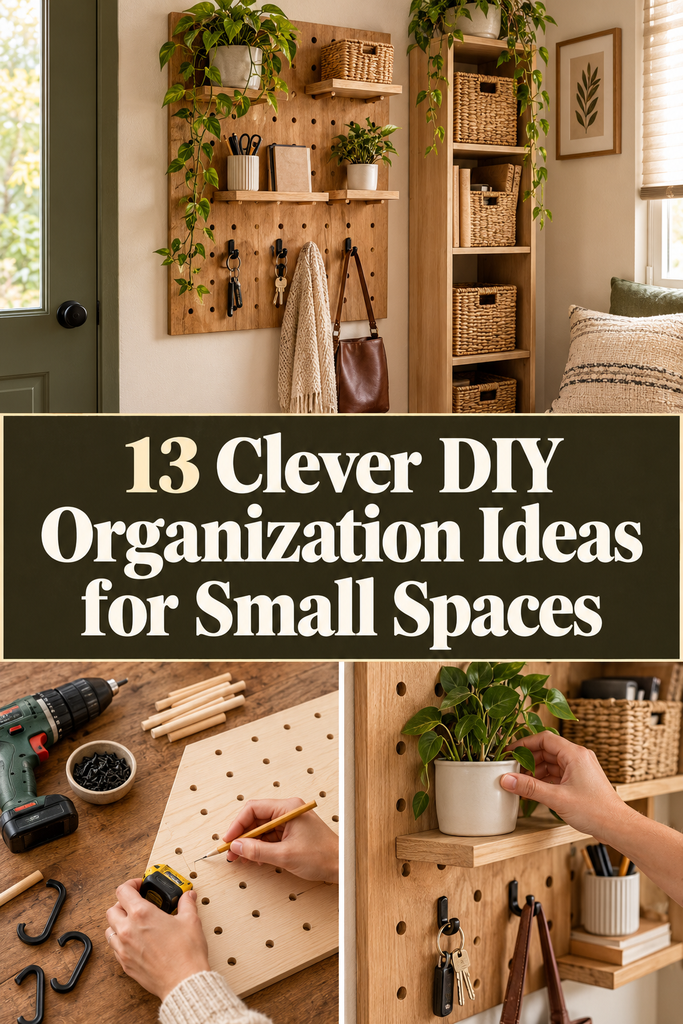
Unlocking Massive Storage Potential Without Expensive Renovations
Achieving functional living in small rooms depends heavily on using overlooked vertical spaces. Narrow gaps between appliances, blank walls, and cabinet doors hide incredible storage potential. You do not need professional construction experience to install brilliant, space-saving organizational hacks. Inexpensive pine boards, tension rods, wire baskets, and simple hooks work wonders everywhere. Thrift stores also offer plenty of wooden crates and wire organizers for pocket change. Furthermore, clearing flat countertops and tabletops immediately creates an open, peaceful room atmosphere. Intentional organization turns chaotic, cramped corners into streamlined, hyper-functional everyday storage zones.
Why Custom DIY Organizers Beat Store-Bought Systems
Mass-produced plastic storage containers rarely fit the exact dimensions of small apartment nooks. In contrast, custom DIY organizers adapt precisely to your home’s unique awkward corners. You choose the specific finishes, timber tones, and hardware to match your decor. Additionally, building customized organizers provides a rewarding, productive sense of creative satisfaction. Transforming basic pine scraps into an ultra-slim spice rack brings lasting daily efficiency. Every completed organization project saves valuable minutes during hectic morning rush hours. Custom handmade organizers ensure you never waste precious square inches on ill-fitting bins.
Smart Pre-Organization Audits for Compact Living
A truly successful organizing overhaul always begins with a ruthless, intentional closet audit. First, assess every problem corner before purchasing any new screws, wood, or containers. Discard expired pantry items, donate unworn clothes, and clear duplicate kitchen kitchen tools. Group remaining necessities into clear functional categories based on daily usage frequency. Keeping your high-frequency daily items easily accessible prevents drawers from descending into chaos. Next, carefully measure your targeted awkward corners using a flexible tape measure. Precise measurements prevent unnecessary trips to hardware shops for mismatched storage components.
Maximizing Tiny Footprints with Multifunctional Storage Solutions
Compact living spaces demand that furniture and wall fixtures serve dual functional purposes. A floating wall mirror can easily conceal secret internal jewelry and vanity storage. Similarly, a tiered hanging rail can organize cooking utensils while displaying green plants. Smart multi-tiered systems maximize air space without stealing an inch of walkable flooring. Light neutral wood tones and crisp white finishes keep small rooms feeling expansive. Moreover, keeping storage solutions elevated makes small apartment floor plans appear noticeably bigger. Simple DIY organizational additions turn small, cramped apartments into organized, airy urban sanctuaries.
Setting Up a Tidy Workspace for Building Organizers
Having a clean, flat crafting area makes building household organizers completely stress-free. Protect kitchen dining tables with sturdy corrugated cardboard or heavy drop cloths beforehand. This simple precaution prevents accidental drill gouges, wood scratches, and sticky glue spills. Assemble essential tools like electric screwdrivers, wood screws, rulers, and sandpaper blocks together. Clear plastic containers keep tiny nails, picture hangers, and anchors sorted during construction. Work in bright, well-ventilated areas when spraying protective protective clear sealants or paints. Keeping your building workspace tidy keeps projects moving quickly toward neat, functional results.
1. Ultra-Slim Rolling Refrigerator Pantry Cart
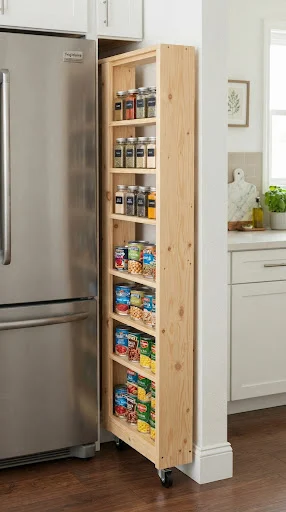
The narrow gap between your kitchen refrigerator and drywall often sits completely unused. That five-inch sliver of dead air space holds massive untapped pantry storage potential. Building a slim rolling cart lets you store dozens of canned goods neatly. It glides out effortlessly on small casters, disappearing smoothly back into its hiding spot.
Utilizing Narrow Kitchen Gaps for Hidden Canned Storage
Small apartment kitchens regularly suffer from overcrowded cabinets and overflowing dry pantry shelves. Slipping a rolling shelving rack into that tight gap creates instant concealed storage. The vertical shelves hold spices, oils, vinegar bottles, and canned foods in single-file order. It keeps cooking essentials easily accessible while freeing up prime eye-level cabinet shelving.
Materials Needed for Rolling Pantries
- Sanded pine craft wood boards (four inches wide)
- Thin plywood or hardboard sheet for the back panel
- Set of four small two-inch swivel caster wheels
- Sturdy cabinet pull handle and coarse wood screws
- Natural wood stain or washable satin white latex paint
Step-by-Step Rolling Cart Construction
- Measure the exact depth and width of your refrigerator gap carefully.
- Cut two long vertical pine side boards to matching wall heights.
- Cut five horizontal pine shelf boards to fit gap depth.
- Screw horizontal shelf boards between the vertical pine side boards evenly.
- Add narrow wooden dowels across shelf fronts to prevent falling cans.
- Fasten the thin plywood back panel securely with small brad nails.
- Sand all rough wooden edges smooth using 120-grit sandpaper blocks.
- Screw four small caster wheels onto the bottom corners of the cart.
- Attach a sleek metal handle onto the front facing wooden upright.
- Slide the rolling cart into the gap and load with jars.
2. Minimalist Under-Bed Rolling Wooden Storage Drawers

The expansive floor area beneath bed frames often turns into a dusty wasteland. Plastic under-bed storage tubs look cheap and scratch up hardwood flooring surfaces quickly. Building shallow wooden drawers on casters provides hidden, elegant out-of-season clothing storage. Adding sleek leather handles brings a high-end Scandinavian look to simple wooden boxes.
Reclaiming Floor Space Beneath Mattresses with Rolling Boxes
Small bedrooms rarely have enough closet space for bulky winter sweaters and linens. Rolling wooden boxes keep heavy blankets tucked away neatly out of daily sight. The low-profile caster wheels glide smoothly across flat carpets and polished wood alike. It turns dead floor space into an organized, accessible extension of your wardrobe.
Materials Needed for Under-Bed Drawers
- Smooth pine or birch plywood panels (six inches high)
- Half-inch thick plywood base sheet cut to bed dimensions
- Four low-profile rubber caster wheels with mounting screws
- Thick natural leather strap scrap for crafting minimalist pull handles
- Drill, driver bits, wood glue, and countersunk wood screws
Step-by-Step Under-Bed Drawer Assembly
- Measure the clearance height between your bed frame and floor.
- Cut four vertical plywood sides to create your shallow box frame.
- Join the four wooden corners securely using wood glue and screws.
- Fasten the bottom plywood base sheet firmly across the frame.
- Sand all interior and exterior timber surfaces until completely silky smooth.
- Mount four low-profile rubber casters to the bottom plywood base corners.
- Cut a six-inch strip of thick natural tan leather strap.
- Fold the leather strap in half to form a soft pull loop.
- Screw the leather loop firmly into the front face of drawers.
- Fill the finished rolling drawer with seasonal linens and slide away.
3. Tiered Tension-Rod Vertical Cutting Board Divider
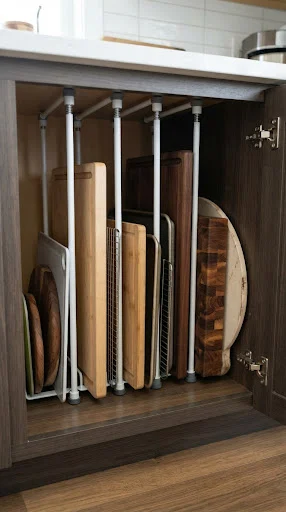
Baking sheets, muffin tins, and heavy cutting boards create loud, chaotic cabinet stacks. Removing one pan from the bottom of a stack causes a noisy avalanche. Installing spring-loaded tension rods vertically divides deep base cabinets into neat organizer slots. It allows you to store flat cookware upright for instant, silent access.
Organizing Flat Kitchen Cookware Vertically Without Tools
Deep kitchen lower cabinets quickly turn into messy dumping grounds for flat trays. Stacking baking pans horizontally ruins non-stick coatings through constant rough metal friction. Vertical dividers let you slide out single sheet pans without disturbing others nearby. This brilliant no-drill project takes two minutes and costs next to nothing.
Materials Needed for Vertical Dividers
- Four to six short adjustable spring-loaded metal tension rods
- Deep kitchen base cabinet or unused lower pantry shelf space
- Damp microfiber cloth for wiping away internal grease and dust
Step-by-Step Tension Rod Installation
- Empty the base cabinet completely and wipe surfaces with soapy water.
- Measure the vertical interior height inside your target lower cabinet shelf.
- Twist your spring-loaded tension rods to match that interior cabinet height.
- Position the first tension rod vertically three inches from the wall.
- Press the spring firmly against the top and bottom cabinet surfaces.
- Install a second tension rod directly behind the first for stability.
- Repeat the process to create several narrow, parallel vertical storage slots.
- Ensure all tension rods are seated securely and straight under tension.
- Slide flat baking sheets and wooden cutting boards between the rods.
- Enjoy smooth, silent cookware access every single time you cook meals.
4. Modern Wall-Mounted Pegboard Tool and Craft Station

Small craft rooms and home offices easily become swamped with scissors, tapes, and rulers. Crowding desktop surfaces with bulky organizer caddies steals precious workspace for creative projects. Mounting an oversized framed pegboard transforms empty drywall into modular, customizable hanging organization. You can rearrange hooks, small ledges, and metal cups as supplies change.
Creating Customizable Modular Wall Displays for Everyday Tools
Horizontal desks stay clutter-free when small craft supplies hang vertically within reach. A painted wooden pegboard organizes brushes, ribbons, and pliers into visual art. The modular holes let you shift wooden shelves around to hold jars. It gives small home offices a clean, industrious, Scandinavian designer workshop vibe.
Materials Needed for Wall Pegboards
- Sheet of sturdy wooden or metal pegboard (quarter-inch holes)
- Four pine furring strips to build a rear standoff frame
- Assorted metal pegboard hooks, wire baskets, and wooden peg dowels
- Heavy-duty drywall wall anchors, screws, and an electric hand drill
- Can of satin warm cream or soft sage interior latex paint
Step-by-Step Pegboard Installation Guide
- Cut the pegboard sheet to fit your designated office wall area.
- Paint the front surface with two coats of warm cream paint.
- Screw four pine furring strips together to build a rectangular frame.
- Mount the wooden perimeter frame securely into wall studs with screws.
- Screw the painted pegboard panel directly onto the wooden standoff frame.
- Ensure the standoff frame creates clearance behind peg holes for hooks.
- Insert metal hooks and small wire hanging baskets into the holes.
- Add small wooden display shelves using pairs of straight peg hooks.
- Hang scissors, craft tapes, measuring tools, and notebooks in zones.
- Step back and admire your clean, open, productive creative desktop.
5. Chic Over-the-Door Copper Pipe Towel Ladder
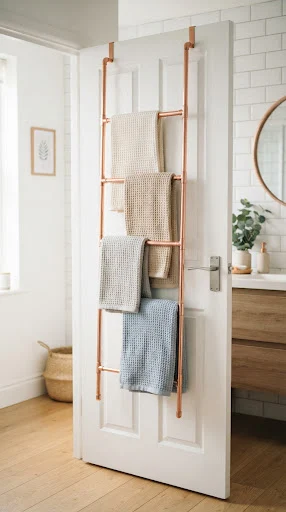
Small bathrooms frequently lack sufficient wall space for mounting wide multiple towel bars. Damp bath towels bunched together on single wall hooks dry slowly and smell musty. Assembling an ultra-slim copper pipe hanging ladder provides multi-tiered hanging storage behind doors. The industrial rose-gold metal adds luxurious modern warmth to tiny, humid bathrooms.
Hanging Multi-Tiered Linens Behind Tiny Bathroom Doors
Wet bath sheets need plenty of open airflow to dry completely between showers. Hanging a tiered ladder over the back of doors uses zero floor space. The warm metallic copper tones contrast beautifully against crisp, painted white bathroom doors. It holds multiple oversized bath towels flat, ensuring fresh, quick drying daily.
Materials Needed for Copper Ladders
- Half-inch rigid copper plumbing pipes cut into equal rungs
- Matching half-inch copper elbow fittings and copper tee connectors
- Fast-setting metal super glue or clear two-part epoxy adhesive
- Two sturdy over-the-door metal hanging hooks or durable woven straps
- Tube of metal polishing cream and clean soft cotton cloth
Step-by-Step Copper Ladder Construction
- Cut three copper pipe rungs eighteen inches wide for towels.
- Cut four vertical copper pipe side pieces twelve inches long each.
- Clean pipe ends thoroughly using steel wool to remove dark oxidation.
- Apply metal adhesive inside copper tee fittings with craft sticks.
- Connect horizontal pipe rungs between vertical pipes using the tee fittings.
- Cap top and bottom corners using sleek ninety-degree copper elbows.
- Allow the high-strength epoxy adhesive to cure undisturbed for four hours.
- Buff the entire copper ladder surface with polishing cream until brilliant.
- Attach durable woven hanging straps securely to the top ladder corners.
- Hang the ladder over the bathroom door using slim metal hooks.
- Drape plush waffle bath towels neatly across rungs to dry.
6. Magnetic Spice Jars for Refrigerator Side Walls
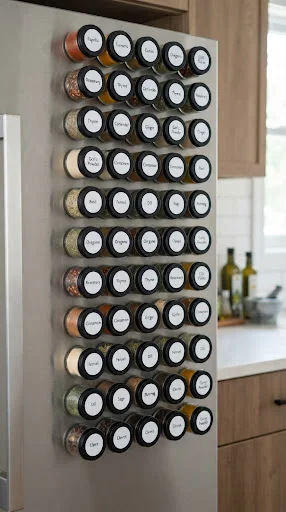
Deep spice cabinets quickly turn into cluttered abysses where small jars disappear forever. Searching through dozens of tiny containers while cooking meals causes frustrating dinner delays. Attaching strong neodymium magnets to glass jar lids creates instant vertical spice storage. The unused steel side panel of your kitchen refrigerator becomes a functional spice rack.
Turning Refrigerator Steel Panels into Accessible Herb Displays
Clear glass jars display colorful spices like turmeric, paprika, and oregano as decor. Mounting them magnetically keeps seasonings at comfortable eye level beside cooking prep areas. You free up an entire cabinet shelf for larger pantry baking staples. It turns an empty kitchen appliance surface into an organized, colorful culinary statement.
Materials Needed for Magnetic Jars
- Set of small, identical round glass jars with flat metal twist lids
- Strong neodymium disc craft magnets (half-inch wide, nickel-plated)
- High-strength two-part epoxy glue or heavy-duty gorilla adhesive
- Sheet of printed or handwritten minimalist waterproof vinyl spice labels
- Rubbing alcohol and clean paper towels for degreasing lid surfaces
Step-by-Step Magnetic Jar Assembly
- Wipe the inside and outside of jar lids with rubbing alcohol.
- Mix a small batch of strong two-part epoxy glue on cardboard.
- Apply a dab of mixed epoxy directly onto the magnet backs.
- Press two strong magnets firmly onto the top of each lid.
- Let the heavy-duty adhesive cure undisturbed for twenty-four full hours.
- Apply minimalist, clean vinyl spice name labels to jar glass bodies.
- Fill glass jars with your favorite dried cooking herbs and spices.
- Twist the magnetized metal lids tightly onto the filled glass jars.
- Snap the magnetic jars onto the side of your metal refrigerator.
- Arrange the jars in neat, alphabetized geometric rows for instant access.
7. Floating Entryway Console with Hidden Drawer
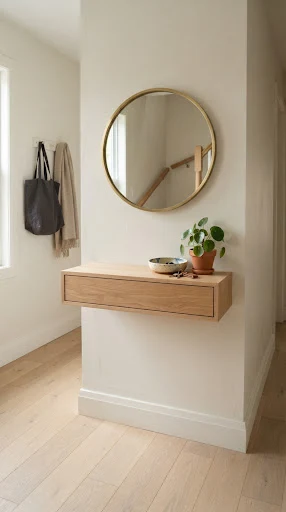
Tiny apartment entryways rarely accommodate bulky credenzas, umbrella stands, or traditional entryway tables. A narrow floating wall console provides a sleek landing pad for everyday keys. Tucking a hidden shallow pull-out drawer inside conceals unsightly mail, sunglasses, and wallets. Mounting the unit directly to wall studs leaves floor space open for shoes.
Decluttering Narrow Entryways with Sleek Suspended Timber
Cramped front doors often become dumping grounds for bags, jackets, and loose mail. A wall-mounted floating shelf creates an airy entrance focal point without visual bulk. You can check your appearance and drop your keys without tripping over table legs. It introduces warm organic wood tones to tiny entryways while managing clutter.
Materials Needed for Floating Consoles
- Sanded pine or white oak timber board (eight inches deep)
- Matching timber strips to construct a shallow internal sliding box
- Concealed heavy-duty steel floating shelf mounting brackets with rods
- Electric hand drill fitted with specialized extra-long timber auger bit
- Satin clear polyurethane wood varnish and wall toggle mounting anchors
Step-by-Step Floating Console Tutorial
- Cut your oak top board cleanly to three feet in length.
- Construct a shallow wooden box frame beneath the main top shelf.
- Assemble a simple sliding drawer box to fit inside that frame.
- Sand all timber surfaces smooth using 180-grit fine sandpaper sheets.
- Apply two coats of satin polyurethane varnish, drying between coats.
- Drill two deep bracket mounting holes into the rear timber edge.
- Hold heavy-duty steel brackets against entryway walls and check level.
- Fasten the steel wall brackets firmly into wall studs with screws.
- Slide the timber console box smoothly onto the anchored steel rods.
- Insert the sliding wooden drawer into the concealed lower cavity.
- Style the top surface with a ceramic key dish and mirror.
8. Inside-Cabinet Wire Basket Cleaning Supply Caddy
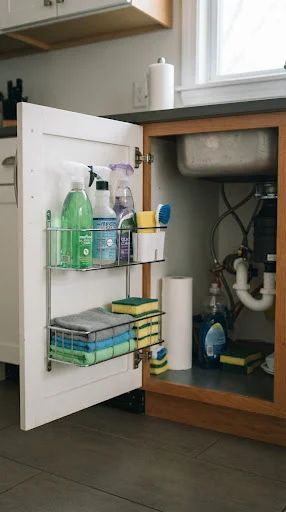
Under-sink kitchen cabinets quickly devolve into messy jungles of cleaning spray bottles. Finding a specific surface cleaner means digging through tangled brushes and damp sponges. Mounting shallow metal wire baskets onto the inside of cabinet doors organizes bottles. It utilizes hollow door clearance while keeping sink cabinet bases totally clear for buckets.
Organizing Spray Bottles Inside Dead Cabinet Door Space
The recessed space behind kitchen and bathroom cabinet doors often goes completely wasted. Attaching lightweight metal wire caddies lifts cleaning chemicals up to comfortable eye level. Keeping bottles upright prevents messy leaks from pooling on cabinet floor boards. It maximizes small utility cabinets without requiring complicated wooden drawer installations.
Materials Needed for Door Caddies
- Shallow rectangular metal wire pantry baskets or chrome caddies
- Pack of short half-inch wood screws with wide truss heads
- Electric hand screwdriver and small pilot drill bit
- Adhesive-backed clear silicone bumpers to prevent door rattling noise
- Flexible measuring tape and lead pencil for marking placements
Step-by-Step Cabinet Door Caddy Guide
- Open the sink cabinet door and measure interior clearance depths carefully.
- Ensure installed baskets will not hit interior shelves when doors close.
- Hold the metal wire basket against the inside wooden door panel.
- Mark screw hole locations carefully using your sharp lead pencil.
- Drill shallow pilot holes, taking care not to drill through doors.
- Drive short half-inch screws through basket mounting holes into wood.
- Fasten the screws securely without over-tightening into thin door panels.
- Stick clear silicone rubber bumper pads onto the lower basket corners.
- Load the wire caddy with glass cleaners, dish soaps, and sponges.
- Close the door gently to verify smooth clearance inside the cabinet.
9. Tiered Hanging Closet Wire Basket Fruit System
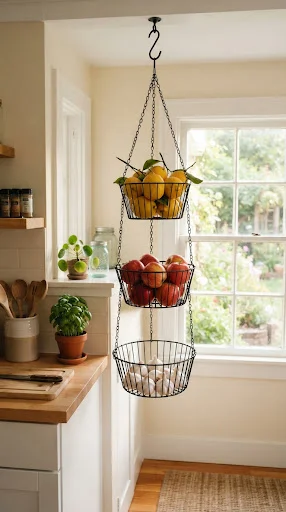
Kitchen countertops in studio apartments are too small to sacrifice for sprawling bowls. Leaving bananas, potatoes, and garlic out on counters creates visual noise and clutter. Suspending a tiered wire hanging basket from ceiling hooks lifts fresh produce upward. It clears food prep surfaces while allowing healthy air circulation around fruits.
Clearing Food Prep Counters with Hanging Produce Baskets
Crowded kitchen counters make everyday dinner preparation stressful, messy, and frustratingly cramped. Lifting round fruits and vegetables into hanging wire tiers restores valuable cutting space. The open metal mesh keeps air flowing freely, preventing produce from spoiling prematurely. It brings charming, functional market style into tiny city kitchen corners.
Materials Needed for Hanging Baskets
- Three-tier collapsible metal wire hanging produce basket system
- Heavy-duty steel swag ceiling hook with spring-toggle drywall anchor
- Electric hand drill fitted with wide spade drill bit for ceilings
- Pair of sturdy pliers to adjust hanging chain link heights
- Damp microfiber cloth for wiping metal wire tiers clean
Step-by-Step Hanging Basket Installation
- Locate an unused corner of your kitchen ceiling near prep counters.
- Drill a hole through the drywall ceiling using your spade bit.
- Insert the spring-action toggle bolt hook into the drilled hole.
- Tighten the ceiling hook clockwise until it clamps firmly against drywall.
- Wipe the three-tier wire basket clean with damp microfiber towels.
- Hang the top chain loop of the basket onto the ceiling hook.
- Adjust intermediate chain lengths using pliers to level each wire tier.
- Place heavy potatoes and root vegetables inside the wide bottom basket.
- Place onions and citrus fruits inside the medium middle basket.
- Rest delicate bananas and fresh avocados safely in the top basket.
10. Minimalist Birch Dowel Vertical Shoe Storage Rail
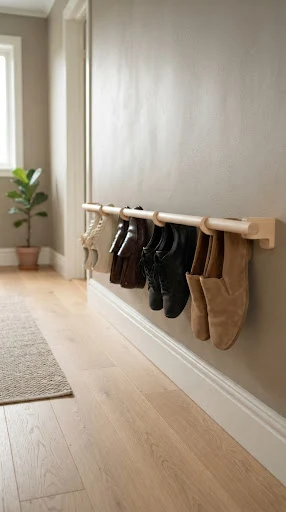
Shoes piled loosely near entryway doors create tripping hazards and unsightly visual chaos. Traditional bulky wooden shoe racks crowd narrow apartment hallways and trap floor dirt. Mounting smooth horizontal birch dowel rails along baseboards creates slim, floating shoe storage. You can tuck dozens of shoes flush against walls without losing floor space.
Storing Footwear Flush Against Hallway Walls with Wooden Rails
Standard shoe cabinets stick out ten inches into narrow, cramped apartment corridors. Resting shoe heels over slender wooden dowels suspends footwear flush against vertical walls. It keeps shoe soles away from drywall, preventing scuffs, dirt, and stains. Vacuuming hallway floors becomes effortless since footwear remains suspended cleanly off carpets.
Materials Needed for Shoe Rails
- Smooth round birch or oak wooden craft dowels (one-inch diameter)
- Pre-drilled wooden dowel wall mounting brackets or heavy brass pipe straps
- Drywall anchors, long wood screws, and electric hand drill
- Fine 180-grit sandpaper block and natural protective timber wax
- Bubble leveling tool and measuring tape for straight alignment
Step-by-Step Shoe Rail Installation
- Sand round wooden dowels smooth using fine 180-grit sandpaper sheets.
- Buff natural timber wax over wood to protect against shoe scuffs.
- Hold your bubble level against the targeted entryway wall near baseboards.
- Mark bracket hole locations seven inches above the finished floor level.
- Drill holes and insert heavy-duty plastic drywall anchors into walls.
- Screw the wooden or brass dowel support brackets firmly into anchors.
- Slide the smooth birch dowel rod horizontally through both brackets.
- Fasten set screws to prevent the round dowel rod from spinning.
- Install a second matching dowel rail twelve inches higher for boots.
- Slide the heels of sneakers and flats over rails to suspend.
11. Custom Acrylic Drawer Divider Vanity Tray
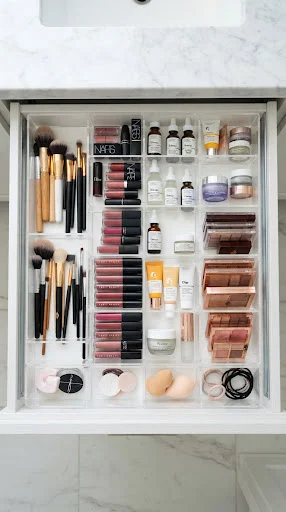
Bathroom and desk drawers quickly devolve into messy, chaotic piles of loose accessories. Digging through cosmetics, lipsticks, and hairpins wastes valuable time every single morning. Cutting clear acrylic sheets creates sleek, custom-fitted drawer organizers that look designer-made. The transparent dividers keep tiny accessories separated without visual clutter or bulk.
Dividing Shallow Drawers into Custom Organizational Compartments
Generic plastic divider trays rarely match the exact interior dimensions of vanity drawers. This leaves awkward empty gaps where small items slide and become hopelessly lost. Slicing custom acrylic dividers lets you tailor compartments to your exact makeup collection. The invisible acrylic walls maximize drawer interior space with crisp, high-end boutique elegance.
Materials Needed for Acrylic Dividers
- Sheets of clear extruded acrylic plastic (one-eighth inch thick)
- Specialized acrylic scoring utility knife with hooked metal blade
- Clear acrylic solvent cement or clear double-sided adhesive dots
- Metal safety straight-edge ruler and fine-tip permanent dry-erase marker
- Flexible measuring tape for measuring interior drawer dimensions
Step-by-Step Acrylic Divider Tutorial
- Measure the exact interior width, depth, and height of drawers.
- Mark cutting lines onto protective plastic film covering the acrylic sheets.
- Clamp your metal straight-edge ruler firmly along the marked line.
- Score the acrylic firmly five times using your hooked scoring knife.
- Move scored line to edge of tables and snap downward cleanly.
- Peel away protective plastic protective films from cut acrylic strips.
- Smooth sharp edges lightly using fine 400-grit wet sandpaper sheets.
- Apply tiny dots of clear solvent cement to join divider intersections.
- Let clear solvent weld joints together undisturbed for twenty minutes.
- Slide custom acrylic organizer grid into your clean vanity drawer.
- Sort makeup brushes, lipsticks, and beauty supplies into tailored slots.
12. Industrial Pipe Wall-Mounted Corner Clothes Rack

Tiny studio apartments and older rental homes often completely lack built-in bedroom closets. Bulky standalone wardrobes crowd small bedroom floors, blocking natural window light and doorways. Assembling an industrial black iron pipe rack across empty corners creates floating closet space. It transforms awkward bedroom corners into functional, chic open-wardrobe display areas.
Converting Awkward Room Corners into Open Industrial Wardrobes
Corner spaces in small bedrooms often sit empty, dead, and entirely underutilized. Mounting a diagonal hanging bar bridges corner walls, offering ample hanging space. The rugged black iron pipe adds bold architectural, urban loft style to bedrooms. It easily supports heavy winter coats without sagging, bending, or wobbling.
Materials Needed for Corner Racks
- Three-quarter-inch threaded black iron plumbing pipe (three feet long)
- Two matching threaded forty-five-degree black iron elbow pipe fittings
- Two circular black iron floor mounting flanges with screw holes
- Heavy-duty toggle wall anchors and long black drywall screws
- Rubbing alcohol, clean rags, and clear satin metal protective lacquer
Step-by-Step Corner Rack Assembly
- Wipe black iron pipes with rubbing alcohol to remove grease.
- Spray all iron pipe pieces with satin lacquer to prevent rust.
- Thread the forty-five-degree elbows onto both ends of straight pipes.
- Thread circular mounting flanges onto the opposite ends of elbows.
- Tighten all pipe threaded joints firmly using heavy pipe wrenches.
- Hold the assembled pipe rack diagonally across your chosen room corner.
- Check that the straight hanging pipe sits level using bubble levels.
- Mark flange screw hole positions onto both intersecting corner walls.
- Drill wall holes and insert heavy-duty toggle anchors into drywall.
- Fasten flanges firmly against walls using heavy black mounting screws.
- Hang your favorite shirts and jackets using matching wooden clothes hangers.
13. Fold-Down Wall-Mounted Murphy Desk and Organizer
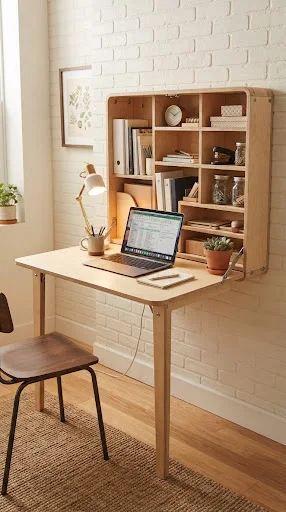
Working from home in a cramped apartment often means sacrificing your dining table. Bulky home office desks permanently consume precious square footage in compact living rooms. Building a wall-mounted fold-down Murphy desk provides an instant, functional workspace when needed. When the workday ends, it folds flat against walls, completely hiding paperwork clutter.
Folding Workstations Away into Walls to Reclaim Living Rooms
Cluttered work computers left on tables ruin relaxing evening downtime in small homes. A fold-down desk keeps laptops and office paperwork hidden away behind closed panels. The inside of the wall cabinet features shallow shelves for pens and notebooks. Dropping the front panel creates a sturdy, level desktop in two seconds flat.
Materials Needed for Murphy Desks
- Sanded three-quarter-inch birch plywood panels for cabinet frame
- Large sturdy piano hinge (continuous brass or nickel-plated hinge)
- Two heavy-duty folding locking lid support hinges or steel cables
- Magnetic touch-latch hardware to keep closed desk front flush
- Heavy-duty steel wall mounting cleats, screws, and hand drill
Step-by-Step Murphy Desk Construction
- Cut four plywood pieces to build a shallow wall cabinet frame.
- Screw the four cabinet frame pieces together using wood glue and screws.
- Add shallow internal wooden divider shelves to organize office supplies.
- Cut a sturdy plywood front door panel to match cabinet dimensions.
- Fasten the front desk panel to the cabinet base with piano hinges.
- Install two heavy-duty locking folding lid support hinges inside.
- These hinges hold the dropped panel perfectly horizontal at desk height.
- Mount heavy-duty French cleat hanging brackets to the cabinet rear.
- Fasten wall cleat securely into wall studs at thirty-inch desk heights.
- Hang the desk cabinet onto the anchored wall cleat with screws.
- Drop desk panel down to work, then fold up to conceal.