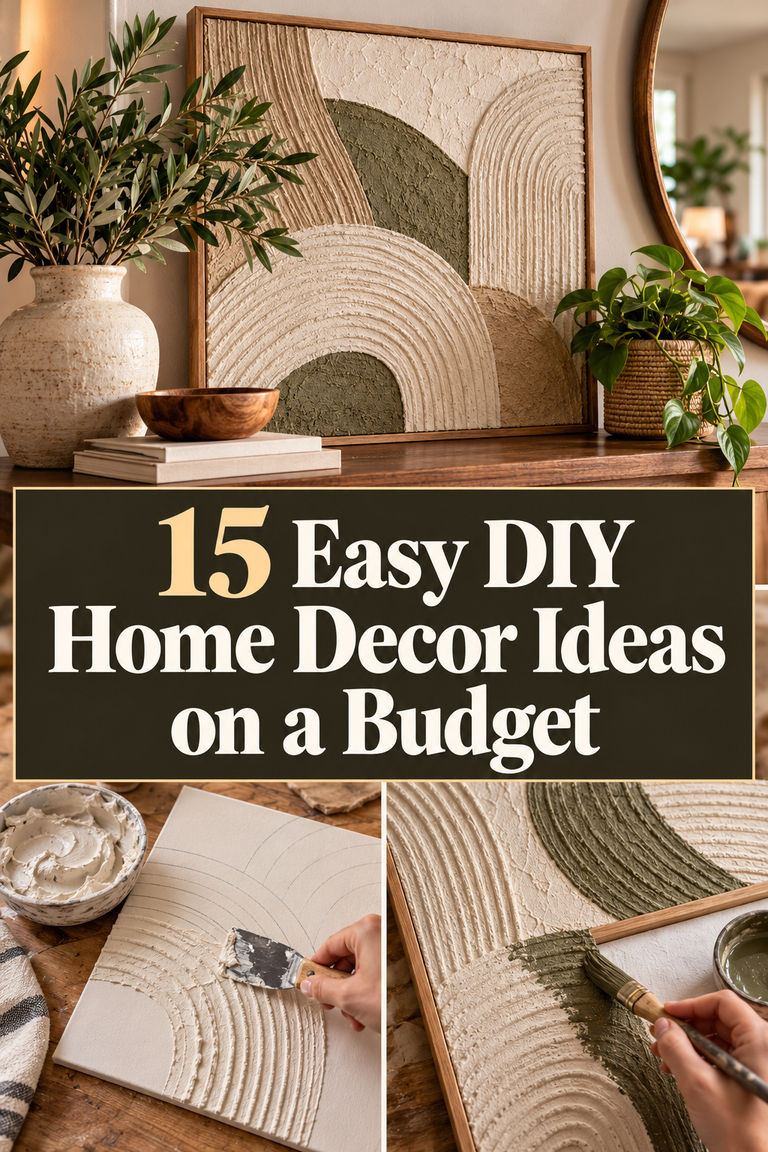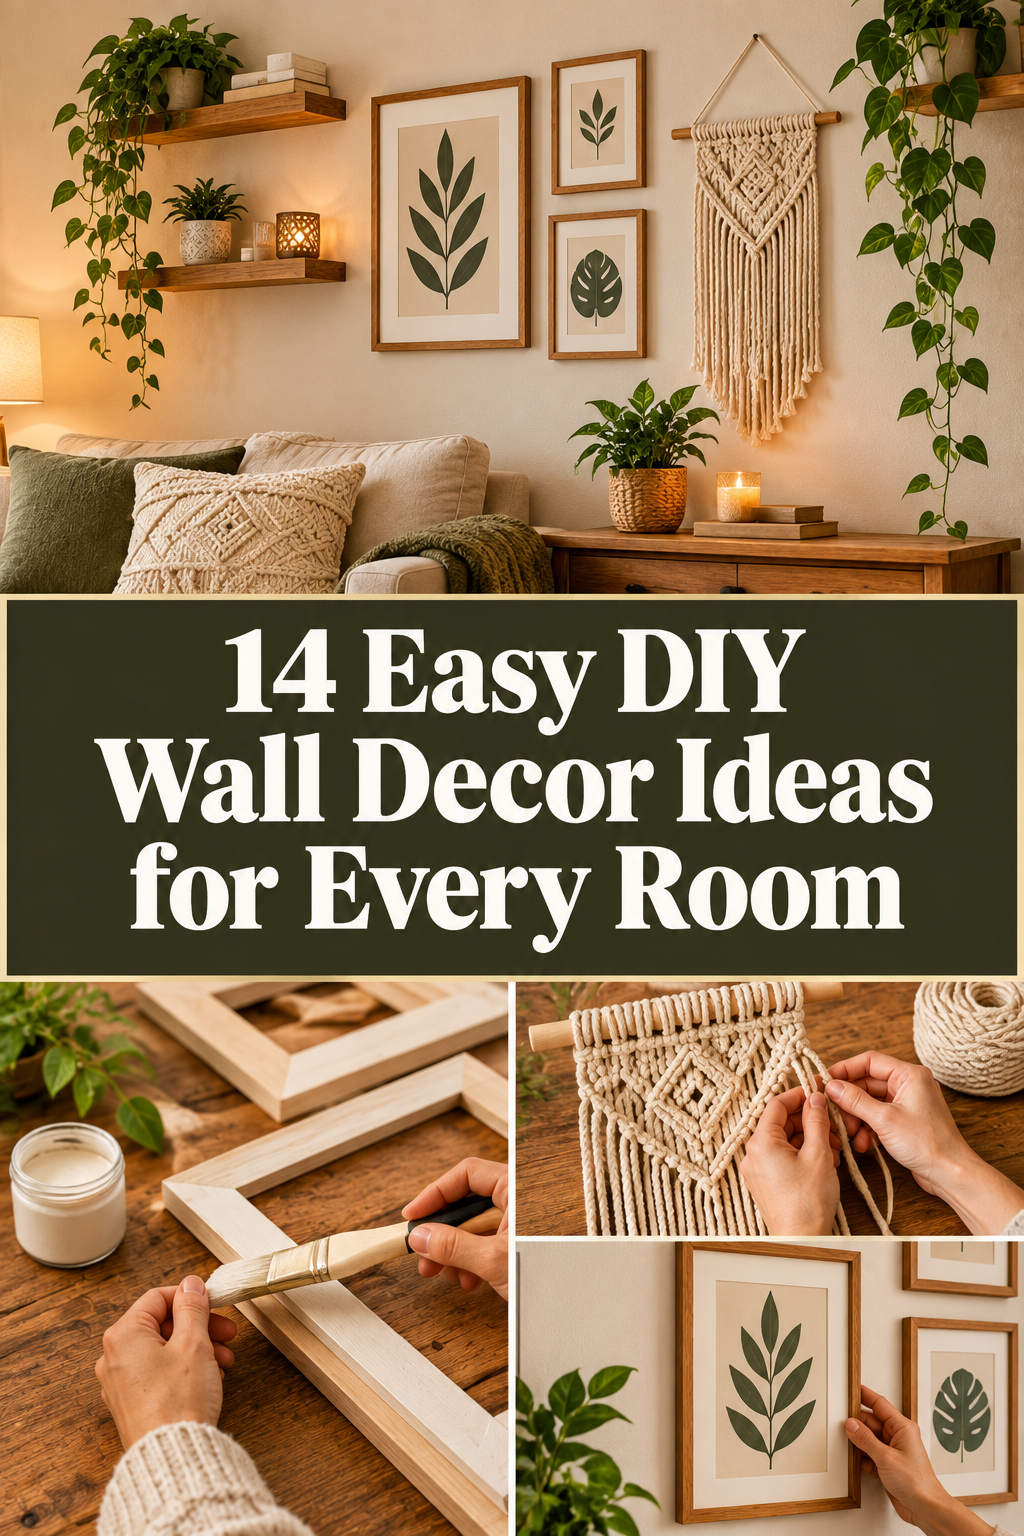
14 Easy DIY Wall Decor Ideas for Every Room
Blank walls often leave modern living spaces feeling cold, flat, and completely uninspired. Many people assume striking wall decor demands large financial investments or costly professional designers. However, simple handcrafted wall art introduces authentic warmth and personal charm into rooms. Pinterest feeds continually showcase viral decor projects that celebrate resourceful, budget-friendly design techniques. You can easily recreate high-end boutique looks using humble, everyday hardware supplies today. Simple weekend craft projects immediately boost your home’s total aesthetic ambiance. Elevating bare drywall combines deliberate vertical styling with balanced, modern color palettes effortlessly.

Creating High-End Aesthetics Without Overspending
Achieving a luxury designer look depends primarily on selecting balanced textures and colors. Raw pine wood, natural unbleached cotton, sculpted plaster, and warm metallics project sophistication. You can easily uncover these versatile craft materials at suburban hardware discount centers. Local thrift stores also conceal sturdy vintage picture frames waiting for modern transformations. Simply coating outdated glass containers in textured matte chalk paint creates stunning stoneware. Furthermore, systematically decluttering flat surfaces instantly elevates the visual caliber of your rooms. Clean, intentional tabletop styling always mimics the composed perfection of luxury architectural magazines.
Why Custom Handcrafted Wall Art Defines Living Spaces
Handcrafted decorative accents infuse genuine character and personal creative narratives into homes. Mass-produced retail decorations often feel completely impersonal, generic, and uninspired across modern rooms. In contrast, thoughtful bespoke creations tell meaningful stories while honoring your unique resourcefulness. Crafting functional wall art additions also provides deeply satisfying, mindful creative relaxation on weekends. Transforming flat wooden boards into functional, chic wall displays brings lasting personal pride. Every completed craft project adds an undeniably unique layer of tailored textural interest. Inexpensive craft supplies adapt smoothly to match your family’s personal practical living requirements.
Smart Planning and Preparation for Stress-Free Crafting
Every triumphant room transformation begins with methodical, organized preparation before handling any tools. First, walk through every individual room to evaluate blank corners needing visual attention. You likely already possess basic glass containers, scrap boards, or spare hardware fasteners. Grouping your existing materials prevents unnecessary, redundant purchases during trips to craft suppliers. Next, establish a sensible, fixed monetary budget for each specific room improvement idea. Keeping individual material costs around twenty dollars ensures home decorating remains delightful and stress-free. Always prioritize sturdy structural silhouettes when browsing through affordable secondhand flea market furniture aisles.
Elevating Compact Rooms with Deliberate Vertical Accents
Cramped apartments benefit dramatically from intentional, space-conscious decorating decisions and smart vertical displays. Empty drywall walls present tremendous unused opportunities for mounting sleek floating shelves and sconces. Upright displays clear valuable tabletop surfaces while creating dynamic, airy focal interest across rooms. Selecting warm, light-colored finishes brightens up shadowy hallway alcoves and compact bedroom sitting areas. Furthermore, hanging reflective mirrored accents naturally bounces radiant outdoor daylight directly across interior spaces. Small decorative adjustments keep domestic upgrade projects manageable for solo weekend crafters working alone. You can assemble charming decorative wall accents quickly without creating lingering renovation household chaos.
Setting Up a Tidy and Safe Creative Workstation
Establishing an orderly crafting table ensures your entire creative process remains smooth and joyful. Protect wide kitchen workspaces completely by rolling out heavy, recycled brown packaging paper beforehand. This fundamental protective layer catches accidental hot glue droplets and stray drips of wet paint. Keep everyday utility supplies like sharp shears, craft rulers, brushes, and adhesives neatly gathered together. Clear plastic containers keep tiny hardware screws, twine skeins, and sandpaper grits immediately accessible. Always open windows wide to ensure proper room ventilation whenever applying aerosol lacquers or glues. Working within tidy surroundings keeps your creative ideas flowing effortlessly toward professional, high-end finished results.
1. Minimalist Sculpted Plaster Arch Canvas Art
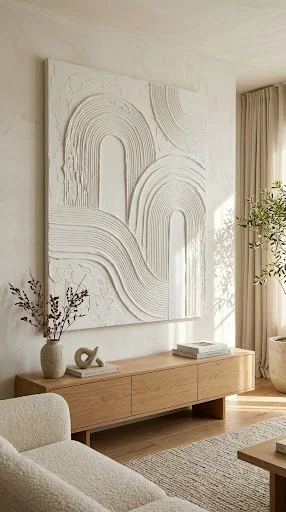
Large-scale abstract wall canvases make living spaces look custom, intentional, and designer-built. Buying giant framed canvas paintings often costs hundreds of dollars at modern galleries. Fortunately, joint compound from hardware stores creates magnificent textured art on cheap canvases. You can sculpt gorgeous minimalist waves using basic notched spackle trowels and spatulas.
Designing Monumental Minimalist Canvas Textures
Textured plaster art provides deep visual dimension without loud, distracting painted patterns. Neutral white wall pieces reflect shadows dynamically throughout sunny afternoons across living rooms. This technique lets you become the inspired abstract artist of your own home. It delivers an upscale museum vibe with remarkably little financial effort or training.
Materials Needed for Plaster Artwork
- Large, inexpensive stretched artist canvas from any discount shop
- Tub of premixed drywall joint compound or patching spackle
- Notched plastic adhesive trowel or coarse plastic texture comb
- Wide putty spatula knife
- Can of ultra-matte white interior paint and rollers
Step-by-Step Plaster Sculpting Guide
- Lay your stretched canvas flat upon protective work surfaces.
- Scoop joint compound directly onto canvas with your spatula.
- Spread the paste evenly across canvas half-inch thick.
- Drag notched plastic trowels firmly across wet joint compound.
- Form sweeping circular arches or clean vertical geometric ridges.
- Smooth messy outer canvas edges using damp craft sponges.
- Allow plaster to dry undisturbed for twenty-four full hours.
- Inspect cured plaster for unexpected cracks or structural flaws.
- Roll matte white paint completely over textured dry compound.
- Let paint dry before mounting artwork in bright rooms.
2. Minimalist Wooden Hanging Plant Propagation Station
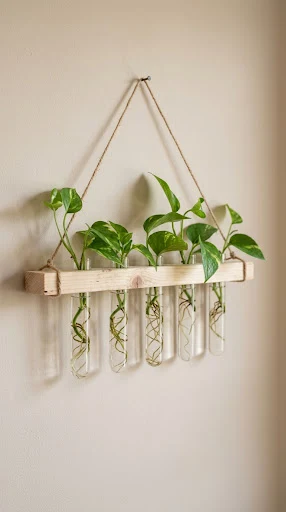
Indoor plants effortlessly introduce vibrant greenery and life into plain, sterile urban rooms. Propagating houseplant cuttings in water creates stunning organic wall art for empty walls. This minimalist timber propagation station merges natural blonde wood with clear laboratory glass. It displays rooted plant clippings while conserving limited tabletop space on desks and counters.
Bringing Natural Greenery to Empty Walls
Empty walls frequently look uninspired, chilly, and stark without natural botanical artwork displays. Wooden hanging stations create an eye-catching, living decorative gallery wall in bright kitchens. Watching tender green roots grow inside water brings continuous joy to plant lovers. It transforms standard vegetative propagation into a striking modern installation with zero maintenance hassle.
Materials Needed for Propagation Displays
- Clear glass test tubes with secure lip rims
- Sanded pine craft wood strip (two inches wide)
- Natural jute twine or soft twisted cotton cord
- Hand drill with specialized wood spade drill bit
- Fine 120-grit sandpaper and matte protective wood wax
Step-by-Step Wood Station Assembly
- Measure equal spaces across your timber strip for holes.
- Mark drilling locations carefully using a sharp lead pencil.
- Secure the timber firmly against a sturdy workbench surface.
- Drill through marked holes using your wide spade bit.
- Sand rough timber edges until the wood feels smooth.
- Apply a thin layer of natural finishing furniture wax.
- Drill two smaller hanging holes through the top edges.
- Thread natural jute rope securely through both hanging holes.
- Knot the cord ends underneath the pine board tightly.
- Slide glass test tubes safely into the predrilled openings.
- Fill glass tubes with water and insert green cuttings.
3. Neutral Boho Brushed Cotton Macramé Feather Hanging
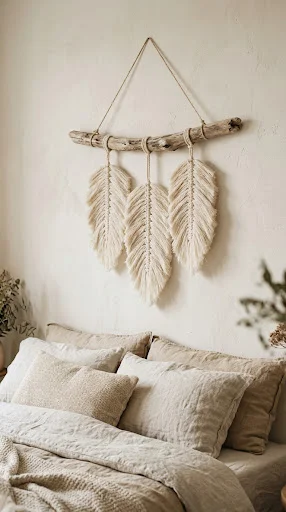
Boho home design remains wildly popular across visual Pinterest feeds and interior magazines. Macramé art adds tactile softness and welcoming warmth to stark, bare living rooms. Traditional woven fiber designs can feel intimidating and tedious for beginner craft lovers. Fortunately, brushed macramé feathers require only simple, repetitive knotting techniques and basic supplies.
Softening Bedroom Walls with Brushed Fiber Art
Sharp furniture edges and flat drywall can feel cold and unwelcoming in bedrooms. Woven cotton feathers introduce inviting, cozy movement into bedroom areas above wooden headboards. Suspended along a rustic branch, they bring rich artisan texture to neutral walls. You can match the cotton cords with your existing bedding and drapery sets.
Materials Needed for Macramé Feathers
- Single-strand natural macramé cotton cord (4mm thickness)
- Foraged natural tree branch or smooth wooden craft dowel
- Sharp fabric scissors or precision rotary fabric cutter
- Fine-tooth metal pet comb or sturdy wire brush
- Extra-hold matte aerosol hairspray or fabric stiffener liquid
Step-by-Step Feather Weaving Guide
- Cut one central support cord thirty centimeters in length.
- Cut twenty smaller horizontal cords twenty centimeters each individually.
- Fold the central cotton cord exactly in half lengthwise.
- Loop pairs of smaller cords across the center spine.
- Tie square lark’s head knots down the spine evenly.
- Pull all knots firmly to guarantee a tight weave.
- Comb the cotton cord strands out using wire brushes.
- Continue brushing until the cotton fringe separates completely soft.
- Trim cord edges carefully into a sleek oval leaf.
- Coat feathers with hairspray so they retain flat shapes.
- Tie the completed feather securely to your wooden branch.
4. Vintage Botanical Nature Prints with Antique Aging
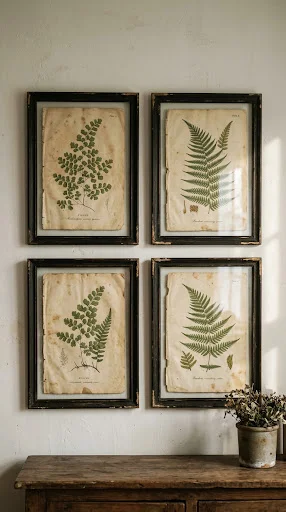
Classic botanical wall galleries instantly make casual homes look curated, historic, and collected. Antique nature illustrations present refined vintage elegance across blank dining spaces and hallways. Original historical art prints often fetch exorbitant prices at antique stores and galleries. However, free public-domain botanical archives allow free digital home printing on standard cardstock.
Recreating Timeless European Gallery Charm
Historic illustrations feature delicate floral details and warm, muted palettes from another era. Giving regular paper an aged tea bath produces realistic, authentic historic patina. Paired with dark thrifted frames, they evoke storied estates and European manor libraries. This project delivers maximum vintage sophistication for mere pennies without specialized artistic skill.
Materials Needed for Aged Botanical Prints
- Standard white cardstock with printed public-domain botanical illustrations
- Two bags of cheap, strongly brewed black tea
- Wide foam brush or shallow kitchen baking sheet
- Secondhand ornate picture frames from your local thrift
- Rubbing sandpaper or fine steel wool for distressing
Step-by-Step Tea-Staining Technique
- Print botanical nature drawings on matte heavy cardstock paper.
- Brew two black teabags inside boiling water for strength.
- Allow the dark tea bath to cool down completely.
- Lay the cardstock paper flat inside a baking pan.
- Coat paper generously with tea using a foam sponge.
- Leave the paper submerged for fifteen minutes to stain.
- Dry the sheet flat using an electric hair dryer.
- Rub frame edges with sandpaper to reveal raw timber.
- Insert the aged botanical paper inside your prepared frame.
- Mount the framed prints in symmetrical groups of four.
5. Architectural Modern Magnetic Wood Poster Rail
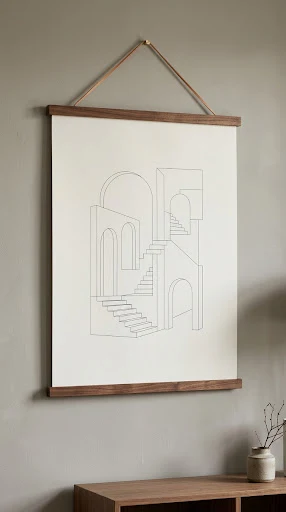
Traditional heavy picture frames with glass often reflect annoying indoor window glares. Magnetic wooden poster rails provide an airy, minimalist solution for displaying large paper art. Rare-earth neodymium magnets clamp delicate art prints securely without puncturing or tearing paper edges. This elegant project lets you swap seasonal artwork prints in mere seconds effortlessly.
Displaying Art Prints with Clean Scandinavian Rails
Heavy glass frames often look bulky and clinical in cozy modern apartment rooms. Slender wooden rails frame paper prints subtly while letting paper textures take focus. The warm timber tones harmonize with wooden furniture, introducing understated organic warmth. It represents an ingenious, budget-conscious framing alternative for oversize prints and charts.
Materials Needed for Poster Rails
- Four identical strips of flat pine or oak craft wood
- Small powerful neodymium disc magnets with countersunk screw holes
- Natural leather cord or twisted cotton twine for hanging
- Super glue or two-part epoxy adhesive for timber bonding
- Hand saw, sandpaper block, and natural wood stain wipe
Step-by-Step Poster Rail Guide
- Cut four timber strips one inch wider than art.
- Sand wood edges smooth using fine 180-grit sandpaper sheets.
- Wipe penetrating walnut wood stain over timber with cloths.
- Drill tiny shallow indentations along inside faces of strips.
- Glue small neodymium magnets flush inside holes with epoxy.
- Ensure magnets on opposing wood strips align with attraction.
- Staple leather cord ends to back of top rail.
- Clamp top of paper print between magnetized wooden rails.
- Clamp bottom of art print between lower magnetized rails.
- The lower weighted rails pull paper prints perfectly flat.
- Hang completed minimalist wall display from small brass nails.
6. Textured Braided Jute Rope Round Mirror Frame
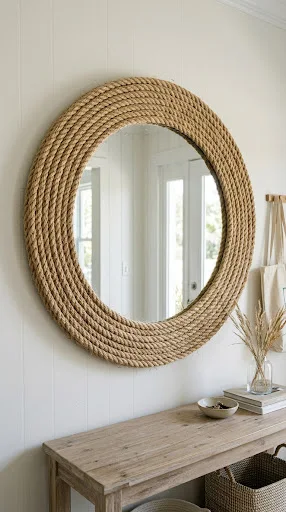
Frameless bathroom vanity mirrors often feel basic, unfinished, and institutional in modern rentals. Adding a natural woven jute border brings welcoming coastal texture and beachside warmth. Thick rope softens shiny reflective glass while masking chipped or imperfect glass edges. This beginner-friendly project instantly transforms plain mirrors in under an hour of crafting.
Transforming Plain Glass into Coastal Accents
Reflective glass bounces bright natural sunlight throughout dark entrance foyers and tiny hallways. Surrounding reflective mirrors with nautical jute rope adds breezy, organic texture to walls. It blends farmhouse charm with breezy, relaxed coastal design motifs without high framing costs. You achieve a custom framed appearance without paying for professional frame shop services.
Materials Needed for Rope Mirrors
- Inexpensive round frameless beveled wall mirror from discount stores
- Thick natural twisted jute rope (half-inch or thicker diameter)
- High-temperature electric hot glue gun with multiple glue sticks
- Sturdy corrugated cardboard or thin plywood backing base panel
- Sharp utility knife and heavy-duty shears for trimming rope
Step-by-Step Mirror Framing Technique
- Trace mirror circumference onto sturdy backing cardboard with pencil.
- Add two inches around outline before cutting with knife.
- Glue mirror firmly onto center of round cardboard base.
- Apply thick bead of hot glue along mirror perimeter.
- Press the jute rope firmly into the hot adhesive.
- Wrap rope continuously around mirror edge in tight coils.
- Add glue under every successive layer of coiled rope.
- Complete three to four concentric rings for substantial framing.
- Cut rope diagonally at the bottom to hide ends.
- Secure loose rope fiber ends with extra hot glue.
- Attach strong sawtooth wall hanger onto the cardboard back.
7. Pressed Backyard Fern Floating Glass Picture Frames
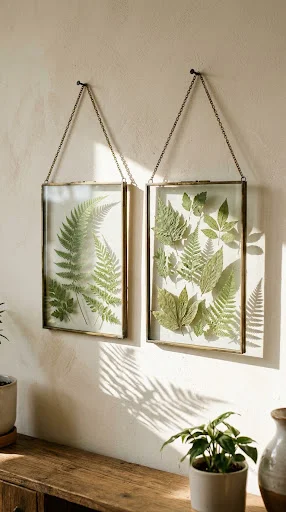
Preserving backyard botanicals captures delicate seasonal beauty for calm modern interior spaces. Standard opaque picture frames can visually crowd tight, narrow hallways and small alcoves. Glass floating frames present dried botanical specimens with light airiness and botanical transparency. The transparent glass reveals wall color behind delicate pressed leaves for modern aesthetics.
Displaying Wild Flora in Transparent Glass
Connecting modern indoor rooms with nature reduces daily mental stress after busy days. Foraging backyard fern fronds costs absolutely nothing for resourceful modern home decorators. Sandwiched between clear glass, leafy silhouettes create elegant naturalist art for living rooms. They add charming vintage apothecary flair to bedrooms, studies, and guest powder rooms.
Materials Needed for Floating Botanical Art
- Foraged green fern fronds, eucalyptus leaves, or flat flowers
- Heavy vintage books or wooden flower press for drying
- Double-glass floating picture frames with thin metallic metal edges
- Small tweezers for carefully handling delicate dried paper-thin botanicals
- Microfiber glass cleaning cloth and streak-free window cleaner spray
Step-by-Step Botanical Pressing Guide
- Collect fresh botanical leaves on dry, sunny afternoon walks.
- Place leaves between sheets of parchment inside heavy books.
- Stack extra books on top to press botanicals flat.
- Leave leaves undisturbed for two full weeks until dry.
- Clean both glass panes thoroughly using streak-free window spray.
- Lift delicate dried leaves gently using your craft tweezers.
- Position botanical specimen right onto the center glass pane.
- Secure leaf with a tiny dot of clear glue.
- Sandwich second glass pane firmly over your dried specimen.
- Slide glass assembly into metal frame and secure clasps.
- Hang floating glass art near windows to catch sunlight.
8. Modern Arched Painted Optical Wall Niche
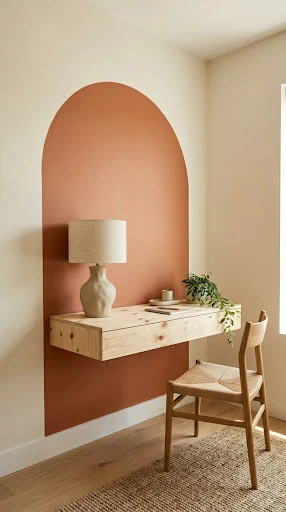
Architectural arches bring soft curves and Mediterranean grace to modern living spaces. Constructing real drywall alcove niches requires costly demolition, structural framing, and plastering work. Painting a faux geometric arch directly onto flat drywall creates a stunning optical illusion. It serves as an artistic framing backdrop for floating shelves, mirrors, or desks.
Framing Everyday Furniture with Optical Painted Arches
Rooms composed solely of sharp rectangular lines often feel rigid, cold, and boxy. A painted arch introduces fluid, organic curves that soften the atmosphere of rooms. The contrasting color behind open shelving anchors floating displays with deliberate designer intention. This simple two-hour painting project uses modest supplies to deliver maximum style.
Materials and Supplies Needed
- Sample pot of rich terracotta, sage green, or warm ochre paint
- Small synthetic angle trim paintbrush and high-density foam roller
- Length of cotton string, thumbtack, and sharp lead pencil
- Blue painter’s masking tape for crisp, clean vertical straight lines
- Bubble leveling tool and measuring tape for finding wall centers
Step-by-Step Painted Arch Tutorial
- Determine the width and vertical height of your desired wall arch.
- Mark the two vertical outer edge lines using levels and pencils.
- Apply blue painter’s tape along both vertical lines, burnishing edges firmly.
- Tie one end of cotton string to a thumbtack pressed between lines.
- Tie a pencil to the other string end, matching half the width.
- Pull string taut and rotate the pencil to draw a perfect semicircular arch.
- Paint along the curved pencil line carefully using your angle brush.
- Roll two coats of contrasting terracotta paint inside the taped arch.
- Allow the paint to dry for forty minutes between coats.
- Peel painter’s tape away slowly while paint is damp for crispness.
- Mount a floating shelf or position a desk inside your new arch.
9. Rustic Farmhouse Reclaimed Timber Floating Shelves
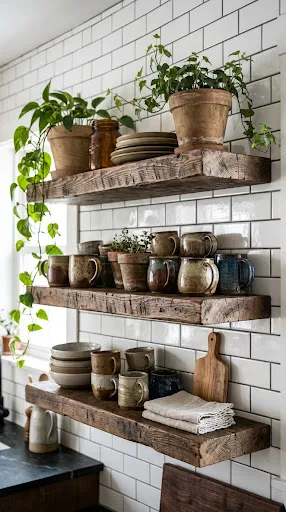
Empty kitchen or bathroom walls crave functional, warm vertical storage for everyday necessities. Thick timber floating shelves provide open display space without visual clutter or bulky brackets. Authentic reclaimed barn wood shelves often carry outrageous boutique price tags at showrooms. However, you can achieve that identical look using cheap construction lumber from retailers.
Expanding Vertical Storage with Rustic Timber
Floating shelves keep kitchen counters completely clear of everyday clutter and cooking spices. Displaying mismatched mugs and ceramics creates cozy, curated open shelving reminiscent of cafes. Staining inexpensive construction pine brings out deep, gorgeous woodgrain patterns across every board. They deliver genuine farmhouse functionality to small, cramped living spaces with ease.
Materials Needed for Floating Shelves
- Construction lumber board (two-by-eight inch kiln-dried pine wood)
- Heavy-duty concealed floating steel shelf mounting bracket rods
- Dark walnut penetrating wood stain and protective polyurethane varnish
- Electric hand drill fitted with specialized extra-long auger bit
- Level tool, pencil, and heavy-duty drywall toggle anchors
Step-by-Step Floating Shelf Installation
- Cut the pine board cleanly to your preferred length.
- Sand rough wood grain using progressive grits of sandpaper.
- Wipe penetrating dark walnut wood stain across all sides.
- Seal dried stained timber with satin protective polyurethane coat.
- Drill mounting holes deep into the back shelf edge.
- Hold heavy-duty steel bracket against the targeted drywall wall.
- Check the bracket placement with your bubble leveling tool.
- Fasten the steel wall bracket firmly into wall studs.
- Slide your prepared timber shelf smoothly onto steel rods.
- Ensure shelf fits flush against painted drywall for stability.
- Style surface with ceramic vessels, small plants, and art.
10. Neutral Textured Chunky Yarn Wall Tapestry
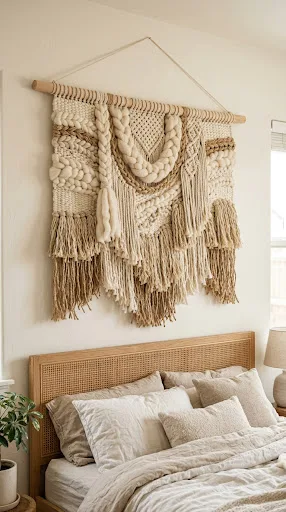
Bare drywall walls above beds often crave soft, sound-dampening textural fiber art. Handwoven wool tapestries from art galleries regularly command hundreds of dollars online. You can effortlessly assemble an impressive fiber wall hanging using wooden dowels. Looping chunky neutral yarns and brushed macramé cords requires zero complex loom weaving.
Softening Bedroom Walls with Neutral Fiber Accents
Echoey bedrooms and hard flooring surfaces can feel acoustically harsh and sterile. Woven fiber wall hangings introduce cozy warmth while absorbing sound waves effectively. Alternating creamy wool yarns, braided ropes, and jute creates rich tactile diversity. This peaceful, meditative craft lets you unwind while creating stunning wall art.
Materials Needed for Fiber Tapestries
- Smooth round wooden craft dowel rod or foraged branch
- Assorted skeins of thick chunky wool yarn in cream
- Thick 4mm unbleached twisted cotton macramé cord spool
- Sharp tailor fabric shears for clean precision fringe trimming
- Thin brass wire or jute cord for hanging dowels
Step-by-Step Tapestry Assembly Guide
- Sand wooden dowel rod smooth using fine sandpaper sheets.
- Tie hanging jute cord securely onto both dowel ends.
- Cut forty strands of chunky yarn five feet long.
- Fold two yarn strands in half to form loops.
- Slide yarn loops beneath dowels, pulling ends through loops.
- Tighten lark’s head knots firmly along the dowel rod.
- Continue attaching yarn bundles across dowel in dense rows.
- Intersperse sections of cotton cord and natural jute twine.
- Comb hanging fibers gently with fingers to align strands.
- Trim bottom fringe diagonally using sharp shears for angles.
- Hang your textural fiber tapestry proudly above your bed.
11. Modern Minimalist Pegboard Storage Wall Display
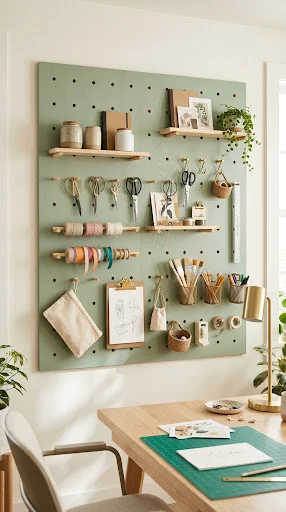
Small craft rooms and home offices easily become swamped with scissors, tapes, and rulers. Crowding desktop surfaces with bulky organizer caddies steals precious workspace for creative projects. Mounting an oversized framed pegboard transforms empty drywall into modular, customizable hanging organization. You can rearrange hooks, small ledges, and metal cups as supplies change.
Creating Customizable Modular Wall Displays for Everyday Tools
Horizontal desks stay clutter-free when small craft supplies hang vertically within reach. A painted wooden pegboard organizes brushes, ribbons, and pliers into visual art. The modular holes let you shift wooden shelves around to hold jars. It gives small home offices a clean, industrious, Scandinavian designer workshop vibe.
Materials Needed for Wall Pegboards
- Sheet of sturdy wooden or metal pegboard (quarter-inch holes)
- Four pine furring strips to build a rear standoff frame
- Assorted metal pegboard hooks, wire baskets, and wooden peg dowels
- Heavy-duty drywall wall anchors, screws, and an electric hand drill
- Can of satin warm cream or soft sage interior latex paint
Step-by-Step Pegboard Installation Guide
- Cut the pegboard sheet to fit your designated office wall area.
- Paint the front surface with two coats of warm cream paint.
- Screw four pine furring strips together to build a rectangular frame.
- Mount the wooden perimeter frame securely into wall studs with screws.
- Screw the painted pegboard panel directly onto the wooden standoff frame.
- Ensure the standoff frame creates clearance behind peg holes for hooks.
- Insert metal hooks and small wire hanging baskets into the holes.
- Add small wooden display shelves using pairs of straight peg hooks.
- Hang scissors, craft tapes, measuring tools, and notebooks in zones.
- Step back and admire your clean, open, productive creative desktop.
12. Elegant Half-Wall Board and Batten Panelling
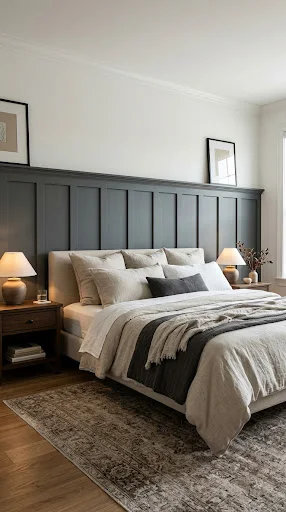
Plain drywall walls frequently look sterile, flat, and builder-grade in standard suburban homes. Installing vertical board and batten wainscoting instantly introduces timeless, historic architectural depth to rooms. This beginner-friendly woodworking project utilizes affordable primed MDF or pine lattice moulding strips. The crisp vertical lines draw the eye upward, making standard ceilings feel much taller.
Adding Historic Architectural Elegance to Plain Drywall
Flat walls lack the tactile presence needed to anchor master bedrooms and dining rooms. Half-wall wooden panelling establishes sophisticated character reminiscent of historic boutique hotels. Painting the woodwork in rich moody hues creates dramatic visual contrast against light ceilings. This project delivers massive, high-impact aesthetic value for a modest hardware investment.
Materials and Supplies Needed
- Primed MDF strips or smooth pine lattice moulding boards
- Heavy-duty construction panel adhesive and finishing brad nails
- Tub of interior painter’s spackle and acrylic paintable latex caulk
- Fine-grit 180 sandpaper block and bubble leveling tool
- Gallon of satin interior latex wall paint in deep olive or slate
Step-by-Step Board and Batten Installation
- Measure the total horizontal width of your selected bedroom wall.
- Determine your target wainscoting height, usually four feet from baseboards.
- Draw a level horizontal line across the wall using bubble levels.
- Fasten the horizontal top chair rail board firmly along the line.
- Calculate equal spacing between vertical batten strips, around twelve inches apart.
- Apply construction adhesive generously along the back of each vertical strip.
- Press the vertical battens firmly against the drywall, checking vertical level.
- Secure each wooden batten securely into drywall using finishing brad nails.
- Fill all nail holes with spackle and caulk all edge seams.
- Sand cured spackle patches smooth using your fine sandpaper block.
- Paint the entire lower panelled wall assembly with satin interior paint.
13. Minimalist Raw Timber Hanging Wall Shelf
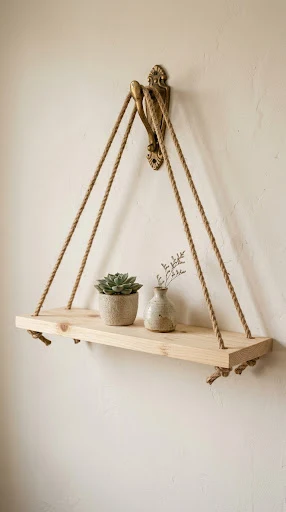
Blank entryway walls often crave functional display space without the visual weight of bulky cabinetry. Suspended raw timber shelves provide an airy, minimalist solution for showcasing small ceramic trinkets. Natural twisted jute cord paired with blonde pine wood brings modern Scandinavian warmth into homes. This beginner-friendly project requires minimal woodworking equipment and installs securely in under thirty minutes.
Suspending Functional Display Storage with Natural Ropes
Heavy floating shelf boxes can visually crowd narrow apartment corridors and tiny guest bathrooms. Hanging rope designs introduce graceful, floating lightness while offering sturdy flat surfaces for decor. Natural timber tones balance cool white drywall, generating an inviting, organic Scandinavian atmosphere instantly. It represents an exceptionally affordable, stylish method for decluttering everyday surface spaces with ease.
Materials Needed for Hanging Shelves
- Sanded pine craft timber board (six inches wide)
- Thick natural twisted cotton rope or durable jute twine
- Heavy-duty steel ceiling hook or decorative wall bracket
- Electric hand drill fitted with half-inch wood drill bit
- Natural beeswax polish or clear matte finishing furniture wax
Step-by-Step Hanging Shelf Tutorial
- Cut your pine timber board cleanly to two feet.
- Sand board edges smooth using fine 180-grit sandpaper sheets.
- Mark drill holes one inch from each board corner.
- Drill through all four marks using wide drill bits.
- Buff clear furniture wax across timber with microfiber cloths.
- Cut two identical lengths of thick natural jute cord.
- Fold both ropes in half to create top loops.
- Thread rope tails downward through corner holes of boards.
- Tie robust stopper knots securely beneath all four corners.
- Check shelf levelness carefully using standard bubble leveling tools.
- Suspend top loops from sturdy decorative metal wall hooks.
14. Chic Antiqued Mirror Glass Wall Gallery
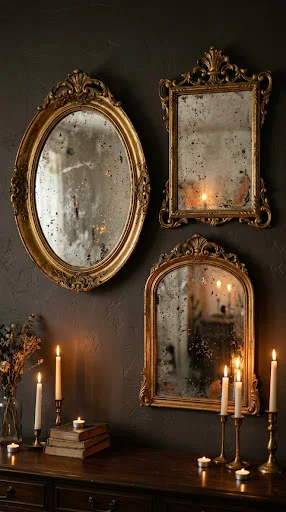
Standard glass bathroom mirrors often look clinical, sterile, and lacking vintage soul. Antiquing mirror glass using chemical strippers and diluted acid creates romantic Parisian patina. The mottled metallic silvering adds moody vintage depth and historic character to rooms. Grouped inside ornate thrifted frames, these antiqued mirrors become mesmerizing gallery focal points.
Infusing Vintage European Patina into Modern Wall Mirrors
Brand-new mirrors reflect rooms with harsh, stark clarity that can feel cold. Distressed antiqued mirrors soften reflections, casting dreamy, romantic light across bedrooms. Removing sections of silver backing reveals rich golden-brown distress reminiscent of French châteaux. This artisanal craft project turns ten-dollar discount mirrors into collectible vintage treasures.
Materials and Supplies Needed
- Inexpensive framed or frameless glass mirrors with painted backings
- Chemical paint stripper gel and broad metal putty spatula tool
- Spray bottle filled with diluted household muriatic acid or bleach
- Black or dark copper acrylic spray paint for backing distressing
- Heavy chemical-resistant rubber safety gloves, respirator mask, and goggles
Step-by-Step Antiqued Mirror Transformation
- Remove mirror glass carefully from its frame in a well-ventilated area.
- Lay mirror face down onto protective cardboard sheets on tables.
- Apply thick layers of paint stripper across the grey backing paint.
- Let stripper sit for thirty minutes until backing paint bubbles up.
- Scrape away the softened paint gently using your putty spatula.
- Wipe exposed silver reflective backing clean with mineral spirits.
- Mist diluted acid solution lightly onto random silver backing areas.
- Watch as the acid dissolves small patches of silvering into spots.
- Neutralize the acid reaction immediately by spraying clean water.
- Spray black or copper paint over the back to seal distressed spots.
- Reinsert the antiqued glass into ornate frames and hang proudly.