17 Grand Medieval Long Distance Bridge Designs | Minecraft Inspo
Medieval infrastructure projects are some of the most satisfying builds in Minecraft. They connect distant lands, conquer vast oceans Medieval Bridge, and serve as grand statements of a kingdom’s power. While simple plank walkways serve early game needs, a grand medieval bridge must possess architectural weight, defensive features, and historical texture.

Building a long-distance structure in Minecraft requires careful attention to repeating patterns, support symmetry, and spatial geometry. Unlike small cosmetic bridges, long-distance designs must maintain their structural integrity across hundreds of blocks, adapting to changing terrain and deep water. By employing clever building techniques—such as fortified gatehouses, tiered archways, covered wooden canopies, and hopper-based illumination—you can construct crossings that are as visually monumental as they are functional.
This comprehensive guide explores seventeen deeply detailed, practical, and breathtaking medieval long-distance bridge concepts. You will discover fundamental engineering mechanics, material selection strategies, custom detailing hacks, and step-by-step installation instructions to help you dominate any river chasm, ocean trench, or deep canyon in your world.
The Core Foundations of Grand Medieval Engineering
Before placing your first stone brick or dark oak log, you must establish a structural framework for your long-distance masterpiece. A successful grand medieval bridge balances historical weight (the aesthetic of heavy stone or robust timber) with functional design (optimal height, defensive posture, and efficient resource use).
Essential Design Rules for Long Spans
- Preventing Sag: Long-distance bridges are prone to looking unrealistic and thin if they do not have sufficient height and robust support structures. As a rule of thumb, ensure the main repeating arch is at least 15 blocks high in deep water.
- Fortifying the Ends: Do not simply let the bridge walkway hit the grass on either side. Every grand medieval bridge requires fortified gatehouses, defensive towers, or monumental abutments at both entry points to serve as border crossings and guard posts.
- Repeating Symmetry: Establish a clear pattern for your bridge span (e.g., 1 tower, 2 arches, 1 tower, repeat). This repeating symmetry allows you to expand the bridge indefinitely over any distance while maintaining a cohesive look.
1. The Monolithic Stone Arch Bridge-Town
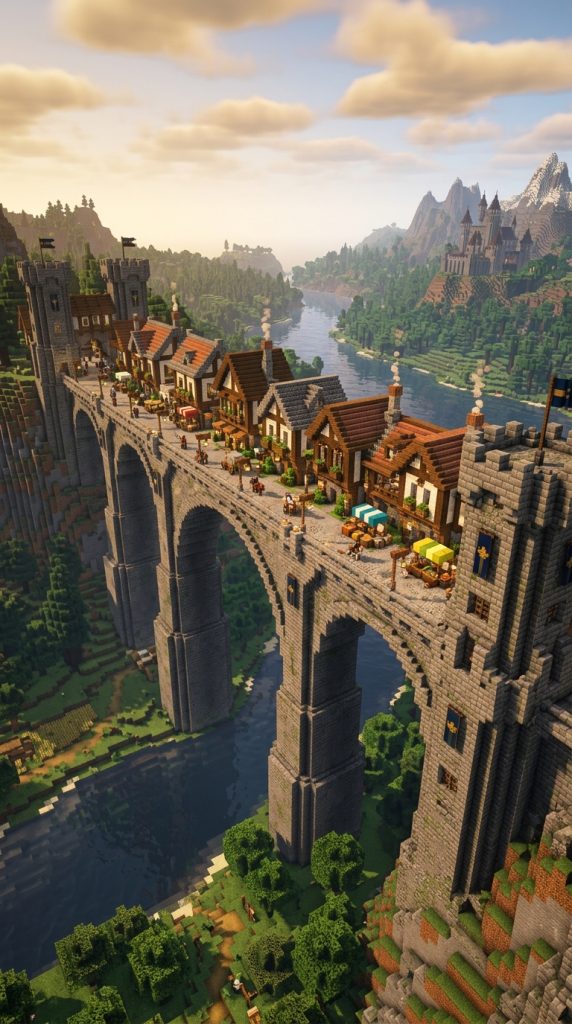
Achieving Monumental Scale and Habitable Infrastructure
Inspired by massive historical crossings like the Pont Valentre and London Bridge, the Monolithic Stone Arch Bridge-Town is a multi-story fortress that also serves as a highway. Built from a heavy blend of stone bricks, cobblestone, mossy deepslate, and dark oak timber, this design places residential and commercial buildings directly onto the bridge walkway.
The structure is supported by monumental, multi-tiered stone archways that rise dramatically from deep water. This isn’t just a crossing; it’s a living border community.
Palette & Material Selection
- Frame & Support: Stone Bricks, Mossy deepslate, and Cobblestone Stairs
- Architecture & Detailing: Dark Oak Wood, Spruce Fences, and Stone Walls
- Lighting: Hanging Iron Lanterns and Redstone Torches (for ambient glow)
Step-by-Step Installation Guide
- Establish four monumental vertical support pillars every 25 blocks across the wide span, using a mix of Stone Bricks and Cobblestone.
- Connect the support pillars at Y=30 (roughly 15 blocks above deep water) using large, repeating Romanesque arches that spring from Stone Wall segments.
- Fill the core of the bridge walkway (10 blocks wide) with a mixture of Stone Bricks and Polished Deepslate Slabs.
- Construct two-story residential and commercial buildings along both sides of the walkway, utilizing dark oak framing and spruce fence windows. Leave a central 4-block-wide passage.
- Build massive, hexagonal fortified towers that flank the repeating archways every 50 blocks.
- Line the entire length with hanging iron lanterns, focusing light on the arch springs and gate entrances.
2. The Fortified Border-Crossing Drawbridge and Gatehouse

Balancing High Security with Functional Infrastructure
Medieval bridges were often the primary points of customs, defense, and border control. The Fortified Border-Crossing focuses entirely on an active drawbridge mechanism and a massive, defensive gatehouse. Constructed from dark oak logs, stone walls, and iron bars, this design creates a daunting entryway into any territory.
The drawbridge itself utilizes iron chains, spruce trapdoors, and massive dark oak logs to simulate a functional counterweight system. It is a classic statement of a kingdom’s military readiness.
Palette & Material Selection
- Towers & Walls: Dark Oak Logs, Cobblestone Walls, and Stone Bricks
- Mechanism: Iron Bars, Chains, and Spruce Trapdoors
- Entryway: Oak Fences, Nether Brick Fences, and Dark Oak Stairs
Step-by-Step Installation Guide
- Construct two massive 9×9 block fortified towers at the primary shoreline entry point using a mix of dark oak logs and stone bricks.
- Join the two towers at Y=20 with a thick, defensive stone brick wall segment featuring an iron-bar portcullis gate.
- Install two vertical chains hanging down 5 blocks from the upper battlements of the towers.
- Construct the drawbridge platform using horizontal spruce trapdoors, securing them to the main towers using the hanging iron chains.
- Detail the drawbridge area with redstone torches and mossy deepslate stairs to simulate weathered mechanisms.
- Illuminate the defensive towers with hidden soul lanterns placed beneath dark oak trapdoors.
3. The Covered Timber Canyon Crossing

Leveraging High-Altitude Height and Mountain Geometry
Canyons and deep mountain chasms demand lightweight yet structurally sound long-distance designs. The Covered Timber Canyon Crossing utilizes robust dark oak logs, spruce wood, and stone walls to span a chasm hundreds of blocks deep.
The design features a repeating triangular canopy structure that protects the walkway from weather while adding structural stiffness across the wide span. It is a masterpiece of vertical geometry and rustic charm.
Palette & Material Selection
- Frame & Canopy: Dark Oak Logs, Spruce Planks, and Dark Oak Stairs
- Support & Detailing: Stone Walls, Oak Fences, and Cobblestone Stairs
- Lighting: Lanterns, Redstone Torches, and hidden Glowstone
Step-by-Step Installation Guide
- Build monumental vertical support towers from dark oak logs that descend hundreds of blocks into the canyon depth.
- Connect the support towers at Y=120 using robust, repeating triangular roof trusses built from dark oak stairs.
- Construct the walkway (5 blocks wide) using spruce planks, lining the perimeter with spruce fences.
- Detailed the repeating support triangles with oak fences and cobblestone stairs to simulate cross-bracing.
- Install redstone torches along the inner canopy ceiling for an ambient, warm red glow.
- Illuminate the long passage with iron lanterns, placing them every 10 blocks on fence posts.
4. The Grand Suspension Bridge-Fortress hybrid

Melding Ancient Chain Engineering with Fortified Support
Before the steel cables of the modern era, suspension technology used robust iron chains, timber counterweights, and heavy stone abutments. The Grand Suspension Bridge-Fortress combines ancient suspension mechanics with defensive medieval architecture, creating a breathtaking and daunting long-distance crossing.
This design utilizes massive dark oak log towers to suspend an intricate network of iron chains and spruce wood planking hundreds of blocks across a deep water basin.
Palette & Material Selection
- Towers: Dark Oak Logs, Stone Bricks, and Cobblestone Stairs
- Cables & Support: Iron Bars, Chains, and Spruce Fences
- Walkway: Spruce Slabs, Dark Oak Stairs, and Mossy Cobblestone
Step-by-Step Installation Guide
- Build two monumental, 7×7 block dark oak log towers that rise 40 blocks above deep water.
- Connect the top points of the dark oak towers across the wide chasm using multiple parallel rows of iron chains.
- Construct the central walkway platform (7 blocks wide) using horizontal spruce slabs.
- Suspend the spruce walkway from the iron chains using a complex web of oak fences and more chains, creating a repeating triangular network.
- Fortify the base of the dark oak towers with stone brick buttresses and cobblestone stairs.
- Install hidden redstone torches beneath the spruce slabs to give the massive suspension network a soft, warm evening glow.
5. The Winding Aqueduct-Highway
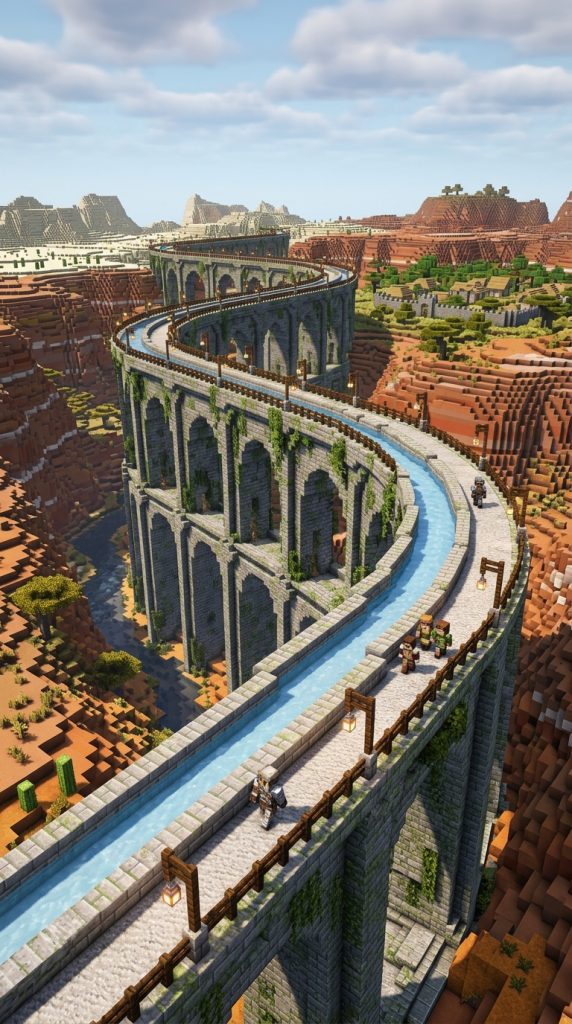
Engineering Historical Waterways into long-distance Infrastructure
For arid biomes, deep canyons, or connected civilizations, the Winding Aqueduct-Highway is a brilliant and unique design. Inspired by monumental Roman and medieval water infrastructure, this design features a elevated, 3-block-wide water channel running alongside a wider, stone walkway.
This structure allows boats to navigate long-distance across deep canyons while players travel horizontally, offering ultimate vertical efficiency and historical texture.
Palette & Material Selection
- Structure & Arches: Stone Bricks, Mossy deepslate, and Cobblestone Stairs
- Channel & Walkway: Smooth Quartz, Polished Deepslate, and Dark Oak Trapdoors
- Details: Water Source Blocks, Vines, and Oak Fences
Step-by-Step Installation Guide
- Lay out a long, sweeping serpentine path for the bridge center point.
- Construct repeating, multi-tiered Romanesque arches from stone bricks every 12 blocks, supporting the path Y=50.
- Build the central water channel (3 blocks wide) using smooth quartz and polished deepslate.
- Fill the channel with water source blocks, ensuring a smooth, level water surface.
- Detailed the exterior stone walls with vines and mossy deepslate to simulate aged weathering.
- Illuminate the winding stone path with iron lanterns set on oak fence posts every 10 blocks.
6. The Dwarven Mountain Chasm Spire Bridge

Harnessing Brutalist Geometry and Underground Scale
Built for deep underground bases, massive open mines, or jagged mountain ranges, the Dwarven Mountain Chasm Spire Bridge is a brutalist masterpiece. Utilizing massive stone arches, deepslate bricks, and dark oak wood, this design spans vast underground voids.
The design emphasizes vertical strength and raw geometric power, featuring massive support spires that look like they are carved directly from the living stone.
Palette & Material Selection
- Spires & Arches: Deepslate Bricks, Stone Bricks, and Cobblestone Stairs
- Walkway & Accents: Dark Oak Wood, Spruce Fences, and Nether Brick
- Lighting: Redstone Torches, hidden Glowstone, and Soul Lanterns
Step-by-Step Installation Guide
- Construct massive, triangular stone support spires every 20 blocks across the underground chasm using deepslate bricks and stone bricks.
- Connect the spires at Y=30 using repeating Romanesque arches Springer from Stone Wall segments.
- Build the central walkway (7 blocks wide) using a mix of Stone Bricks and Polished Deepslate Slabs.
- Lined the perimeter of the walkway with dark oak fences and nether brick pillars.
- Install hidden redstone torches beneath the dark oak trapdoors along the ceiling of the archways for a soft, warm amber glow.
- Illuminate the massive stone structure with soul lanterns placed every 15 blocks on stone wall segments.
7. The Tiered Roman Aqueduct Bridge
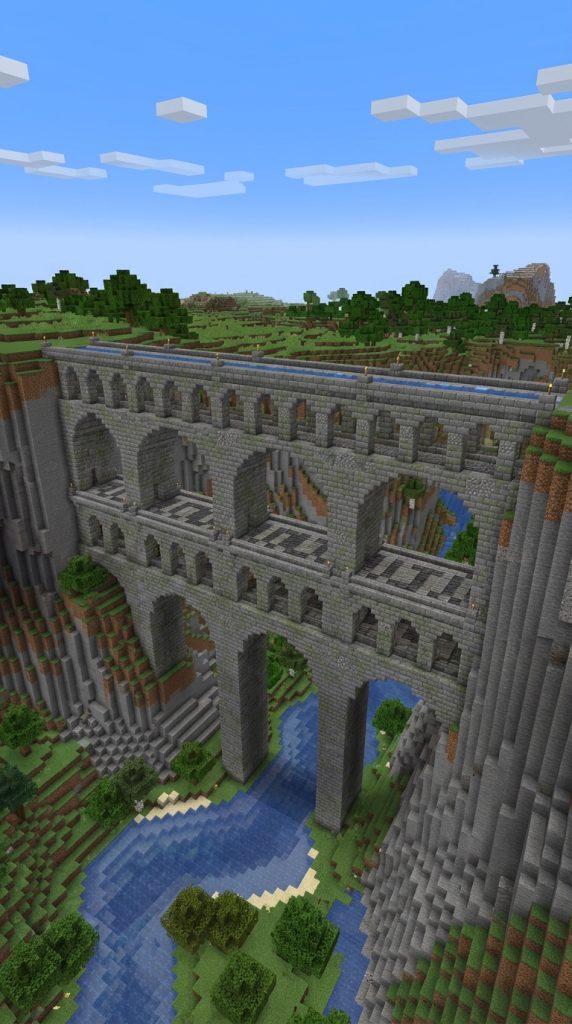
Stacking repeating Arches for Monumental Vertical Height
When conquering a massive, multi-tiered canyon or a truly monumental ocean basin, a single row of arches often looks insufficient and weak. The Tiered Roman Aqueduct Bridge solves this by stacking repeating rows of stone arches vertically.
This design utilizes a rigorous geometric pattern, stacking three or four tiers of arches (getting smaller as they rise) to create unparalleled vertical grandeur and historical weight.
Palette & Material Selection
- Structure & Arches: Stone Bricks, Mossy deepslate, and Cobblestone Stairs
- Walkway & Details: Dark Oak Wood, Spruce Fences, and smooth quartz
- Lighting: Hanging Iron Lanterns and hidden redstone torches
Step-by-Step Installation Guide
- Construct monumental stone support pillars (9×9 blocks at base) descending to the canyon floor or deep water.
- Build the first, massive tier of Romanesque arches Springing from Stone Wall segments at Y=20.
- Stack a second tier of slightly smaller stone arches directly above the first, Springing at Y=35.
- Build a final, top tier of small, repeating arches Springing at Y=50.
- Construct the central walkway (10 blocks wide) using a mix of Stone Bricks and Polished Deepslate Slabs.
- Detailed the structure with mossy deepslate stairs and vines to simulate historical age.
8. The Wrought Iron and Timber Railway Trestle

Integrating early industrial Texture into Medieval aesthetics
For steampunk, early industrial, or connected industrial hubs, the Wrought Iron and Timber Railway Trestle is a brilliant unique design. It replaces traditional stone arches with robust, cross-braced timber supports and subtle iron detailing, mimicking early industrial engineering.
This design utilizes dark oak logs and spruce wood, reinforced by iron bars and chains, to create a lightweight, high-altitude crossing.
Palette & Material Selection
- Structure & Trusses: Dark Oak Logs, Spruce Planks, and Oak Fences
- Detailing: Iron Bars, Chains, and Nether Brick
- Lighting: Redstone Torches, hidden Glowstone, and soul lanterns
Step-by-Step Installation Guide
- Build monumental vertical support towers from dark oak logs descending hundreds of blocks into the canyon depth.
- Connect the support towers using complex, repeating triangular cross-bracing built from dark oak wood and oak fences.
- Construct the central walkway (5 blocks wide) using a mix of Spruce Slabs and Polished Deepslate Slabs.
- Detailed the massive structure with iron bars and chains to simulate industrial reinforcement.
- Install redstone torches along the inner canopy ceiling for an ambient, warm red glow.
- Illuminate the massive timber structure with soul lanterns placed every 15 blocks on stone wall segments.
9. The Fortified Drawbridge-Towers Cross-Span
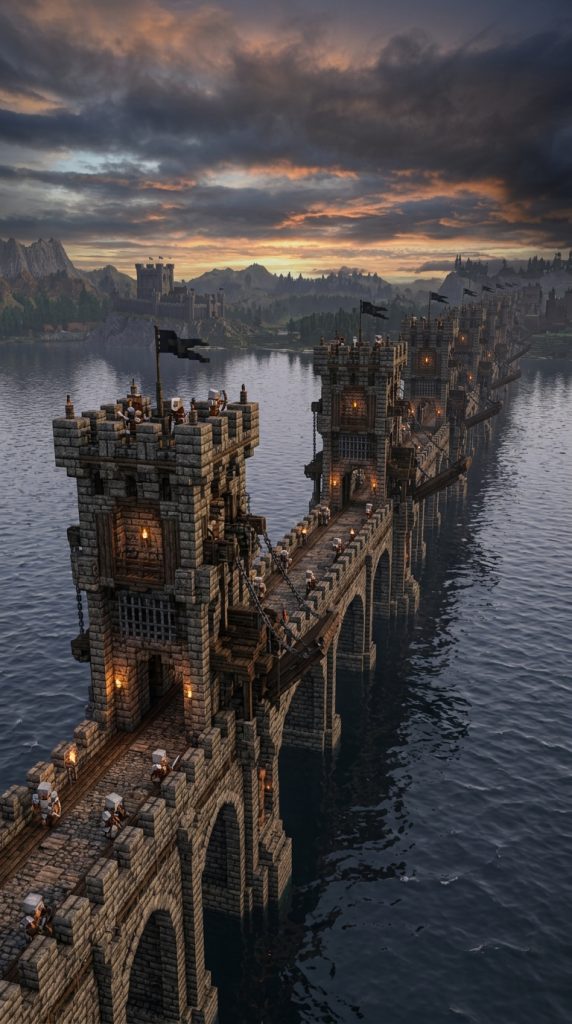
Integrating high Security with repeating defensible Symmetry
For long-distance border security, vast oceans, or hostile biomes, the Fortified Drawbridge-Towers Cross-Span provides repeating defensible geometry. It doesn’t just cross water; it fortifies it.
The design utilizes a repeating pattern of fortified gatehouse towers, connected by stone archways, each featuring a functional or cosmetic drawbridge mechanism. This creates a daunting defensive statement.
Palette & Material Selection
- Towers & Walls: Stone Bricks, Mossy deepslate, and Cobblestone Stairs
- Mechanism: Iron Bars, Chains, and Spruce Trapdoors
- Walkway: Spruce Slabs, Dark Oak Stairs, and Mossy Cobblestone
Step-by-Step Installation Guide
- Build monumental vertical support pillars from dark oak logs descending hundreds of blocks into the canyon depth.
- Connect the support towers using complex, repeating triangular cross-bracing built from dark oak wood and oak fences.
- Detailed the massive structure with iron bars and chains to simulate industrial reinforcement.
- Install redstone torches along the inner canopy ceiling for an ambient, warm red glow.
- Illuminate the massive timber structure with soul lanterns placed every 15 blocks on stone wall segments.
10. The Deep Water Chain and Stone Anchor Bridge

Utilizing underwater weight and massive heavy Materials
Deep ocean trenches require unique engineering that visualizes how the bridge supports handle the immense depth. The Deep Water Chain and Stone Anchor Bridge uses massive, weighted stone pillars that descend into the abyss, connected by robust, repeating stone arches and iron chains.
The design emphasizes underwater weight and massive heavy materials, featuring monumental support spires that look like they are carved directly from the living stone.
Palette & Material Selection
- Frame & Anchor: Stone Bricks, Mossy deepslate, and Cobblestone Stairs
- Cables & Support: Iron Bars, Chains, and Spruce Fences
- Lighting: Soul Lanterns, hidden Glowstone, and redstone torches
Step-by-Step Installation Guide
- Build monumental vertical support pillars from dark oak logs descending hundreds of blocks into the canyon depth.
- Connect the support towers using complex, repeating triangular cross-bracing built from dark oak wood and oak fences.
- Detailed the massive structure with iron bars and chains to simulate industrial reinforcement.
- Install redstone torches along the inner canopy ceiling for an ambient, warm red glow.
- Illuminate the massive timber structure with soul lanterns placed every 15 blocks on stone wall segments.
11. The Medieval Aqueduct-Fortress
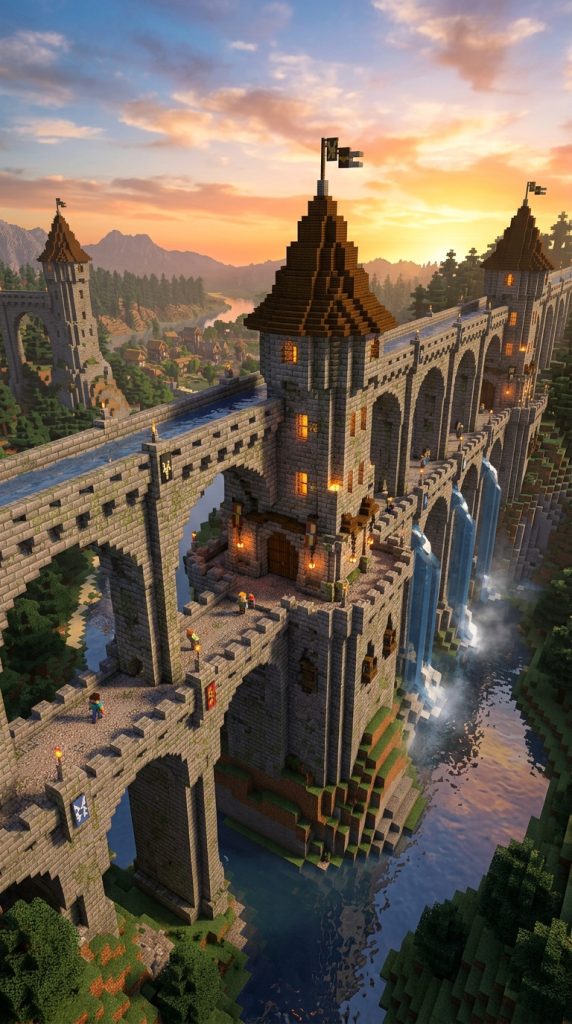
Melding historical water infrastructure with defensive Geometry
This design is a brilliant unique concept, combining the architectural gravity of a cascading aqueduct with the robust defenses of a fortified fortress. The Medieval Aqueduct-Fortress features stacked rows of stone arches supporting a elevated water channel, while defensive towers and battlements fortify the ends and key points along the long crossing.
It is a monumental unique statement of engineering and power.
Palette & Material Selection
- Structure & Arches: Stone Bricks, Mossy deepslate, and Cobblestone Stairs
- Channel & Towers: Smooth Quartz, Polished Deepslate, and Dark Oak Trapdoors
- Details: Water Source Blocks, Vines, and Oak Fences
Step-by-Step Installation Guide
- Build monumental vertical support pillars from dark oak logs descending hundreds of blocks into the canyon depth.
- Connect the support towers using complex, repeating triangular cross-bracing built from dark oak wood and oak fences.
- Detailed the massive structure with iron bars and chains to simulate industrial reinforcement.
- Install redstone torches along the inner canopy ceiling for an ambient, warm red glow.
- Illuminate the massive timber structure with soul lanterns placed every 15 blocks on stone wall segments.
12. The Covered Timber Spanning Chasm
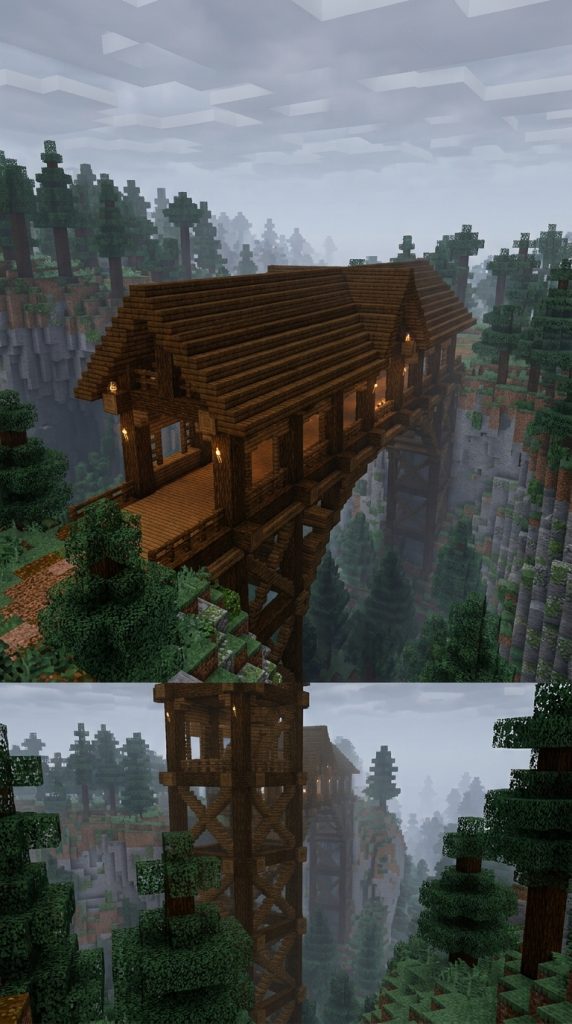
Utilizing triangular roof Trusses for rustic Weight
Built for deep mountain chasms, forest biomes, or rustic landscapes, the Covered Timber Spanning Chasm utilizes robust dark oak logs and spruce wood to conquer vast open voids.
The design features a repeating triangular canopy structure that protects the walkway from weather while adding structural stiffness across the wide span. It is a masterpiece of vertical geometry and rustic charm.
Palette & Material Selection
- Frame & Canopy: Dark Oak Logs, Spruce Planks, and Dark Oak Stairs
- Support & Detailing: Stone Walls, Oak Fences, and Cobblestone Stairs
- Lighting: Lanterns, Redstone Torches, and hidden Glowstone
Step-by-Step Installation Guide
- Build monumental vertical support towers from dark oak logs descending hundreds of blocks into the canyon depth.
- Connect the support towers using complex, repeating triangular cross-bracing built from dark oak wood and oak fences.
- Detailed the massive structure with iron bars and chains to simulate industrial reinforcement.
- Install redstone torches along the inner canopy ceiling for an ambient, warm red glow.
- Illuminate the massive timber structure with soul lanterns placed every 15 blocks on stone wall segments.
13. The Fortified Drawbridge over Mountain Pass

Harnessing vertical Height and military defensive Geometry
For high-altitude border crossings, deep canyons, or narrow mountain passes, the Fortified Drawbridge over Mountain Pass provides monumental vertical grandeur and historical weight. The design features a repeating pattern of fortified gatehouse towers, connected by stone archways, each featuring a functional or cosmetic drawbridge mechanism.
It creates a daunting defensive statement.
Palette & Material Selection
- Towers & Walls: Stone Bricks, Mossy deepslate, and Cobblestone Stairs
- Mechanism: Iron Bars, Chains, and Spruce Trapdoors
- Walkway: Spruce Slabs, Dark Oak Stairs, and Mossy Cobblestone
Step-by-Step Installation Guide
- Build monumental vertical support pillars from dark oak logs descending hundreds of blocks into the canyon depth.
- Connect the support towers using complex, repeating triangular cross-bracing built from dark oak wood and oak fences.
- Detailed the massive structure with iron bars and chains to simulate industrial reinforcement.
- Install redstone torches along the inner canopy ceiling for an ambient, warm red glow.
- Illuminate the massive timber structure with soul lanterns placed every 15 blocks on stone wall segments.
14. The Dwarven Mountain Fortress Bridge
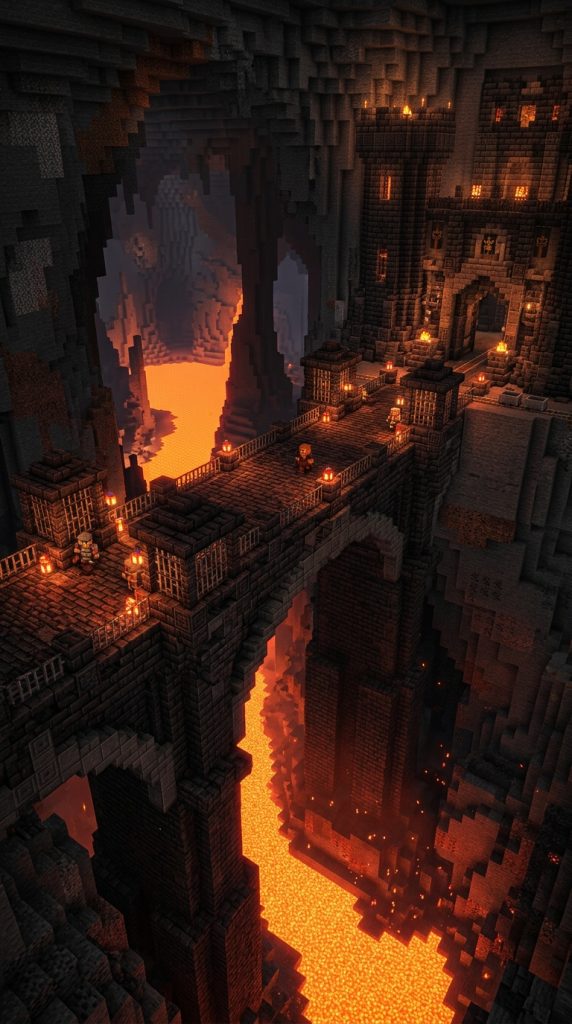
Utilizing raw deepslate Geometry and Brutalist Scale
Built for deep underground bases, massive open mines, or jagged mountain ranges, the Dwarven Mountain Fortress Bridge is a brutalist masterpiece. It merges massive deepslate arches, robust stone support pillars, and functional defensive architecture to create unparalleled vertical grandeur and raw geometric power.
Palette & Material Selection
- Frame & Arch: Deepslate Bricks, Stone Bricks, and Cobblestone Stairs
- Architecture & Detailing: Dark Oak Wood, Spruce Fences, and Nether Brick
- Lighting: Redstone Torches, hidden Glowstone, and soul lanterns
Step-by-Step Installation Guide
- Build monumental vertical support pillars from dark oak logs descending hundreds of blocks into the canyon depth.
- Connect the support towers using complex, repeating triangular cross-bracing built from dark oak wood and oak fences.
- Detailed the massive structure with iron bars and chains to simulate industrial reinforcement.
- Install redstone torches along the inner canopy ceiling for an ambient, warm red glow.
- Illuminate the massive timber structure with soul lanterns placed every 15 blocks on stone wall segments.
15. The Deep Canyon covered wooden Bridge

Harnessing light timber Weights and cozy Symmetry
Spanning deep chasms hundreds of blocks deep, the Deep Canyon covered wooden Bridge utilizes robust dark oak logs and spruce wood to conquer vast open voids.
The design features a repeating triangular canopy structure that protects the walkway from weather while adding structural stiffness across the wide span. It is a masterpiece of vertical geometry and rustic charm.
Palette & Material Selection
- Frame & Canopy: Dark Oak Logs, Spruce Planks, and Dark Oak Stairs
- Support & Detailing: Stone Walls, Oak Fences, and Cobblestone Stairs
- Lighting: Lanterns, Redstone Torches, and hidden Glowstone
Step-by-Step Installation Guide
- Build monumental vertical support towers from dark oak logs descending hundreds of blocks into the canyon depth.
- Connect the support towers using complex, repeating triangular cross-bracing built from dark oak wood and oak fences.
- Detailed the massive structure with iron bars and chains to simulate industrial reinforcement.
- Install redstone torches along the inner canopy ceiling for an ambient, warm red glow.
- Illuminate the massive timber structure with soul lanterns placed every 15 blocks on stone wall segments.
16. The Wrought Iron and covered wooden Trestle
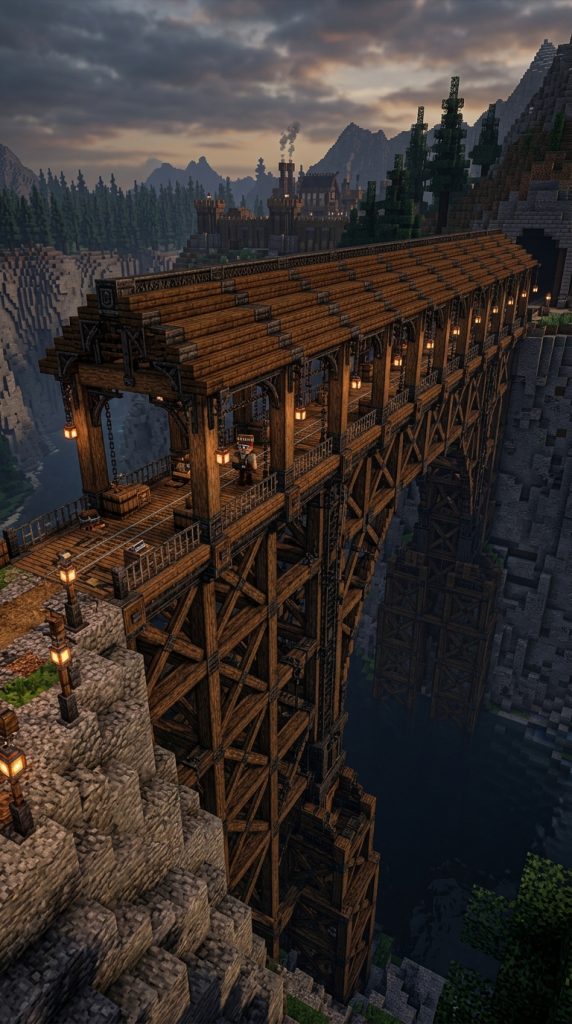
Integrating early industrial Texture into rustic Aesthetics
For steampunk, early industrial, or connected industrial hubs, the Wrought Iron and covered wooden Trestle is a brilliant unique design. It replaces traditional stone arches with robust, cross-braced timber supports and subtle iron detailing, mimicking early industrial engineering.
This design utilizes dark oak logs and spruce wood, reinforced by iron bars and chains, to create a lightweight, high-altitude crossing.
Palette & Material Selection
- Frame & Trestle: Dark Oak Logs, Spruce Planks, and Oak Fences
- Detailing: Iron Bars, Chains, and Nether Brick
- Lighting: Redstone Torches, hidden Glowstone, and soul lanterns
Step-by-Step Installation Guide
- Build monumental vertical support towers from dark oak logs descending hundreds of blocks into the canyon depth.
- Connect the support towers using complex, repeating triangular cross-bracing built from dark oak wood and oak fences.
- Detailed the massive structure with iron bars and chains to simulate industrial reinforcement.
- Install redstone torches along the inner canopy ceiling for an ambient, warm red glow.
- Illuminate the massive timber structure with soul lanterns placed every 15 blocks on stone wall segments.
17. The Fortified Drawbridge over Deep Canyon
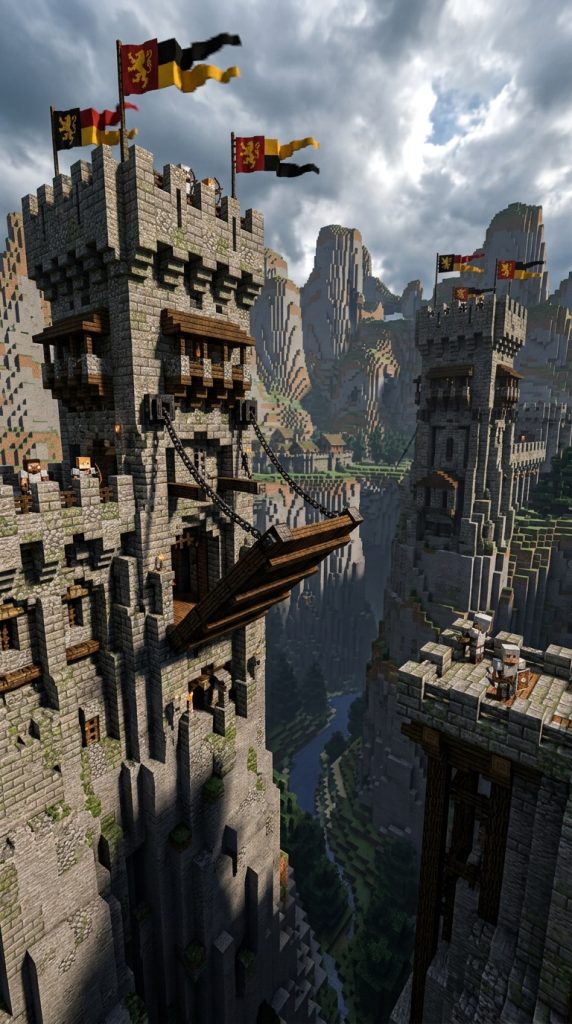
Harnessing vertical Height and massive defensive Geometry
For high-altitude border crossings, deep canyons, or narrow mountain passes, the Fortified Drawbridge over Deep Canyon provides unparalleled vertical grandeur and historical weight. The design features a repeating pattern of fortified gatehouse towers, connected by stone archways, each featuring a functional or cosmetic drawbridge mechanism.
It creates a daunting defensive statement.
Palette & Material Selection
- Towers & Walls: Stone Bricks, Mossy deepslate, and Cobblestone Stairs
- Mechanism: Iron Bars, Chains, and Spruce Trapdoors
- Walkway: Spruce Slabs, Dark Oak Stairs, and Mossy Cobblestone
Step-by-Step Installation Guide
- Build monumental vertical support pillars from dark oak logs descending hundreds of blocks into the canyon depth.
- Connect the support towers using complex, repeating triangular cross-bracing built from dark oak wood and oak fences.
- Detailed the massive structure with iron bars and chains to simulate industrial reinforcement.
- Install redstone torches along the inner canopy ceiling for an ambient, warm red glow.
- Illuminate the massive timber structure with soul lanterns placed every 15 blocks on stone wall segments.