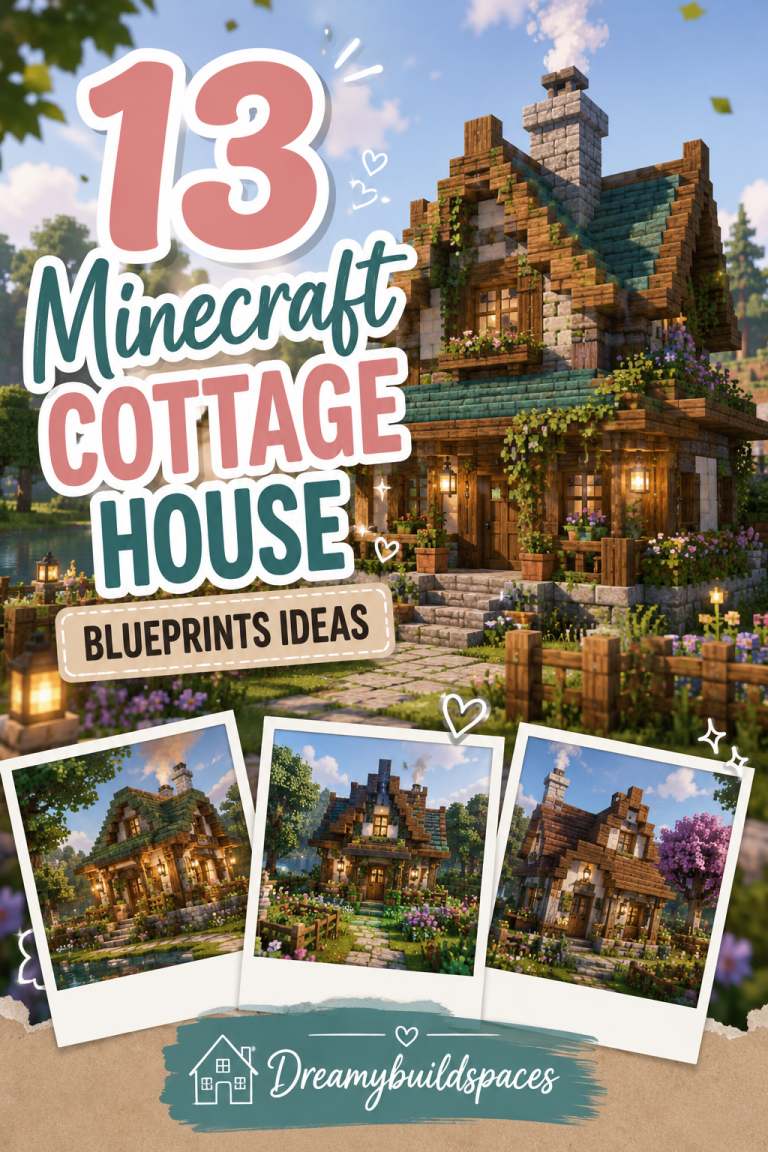
13 Soft Cottagecore And Fairycore Aesthetics in Minecraft
Step inside the dreamy, whimsical world of Minecraft cottagecore and fairycore. Building with soft, gentle palettes brings a calming and peaceful atmosphere to your single-player or multiplayer survival worlds. These aesthetics prioritize nature, pastel tones, mystical lighting, and detailed organic integration.
Unlocking the Potential of Whimsical Block Palettes
Fairycore and cottagecore builds thrive on textural soft blending and varied block selections. You can combine pale pink cherry blossoms, soft birch woods, mossy greens, and muted terracotta. Mixing hard stone structures with overgrown organic flora transforms simple houses into enchanted storybook sanctuaries.
Setting the Scene for Dreamy and Cozy Builds
Creating a true storybook atmosphere relies heavily on ambient lighting and surrounding plant life. Spore blossoms cast soft, drifting green particles through the air, while glowberries add warm, golden points of light. Incorporating winding cobblestone paths, wild flower gardens, and gently glowing lanterns turns any forest clearing into a magical haven.
Mastering the Harmony of Nature and Structure
In these gentle build styles, natural surroundings are just as vital as the buildings themselves. Structures should look as though they grew organically out of the enchanted landscape. Softly curved rooflines, overgrown vines, and custom flower beds ensure that your architecture blends seamlessly with the natural terrain.
Idea 1: The Enchanted Cherry Blossom Cottage
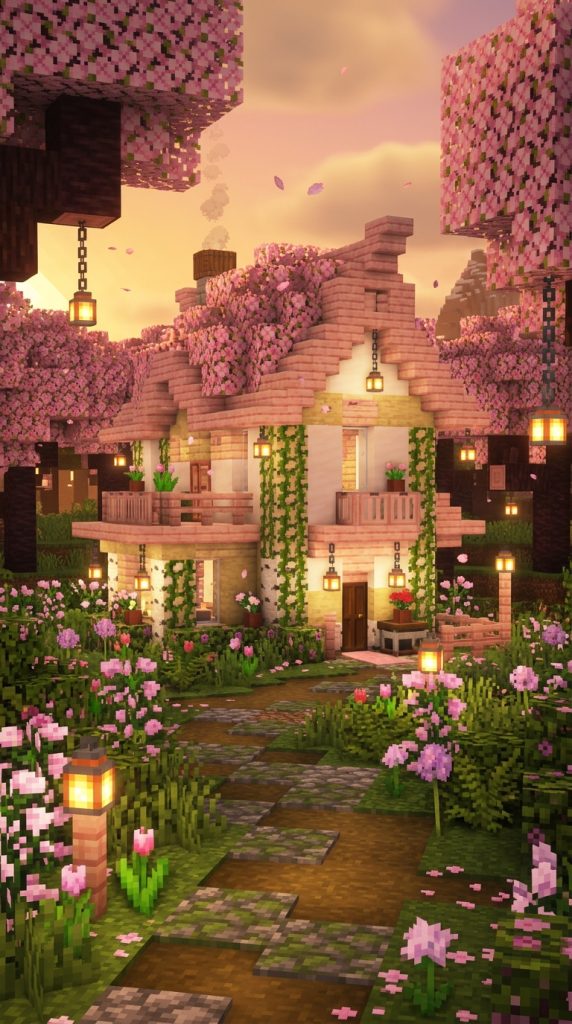
A Pastel Haven Hidden Beneath Pink Leaves
Imagine a cozy, two-story cottage nestled within a dense grove of pink cherry trees. Its walls are crafted from warm birch wood and white quartz, capped with a sweeping roof made of pink cherry wood and stripped logs. Flowing vines and soft pink petals drape down the sides, making the home feel completely woven into the surrounding forest.
How to Build the Cottage Frame and Walls
Begin by laying out an asymmetrical floor plan using mossy cobblestone for the foundation. Erect corner support pillars using stripped birch logs to keep the palette light and airy. Fill in the wall panels using a mix of white concrete powder, smooth quartz, and birch planks for a subtle, weathered texture.
Crafting the Whimsical Pink Roofline
Construct a steep, flared roof using cherry wood stairs and slabs. Extend the roof eaves two blocks beyond the walls to create a dramatic, fairytale overhang. Interspersed cherry leaf blocks along the roof ridge allow pink particles to drift downwards, while pink petals scattered along the roof add realistic detail.
Final Touches and Surrounding Flora
Place a hanging lantern beside the carved spruce front door. Surround the base of the cottage with a dense flower garden featuring pink tulips, peonies, and alliums. Path blocks mixed with moss and coarse dirt form a gentle, winding walkway leading to the entrance.
Interior Layout and Garden Details
Step inside to create an inviting interior featuring a birch wood staircase, pink wool rugs, and bookshelf-lined walls. Position flower pots with cherry saplings along window sills. Outdoors, construct a small wooden well with a cherry slab roof, complete with a water bucket held by an iron chain.
Required Materials and Block List
- Cherry Planks: 6 Stacks
- Cherry Stairs: 8 Stacks
- Stripped Birch Logs: 5 Stacks
- Birch Planks: 6 Stacks
- Smooth Quartz: 4 Stacks
- Mossy Cobblestone: 4 Stacks
- Cherry Leaves: 5 Stacks
- Pink Petals: 3 Stacks
- Lanterns: 2 Stacks
- Peonies: 2 Stacks
Idea 2: The Mushroom Canopy Fairy Dwelling
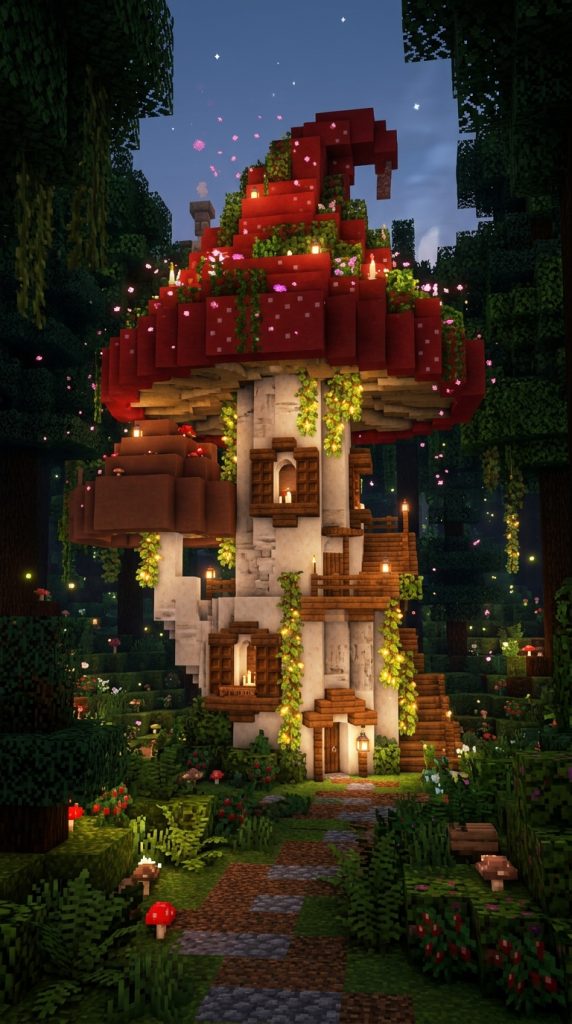
A Mystical Home Built Inside Giant Fungi
Giant red and brown mushrooms provide the perfect structural foundation for a fairytale abode. Nestled deep inside a dark forest or mushroom field, this dwelling combines natural cap roofs with cozy wooden living quarters. Glowing lichen and hanging glowberries illuminate the damp, magical space below.
Building the Stem Base and Elevated Living Platform
Locate or grow a giant red mushroom using bone meal on a red mushroom cap. hollow out the interior of the thick white stem using an axe. Install a circular wooden floor midway up the stem using dark oak or spruce slabs to create a cozy upper loft.
Shaping the Overgrown Cap and Windows
Carefully cut out small window openings in the red mushroom cap. Frame the windows with spruce trapdoors to serve as rustic shutters. Add spore blossoms to the underside of the cap so glowing green particles continually drift down around the dwelling.
Decorating the Ambient Exterior and Base
Wrap glowing cave vines and glowberries around the mushroom stem. Lay down a carpet of moss blocks around the base of the stem, interspersing red and brown mini-mushrooms. Place small lantern posts made of spruce fences around the perimeter for a soft, inviting glow.
Adding Furniture and Outdoor Pathways
Inside the stem, build a spiraling ladder made of spruce trapdoors leading to the sleeping loft. Place a red bed surrounded by bookshelves and a small brewing stand. Outside, build a path made of mud bricks and moss carpet leading to a neighboring mushroom structure.
Required Materials and Block List
- Red Mushroom Blocks: 8 Stacks
- Mushroom Stem Blocks: 6 Stacks
- Spruce Slabs: 5 Stacks
- Spruce Trapdoors: 4 Stacks
- Moss Blocks: 6 Stacks
- Cave Vines with Glowberries: 3 Stacks
- Spore Blossoms: 1 Stack
- Mud Bricks: 4 Stacks
- Red Mushrooms: 2 Stacks
- Lanterns: 2 Stacks
Idea 3: The Overgrown Mossy Overlook Greenhouse
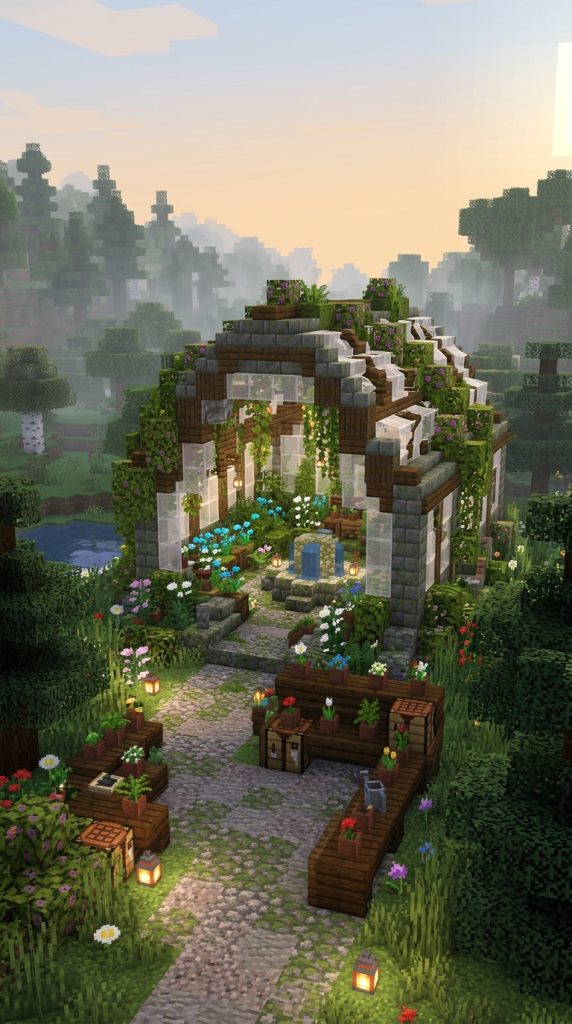
Glass Panes Framed by Lush Greenery and Flowers
A fairytale greenhouse made of weathered stone, dark oak beams, and glass panes serves as a tranquil botanical sanctuary. Inside, exotic flora, potted plants, and winding vines thrive, while the exterior is heavily draped in moss and flowering azalea bushes.
Constructing the Weathered Stone and Wood Frame
Outline the perimeter using mossy stone bricks and cracked stone blocks. Erect tall support beams at each corner using stripped dark oak logs. Connect the beams at the top with curved wooden arches, forming a high, domed roof structure.
Installing the Glass Ceiling and Overgrown Elements
Fill the roof and wall openings with clear or white stained glass panes. Intentionally break out a few glass panes and replace them with flowering azalea leaves and moss blocks to give the building an aged, natural aesthetic. Hang long strands of weeping vines from the ceiling beams.
Interior Botanical Layout and Water Features
Cover the interior floor with a mix of moss blocks, coarse dirt, and packed mud. Build raised plant beds using spruce trapdoors, filling them with blue orchids, oxeye daisies, and ferns. Construct a small interior stone fountain that spills water into a shallow lily pond.
Exterior Landscaping and Storage Detail
Outside the glass entrance, place wooden barrel stacks filled with gardening supplies. Construct a small outdoor potting bench using spruce slabs and iron trapdoors, topped with flower pots and shears. Winding stone paths frame the exterior perimeter.
Required Materials and Block List
- Mossy Stone Bricks: 8 Stacks
- Stripped Dark Oak Logs: 6 Stacks
- White Stained Glass Panes: 10 Stacks
- Moss Blocks: 8 Stacks
- Flowering Azalea Leaves: 5 Stacks
- Spruce Trapdoors: 6 Stacks
- Blue Orchids: 3 Stacks
- Ferns: 3 Stacks
- Barrels: 4 Stacks
- Flower Pots: 2 Stacks
Idea 4: The Willow Tree Hollow Living Quarters
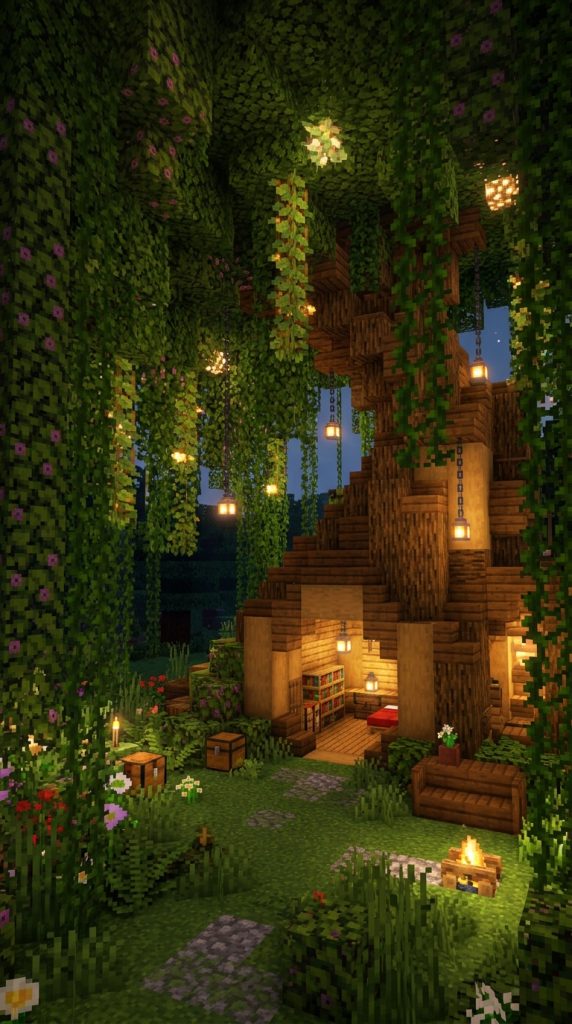
A Secret Sanctuary Beneath Hanging Leaf Canopies
Building inside the drooping canopy of a giant custom willow tree yields a cozy, hidden sanctuary. The draped leaves touch the ground, forming natural green curtain walls that shelter a warm wooden home hidden within the main trunk.
Designing the Custom Willow Trunk and Branches
Construct a thick, winding trunk using a mixture of oak logs and stripped oak wood. Extend wide, organic branches outward in all directions, curving them gently downward toward the ground. Ensure the root system spreads wide across the grassy floor.
Draping the Dense Leaf Curtain
Cover the branches with a heavy layer of oak leaves and azalea leaves. Extend strands of vines and leaf blocks straight down to ground level, creating dense, cascading green walls that completely conceal the interior space around the trunk.
Carving Out the Living Space Inside
Hollow out the center of the wooden trunk to build a multi-level living area. Install birch wood flooring and construct small, arched doorways leading out to hidden balcony platforms nestled within the leaf canopy.
Ambient Interior Decor and Mystical Lighting
Hang froglights or sea lanterns wrapped in banners high in the leaf canopy to cast a soft light downward. Decorate the interior with cozy rugs, loom stations, and leaf-covered reading nooks. Out front, a hidden stone path leads through the hanging vines.
Required Materials and Block List
- Oak Logs: 10 Stacks
- Stripped Oak Wood: 6 Stacks
- Oak Leaves: 12 Stacks
- Azalea Leaves: 6 Stacks
- Birch Planks: 5 Stacks
- Vines: 4 Stacks
- Froglights: 2 Stacks
- Moss Carpet: 4 Stacks
- Bookshelves: 3 Stacks
- Lanterns: 2 Stacks
Idea 5: The Soft Lavender Garden Cottage
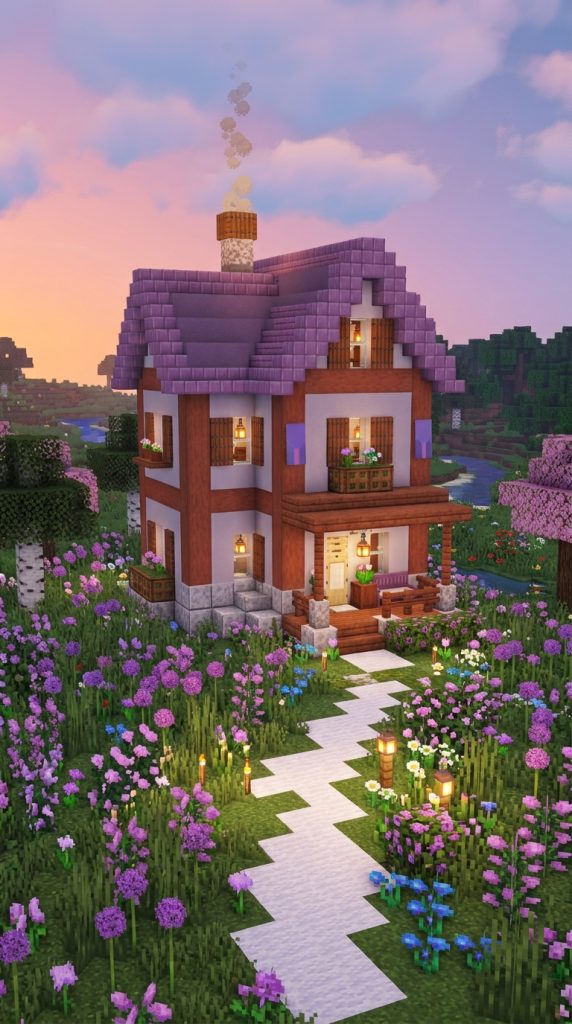
Pastel Purple Shades Blended with Weathered Timber
Utilizing soft purple blocks like magenta terracotta, purpur accents, and allium flowers creates a gentle lavender cottage. Paired with pale wood tones and white plaster, this cottage looks like it belongs in a magical storybook meadow.
Setting Up the Light Stone Foundation and Walls
Build the base foundation using polished diorite and calcite blocks. Erect the wall panels using white concrete powder interspersed with stripped mangrove logs for a subtle contrast. Keep the structure compact with soft, rounded corners.
Building the Lavender Shingled Roof
Construct a high-gabled roof using a combination of mud brick stairs and purple-tinted blocks like magenta terracotta and purpur slabs. The muted purple tones blend gently with the light walls beneath, creating a distinct pastel aesthetic.
Landscaping the Surrounding Lavender Field
Plant extensive beds of alliums, lilacs, and lavender-colored flowers around the cottage perimeter. Intermingle pale moss carpet and white carpet pathways leading to a small wooden porch built from birch slabs.
Interior Furnishings and Reading Nook
Furnish the interior with light birch furniture, purple wool carpets, and a stone fireplace made of calcite. Place a reading desk by a large bay window overlooking the flower fields outside.
Required Materials and Block List
- Calcite Blocks: 6 Stacks
- Polished Diorite: 5 Stacks
- White Concrete Powder: 6 Stacks
- Mud Brick Stairs: 7 Stacks
- Magenta Terracotta: 4 Stacks
- Birch Slabs: 5 Stacks
- Alliums: 5 Stacks
- Lilacs: 4 Stacks
- Purple Wool: 3 Stacks
- Stripped Mangrove Logs: 4 Stacks
Idea 6: The Crystal Light Fairy Grotto
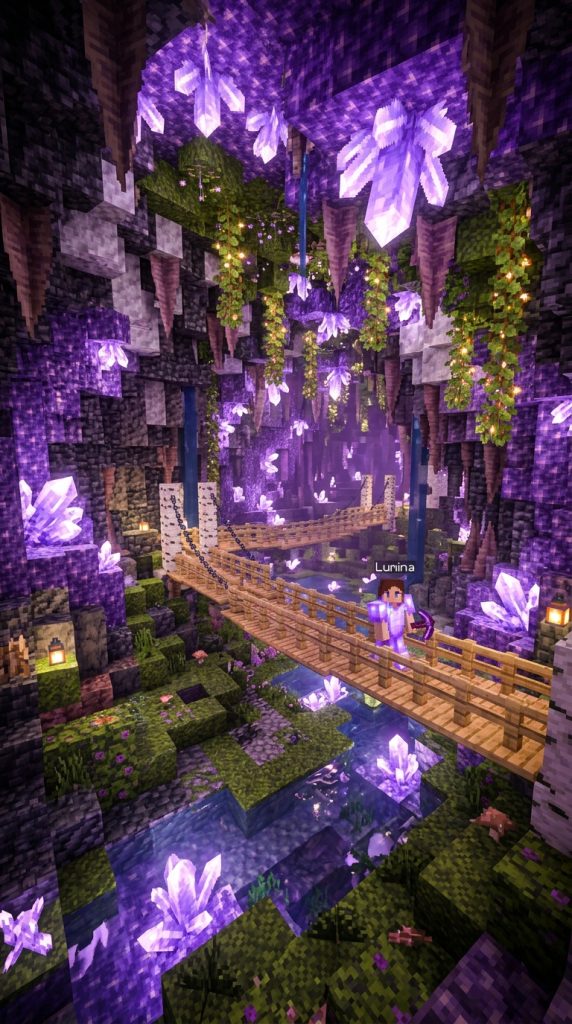
Amethyst Clusters Glowing in Hidden Underground Caves
Tucked beneath a lush forest floor lies a crystal grotto featuring amethyst geodes, shimmering water pools, and glowing vegetation. This fairycore build turns a standard stone cave into an underground wonderland.
Sculpting the Natural Underground Cavern
Carve out an expansive underground chamber with organic, uneven walls. Replace standard stone with dripstone blocks, smooth basalt, and calcite to create rich natural textures along the ceiling and floor.
Integrating Amethyst Crystals and Water Pools
Embed amethyst blocks and glowing amethyst clusters into the ceiling and walls. Excavate shallow pools along the floor, filling them with clear water and placing sea pickles underneath for bioluminescent light.
Draping the Cavern in Mystical Flora
Cover the ground with moss blocks and small dripleaves. Hang glowberries and weeping vines from the dripstone ceiling. Place spore blossoms high up to create a constant mist of green particles throughout the grotto.
Building Wooden Bridges and Fairy Platforms
Construct delicate walking bridges over the crystal pools using birch fences and slabs. Add small fairy houses built from hollowed-out oak logs perched on stone ledges along the cavern walls.
Required Materials and Block List
- Amethyst Blocks: 6 Stacks
- Amethyst Clusters: 4 Stacks
- Calcite: 6 Stacks
- Dripstone Blocks: 5 Stacks
- Moss Blocks: 8 Stacks
- Cave Vines with Glowberries: 4 Stacks
- Dripleaves: 3 Stacks
- Birch Slabs: 4 Stacks
- Sea Pickles: 2 Stacks
- Spore Blossoms: 2 Stacks
Idea 7: The Storybook Apiary and Honey Farm
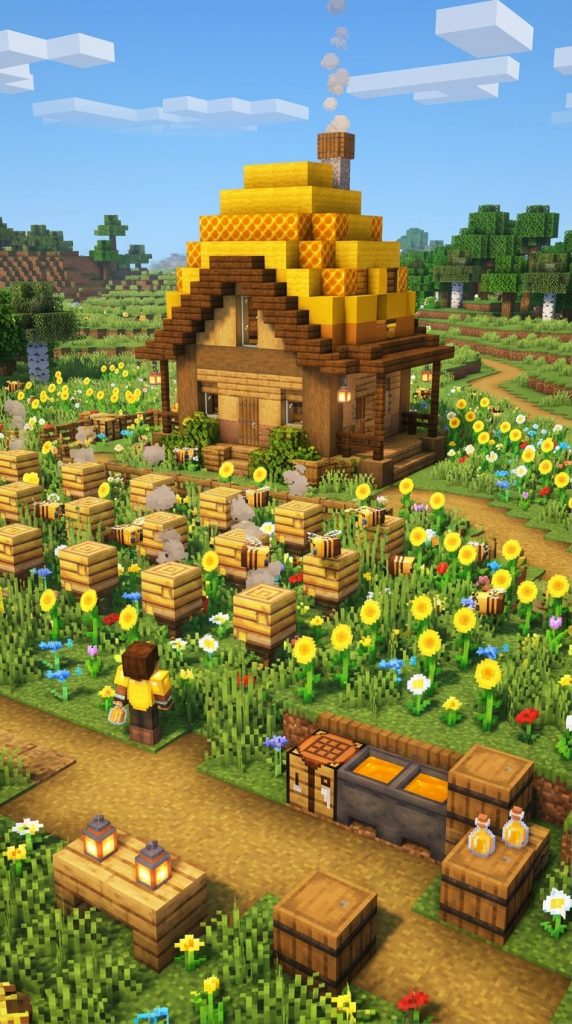
Warm Amber Tones Surrounded by Wildflower Fields
A cottagecore honey farm built around beehives features warm terracotta tones, yellow glazed tiles, and overflowing flower beds. This idyllic build looks picture-perfect set against a sunlit meadow background.
Building the Timber Frame and Honeycomb Roof
Erect a small timber-framed cottage using stripped oak logs and mud bricks. Construct a rounded, domed roof using yellow terracotta, honeycomb blocks, and smooth sandstone stairs to mimic the shape of a beehive.
Laying Out the Beehives and Flower Fields
Arrange bee nests and crafted beehives in neat rows framed by oak trapdoors. Surround the hives with dense rows of sunflowers, dandelions, and blue orchids to keep the bees active and productive.
Designing the Honey Processing Station
Outside the cottage, place cauldrons, barrels, and glass bottles on spruce workbenches. Use item frames displaying honey bottles and honeycombs to create an active artisan workstation atmosphere.
Adding Outdoor Details and Lighting
Install campfires beneath the beehives, hiding them with carpet blocks so smoke rises safely without angering the bees. Illuminate the farm at night using copper lanterns resting on fence posts.
Required Materials and Block List
- Stripped Oak Logs: 6 Stacks
- Mud Bricks: 6 Stacks
- Yellow Terracotta: 5 Stacks
- Honeycomb Blocks: 3 Stacks
- Beehives: 2 Stacks
- Sunflowers: 4 Stacks
- Cauldrons: 3 Blocks
- Barrels: 4 Stacks
- Copper Lanterns: 2 Stacks
- Oak Trapdoors: 4 Stacks
Idea 8: The Enchanted Woodland Treehouse Bridge
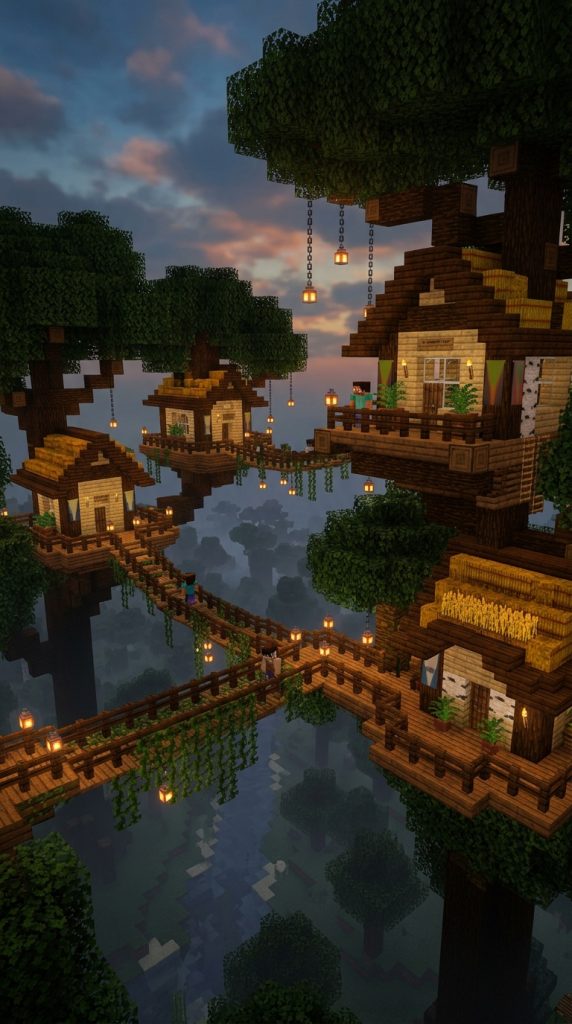
Wooden Suspended Walkways Nestled in High Branches
Connecting multiple giant forest trees via rope bridges creates an elevated cottagecore sanctuary. High above the forest floor, these small treehouses offer safe, serene living spaces with stunning canopy views.
Framing the Giant Anchor Trees
Select or build three large oak trees positioned close together. Reinforce their trunks with additional oak logs and stripped wood, expanding the upper branch structures to support heavy platforms.
Building Elevated Wooden Platforms and Cabins
Construct sturdy wooden floor platforms using dark oak slabs suspended from major branches. Build small, cozy cabins on these platforms using birch wood walls and thatched hay bale roofs.
Connecting Cabins with Rope and Plank Bridges
Link the elevated treehouses together using swaying bridges made of oak slabs and oak fences. Drape vines and hanging moss along the bridge railings for a natural, weathered aesthetic.
Decorating the High Canopy Spaces
Hang lanterns underneath the wooden platforms to illuminate the forest floor below. Furnish the upper cabins with beds, armor stands, and small balconies adorned with potted flowering azaleas.
Required Materials and Block List
- Oak Logs: 10 Stacks
- Dark Oak Slabs: 8 Stacks
- Birch Planks: 6 Stacks
- Hay Bales: 6 Stacks
- Oak Fences: 8 Stacks
- Vines: 5 Stacks
- Lanterns: 3 Stacks
- Flowering Azalea Pots: 2 Stacks
- Stripped Oak Wood: 4 Stacks
- Moss Carpet: 3 Stacks
Idea 9: The Sunken Fairytale Flower Fountain
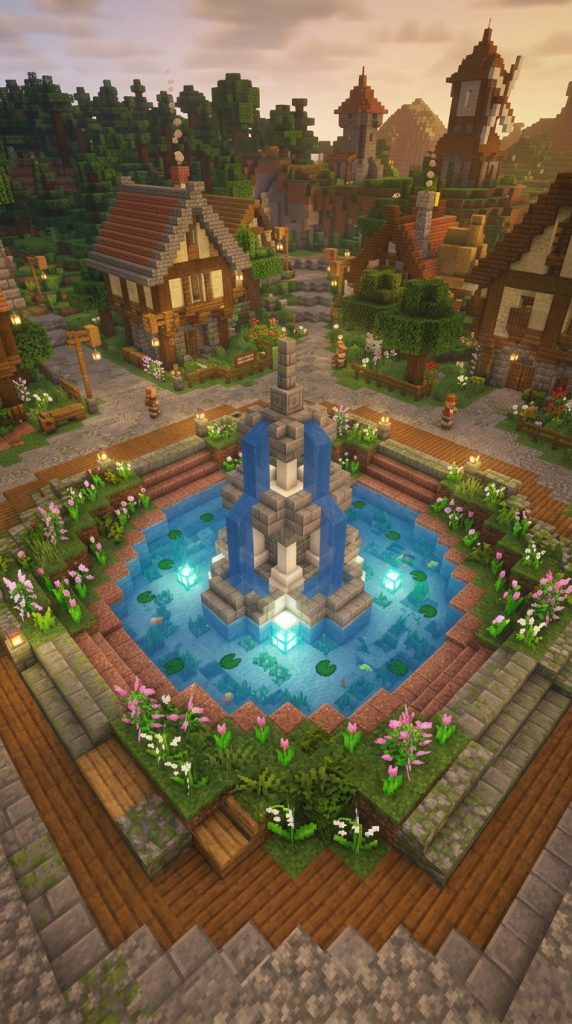
Mystical Waters Surrounded by Stone Arches and Petals
A sunken stone fountain garden serves as a tranquil centerpiece for any cottagecore village. Built with mossy cobblestone and smooth quartz, the fountain is framed by terraced flower beds and glowing water channels.
Excavating the Sunken Circular Plaza
Dig a circular, three-block-deep basin into the ground. Line the outer terraced walls with mossy stone bricks and granite slabs to create clean, tiered garden steps leading down to the water.
Sculpting the Central Stone Fountain Spire
Build a multi-tiered fountain spire in the center using chiseled stone bricks, quartz stairs, and diorite walls. Water cascades smoothly from the top tier down into the surrounding basin pool.
Planting Terraced Flower Beds and Foliage
Fill the terraced levels surrounding the fountain with a dense mixture of pink tulips, lily of the valley, and ferns. Place lily pads and glowing sea pickles in the fountain pool water.
Adding Pathways and Garden Seating
Construct curved stone benches around the upper plaza edge using quartz slabs. Connect the sunken fountain plaza to nearby village paths using wide cobblestone steps lined with iron lanterns.
Required Materials and Block List
- Mossy Stone Bricks: 8 Stacks
- Granite Slabs: 6 Stacks
- Smooth Quartz Stairs: 5 Stacks
- Chiseled Stone Bricks: 3 Stacks
- Diorite Walls: 3 Stacks
- Pink Tulips: 4 Stacks
- Lily of the Valley: 4 Stacks
- Sea Pickles: 2 Stacks
- Lily Pads: 2 Stacks
- Lanterns: 2 Stacks
Idea 10: The Overgrown Cobblestone Bridge and Gate
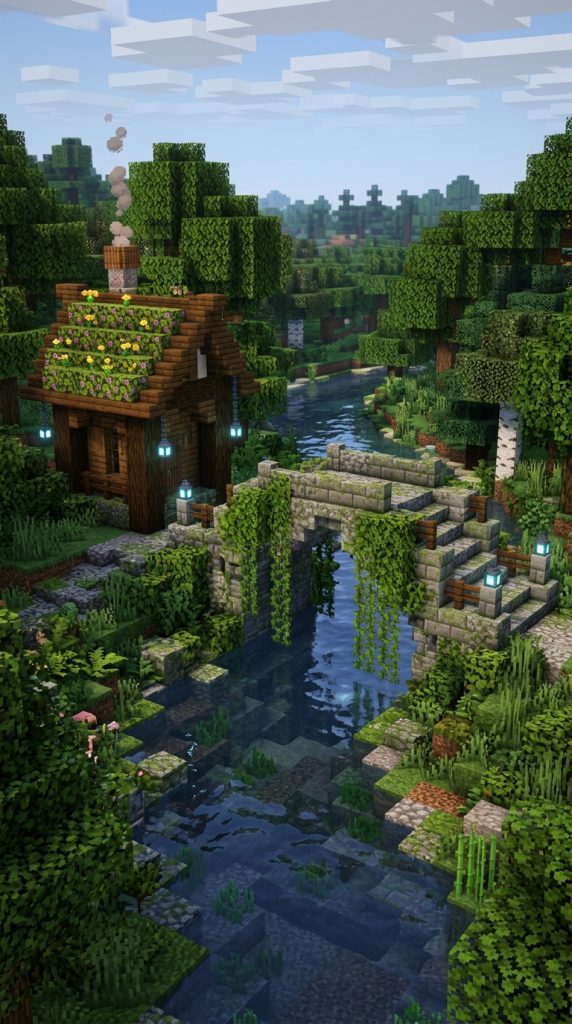
An Ancient Stone Gateway Straddling a Peaceful Stream
Crossing a forest stream becomes a magical experience with an overgrown cobblestone arch bridge. Accompanied by a small timber gatehouse, this build marks the boundary to an enchanted woodland realm.
Constructing the Curved Stone Bridge Arch
Build a gently curving arch over the river using cobblestone, mossy cobblestone, and stone brick stairs. Replace select solid floor blocks with mossy cobblestone slabs to simulate centuries of wear.
Building the Guard Gatehouse Structure
Erect a small, charming gatehouse on one side of the bridge using dark oak logs and white plaster walls. Roof the gatehouse with spruce stairs topped with a layer of flowering azalea leaf blocks.
Draping Overgrown Foliage Along Stone Arches
Attach weeping vines and green vines to the underside of the stone bridge arch so they trail into the river water. Plant flowering azalea bushes along the stone bridge handrails for color.
Detailing the Riverbanks and Lighting
Line the riverbanks below with coarse dirt, moss blocks, and pointed dripstone pebbles. Position soul lanterns on iron chains hanging from the center of the stone bridge arch over the water.
Required Materials and Block List
- Cobblestone: 8 Stacks
- Mossy Cobblestone: 6 Stacks
- Stone Brick Stairs: 5 Stacks
- Dark Oak Logs: 4 Stacks
- Spruce Stairs: 5 Stacks
- Flowering Azalea Leaves: 4 Stacks
- Vines: 4 Stacks
- Coarse Dirt: 4 Stacks
- Soul Lanterns: 2 Stacks
- Iron Chains: 1 Stack
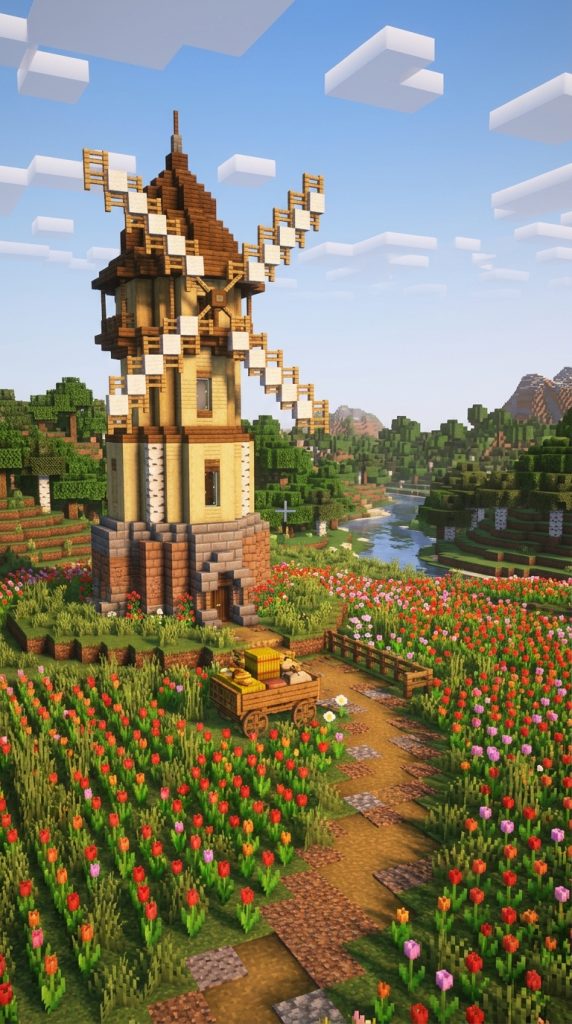
Idea 11: The Whimsical Windmill and Flower Mill
Pastel Blades Turning Over Blooming Petal Fields
A fairytale windmill features a rounded, tapered tower painted in soft pastel shades, with large wooden blades covered in white wool. Set in a field of swaying tulips, it processes wheat while adding charm to the landscape.
Building the Tapered Stone and Wood Tower
Construct a round, tapered tower base using mud bricks and smooth sandstone. As the tower rises, narrow its diameter slightly, transitioning to light birch wood planks for the upper levels.
Crafting the Lattice Blades and Mechanism
Install a central axle made of dark oak wood protruding from the upper tower. Attach four wide windmill blades crafted from oak fences and white wool carpet, angled to suggest motion.
Interior Milling Workspace and Grain Storage
Inside the windmill base, construct a millstone setup using stone pressure plates, grindstones, and barrels. Storage chests and wheat sacks stack against the walls for an authentic working feel.
Landscaping the Surrounding Tulip Field
Surround the windmill base with a vast field of red, orange, and pink tulips. Path blocks wind through the flower field, leading to a small wooden cart loaded with wheat bales.
Required Materials and Block List
- Mud Bricks: 8 Stacks
- Smooth Sandstone: 6 Stacks
- Birch Planks: 6 Stacks
- White Wool: 4 Stacks
- Oak Fences: 5 Stacks
- Grindstones: 2 Blocks
- Barrels: 6 Stacks
- Tulips (Assorted): 10 Stacks
- Hay Bales: 4 Stacks
- Path Blocks: 5 Stacks
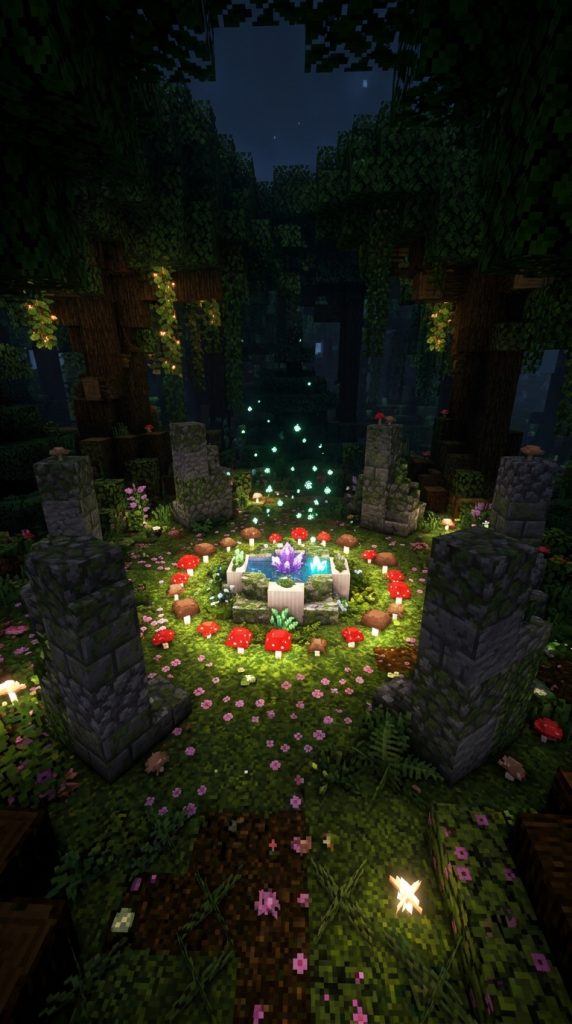
Idea 12: The Hidden Fairy Ring Clearing
Glowing Mushrooms and Ancient Stone Pillars in Deep Woods
Deep inside an old-growth forest lies a secret fairy ring. A circle of glowing mushrooms surrounds ancient, moss-covered stone monoliths, creating an enchanting spot for quiet reflection or magical roleplay.
Erecting the Ancient Stone Monoliths
Position six weathered stone pillars in a broad circle. Build the pillars using a mix of mossy cobblestone, cracked stone bricks, and chiseled stone, making each pillar vary slightly in height.
Creating the Central Mushroom Ring
Inside the monolith circle, plant a perfect ring of red and brown mushrooms. Intermingle red mushroom blocks and shroomlights buried beneath moss carpet so the ground glows softly at night.
Draping Vegetation and Particle Effects
Suspend spore blossoms from high tree branches directly over the fairy ring. Scatter pink petals, moss carpet, and azalea bushes around the base of the stone monoliths.
Adding Mysterious Center Details
Place a smooth quartz altar or a small water basin in the exact center of the ring. Surround the basin with amethyst clusters and glowing sea pickles for an eerie, beautiful light display.
Required Materials and Block List
- Mossy Cobblestone: 6 Stacks
- Cracked Stone Bricks: 4 Stacks
- Shroomlights: 3 Stacks
- Moss Carpet: 6 Stacks
- Red Mushroom Blocks: 3 Stacks
- Spore Blossoms: 2 Stacks
- Pink Petals: 4 Stacks
- Smooth Quartz: 2 Stacks
- Amethyst Clusters: 2 Stacks
- Sea Pickles: 2 Stacks
Idea 13: The Cozy Starlight Cottage Loft
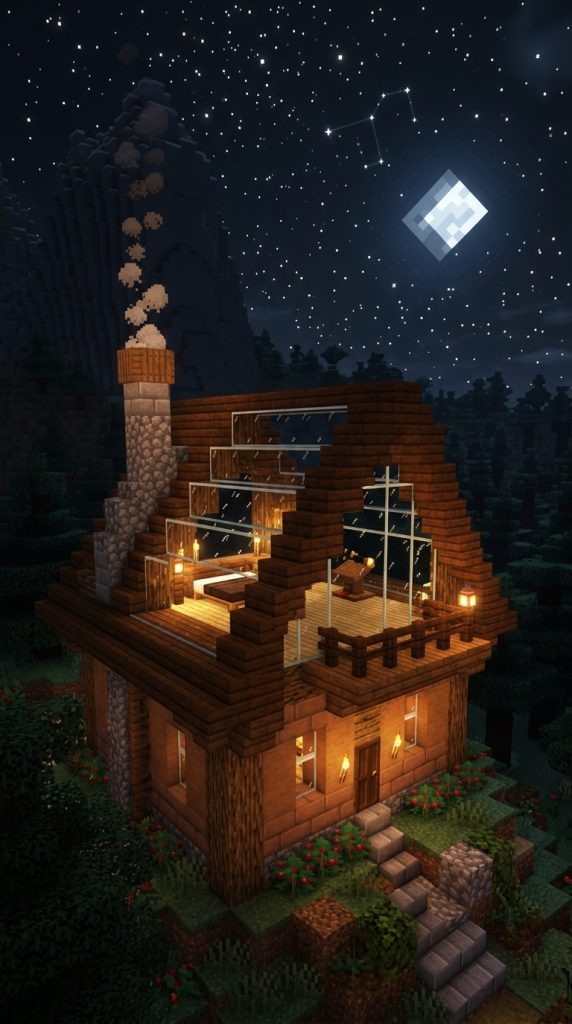
A Dreamy Sanctuary for Stargazing Beneath the Forest Canopy
This cottagecore build features a glass-roofed stargazing loft built atop a cozy timber home. Located in a high mountain forest clearing, it offers panoramic views of the night sky framed by warm wooden architecture.
Building the Timber Frame Home Foundation
Construct a warm ground floor using stripped spruce logs, mud bricks, and dark oak plank framing. Large arched windows bring in natural sunlight, while a stone chimney sits along one side wall.
Constructing the Stargazing Glass Loft
Erect a steep, triangular roof loft on the second floor using spruce stairs and clear glass blocks. The glass ceiling exposes the bed and stargazing desk directly to the night sky above.
Interior Cozy Furnishings and Stargazing Setup
Furnish the loft bedroom with a soft white bed, bookshelves, and a telescope setup made with a spyglass on a lectern. Hang warm yellow lanterns from the wooden ceiling ridge beams.
Outdoor Balcony and Mountain Garden Details
Attach a small wooden balcony off the loft bedroom using spruce slabs and fences. Surround the cottage base with sweet berry bushes, spruce leaf hedges, and glowing campfire smoke rising from the chimney.
Required Materials and Block List
- Stripped Spruce Logs: 8 Stacks
- Mud Bricks: 6 Stacks
- Clear Glass Blocks: 6 Stacks
- Spruce Stairs: 8 Stacks
- Spruce Slabs: 6 Stacks
- Bookshelves: 4 Stacks
- Spyglass: 1 Item
- Lecterns: 1 Block
- Sweet Berry Bushes: 3 Stacks
- Lanterns: 3 Stacks