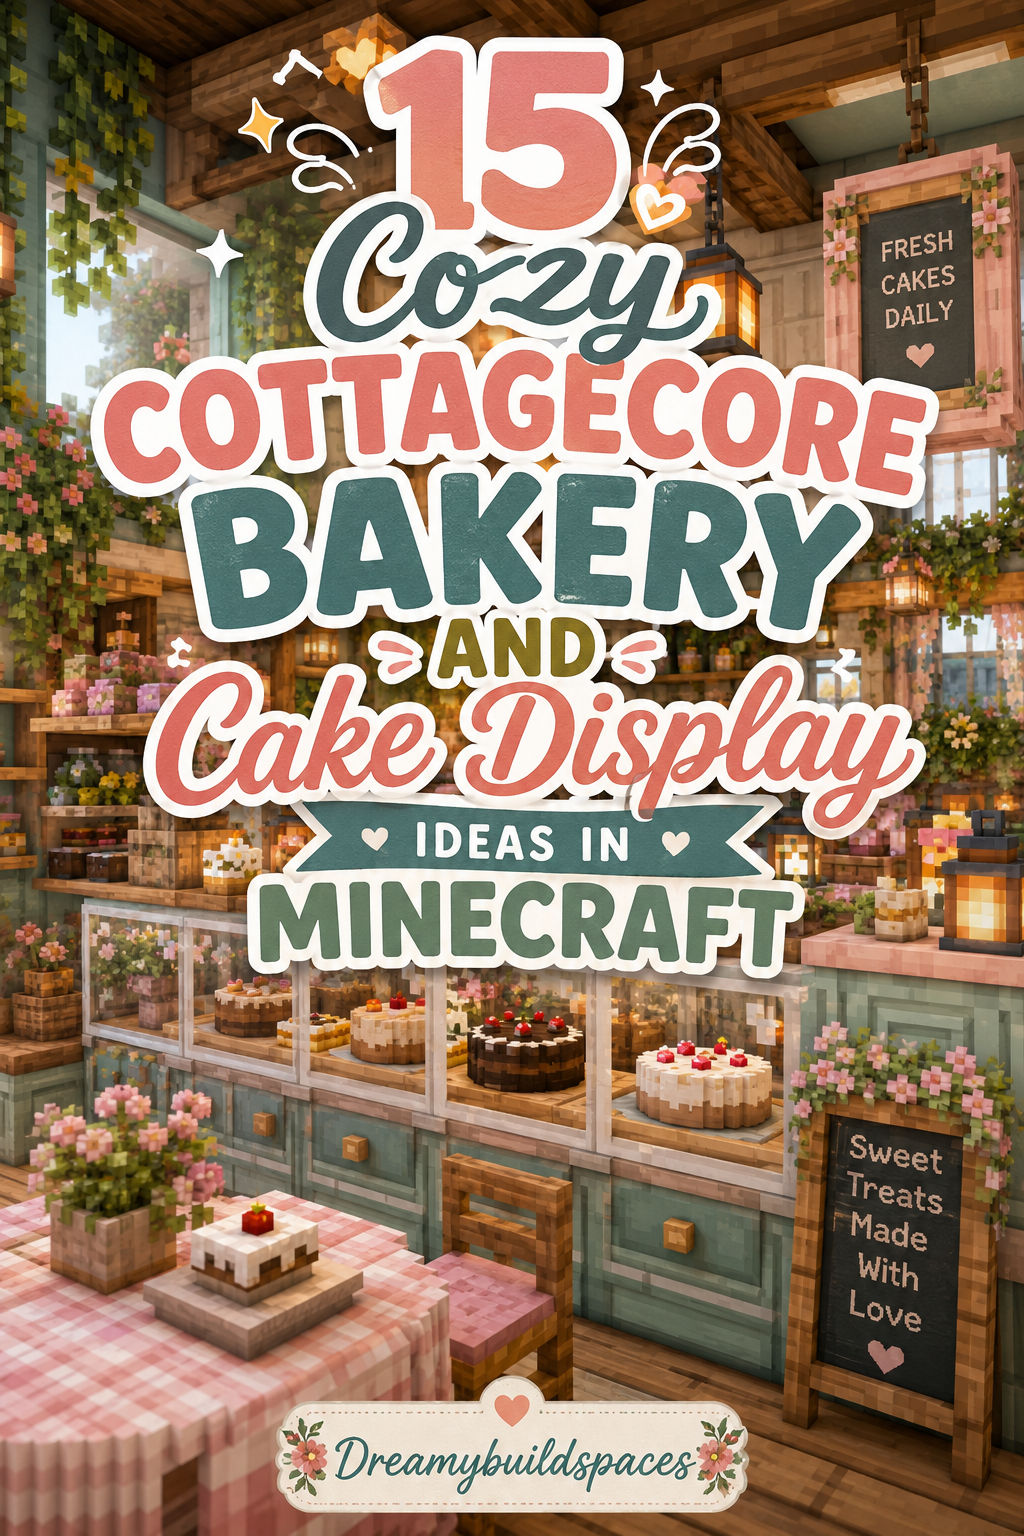
15 Cozy Cottagecore Bakery And Cake Display Ideas in Minecraft
There is something extraordinarily comforting about turning a simple wheat farm into an enchanting, flour-dusted village bakery in Minecraft. The cottagecore aesthetic thrives on rustic textures, pastel accents, warm lighting, and a deep, harmonious connection with nature. While building a quaint wooden cabin is a great start, transforming it into a fully realized bakery requires an eye for interior layout, detailed countertop displays, and clever block combinations. From sunlit roadside cake stands to secret subterranean pastry cellars, incorporating creative display hacks brings your builds to life. In this comprehensive guide, you will discover fifteen cozy cottagecore bakery and cake display concepts to elevate your survival settlement or creative world.
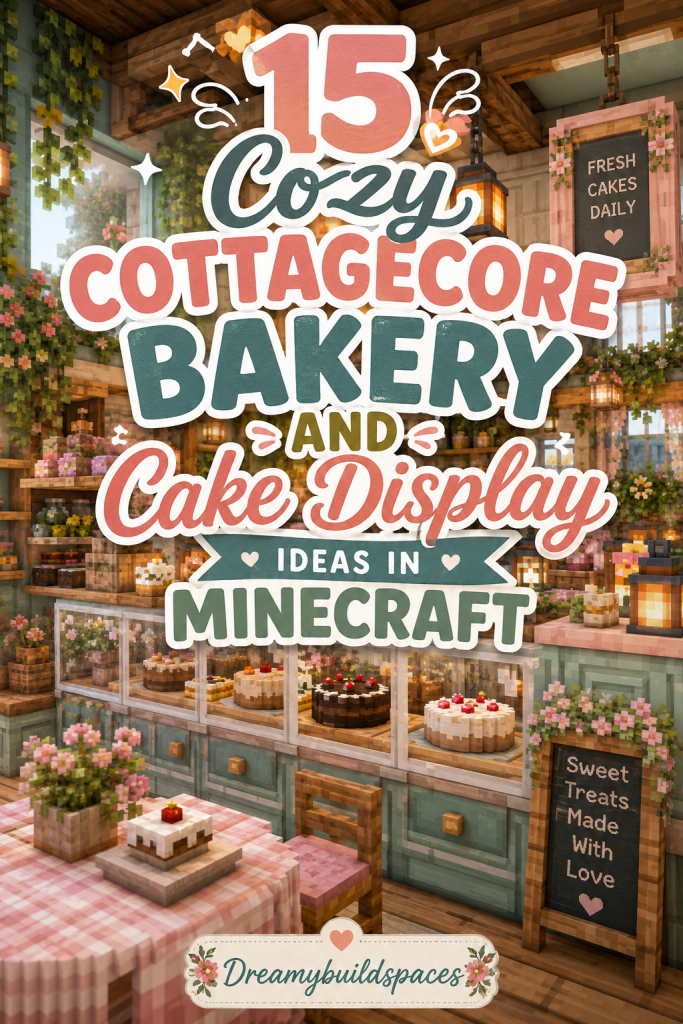
Minecraft provides a rich selection of natural and decorative blocks that suit cottagecore bakeries effortlessly. Stripped cherry and birch logs deliver soft, creamy pastel frames, while dark oak and spruce supply heavy, grounding outlines for counter edges and roofing. Smokers, barrels, composters, and water cauldrons offer functional utility while mimicking real-world kitchen equipment. Furthermore, decorative elements like paper lanterns, glass panes, item frames, and pink petal carpets introduce delicate charm to display counters and dining patios. Combining these accessible materials allows you to craft picturesque shops that feel warm, active, and deeply inviting.
In this guide, we will explore fifteen unique, cozy cottagecore bakery and cake display ideas. Each concept includes a full overview, detailed materials list, and step-by-step tutorial instructions. You will learn how to build custom cake pedestals, construct glass display counters, and organize charming outdoor seating areas. Additionally, these designs suit both early-game survival mode players and creative world builders. So, grab your iron axe, gather your baking ingredients, and let us dive directly into these aesthetic Minecraft cottagecore bakery ideas.
1. The Glass-Dome Cake Pedestal Counter
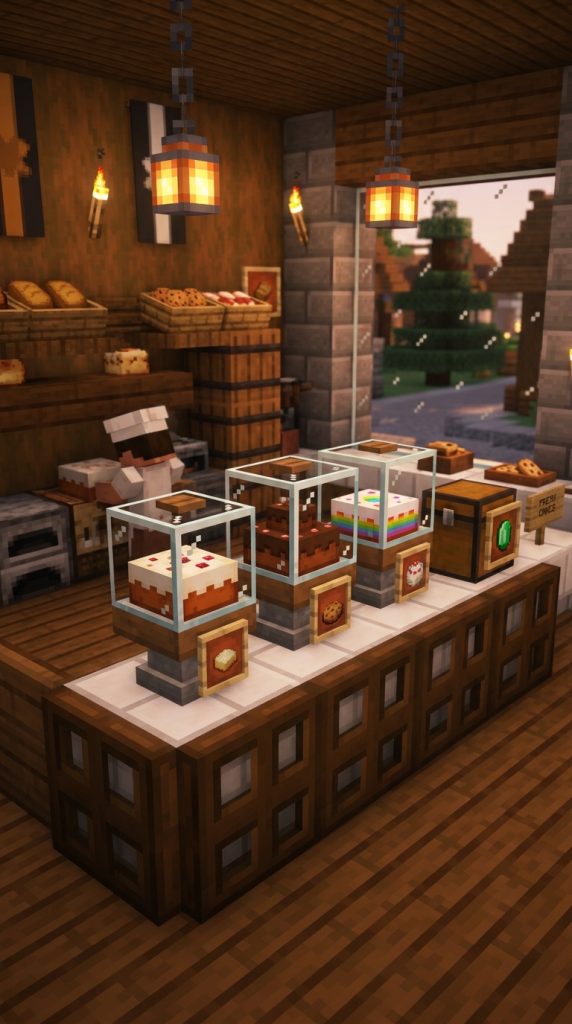
The glass-dome cake pedestal counter is a classic, high-detail display setup that makes baked goods look like the star attraction of your shopfront. It features a smooth quartz or polished diorite serving counter lined with elevated cake pedestals enclosed beneath clear or white stained glass blocks. Furthermore, spruce trapdoor side paneling and dark oak framing create a clean, elegant patisserie counter that fits seamlessly into cozy shop interiors.
This display concept focuses on elevated presentation and realistic shop detailing. Placing a cake on top of an inverted quartz stair or a flower pot elevates the cake slightly, making it appear as if it is resting on an authentic ceramic pedestal. Enclosing the cake behind glass blocks or glass panes simulates a professional glass display case, keeping your baked treats looking pristine and protected. Consequently, your bakery interior immediately gains a sophisticated, high-end feel.
Elevated Display Geometry
Creating elevated pedestals requires using blocks that sit slightly higher than flat floor surfaces. Inverted stairs, slabs, or wall posts create distinct height variations along a flat counter. Furthermore, placing item frames with white carpets directly beneath cake blocks simulates porcelain serving plates, adding subtle layering that elevates simple Minecraft items into artisanal baked displays.
Materials Needed
- Smooth Quartz Stairs & Slabs
- Dark Oak Trapdoors
- Glass Blocks & Panes
- Cake Blocks
- Item Frames & White Carpets
Step-by-Step Guide
First, construct a four-block-long serving counter using smooth quartz stairs facing backward, creating a clean white ledge. Frame the left and right ends of the counter using dark oak trapdoors flipped vertically to form wooden side cabinets. Consequently, you build a sleek, high-contrast counter base.
Second, place item frames flat on top of the quartz counter blocks, inserting white carpets inside them to serve as plate liners. Place cake blocks directly on top of the item frame pedestals. Consequently, your cakes appear elevated on clean ceramic serving platters.
Third, enclose the cakes by placing glass blocks over them, trimming the front face with clear glass panes for visibility. Attach dark oak trapdoors along the top edge of the glass case to form a decorative wooden trim. Finally, place a flower pot with a pink tulip on the counter corner.
2. The Brick Hearth Oven & Pastry Prep Kitchen
The brick hearth oven and pastry prep kitchen combines rustic industrial baking power with cozy cottagecore charm. It features a prominent, three-block-wide red brick oven protrusion built directly into the kitchen wall, housing active smokers and glowing campfires behind iron bars. Furthermore, an adjacent prep table packed with water cauldrons, flour sacks, and rolling boards showcases a busy baker hard at work.
Industrial hearths bring vibrant warmth, light, and realistic storytelling to food prep areas. The rich orange-red tone of brick blocks provides a comforting contrast against light spruce planks and creamy birch logs. Furthermore, organizing functional cooking blocks like smokers and composters alongside decorative flour sacks creates an active working kitchen. As a result, your bakery feels warm, functional, and deeply authentic.
Smoke Venting & Safety Framing
Enclosing active campfires behind iron bars inside brick hearth openings generates realistic flickering light and smoke without creating fire hazards in wooden cottages. Extending a brick chimney column upward through the roof vents smoke safely outside. Furthermore, placing web blocks or campfires at the chimney top simulates rising chimney smoke.
Materials Needed
- Bricks & Brick Stairs
- Smokers & Campfires
- Water Cauldrons
- Loom Blocks (for Flour Sacks)
- Iron Bars
Step-by-Step Guide
First, mark out a three-block-wide section along your main kitchen wall face and replace it with brick blocks. Carve out a two-block-tall central alcove, placing a campfire at the bottom and a smoker directly above it. Consequently, you lay the foundation for a heavy masonry baking oven.
Second, enclose the front of the campfire using iron bars and frame the oven arch using inverted brick stairs. Extend a solid brick chimney column up through the ceiling and roof. Consequently, your hearth gains a realistic, smoke-venting industrial structure.
Third, construct an adjacent prep table using spruce slabs set over water cauldrons and loom blocks placed sideways to mimic woven flour sacks. Place an item frame with a wooden button on the counter to act as a dough rolling pin. Finally, hang iron lanterns beside the hearth.
3. The Pastel Pink Cherry Blossom Tea & Cake Porch
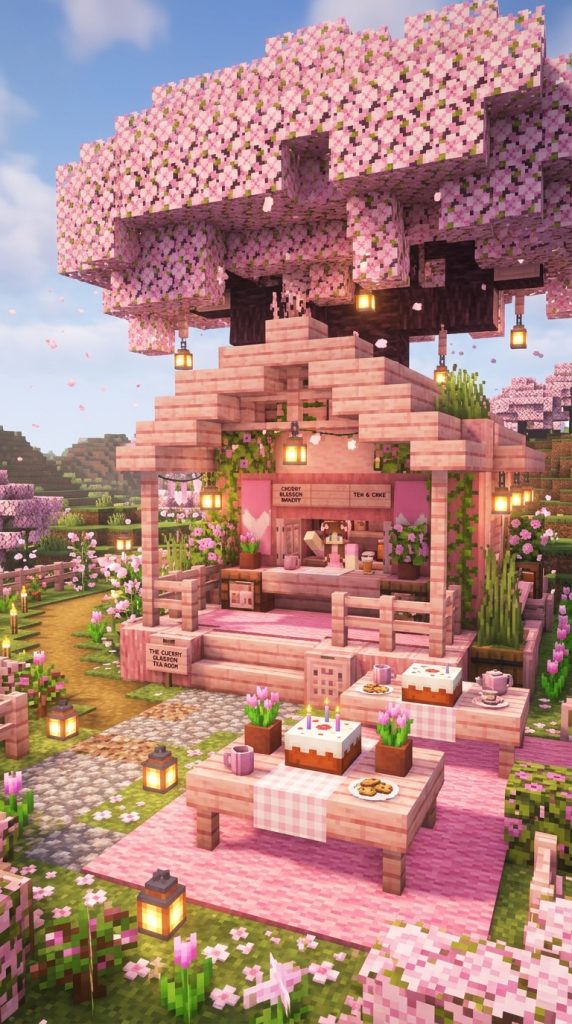
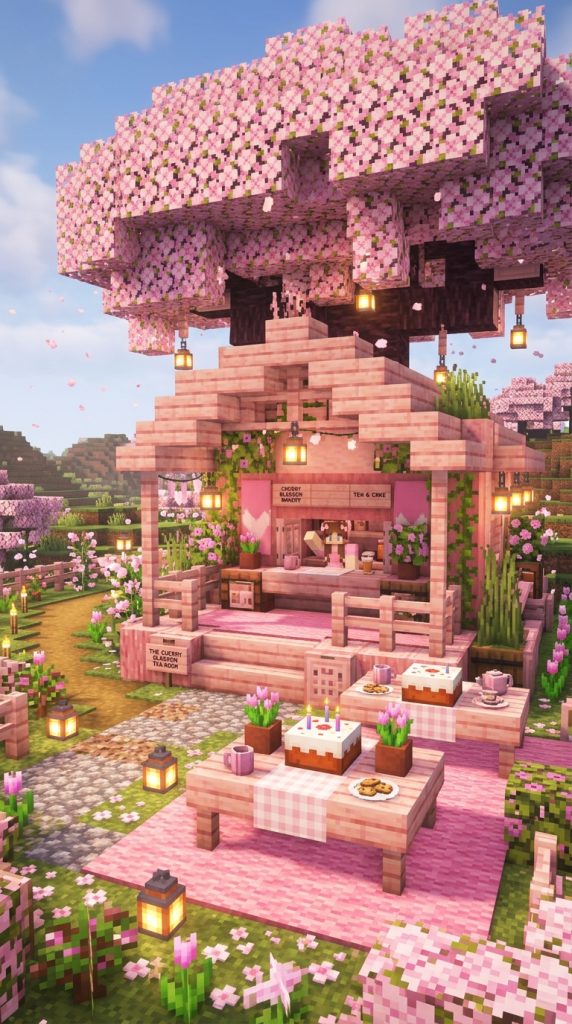
The pastel pink cherry blossom tea and cake porch brings gentle, romantic fairytale energy to the exterior of your bakery. Built under the canopy of a blooming cherry blossom tree, it features a sweet pink cherry wood serving window attached to an open-air veranda. Furthermore, outdoor tea tables surrounded by potted pink tulips, hanging paper lanterns, and pink petal carpets invite passing villagers to relax.
Porch displays excel at connecting indoor bakery shops with outdoor nature scenery. Utilizing pink cherry wood planks paired with creamy stripped birch logs creates a light, dreamy color palette that feels sweet and appetizing. Furthermore, setting up outdoor dining tables equipped with tea cups and cake slices encourages relaxed roleplay. Consequently, your bakery exterior transforms into an enchanting garden destination.
Outdoor Canopy Integration
Building your tea porch beneath overlapping cherry leaf blocks creates an organic roof that drops gentle pink particles over dining tables. Interweaving flowering azalea leaves into the porch roofline adds soft green and pink textures. Furthermore, placing candle clusters on tables casts a warm, flickering glow across outdoor seating during dusk.
Materials Needed
- Cherry Wood Planks & Stairs
- Stripped Birch Logs
- Paper Lanterns
- Pink Petals & Carpet
- Flower Pots & Pink Tulips
Step-by-Step Guide
First, construct a raised four-by-six block wooden porch deck using smooth cherry wood slabs anchored into stripped birch corner posts. Attach the porch directly to the front facade of your bakery building. Consequently, you establish an elevated outdoor seating platform.
Second, cut out a wide three-block window opening on the bakery wall, installing a cherry wood slab counter across the sill. Hang paper lanterns from the porch roof overhang above the counter to illuminate the serving window. Consequently, your shop gains an accessible outdoor pass-through window.
Third, arrange small tea tables on the porch using birch fences topped with pink carpet tiles, surrounding them with birch stair chairs. Place flower pots with pink tulips and cake slices on the tables, scattering pink petals across the floor. Finally, enjoy a romantic garden tea porch setup.
4. The Rustic Cobblestone Roadside Pastry Cart
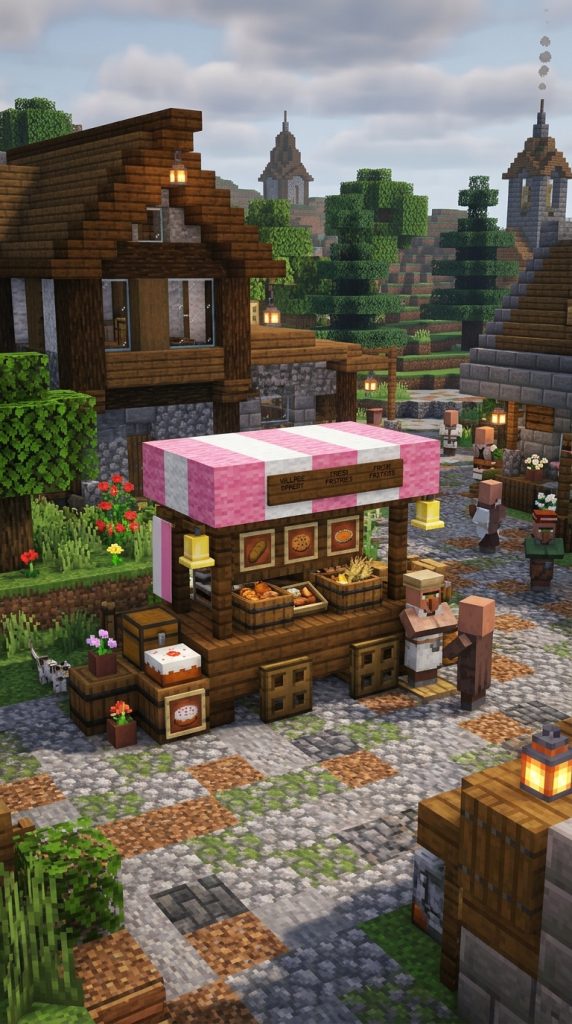
Positioned along a winding village dirt path, the rustic cobblestone roadside pastry cart is a charming mobile food display for traveling merchants. It features a compact wooden cart frame supported by dark oak trapdoor wheels, topped with a sloped pink and white striped wool awning. Furthermore, open display shelves stocked with fresh bread, cookies, and fruit pies welcome passing travelers.
Mobile market carts add dynamic storytelling and vibrant color to village roads. The compact footprint fits easily into tight street corners, village squares, or river crossings without requiring a full building structure. Furthermore, using striped wool awnings introduces cheerful fabric patterns that break up brown wood and grey stone surroundings. Consequently, your town paths feel active and lived-in.
Cart Wheel & Handle Detailing
Constructing realistic cart wheels relies on placing dark oak or spruce trapdoors vertically against the sides of a slab axle. Attaching wooden fence posts to the front of the cart simulates pulling handles used by traveling vendors. Furthermore, placing a composter or barrel on the back of the cart mimics a mobile supply bin.
Materials Needed
- Spruce Slabs & Fences
- Dark Oak Trapdoors
- Pink & White Wool
- Item Frames
- Bread, Cookies & Pies
Step-by-Step Guide
First, lay down a three-block-long wooden cart body using spruce slabs placed one block above the ground. Attach dark oak trapdoors flat against the sides of the middle slab to serve as cart wheels. Consequently, you construct a balanced mobile vehicle chassis.
Second, erect four vertical spruce fence posts at the corners of the cart body to support an overhead frame. Construct a sloped, striped canopy over the cart using alternating pink and white wool blocks. Consequently, your food cart receives a colorful, weather-proof fabric awning.
Third, place item frames along the top slab deck of the cart, filling them with cookies, bread, and pumpkin pies. Attach wooden fence handles to the front and place a supply barrel at the rear. Finally, hang a lantern from the front awning corner to light the path.
5. The Sunlit Window-Bench Bakery Nook
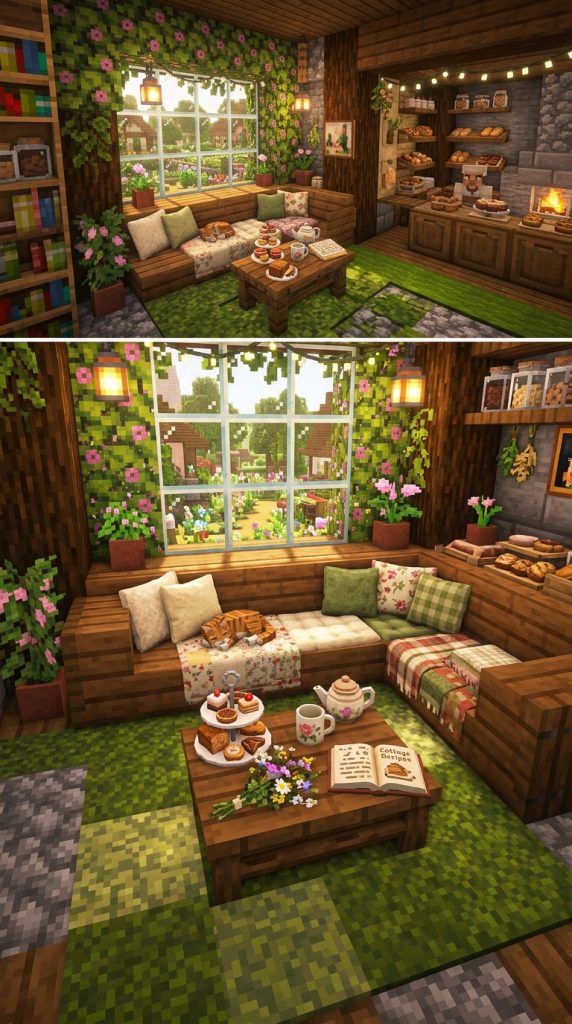
The sunlit window-bench bakery nook creates a warm, relaxing indoor seating spot where customers can enjoy baked treats while looking out at garden views. Built into a wide window recess framed with flowering azalea leaves, it features smooth spruce bench seating, plush wool rugs, and a low coffee table holding fresh cakes and tea cups.
Indoor window nooks focus on natural daylighting, cozy furniture arrangements, and soft texturing. Positioning bench seating against large glass windows allows sunlight to flood the room, highlighting warm wood grains and floral decorations. Furthermore, combining moss carpets with pink petal tiles creates a soft, plush floor accent around the seating area. As a result, your bakery interior feels welcoming and comfortable.
Daylight & Frame Optimization
Building wide three-block window openings fitted with clear glass panes maximizes natural light entry during the day. Framing the interior window casing with flowering azalea leaf blocks creates an organic, living frame that connects the room to outdoor gardens. Furthermore, placing candles on the bench table ensures warm lighting after sunset.
Materials Needed
- Spruce Slabs & Stairs
- Flowering Azalea Leaves
- Clear Glass Panes
- Moss Blocks & Carpets
- Candles & Cakes
Step-by-Step Guide
First, cut out a large three-block-wide by two-block-tall window opening along your main bakery wall. Frame the interior perimeter of the opening using flowering azalea leaf blocks and install clear glass panes inside. Consequently, you create a sunlit focal point for the room layout.
Second, construct a low, built-in window bench along the glass sill using spruce slabs flanked by spruce stairs for armrests. Place a low coffee table in front of the bench using a single spruce slab surrounded by rugs. Consequently, your window space transforms into a comfortable dining nook.
Third, place a cake and a cluster of candles on the coffee table. Line the floor surrounding the bench with moss carpets and scatter pink petals across the walking area. Finally, place floor-to-ceiling bookshelves along the adjacent wall to complete the cozy reading nook.
6. The Overgrown Cottagecore Watermill Bakery
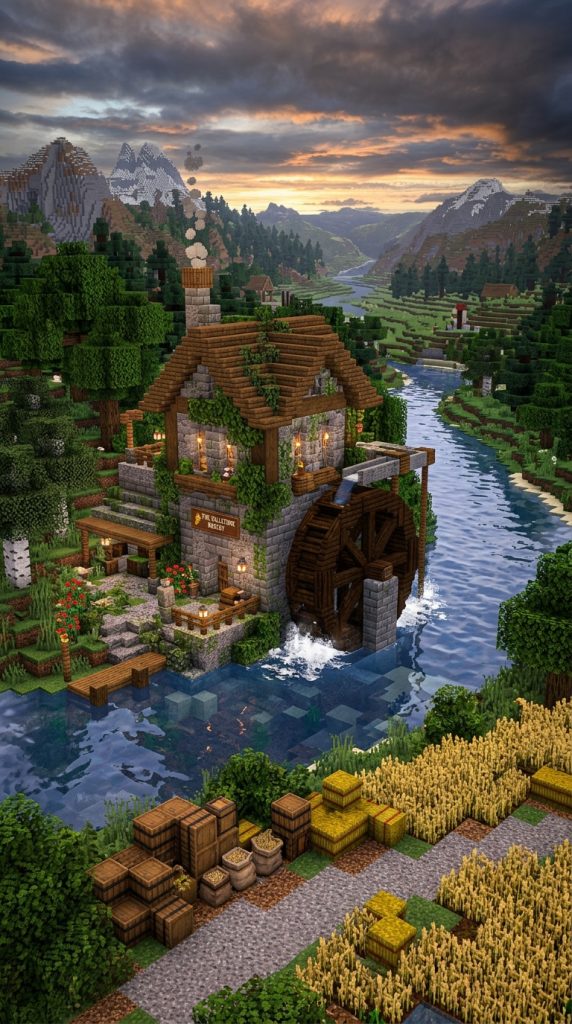
Set along the edge of a roaring river or millpond, the overgrown cottagecore watermill bakery uses natural water power to grind fresh grain into flour. It features a heavy stone brick building equipped with a massive rotating dark oak water wheel, attached to a warm wooden bakery shopfront. Furthermore, climbing vines, leaf bushes, and outdoor flour barrels showcase a busy agricultural homestead.
Watermill bakeries combine heavy industrial machinery with sweet agricultural storytelling. The dramatic scale of a rotating timber water wheel set over flowing river water creates an impressive landmark for your town. Furthermore, connecting the watermill directly to a bakery shopfront illustrates the complete farm-to-table process of bread making. Consequently, your world gains a functional agricultural hub.
Water Wheel Physics & Mechanics
Building a circular water wheel requires arranging dark oak stairs in a symmetrical four-way curve around a central log axle. Inserting wooden trapdoors between wheel spokes mimics water buckets that catch river currents. Furthermore, adding splash particles using water buckets beneath the wheel enhances mechanical realism.
Materials Needed
- Stone Bricks & Cobblestone
- Dark Oak Stairs & Slabs
- Dark Oak Trapdoors
- Stripped Spruce Logs
- Barrels & Wheat Bales
Step-by-Step Guide
First, construct a sturdy six-by-eight block stone brick building along your riverbank. Extend a horizontal dark oak log axle two blocks outward from the stone wall over the flowing water channel. Consequently, you build a solid mechanical anchor over the river.
Second, build a five-by-five circular wheel around the log axle using dark oak stairs, slabs, and trapdoors, dipping the lower edge into the river. Attach a wooden bakery shopfront to the side of the stone watermill using spruce planks. Consequently, your watermill achieves dramatic industrial scale.
Third, cover the shopfront with a dark oak stair roof draped with climbing vines and flowering leaves. Stack wheat bales and flour barrels around the entrance, setting up a bread display counter out front. Finally, hang iron lanterns along the river dock.
7. The Tiered Dessert Canopy & Buffet Table
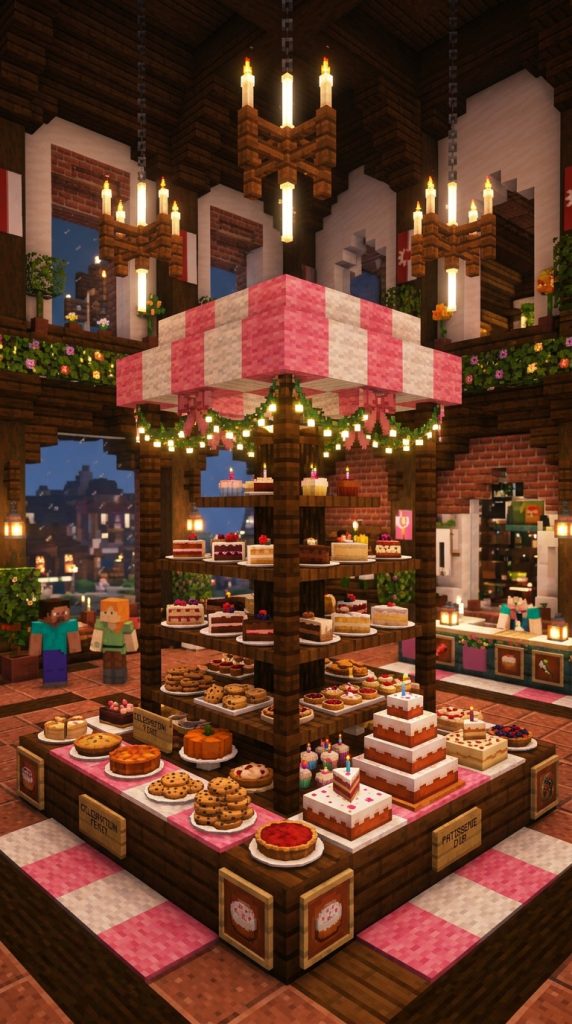
The tiered dessert canopy and buffet table is an opulent interior display layout designed for grand patisseries, wedding halls, or village celebrations. It showcases a multi-level wooden display buffet packed with various cake slices, pies, cookies, and fruit platters. Furthermore, a sweeping wool canopy overhead and glowing candle chandeliers cast a celebratory light over the dessert feast.
Buffet tables excel at displaying maximum food variety within an organized, luxurious presentation. Arranging slabs, stairs, and trapdoors at varying heights creates distinct shelf tiers that keep display items clearly visible. Furthermore, using colorful wool or carpet banners for the overhead canopy adds festive event energy to your bakery interior. Consequently, your dessert hall looks majestic and bountiful.
Multi-Level Shelf Layering
Designing tiered display shelves relies on stepping block heights back as they rise. Using inverted stairs for the lower tier, slabs for the middle tier, and fence posts with slabs for the upper tier creates three distinct display levels. Furthermore, placing item frames with glowing sea lanterns behind shelves illuminates treats from behind.
Materials Needed
- Dark Oak Slabs & Stairs
- Spruce Trapdoors
- Pink & White Wool Banners
- Candles & Sea Lanterns
- Cakes, Pies, Cookies & Berries
Step-by-Step Guide
First, construct a long six-block buffet table against your main shop wall using dark oak stairs. Place a secondary shelf row on top using dark oak slabs pushed against the wall face. Consequently, you build a broad, two-tiered display shelf foundation.
Second, place cake blocks, pumpkin pies, cookies, and sweet berries on item frames across both shelf tiers. Frame the outer edges of the buffet table using spruce trapdoors turned vertically for wooden side paneling. Consequently, your dessert table displays rich food variety neatly.
Third, construct a sweeping fabric canopy over the buffet table using alternating pink and white wool banners suspended from fence posts. Hang candle chandeliers from the canopy frame to illuminate the dessert feast brightly. Finally, scatter flower petals along the floor base.
8. The Underground Secret Pastry Cellar
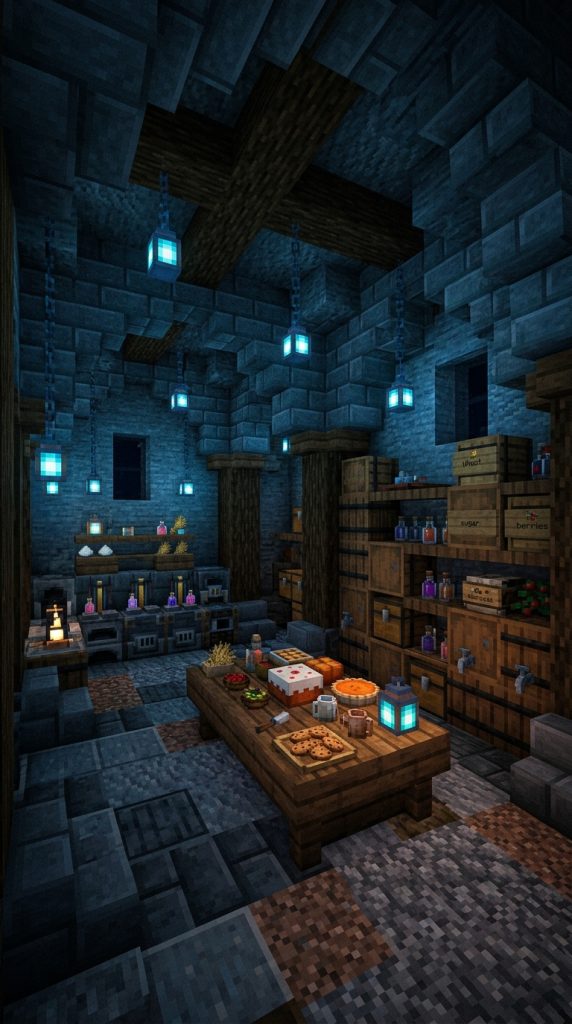
Tucked beneath the floorboards of a humble cottage, the underground secret pastry cellar is a hidden haven for aged desert wines, special preserves, and rare baked delights. Accessed via a trapdoor ladder or hidden bookshelf passage, it features vaulted deepslate brick arches, barrel storage racks, and glowing soul lanterns that cast a magical, cool atmosphere over secret tasting tables.
Underground cellars offer fantastic spatial contrast to bright, sunlit surface shops. The dark, cool aesthetic of deepslate bricks, mossy stone, and polished basalt mimics historical European wine and food vaults. Furthermore, organizing rows of barrels, potion bottles, and honey jars creates an immersive storage cellar for endgame survival players. As a result, your bakery possesses intriguing hidden depth.
Vaulted Arch Framing
Constructing vaulted ceiling arches requires curving deepslate stairs upward from support pillars to meet at a central ceiling peak. Using polished basalt for corner pillars adds heavy structural realism. Furthermore, placing cool blue soul lanterns along stone walls creates dramatic color contrast against warm wooden storage barrels.
Materials Needed
- Deepslate Bricks & Stairs
- Polished Basalt
- Barrels & Honey Blocks
- Soul Lanterns
- Brewing Stands & Cauldrons
Step-by-Step Guide
First, carve out an eight-by-eight block room four blocks deep beneath your cottage floor. Line the walls and floor with deepslate bricks and polished basalt corner pillars to create a solid stone vault shell. Consequently, you establish a secure subterranean cellar space.
Second, construct vaulted ceiling arches across the room using deepslate brick stairs meeting at the center ceiling ridge. Install a vertical spruce ladder in one corner leading up to a trapdoor in the cottage floor above. Consequently, your cellar gains safe access and dramatic structural arches.
Third, line the cellar walls with stacked barrels, honey blocks, and brewing stands for food aging. Place a central wooden tasting table equipped with cake slices, wine cauldrons, and soul lanterns. Finally, hide the entrance hatch beneath a soft carpet on the surface floor.
9. The Cottagecore Flower-Bed Cake Stand
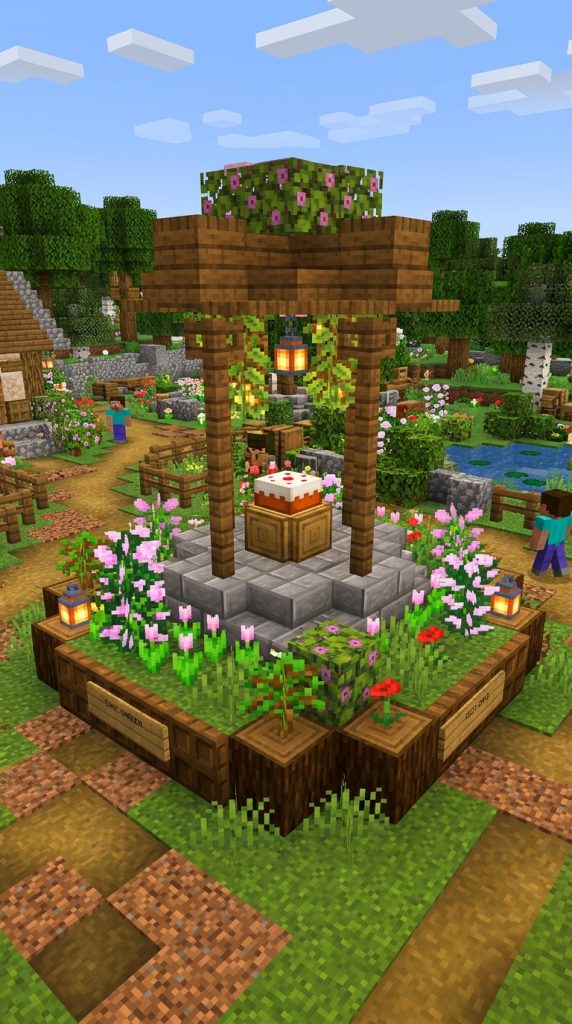
The cottagecore flower-bed cake stand is a sweet, nature-infused outdoor display idea perfect for village parks and garden pathways. It features a circular stone brick display pedestal set directly inside a raised garden bed filled with lavender, pink tulips, and flowering azalea bushes. Furthermore, a central cake rests on the pedestal under a dainty wooden gazebo roof.
Garden display stands celebrate natural beauty, floral color, and outdoor sweet shops. Embedding stone display pedestals inside dense flower beds makes the cake look like a magical garden treasure. Furthermore, building a light wooden gazebo roof overhead protects the cake display from rain while providing hanging points for lanterns. Consequently, your garden path gains a charming focal point.
Botanical Bed Layering
Creating dense garden beds relies on mixing flower types of varying heights and textures. Surround the stone pedestal base with tall lilac bushes, medium pink tulips, and low pink petal carpet tiles. Furthermore, placing moss blocks along the garden border creates a soft, green retaining edge that blends into surrounding grass.
Materials Needed
- Mossy Stone Bricks & Slabs
- Spruce Fences & Trapdoors
- Flowering Azalea Leaves
- Pink Tulips & Lilacs
- Cake Block & Lanterns
Step-by-Step Guide
First, lay out a five-by-five block square garden bed on flat ground, framing the outer border with moss blocks and mossy stone brick slabs. Raise a two-block-tall stone brick pedestal in the exact center of the bed. Consequently, you create a dedicated garden display platform.
Second, plant dense rows of lilacs, pink tulips, and flowering azalea bushes inside the garden bed around the central stone pedestal. Place a cake block directly on top of the stone pedestal surface. Consequently, your cake display becomes encased in colorful botanical growth.
Third, erect four spruce fence posts around the pedestal corners to support a small, sloped wooden gazebo roof made of spruce slabs. Hang iron lanterns from the roof corners to cast a warm glow over the flowers. Finally, scatter pink petals along surrounding paths.
10. The Baker’s Flour Mill & Silo Tower
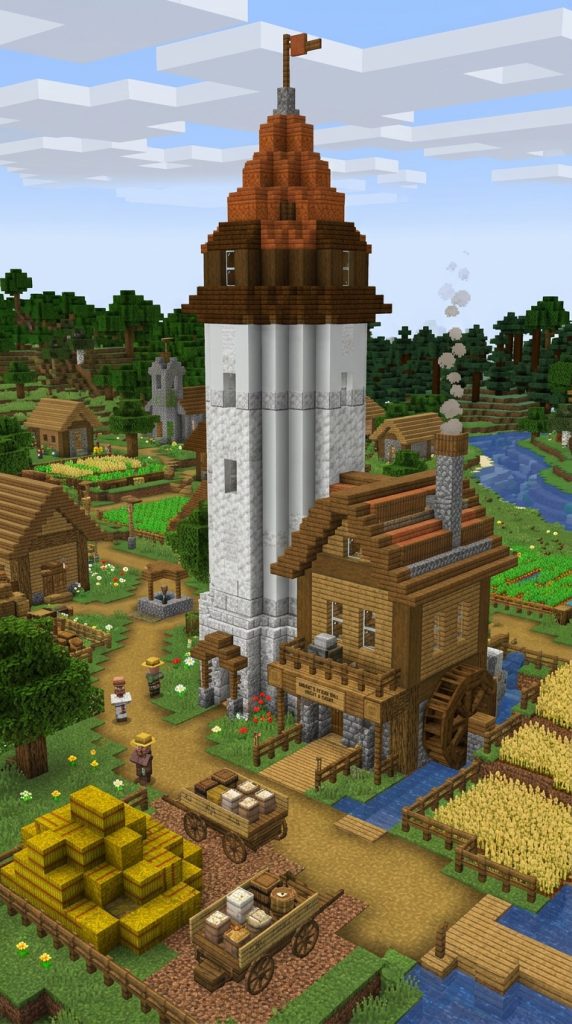
The baker’s flour mill and silo tower brings imposing height, agricultural production, and industrial detail to your bakery estate. Built with weathered stone bricks and whitewashed diorite, it features a tall cylindrical grain silo attached to a wind-powered flour mill tower. Furthermore, stacked hay bales, flour barrels, and horse supply carts surround the base.
Agricultural silo towers supply essential visual scale and functional storage to farm districts. The tall, rounded silhouette of a grain silo contrasts wonderfully with low, rectangular cottage roofs. Furthermore, filling the silo interior with hay bales, composters, and wheat chests provides massive crop storage for survival farming operations. Consequently, your bakery estate feels complete and self-sustaining.
Cylindrical Tower Geometry
Constructing realistic round towers in Minecraft requires building an octagonal or rounded block footprint—such as a three-by-one wall pattern on four sides. Tapering the tower walls inward slightly near the top creates a realistic, historical silo shape. Furthermore, using diorite or calcite blocks gives the silo a authentic whitewashed finish.
Materials Needed
- Polished Diorite or Calcite
- Stone Bricks & Cobblestone
- Hay Bales & Composters
- Spruce Wood Planks
- Cart Wheels (Trapdoors)
Step-by-Step Guide
First, lay out a circular six-by-six block stone base on flat ground, building the walls eight blocks high using whitewashed diorite or calcite blocks. Consequently, you construct a tall, sturdy grain silo tower shell.
Second, attach a rectangular spruce wood flour processing room to the base of the silo tower, equipped with composters, smokers, and wheat barrels. Extend a wooden conveyor chute from the silo wall into the processing room. Consequently, your flour mill achieves functional layout flow.
Third, top the silo tower with a conical dark oak stair roof capped with a lightning rod. Stack hay bales, flour barrels, and supply carts around the outdoor yard, lighting the area with hanging lanterns. Finally, connect the flour mill to your main bakery shop via a dirt path.
11. The Minimalist Glass-Case Patisserie Counter
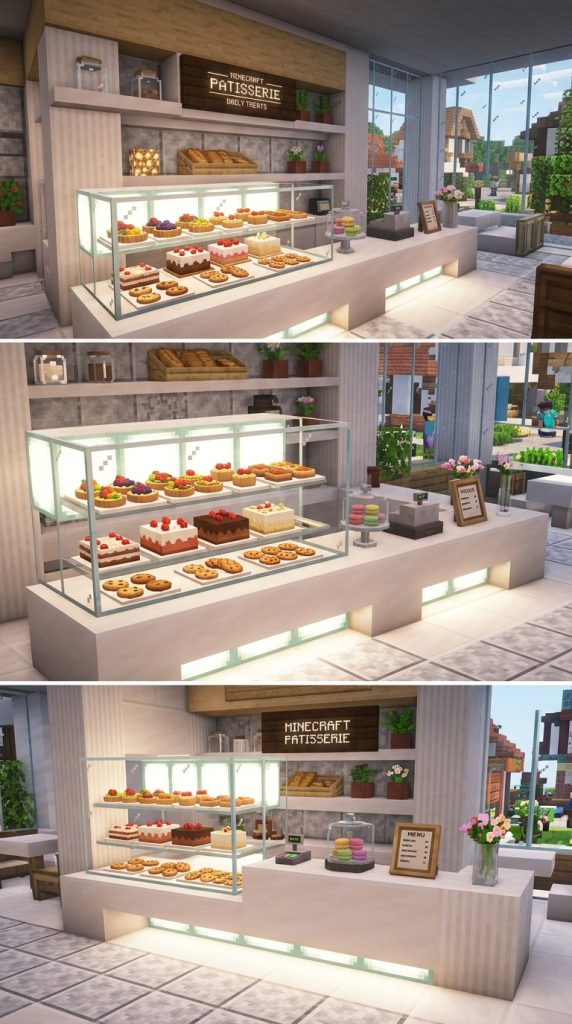
The minimalist glass-case patisserie counter offers a sleek, modern-tinted cottagecore design for clean, organized shopfronts. It features a smooth white quartz counter base equipped with full-length clear glass display cases illuminated by hidden sea lanterns. Furthermore, neat rows of cakes, fruit tarts, and iced cookies sit behind glass, creating a professional bakery aesthetic.
Minimalist display counters focus on pristine organization, bright illumination, and uncluttered visual lines. The crisp white surface of quartz or white concrete highlights the vibrant colors of baked cakes and fruit pies without visual noise. Furthermore, embedding sea lanterns flush into the counter floor casts clean, shadowless light through the display cases. As a result, your patisserie looks modern, high-end, and immaculate.
Shadowless Interior Lighting
Achieving bright, professional glass lighting requires hiding light sources beneath floor surfaces. Placing sea lanterns or froglights directly under display shelves and covering them with white carpets or glass slabs illuminates food items cleanly. Consequently, display cases stay bright and eye-catching during day and night cycles.
Materials Needed
- Smooth Quartz Blocks & Stairs
- Clear Glass Blocks & Panes
- Sea Lanterns or Froglights
- White Carpets
- Cakes, Cookies & Pies
Step-by-Step Guide
First, dig a four-block-long trench one block deep along your shop counter line and fill it with sea lanterns. Place clear glass blocks directly on top of the sea lanterns to form a glowing floor base. Consequently, you create an illuminated, shadowless display counter foundation.
Second, place cake blocks, pumpkin pies, and cookies on top of the glowing glass floor blocks. Enclose the front and top of the food items using clear glass panes and smooth quartz slabs for trimmings. Consequently, your baked goods sit protected inside a pristine glass case.
Third, frame the back of the counter with smooth quartz stairs to serve as a clerk working ledge. Place a stone pressure plate on the counter to act as a credit card scanner or cash register. Finally, decorate side counters with potted orchids.
12. The Fairytale Gingerbread & Sugar Cottage Bakery
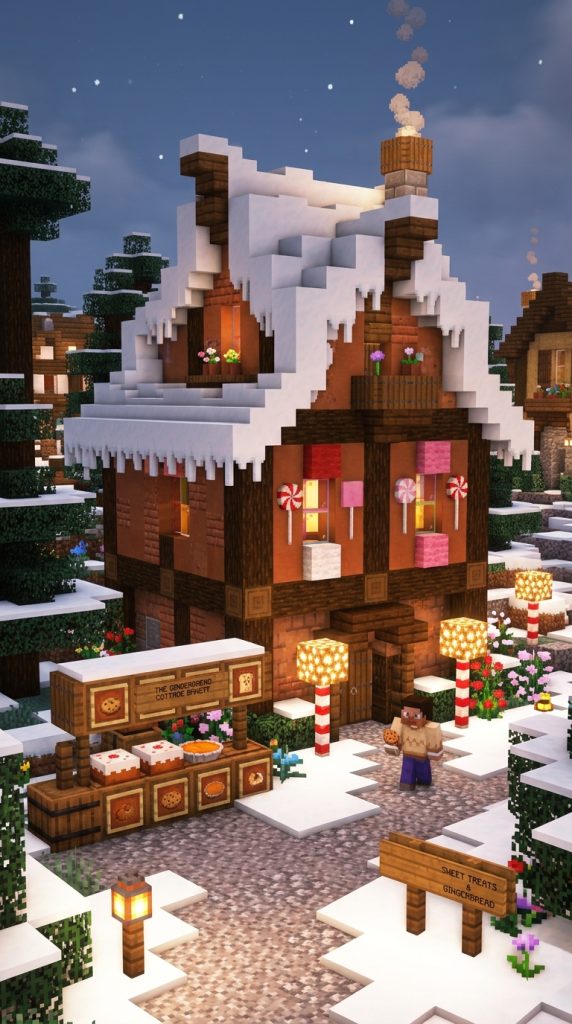
The fairytale gingerbread and sugar cottage bakery is an enchanting, whimsical fantasy build that looks like it was crafted entirely out of sweets. Built with warm mud bricks, dark oak logs, and white quartz roof trims mimicking icing glaze, it features glowing shroomlight candy posts and gingerbread cake displays out front. It brings magical fairytale wonder to your world.
Whimsical fantasy builds allow for playful block combinations and storybook architecture. Using mud bricks or brown terracotta creates a rich, baked gingerbread wall texture. Furthermore, using smooth quartz slabs along roof edges mimics dripping sugar icing, while pink wool and magenta glass represent sugary candies. Consequently, your bakery looks straight out of a classic fairytale illustration.
Sugar Glaze Roof Sculpting
To simulate dripping sugar icing along rooflines, place smooth quartz slabs and inverted quartz stairs along the lower edges of dark oak roofs. Alternating slab heights creates an irregular, dripping liquid effect. Furthermore, placing white carpets on top of roof slopes enhances the frosted sugar appearance.
Materials Needed
- Mud Bricks & Terracotta
- Smooth Quartz Slabs & Stairs
- Shroomlights & Pink Wool
- Dark Oak Logs & Stairs
- Cakes & Sweet Berries
Step-by-Step Guide
First, construct a cozy six-by-eight block cottage wall frame using rich mud bricks framed with dark oak corner logs. Cut out small, arching window openings fitted with magenta stained glass panes. Consequently, you establish a warm, gingerbread-textured building shell.
Second, construct a steep dark oak stair roof over the cottage. Attach smooth quartz slabs along the outer roof eaves, staggering slab heights to mimic dripping white sugar icing glaze. Consequently, your cottage receives its iconic storybook sweet shop roofline.
Third, line the front yard path with shroomlight blocks topped with pink wool to serve as glowing candy street posts. Set up outdoor cake display tables made of quartz slabs loaded with cakes and sweet berries. Finally, place a baking smoker chimney on the roof.
13. The Rustic Botanical Bread & Pie Cooling Rack
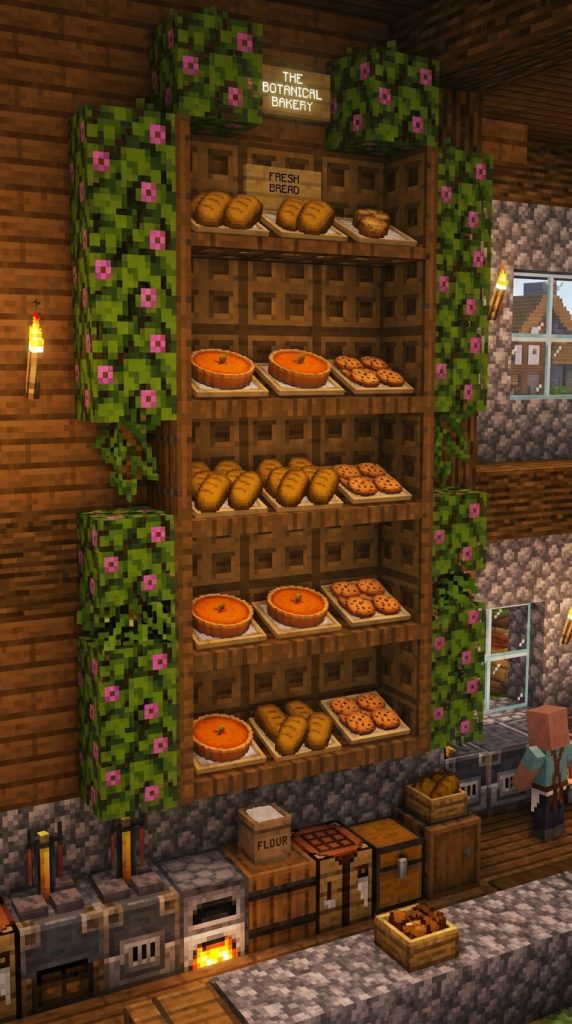
The rustic botanical bread and pie cooling rack is an essential wall-mounted display detail that adds immediate life and texture to any cottagecore kitchen. Built against a exposed brick or stone wall, it features vertical spruce ladders, wooden trapdoor shelves, and item frames displaying warm loaves of bread and fruit pies fresh from the oven.
Wall-mounted cooling racks maximize vertical room space while filling empty wall areas with rich kitchen details. Arranging shelves near baking ovens creates realistic workflow storytelling within your bakery interior. Furthermore, placing hanging leaf vines and potted herbs along the top shelf integrates sweet botanical charm. Consequently, your kitchen wall looks active and delicious.
Vertical Wall Space Utilization
Utilizing vertical wall surfaces prevents small cottage kitchens from feeling crowded at floor level. Combining spruce trapdoors with wooden fence posts creates sturdy, thin wall shelves that do not invade walking paths. Furthermore, tilting item frames holding bread items creates dynamic visual variety along shelf rows.
Materials Needed
- Spruce Trapdoors & Fences
- Item Frames
- Bread, Cookies & Pumpkin Pies
- Flowering Azalea Leaves
- Flower Pots & Herbs
Step-by-Step Guide
First, select a four-block-wide section of exposed stone or brick wall in your bakery kitchen. Attach two vertical columns of spruce fences three blocks tall against the wall face, spaced two blocks apart. Consequently, you erect sturdy wall-shelf mounting brackets.
Second, place horizontal spruce trapdoors between the fence brackets to form three open display shelf tiers. Flip the trapdoors flat to create thin wooden cooling ledges. Consequently, your kitchen wall gains structured, space-saving display shelves.
Third, place item frames along the trapdoor shelves, inserting bread loaves, cookies, and pumpkin pies inside. Drapes flowering azalea leaves over the top shelf rail and place potted herbs on side ledges. Finally, hang iron lanterns beneath the bottom shelf to illuminate the displays.
(Nighttime Base Security)
Securing your cozy cottagecore bakery at night is essential for keeping villagers, shop customers, and delicious food displays completely safe. Hostile mobs like creepers, zombies, and skeletons spawn in dark, unlit corners around your shop if light levels drop too low. Placing iron lanterns or paper lanterns every five blocks along outdoor dining patios and dirt paths prevents unwanted mob spawns effectively. Furthermore, enclosing your bakery garden yard with a low flowering azalea leaf hedge or spruce fence keeps wandering monsters at a safe distance from glass display windows. Installing wooden trapdoors or doors on all shop entrances guarantees quick, secure retreats during night explorations. Consequently, your warm pastel bakery sanctuary remains a completely safe, peaceful haven through every night cycle.
14. The Seaside Cottagecore Pastry Dock & Cafe
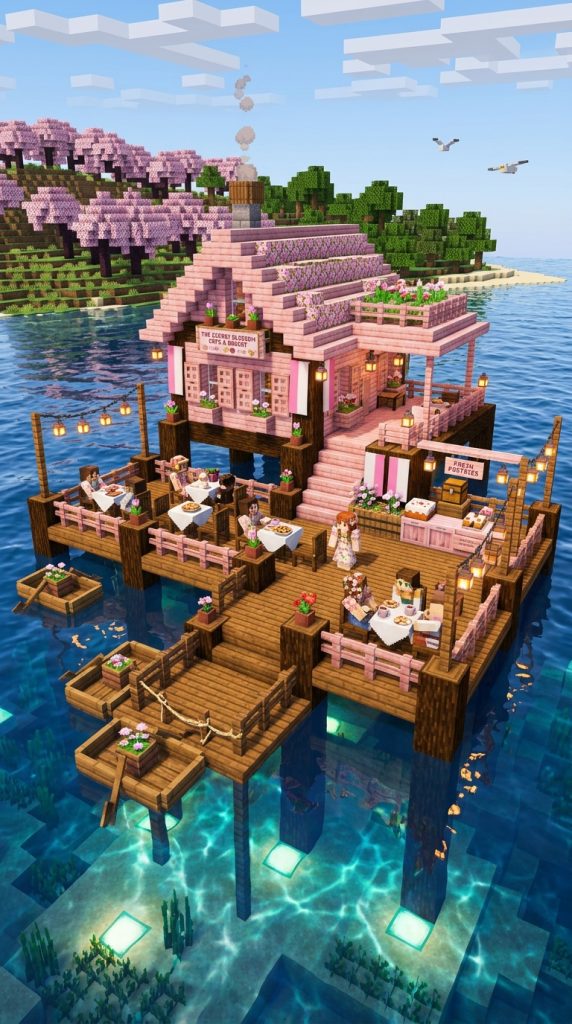
Built along the wooden piers of a ocean bay or fishing port, the seaside cottagecore pastry dock & cafe brings breezy coastal charm to your food shop. It features a light pink cherry wood cabin supported by stilt posts set into the water, complete with an open fishing pier dining deck. Furthermore, glowing end rods, boat moorings, and seaside cake tables create a soothing aquatic cafe.
Waterfront food shops introduce soothing water reflections and relaxing coastal atmosphere to your world. Extending a light wooden pier out over clear ocean water provides boat docking access and fishing spots for survival players. Furthermore, pairing soft pink cherry wood with white quartz piers creates a bright, sun-bleached coastal aesthetic. Consequently, your seaside bakery looks adventurous, tranquil, and picturesque.
Submerged Pier Lighting & Reflections
Placing submerged sea lanterns or froglights beneath your wooden dock posts creates shimmering underwater reflections at night. The soft white light bouncing off water surfaces highlights the underside of your cherry wood pastry pier. Furthermore, planting sea pickles and kelp around dock stilts adds vibrant aquatic detail.
Materials Needed
- Cherry Wood Planks & Slabs
- Stripped Birch Log Stilts
- Smooth Quartz Blocks
- Sea Lanterns & End Rods
- Cakes & Tropical Fish
Step-by-Step Guide
First, drive six stripped birch log pillars four blocks deep into your coastal bay floor, extending them two blocks above the water surface. Connect the top of the stilts using horizontal cherry log beams to form a wide pier platform. Consequently, you construct a sturdy, water-resistant dock foundation.
Second, construct a cozy six-by-six block pastry cabin on top of the pier platform using pink cherry wood planks and white quartz corner posts. Build an open side doorway leading out onto an outdoor dining pier equipped with wooden tables and chairs. Consequently, your seaside cafe gains direct water access.
Third, construct a sloped cherry stair roof over the cabin, installing wide glass windows looking out over the ocean. Set up cake display tables on the outdoor pier, tying a wooden boat to the dock post using a lead. Finally, place sea lanterns underwater around dock stilts.
15. The Grand Village Patisserie & Tea Estate
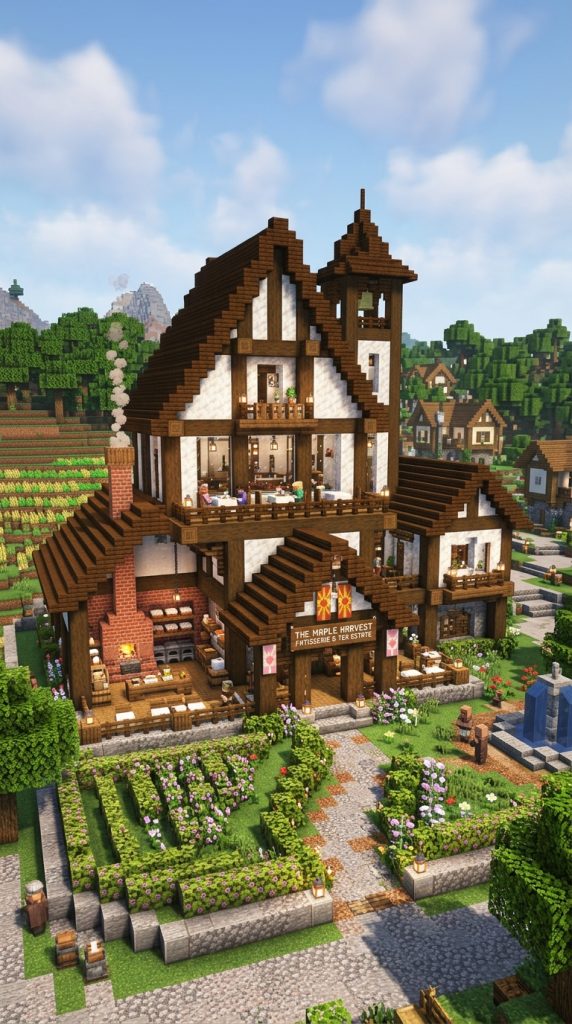
The grand village patisserie and tea estate is the ultimate master food build for established survival worlds and fantasy towns. It combines all bakery elements—including a two-story timber-framed main building, a brick baking hearth, a glass-case display counter, a second-floor tea lounge, and an outdoor hedge maze garden. It serves as a majestic architectural centerpiece for your entire settlement.
Grand patisserie estates provide unmatched space for all your baking, farming, and social entertainment needs. The massive visual scale of the building creates a commanding focal point along central village roads. Furthermore, detailing the interior with full dining tables, cake pedestals, brewing stands, and jukeboxes creates an inviting community gathering hall. Consequently, your village patisserie offers a luxurious, permanent home for your entire world journey.
Multi-Wing Architecture & Layout Flow
Designing large estate buildings requires dividing building volumes into distinct functional wings. Connecting the main pastry shopfront to a side baking kitchen and an upper tea lounge creates structural variety, sweeping rooflines, and majestic visual depth. Furthermore, adding grand gabled roofs with dormer windows prevents massive roof surfaces from looking plain.
Materials Needed
- Dark Oak Logs & Stairs
- Calcite or White Terracotta
- Cherry Wood Planks & Stairs
- Bricks & Glass Cases
- Flowering Azalea Hedges
Step-by-Step Guide
First, lay out a wide ten-by-sixteen block main foundation using polished deepslate and stone bricks. Build the lower foundation walls four blocks high, featuring a grand double-door entrance framed by heavy dark oak log pillars. Consequently, you establish a solid, durable foundation for a grand patisserie estate.
Second, construct a spacious second story using clean white calcite blocks framed with dark oak timber cross-beams. Cut out wide window openings fitted with clear glass panes and cherry wood trapdoor shutters. Consequently, the patisserie facade achieves an authentic, high-end timber-frame aesthetic.
Third, cover the entire estate with a sweeping dark oak stair roof featuring cherry wood trims and decorative dormer windows. Equip the ground floor with glass cake display counters and brick baking ovens, while setting up a luxury tea lounge upstairs. Finally, construct a flowering azalea hedge garden out front to complete your grand estate.