
12 Functional And Cute Wooden Bridges for Survival Mode
When you embark on a fresh Minecraft survival world, your initial focus naturally centers on basic survival necessities: securing a secure shelter, gathering iron tools, setting up automated wheat farms, and building safe bed placement. However, as your world matures and your exploration radius expands across vast rivers, yawning ravines, treacherous canyons, and dense swamp biomes, traversing open terrain on foot becomes tedious and dangerous. Navigating jagged landscape obstacles efficiently requires reliable, well-designed infrastructure. Bridges serve as the vital architectural arteries connecting your base camps, mining outposts, and agricultural fields.

While basic cobblestone pathways and dirt-pillar spanning bridges get you across water early in the game, they quickly look uninspired and blocky. Upgrading your transit network with functional, cute wooden bridges transforms your survival map from a messy collection of random camps into a cohesive, lived-in kingdom. Wood represents the most accessible, renewable, and aesthetically adaptable building material available during early and mid-game progression. These twelve functional and cute wooden bridge designs provide the ultimate survival engineering guide to span every chasm and river in your world with style.
Why Wood is the Ultimate Survival Building Material
Choosing wood over stone or metal for your survival bridge projects offers multiple distinct advantages. First, wood is endlessly renewable through tree farming, ensuring you never face resource scarcity when expanding long-distance transit lines. Second, Minecraft offers a rich variety of wood types—including oak, spruce, birch, jungle, acacia, dark oak, mangrove, and cherry—each carrying unique color temperatures and grain patterns.
Furthermore, combining stripped logs, vertical fences, wooden stairs, and trapdoors allows you to achieve intricate structural depth and organic curves that rigid stone bricks simply cannot replicate. A well-crafted wooden bridge looks organic, blending harmoniously into natural riverbanks and forest canopies rather than clashing with the environment.
Engineering Safe Bridges for Hardcore and Survival Gameplay
In standard survival or hardcore difficulty modes, bridges must do more than simply look picturesque—they must prioritize player safety against hostile mobs. Creepers sneaking up behind you, skeletons sniping you into deep rivers, and phantoms dive-bombing from above turn exposed, unprotected bridges into deadly hazards.
Therefore, functional survival bridge design incorporates tactical safety features such as protective side railings, warm lantern illumination to prevent mob spawning, and reinforced overhangs. Balancing aesthetic cuteness with rugged structural defense ensures your transit network remains entirely monster-proof, letting you sprint across ravines at night without fear.
Mastering Structural Support and Architectural Pylons
One of the most common mistakes amateur builders make is constructing completely flat, unsupported wooden bridges that stretch across wide water channels without any visible pylons. In real-world physics and immersive Minecraft building alike, floating wooden planks destroy the illusion of structural integrity.
Elite survival builders always anchor their bridges securely using underwater stone-brick foundations, sturdy stripped log support columns, and diagonal wooden bracing beams. Varying your bridge heights and adding curved arch profiles creates natural rhythm across expansive river spans. Thoughtful structural planning turns simple utility crossings into breathtaking engineering landmarks.
Essential Supplies for Survival Bridge Construction
Before you launch into a major bridge-building campaign across your survival map, setting up a comprehensive material staging area saves countless hours of frustrating resource gathering. Stock your double chests with thousands of oak and spruce logs, assorted wooden stairs and slabs, fences, iron chains, and lanterns.
In addition, keep scaffolding blocks, water buckets, and lead ropes close at hand to make over-water and mid-air construction safe and efficient. Having your supplies categorized and accessible ensures your building process flows smoothly without interruptions. Let us explore twelve functional and cute wooden bridge designs tailored specifically for survival mode.
1. The Classic Oak Arch River Bridge

Timeless Curved Wooden Spans Hugging Gentle Waterways
Every established survival base eventually requires crossing a meandering river to access nearby mining hills or animal pastures. The Classic Oak Arch River Bridge represents the foundational gold standard of Minecraft bridge design. Utilizing standard oak planks, stripped oak logs, and inverted stairs, this arched span curves gracefully over water without requiring complex resource farms.
Furthermore, lantern-topped fence posts guide your path safely home after dark, ensuring creepers cannot ambush you mid-crossing. It serves as the essential architectural artery connecting your home base to the wider world.
How to Build the Oak Arch Bridge Step-by-Step
First, clear both riverbanks and establish your foundation footings using cobblestone walls driven deep into the riverbed. Next, lay a gently curved arch profile across the water using oak stairs placed upside-down to create smooth upward momentum.
Then, build your primary walking deck across the upper oak slab layer, five blocks wide for comfortable horse and villager transit. Install spruce fence posts and wooden gates along both outer edges as safety handrails. Afterward, hang copper lanterns from overhead wooden fence arms to illuminate the water below. Finally, plant oak bushes and fern clusters along the bridge approach pads.
Required Survival Materials for Oak Arch Bridge
- Oak planks, oak slabs, and assorted oak stairs
- Stripped oak logs for underlying support arches
- Spruce fence posts and spruce wooden gates
- Copper lanterns and iron chain links
- Cobblestone walls for riverbed support foundations
- Oak bushes, ferns, and coarse dirt for landscaping
2. The Steep Spruce Mountain Ravine Suspension Bridge

Swaying High-Altitude Crossings Spanning Deep Volcanic Chasms
When your survival exploration leads you high into extreme hills biomes, you will inevitably encounter yawning vertical ravines that block your path. Building a high-altitude suspension bridge across these terrifying chasms provides a thrilling engineering challenge. Constructing deep spruce wood framing suspended by heavy iron chains creates an authentic, rugged mountain outpost aesthetic.
Additionally, viewing the dark canyon floor far below while crossing adds an incredible sense of adventurous scale to your survival world.
How to Build the Mountain Suspension Bridge Step-by-Step
Begin by anchoring heavy stripped spruce log pillars deep into rock faces on both sides of the ravine. Next, build a narrow, sturdy walking deck using spruce trapdoors and bark-stripped logs.
Then, string heavy iron chains across the span in a gentle sagging catenary curve, anchoring them firmly into cliffside stone walls. Build protective vertical spruce fence railings that attach directly to the hanging chains. Afterward, place campfires inside cobblestone pits at both bridge entrances to act as warning beacons. Finally, hang soul lanterns along the mid-span to pierce the mountain fog.
Required Survival Materials for Mountain Suspension Bridge
- Stripped spruce logs, spruce planks, and spruce trapdoors
- Iron chains and iron bars for suspension rigging
- Cobblestone blocks and campfire pits
- Soul lanterns and copper lanterns
- Scaffolding blocks for safe mid-air building access
- Oak and spruce buttons for structural bolt detailing
3. The Overgrown Jungle Rope Bridge

Swaying Treetop Walkways Tethered by Jungle Vines and Wood
Traversing dense jungle biomes on foot can prove frustrating due to tangled undergrowth, aggressive ocelots, and sudden river gaps. The Overgrown Jungle Rope Bridge offers an enchanting, Indiana Jones-inspired aerial solution. Built entirely from jungle wood planks, bamboo scaffolding, and thick hanging vines, this bridge weaves through the upper jungle canopy.
Furthermore, wrapping green vines and weeping willows around the suspension ropes creates an overgrown, ancient ruin atmosphere that looks breathtaking against tropical foliage.
How to Build the Jungle Rope Bridge Step-by-Step
Start by finding two sturdy giant jungle trees standing on opposite sides of a tropical river gorge. Next, build viewing platforms into the tree trunks high above the ground using jungle planks.
Then, construct a swaying, narrow walking deck across the span using alternating jungle slabs and trapdoors. Run parallel jungle fences along the sides to serve as rope handrails. Afterward, drape green vines and hanging moss heavily from the overhead tree branches down over the bridge deck. Finally, illuminate the tropical crossing with warm glowing torches hidden behind leaf blocks.
Required Survival Materials for Overgrown Jungle Rope Bridge
- Jungle wood planks, jungle slabs, and jungle trapdoors
- Jungle fences and bamboo scaffolding blocks
- Green vines, weeping vines, and hanging moss
- Torch blocks and glowstone hidden in leaves
- Giant jungle tree trunks for natural anchor points
- Liana leaf blocks for organic canopy integration
4. The Covered Mill Village Timber Bridge

Protected Weatherproof Crossings Featuring Gabled Roof Shelters
Rain, snow, and phantom attacks make exposed bridge crossings hazardous during long Minecraft nights. The Covered Mill Village Timber Bridge solves environmental exposure with a charming gabled wooden roof structure. Inspired by historic New England covered bridges, this design combines sturdy oak framing with a protective spruce shingle roof.
Moreover, enclosing the bridge shields villagers and wandering traders from hostile mobs while they travel between your farming districts and village market square.
How to Build the Covered Mill Bridge Step-by-Step
Begin by laying a wide, flat oak plank foundation across a rushing rural river. Next, erect vertical structural support posts every four blocks using stripped dark oak logs.
Then, build enclosed side walls using spruce planks and install open window bays so you can peer out at the river. Construct a steeply pitched gabled roof overhead using spruce stairs and spruce slabs. Afterward, hang iron lanterns from the interior roof beams to keep the walkway brightly lit. Finally, place cobblestone defensive walls at both portal entrances.
Required Survival Materials for Covered Mill Bridge
- Stripped dark oak logs, oak planks, and oak stairs
- Spruce planks, spruce stairs, and spruce slabs
- Iron lanterns, iron chains, and iron bars
- Glass panes for optional window protection
- Cobblestone walls for base fortifications
- Wrought-iron village bell mounted near the entrance
5. The Low-Slung Marshland Board Walk

Rustic Silt-Supported Pylons Winding Through Murky Swamps
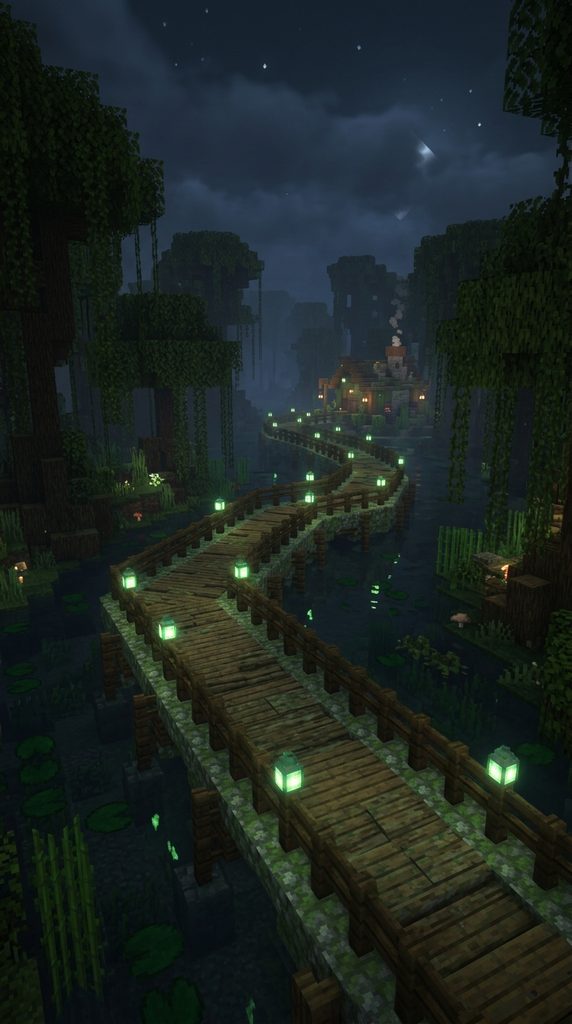
Traversing swamp biomes requires an entirely different engineering approach than bridging clear mountain rivers. Submerged mud blocks and shallow water demand a low-slung boardwalk that floats just inches above the murky water surface. Using weathered mangrove wood, stripped oak logs, and mossy cobblestone foundations creates an authentic bayou outpost aesthetic.
Additionally, stringing glowing green froglights along the low handrails provides magical illumination that pierces swamp fog.
How to Build the Marshland Board Walk Step-by-Step
Start by driving vertical mangrove log pylons deep into the soft swamp mud floor. Next, lay a winding, irregular boardwalk path using oak slabs and mangrove planks.
Then, use mossy cobblestone blocks and stone buttons for foundational water supports that blend with algae-covered banks. Hang green vines and weeping willows from nearby swamp oak branches down over the path. Afterward, place froglights and copper lanterns on low fence posts to guide night travelers. Finally, scatter lily pads and water lilies around the wooden support pilings.
Required Survival Materials for Marshland Board Walk
- Mangrove wood planks, mangrove logs, and mangrove stairs
- Oak wood slabs and mossy cobblestone blocks
- Green vines, weeping vines, and lily pads
- Froglights (green, yellow, or pearl) and copper lanterns
- Stone buttons and coarse dirt for shoreline blending
- Mud blocks and water buckets
6. The Cherry Blossom Zen Moon-Bridge
Graceful Arched Pedestrian Crossings Inspired by Eastern Gardens
If your survival base features peaceful aesthetic gardens, koi ponds, or Japanese-inspired architecture, the Cherry Blossom Zen Moon-Bridge is an absolute must-build. Featuring a high, semi-circular arch constructed from pink cherry wood and dark basalt, this bridge casts a perfect reflective circle onto the water below when paired with its mirror image.
Furthermore, pink cherry petals falling from surrounding trees blanket the wooden steps in soft pink hues, creating an atmosphere of pure tranquility.
How to Build the Zen Moon-Bridge Step-by-Step
Begin by excavating a pristine circular koi pond or decorative stream within your base garden. Next, construct a steep, semi-circular arch framework using polished basalt and cherry wood stairs.
Then, lay flat cherry wood slabs along the high arched walking deck, incorporating step-ups for realistic foot travel. Install dark oak fences and low wooden railings to accent the delicate pink wood tones. Afterward, plant blooming cherry trees along both garden bank approaches. Finally, place mossy stone lanterns and bamboo stalks around the pond perimeter.
Required Survival Materials for Zen Moon-Bridge
- Cherry wood planks, cherry wood stairs, and cherry slabs
- Polished basalt blocks for structural arch support
- Dark oak fences and dark oak trapdoors
- Cherry tree saplings, cherry leaves, and cherry logs
- Mossy stone Japanese lanterns and bamboo stalks
- Water buckets and tropical fish buckets for koi ponds
7. The Ice Spikes Tundra Frost Bridge
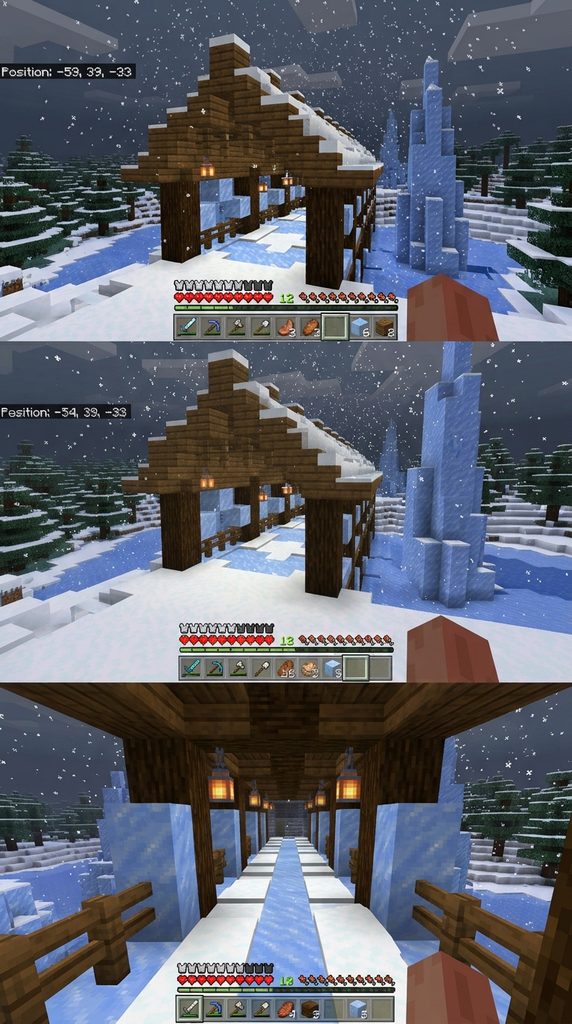
Winter-Proof Survival Crossings Built from Packed Ice and Spruce
Survival builders who choose to establish their home bases in freezing snowy tundra biomes face unique architectural challenges. Water freezes solid, and wooden structures get dusted with heavy snow layers. The Ice Spikes Tundra Frost Bridge combines frost-resistant spruce wood with sparkling packed ice blocks and snow layers.
Moreover, building a covered winter bridge keeps heavy blizzards from obstructing your path while you haul iron ore back from mining expeditions.
How to Build the Tundra Frost Bridge Step-by-Step
Start by clearing frozen sea ice to establish a clean, straight channel underneath your bridge span. Next, build sturdy support pillars using stripped spruce logs driven into the frozen shoreline.
Then, lay a solid spruce plank walking deck dusted thickly with snow layers and white carpet blocks. Construct protective spruce framing walls and a steep gabled roof designed to shed heavy winter snow. Afterward, install warm yellow lanterns along the interior walls to melt away claustrophobia. Finally, edge the exterior river approaches with jagged blue ice spikes.
Required Survival Materials for Tundra Frost Bridge
- Stripped spruce logs, spruce planks, and spruce stairs
- Packed ice blocks, blue ice blocks, and snow layers
- White wool carpet blocks for realistic snow accumulation
- Warm yellow copper lanterns and iron chains
- Bricks and campfires for interior warming hearths
- Cobblestone foundations and stone brick stairs
8. The Desert Oasis Acacia Aqueduct Bridge
Multi-Functional Water Channels Spanning Arid Desert Canyons
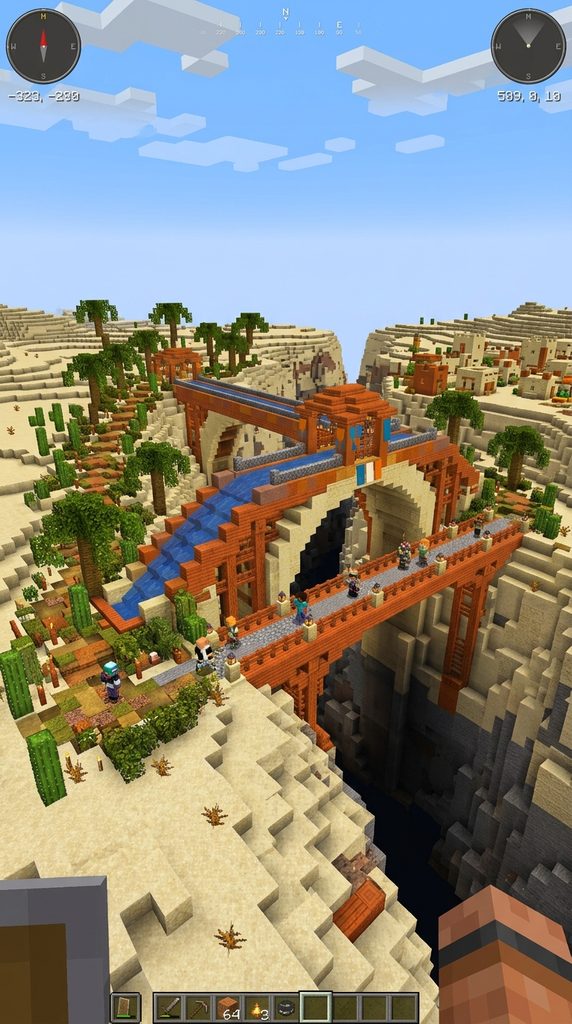
Desert survival bases often struggle with water scarcity and farming irrigation. The Desert Oasis Acacia Aqueduct Bridge solves this problem brilliantly by combining a pedestrian footbridge with a functional flowing water aqueduct channel. Using warm orange acacia wood, smooth sandstone, and terracotta blocks captures an authentic arid climate aesthetic.
Additionally, running a continuous stream of fresh water across the top of the bridge helps irrigate distant desert crop fields while looking stunning.
How to Build the Desert Oasis Bridge Step-by-Step
Start by building massive stone-brick and smooth-sandstone supporting pillars across a dry desert canyon. Next, construct dual parallel walkways using acacia wood planks separated by an open central water channel.
Then, pump water from a distant source to flow steadily through the aqueduct channel across the canyon. Build low acacia fence railings along both outer pedestrian pathways. Afterward, plant palm trees and cacti along the canyon approach ramps. Finally, illuminate the desert crossing with golden lanterns.
Required Survival Materials for Desert Oasis Bridge
- Smooth sandstone, cut sandstone, and sandstone walls
- Acacia wood planks, acacia stairs, and acacia fences
- Terracotta blocks in orange, yellow, and brown tones
- Water buckets for filling the central aqueduct channel
- Palm trees (jungle wood and jungle leaves)
- Golden copper lanterns and iron chains
9. The Nether Bastion Fortress Bridge
Ominous Dark Fantasy Crossings Forged from Blackstone
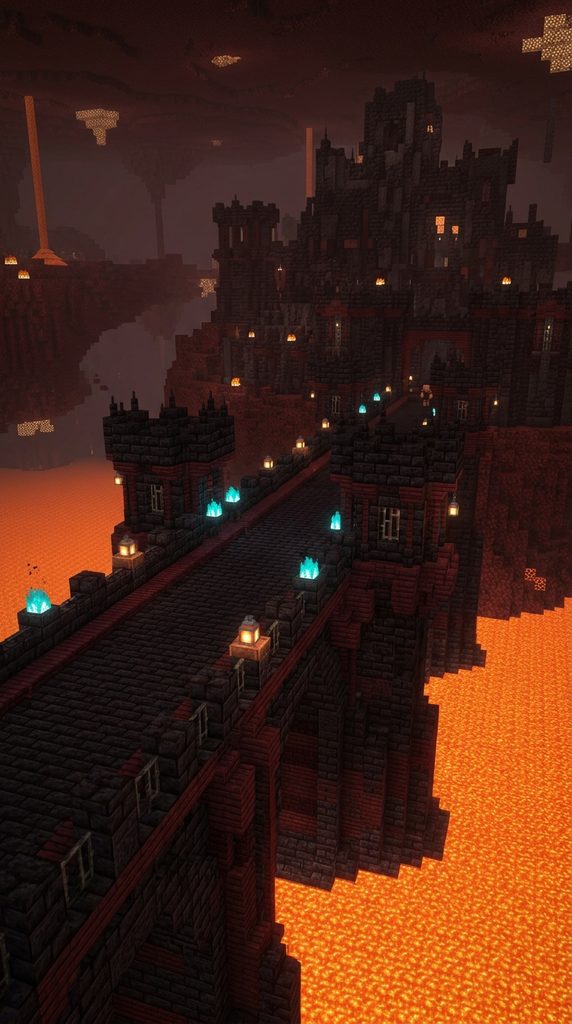
When your survival adventures take you deep into dangerous Nether dimensions or dark fantasy building themes, standard oak bridges simply will not suffice. The Nether Bastion Fortress Bridge provides an intimidating, fortified crossing forged from polished blackstone bricks, nether bricks, and crimson wood.
Furthermore, rivers of flowing lava moat waters and flickering soul-fire lanterns frame the intimidating bridge portals, ensuring no Piglin or hostile mob can cross safely.
How to Build the Nether Bastion Bridge Step-by-Step
Start by outlining a fortified rectangular bridge perimeter across a bubbling lava sea using polished blackstone bricks. Next, erect soaring exterior walls mixing blackstone, deepslate tiles, and red nether bricks.
Then, construct aggressive defensive parapets and iron-bar gatehouses at both bridge entrances. Afterward, mount glowing soul-fire torches and copper lanterns along every dark stone battlement. Finally, test the lava clearance below to ensure your survival character can safely cross without thermal damage.
Required Survival Materials for Nether Bastion Bridge
- Polished blackstone bricks, blackstone, and gilded blackstone
- Nether bricks, red nether bricks, and crimson stem wood
- Deepslate tile stairs, deepslate slabs, and iron bars
- Lava buckets and soul-fire torches
- Iron chains, copper lanterns, and iron doors
- Smooth basalt and polished basalt pillars
10. The Medieval Drawbridge Portcullis Crossing

Fortified Survival Gateways Featuring Working Mechanical Chains
For players who treat survival defense as a top priority against zombie sieges and multiplayer raids, security is paramount. The Medieval Drawbridge Portcullis Crossing features heavy dark oak timber decks paired with functional stone gatehouse towers.
Moreover, integrating iron chains and mechanical aesthetic components makes the bridge look capable of hoisting itself up against invading threats, adding incredible roleplay depth to your base entrance.
How to Build the Drawbridge Portcullis Step-by-Step
Start by building twin stone-brick defensive guard towers on either side of your base moat. Next, span the gap between towers using thick dark oak logs and heavy floor planks.
Then, install an iron-bar portcullis gate sliding vertically inside the stone gateway arch. Run heavy iron chains from the bridge deck up to overhead winches mounted inside the watchtowers. Afterward, place armor stands dressed in iron and diamond armor on the battlements. Finally, illuminate the gatehouse with bright copper lanterns.
Required Survival Materials for Drawbridge Portcullis
- Stone bricks, cracked stone bricks, and cobblestone walls
- Dark oak logs, dark oak planks, and dark oak trapdoors
- Iron bars for the sliding portcullis gate mechanism
- Iron chains, copper lanterns, and iron doors
- Armor stands, iron armor sets, and shields
- Scaffolding blocks for tower construction
11. The Industrial Iron-Reinforced Cargo Bridge

Heavy-Duty Harborside Bridges Handling Villager Transport
As your survival village expands into a bustling commercial shipping port with automatic iron farms and trading halls, your transit infrastructure must reflect industrial power. The Industrial Iron-Reinforced Cargo Bridge combines weathered copper, iron blocks, and dark oak timber.
Additionally, overhead lifting cranes and docked rowboats give this harbor bridge a busy, productive atmosphere that tells a rich visual story about your village daily economy.
How to Build the Industrial Cargo Bridge Step-by-Step
Start by driving heavy iron block pillars and cobblestone foundations deep into the harbor seabed. Next, lay wide, durable walking decks using stripped dark oak logs and smooth stone slabs.
Then, construct industrial iron-bar side railings and overhead utility scaffolding frameworks. Mount a wooden crane derrick with a lead pulley system over one side of the bridge deck. Afterward, place wooden storage barrels, chests, and cartography tables near the bridge approaches. Finally, dock wooden rowboats beneath the span.
Required Survival Materials for Industrial Cargo Bridge
- Stripped dark oak logs, oak planks, and smooth stone slabs
- Iron blocks, iron bars, and weathered copper blocks
- Wooden barrels, chests, and cartography tables
- Leads, iron chains, and copper lanterns
- Cobblestone foundations and stone brick walls
- Oak rowboats moored along the pilings
12. The Enchanted Glowing Mushroom Forest Bridge

Whimsical Fungal Walkways Illuminated by Spore Blossoms
Embrace pure fantasy imagination with the Enchanted Glowing Mushroom Forest Bridge. Built inside a giant dark forest or custom mushroom grove, this whimsical crossing utilizes giant red and brown mushroom blocks combined with smooth white quartz framing.
Furthermore, glowing mushroom stems, hanging spore blossoms, and mystical particle effects illuminate the walkway in soft, magical colors, making night travel an absolute joy in survival mode.
How to Build the Mushroom Forest Bridge Step-by-Step
Start by stacking giant mushroom stem blocks to form smooth structural bridge arches across a magical stream. Next, flare the upper walking deck outward using smooth quartz slabs and white concrete blocks.
Then, construct organic protective railings using giant mushroom cap blocks and wooden trapdoors. Hang glowing spore blossoms and glow-berry vines from overhead tree branches down over the bridge deck. Afterward, scatter glowing mushrooms and moss blocks across the bridge approaches. Finally, ensure the entire magical woodland crossing is safely lit.
Required Survival Materials for Enchanted Mushroom Bridge
- Giant mushroom stems, red mushroom blocks, and brown mushroom blocks
- Smooth quartz slabs, quartz stairs, and white concrete
- Oak trapdoors, wooden fences, and iron chains
- Glow lichen, red mushrooms, and spore blossom blocks
- Glow-berry vines and weeping vines for magical foliage
- Water buckets and mossy cobblestone foundations