Minecraft Arts & Crafts Ideas for Your Cozy World
There is a quiet, rhythmic magic to playing Minecraft in a cozy, relaxed style. Beyond the hectic chase for Netherite, defeating bosses, or building ultra-efficient industrial farms lies a serene creative canvas. In this space, building becomes an extension of crafting, interior design, and artistic expression.

Bringing an “arts and crafts” mindset into your Minecraft world means treating blocks not just as structural walls, but as textiles, paints, pottery, glasswork, and sculpted decor. By leveraging subtle block textures, intricate palette gradients, and creative placement tricks, you can turn a basic shelter into a warm, handmade studio or artisan village.
This comprehensive guide explores twelve deeply detailed, practical, and highly creative arts-and-crafts design concepts to transform your world into a handmade, cozy masterpiece.
The Artisan’s Palette & Studio Foundations
Before diving into specific projects, it helps to understand the foundational principles of cozy, arts-and-crafts-inspired Minecraft building. Traditional builds often rely on hard stone and basic wood planks. In contrast, an artisan-style build prioritizes warmth, tactile texture, layered depth, and natural variation.
Mixing materials like Terracotta, Glazed Terracotta, Wool, Stripped Logs, Mud Bricks, and Painted Glass allows you to simulate real-world art mediums like oil painting, quilting, pottery, and stained glass. Lighting should always lean toward soft amber tones using candles, lanterns, and concealed light sources hidden behind leaves or carpets.
1. The Patchwork Quilt & Loom Workshop

Creating Textile Masterpieces with Banners and Wool
A dedicated loom workshop brings the cozy charm of traditional textile arts into your Minecraft home. This concept centers around a grand tapestry loom, colorful rolls of fabric, and a mosaic floor that mimics a handmade patchwork quilt.
Using varying shades of wool, terracotta, and carpets, you can design a floor that looks like an antique woven rug. Incorporating looms, spinning wheels made from grindstones, and wall-mounted banners adds functional realism and deep visual story to your creative studio space.
Mastering Banner Weaving & Fabric Stacks
Banners are one of the most versatile decorative tools in Minecraft, acting as hanging tapestries, fabric bolts, or curtains. Layering banners with subtle patterns—such as gradients, borders, and cross symbols—creates rich, detailed textile hangings.
Stacking differently colored wool blocks horizontally behind trapdoors or stairs simulates shelves packed with soft fabric bolts ready for crafting. Adding loom blocks into your workbench setup gives you quick access to create intricate custom patterns whenever inspiration strikes.
Essential Supplies for the Loom Workshop
- Assorted Wool, Carpet, and Terracotta blocks
- Looms and Grindstones
- Scaffolding and Spruce Trapdoors
- Banners in various colors and patterns
- Item Frames with Shears and String
Step-by-Step Implementation Guide
- Lay a seven-by-seven floor pattern using alternating wool, terracotta, and carpet blocks to form a patchwork quilt layout.
- Build a large vertical loom frame against the back wall using spruce logs, scaffolding, and iron chains.
- Hang custom-patterned banners from the top frame bar to represent a half-finished woven tapestry.
- Construct fabric storage shelves along the side wall using spruce trapdoors stacked vertically.
- Fill the shelves with alternating colored wool blocks to look like organized bolts of fabric.
- Place two loom blocks into the floor workspace alongside a grindstone mounted sideways to serve as a spinning wheel.
- Add item frames holding shears, string, and colored dyes along the wall above the workbench.
- Light the room with hanging iron lanterns and a cluster of lit beeswax candles on the main worktable.
2. The Pottery Kiln & Clay Sculpting Studio
Crafting Earthy Ceramics with Terracotta and Mud
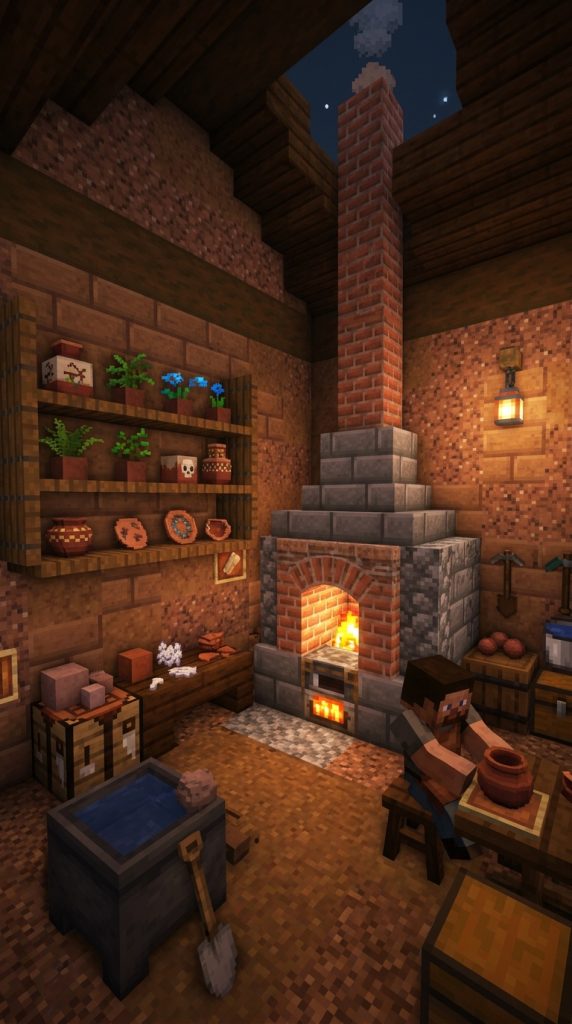
Pottery is one of the oldest human crafts, making it a perfect fit for a cozy rustic home. A dedicated ceramics studio combines raw clay, terracotta pots, mud bricks, and a roaring masonry kiln where fresh pots are fired.
This build emphasizes warm, earthy tones like terracotta, granite, packed mud, and clay. Displaying decorated pots, flower pots, and unglazed ceramic bowls creates a productive, hands-on artistic atmosphere that feels grounded and authentic.
Building Realistic Blast Kilns and Workstations
A functional blast furnace or smoker built into a brick chimney structure serves as the heart of your pottery studio. Surrounding the kiln with piles of raw clay blocks and mud bricks makes it look like an active, working artisan shop.
Decorated pots introduced in recent Minecraft updates offer incredible storytelling potential. Placing carved sherds and pots around the room on wooden pedestals makes your studio feel like an authentic ceramic art gallery.
Materials Required for the Pottery Studio
- Raw Clay blocks, Terracotta, and Mud Bricks
- Blast Furnaces, Smokers, and Bricks
- Decorated Pots and Flower Pots
- Armor Stands and Wooden Buttons
- Water Cauldron for clay washing
Step-by-Step Implementation Guide
- Construct a main feature wall using mud bricks, granite, and exposed brick blocks for a warm, rustic texture.
- Build a double-height masonry kiln using bricks and a blast furnace, topping it with a brick chimney flue.
- Place a cauldron filled with water next to the kiln to serve as a clay-washing basin.
- Set up crafting tables and spruce slabs as sculpting workbenches in the center of the room.
- Position raw clay blocks and mud blocks under workbenches to look like fresh clay stock ready for throwing.
- Display decorated pots and flower pots on spruce trapdoor wall shelves at varying heights.
- Place an armor stand wearing a leather tunic behind the table to represent the potter’s apron.
- Scatter wooden buttons and stone pressure plates across work surfaces to simulate small pottery tools and clay scraps.
3. The Stained Glass & Sunroom Atelier
Harnessing Light and Color with Glass Mosaic Art
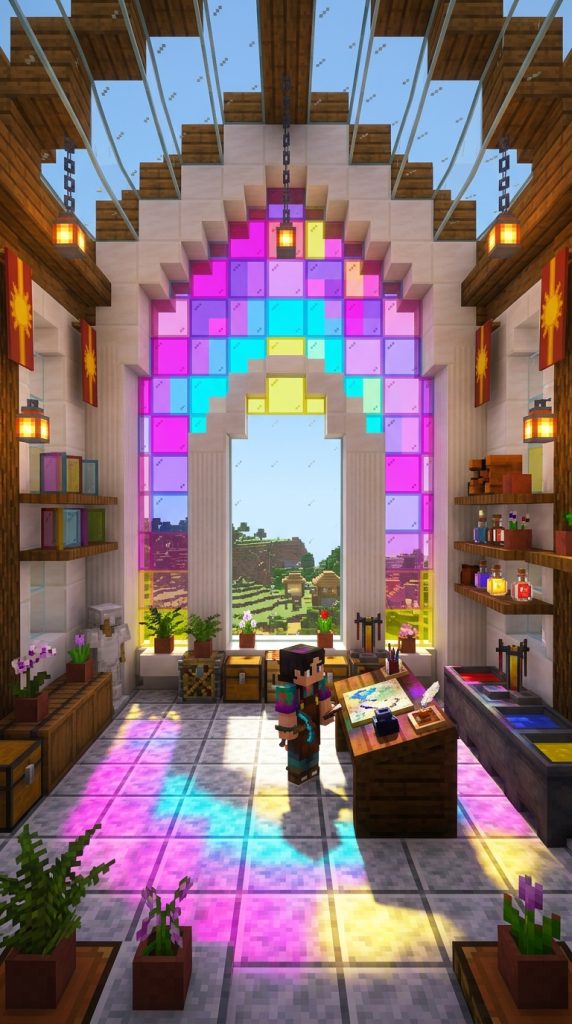
Glassblowing and stained glass art bring vibrant, glowing color into any Minecraft building. Building a sunroom atelier with large mosaic windows allows sunlight to filter through colored glass, casting beautiful visual tones across your interior floor.
This concept works best in elevated positions or sunrooms overlooking gardens. Combining tinted glass, stained glass panes, and smooth quartz or copper frames creates an elegant, high-end art studio environment filled with natural daylight.
Mixing Stained Glass Colors for Smooth Gradients
Creating stunning stained glass art in Minecraft requires mixing complementary glass colors rather than placing single solid blocks. Transitioning from dark blue to cyan, light blue, and white glass creates realistic sky and water gradients.
Layering colored glass panes with iron bars or black stained glass simulates the leaded metal lines found in real cathedral windows. Positioning light sources like sea lanterns or froglights behind the glass ensures the mosaic glows brightly even during nighttime.
Tools for the Glass Atelier
- Stained Glass blocks and Panes in multiple colors
- Black Stained Glass or Iron Bars
- Smooth Quartz, Copper, or Spruce framing blocks
- Cartography Tables and Glass Bottles
- Sea Lanterns or Froglights for backlighting
Step-by-Step Implementation Guide
- Frame a large arched window opening on the main wall using smooth quartz or copper blocks.
- Design a mosaic pattern using a gradient of stained glass panes (e.g., magenta, purple, blue, and yellow).
- Outline the primary shapes within the glass window using black stained glass panes or iron bars for lead lines.
- Conceal sea lanterns or froglights behind the outer frame to backlight the stained glass at night.
- Position a cartography table near the window to serve as the glass cutter’s drafting desk.
- Place cauldrons and glass bottles filled with colored water (in Bedrock) or tinted glass blocks around the desk.
- Add floating display shelves holding clear glass bottles and amethyst clusters to catch the incoming light.
- Lay polished diorite or white terracotta flooring beneath the window to reflect the colorful sunlight.
4. The Botanical Press & Flower Crafting Herbarium

Preserving Nature through Herbal Arts and Paper Craft
A botanical press studio is dedicated to pressing wildflowers, drying herbs, and crafting handmade botanical paper. This charming concept blends gardening with crafting, featuring hanging dried plants, paper presses, and organized seed drawers.
Using moss blocks, azalea leaves, hanging roots, and wild flora brings vibrant greenery indoors. Combined with bookshelves, lecterns, and paper items, this studio becomes a peaceful sanctuary for naturalists and potion crafters alike.
Crafting Flower Presses and Drying Racks
Simulating a flower press in Minecraft can be achieved using pistons, trapdoors, and heavy stone slabs. Placing flower items on item frames mounted on trapdoors makes it appear as though blossoms are actively being flattened into paper.
Using fences and iron chains suspended from the ceiling allows you to attach oak leaves, spore blossoms, and hanging roots overhead. This creates an authentic herb-drying rack that fills the room with rustic, organic detail.
Botanical Studio Materials List
- Moss blocks, Azalea leaves, and Spore Blossoms
- Hanging Roots, Vines, and Wild Flowers
- Lecterns, Bookshelves, and Paper
- Pistons, Smooth Stone Slabs, and Spruce Trapdoors
- Item Frames and Glass Bottles
Step-by-Step Implementation Guide
- Build an open-timber ceiling using dark oak logs, with spruce fences running horizontally across the beams.
- Hang hanging roots, spore blossoms, and oak leaf blocks from the fences to create herb-drying racks.
- Set up a flower pressing station using a smooth stone slab topped with an inverted piston pointing downward.
- Mount item frames holding various wildflowers directly onto the sides of spruce trapdoor counters.
- Place a lectern in the center of the room with a book and quill detailing flower names and potion recipes.
- Position bookshelves and composters against the walls to store plant trimmings and organic fertilizer.
- Add glass bottles and flower pots containing rare tulips and orchids along the windowsills.
- Scatter moss carpet and green carpet in irregular patches across the wooden floor to soften straight lines.
5. The Miniature Model & Toymaker’s Workshop
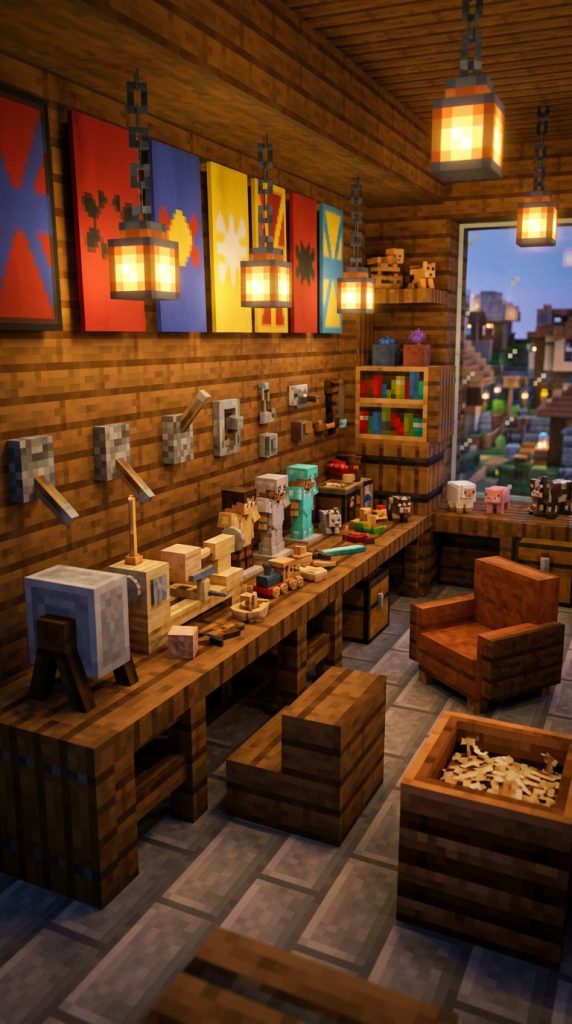
Building Whimsical Miniatures and Wooden Toys
Step into the shoes of an artisan toymaker with a workshop dedicated to miniature models, carved wooden figurines, and playful novelties. This whimsical concept uses small block tricks, player heads, and armor stand posing to create tiny details.
By utilizing lightning rods, buttons, levers, and custom armor stands, you can create intricate miniature ships, dollhouses, and wooden horses. It brings a cozy, magical childhood nostalgia into your Minecraft world.
Utilizing Armor Stands for Micro-Details
Armor stands are the ultimate secret tool for detailed interior decorating in Minecraft. By equipping armor stands with custom heads, tools, or leather armor and pushing them into blocks using pistons, you can create tiny figurines.
Using player heads textured as small gift boxes, rubik’s cubes, or mini blocks adds incredible detail to workbench tops. Placing lightning rods horizontally using end rods creates fine wood-turning lathe machinery for carving wooden components.
Components for the Toymaker Workshop
- Armor Stands and Player Heads (mini blocks/gifts)
- Lightning Rods, End Rods, and Levers
- Composters, Grindstones, and Tripwire Hooks
- Colored Concrete, Wool, and Wood Slabs
- Item Frames and Carved Pumpkins
Step-by-Step Implementation Guide
- Build a warm spruce and dark oak workbench spanning the main wall, supported by scaffolding legs.
- Place a grindstone and lightning rod on the workbench to serve as a miniature wood-carving lathe.
- Position an armor stand behind the bench, sinking it into the floor using a piston so only its head and hands show.
- Equip the armor stand with a wooden sword or pickaxe to look like a small carved figurine in progress.
- Place decorative player heads (or small skulls/heads) on the desk to represent finished toy blocks.
- Mount tripwire hooks, levers, and buttons on the wall above the bench to look like precision carving tools.
- Add a composter filled with wood sawdust (using oak buttons on top) beside the workbench.
- Hang warm lanterns and colorful wool banners to give the shop a cheerful, festive atmosphere.
6. The Cartographer’s Map & Calligraphy Nook
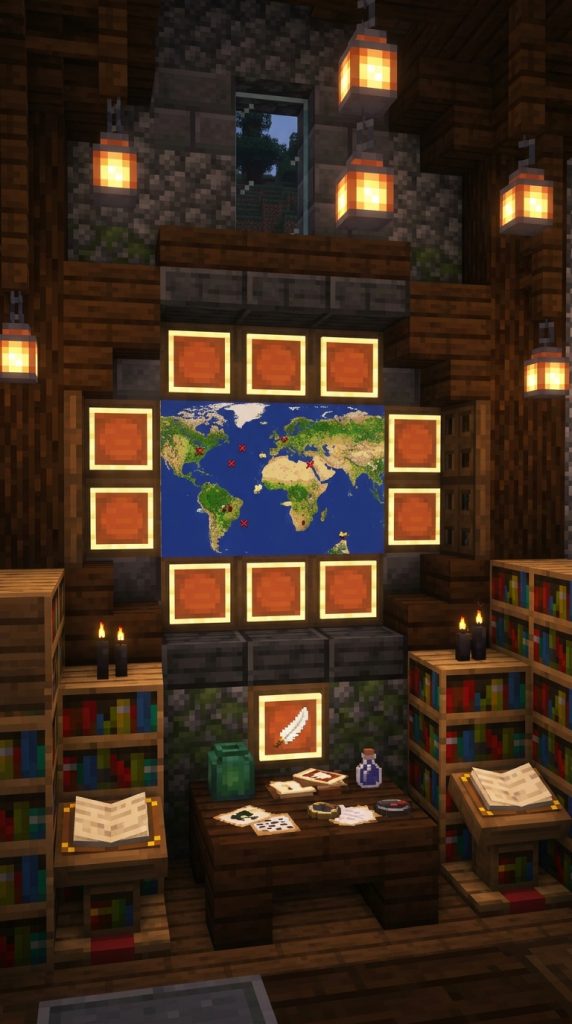
Mapping Your World with Hand-Drawn Charm
For travelers and explorers, a cartography and calligraphy nook serves as the nerve center for world mapping and record keeping. This studio centers around map tables, inkwells, parchment scrolls, and large wall-mounted map displays.
Combining cartography tables, lecterns, copper telescopes (spyglasses), and feather quills creates a scholarly, medieval studio atmosphere. It allows you to document your world’s geography while enjoying an aesthetically pleasing workspace.
Designing Seamless Wall Map Displays
Creating a full-scale wall map using item frames and filled maps provides a breathtaking visual centerpiece for your home. Bordering the map with dark oak stairs, spruce trapdoors, and glowing lanterns transforms raw maps into a framed museum gallery piece.
Incorporating inkwells using sea pickles, cauldrons with black water, and black candles adds detailed realism to drafting tables. Placing spyglasses in item frames makes them look like brass navigation instruments ready for expedition planning.
Cartographer Nook Material Requirements
- Cartography Tables, Lecterns, and Bookshelves
- Item Frames, Maps, and Spyglasses
- Sea Pickles (as inkwells), Feathers, and Paper
- Dark Oak Slabs, Stairs, and Spruce Trapdoors
- Black Candles and Copper Blocks
Step-by-Step Implementation Guide
- Build a five-by-three recessed wall frame using dark oak stairs and polished deepslate.
- Fill the recessed space completely with glow item frames and snap map items in place to create a world map.
- Set up a cartography table in the center of the nook, flanked by two tall bookshelves.
- Place a single green sea pickle on the table next to a feather in an item frame to simulate an inkwell and quill.
- Add a lectern holding a written logbook detailing coordinates of important bases and landmarks.
- Mount a spyglass in an item frame on the desk edge to serve as a brass sea telescope.
- Light black candles on top of neighboring bookshelves to provide dramatic, focused task lighting.
- Place a globe-like visual using a decorative player head or brown glazed terracotta block on a wooden pedestal.
7. The Cozy Candle Manufacturer & Wax Works
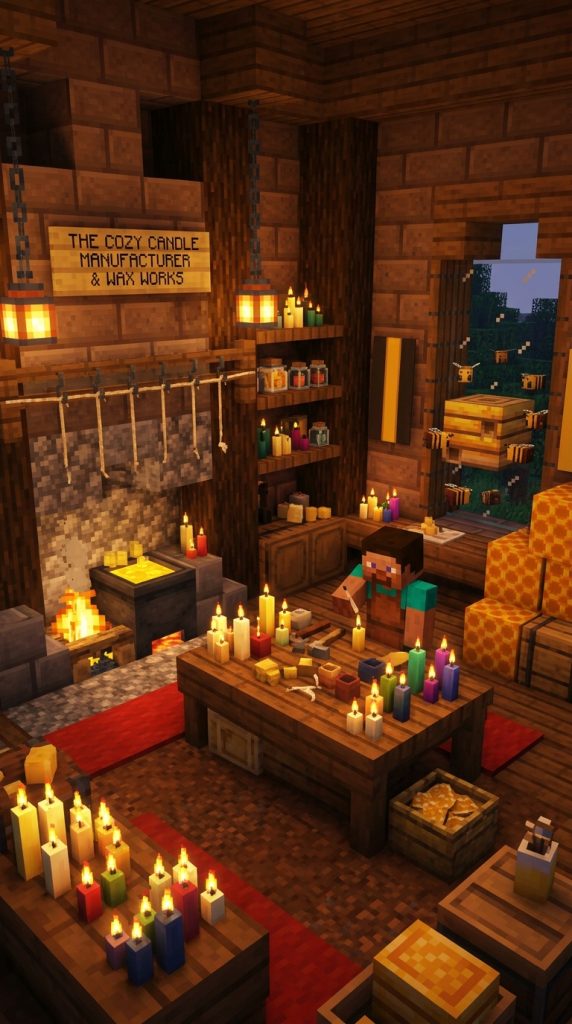
Crafting Beeswax Illumination and Warm Honey Decor
Nothing says “cozy” quite like the soft, warm amber glow of flickering candles. A candle-making studio focuses on harvesting honey, melting beeswax, and dipping cotton wicks to craft decorative candles of all colors.
This build makes extensive use of honeycomb blocks, honey blocks, beehives, and candles. The warm yellow, orange, and golden-brown color palette creates an incredibly inviting atmosphere that feels sweet and rustic.
Building Wax Melting Vat Stations
Simulating a wax melting station can be achieved using cauldrons placed over campfires or magma blocks. Placing orange or yellow stained glass inside cauldrons gives the illusion of warm, molten beeswax ready to be poured.
Stacking candles of different colors and heights across counters creates a charming, handmade marketplace feel. Incorporating beehives into exterior wall cutouts allows real bees to buzz peacefully outside your studio windows.
Candle Studio Materials List
- Candles in various colors (especially yellow, orange, and plain)
- Honeycomb blocks, Honey blocks, and Beehives
- Cauldrons, Campfires, and Tripwire Hooks
- Yellow and Orange Stained Glass
- Spruce Wood and Mud Bricks
Step-by-Step Implementation Guide
- Construct walls using a mix of mud bricks, spruce logs, and honeycomb blocks for a warm, golden texture.
- Build a wax-melting hearth by placing a cauldron over a lit campfire sunk into the floor.
- Place orange or yellow stained glass inside the cauldron to look like liquid molten beeswax.
- Mount tripwire hooks on the wall above the cauldron to represent drying wick racks.
- Arrange clusters of unlit and lit candles across spruce slab workbenches in groups of one, two, three, and four.
- Stack honeycomb blocks and honey blocks in a corner to represent raw honey stores ready for refining.
- Install a beehive into a window frame so bees can fly in and out without entering the workspace.
- Light up the room exclusively using clusters of warm beeswax candles placed on iron bars and stone ledges.
8. The Painter’s Attic Loft & Easel Studio
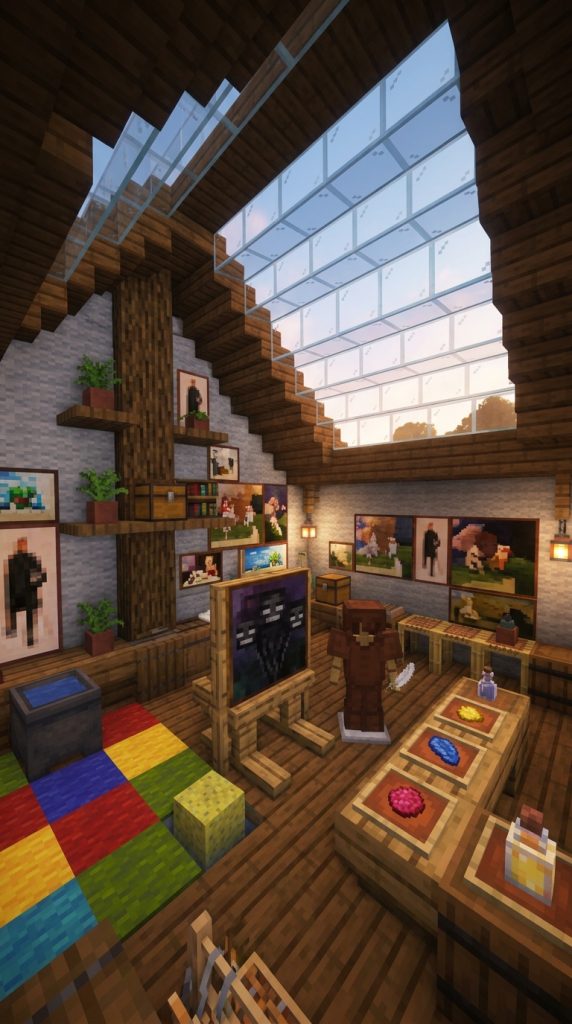
Capturing Artistic Inspiration in Skylit Spaces
An artist’s attic loft is the quintessential creative haven. Tucked beneath sloping rooflines with large glass skylights, this studio features painting easels, color palette stations, and canvases in various stages of completion.
This build utilizes Minecraft paintings, armor stands, banners, and colorful dye items to create an authentic fine-arts studio. The high ceilings and natural top lighting make it an ideal retreat for creative players.
Constructing Custom Easels and Palette Desks
Creating a convincing painting easel in Minecraft is simple yet incredibly effective. Placing a painting onto an item frame attached to a spruce sign or trapdoor gives the impression of a canvas sitting on a wooden tripod frame.
Setting up an artist’s palette desk involves placing colored dyes, water glass bottles, and brushes (feather items) onto item frames flat on horizontal trapdoors. This visual clutter adds intentional charm and realistic detail.
Painter’s Loft Materials Checklist
- Minecraft Paintings of various sizes
- Spruce Trapdoors, Signs, and Armor Stands
- Dyes in all primary and secondary colors
- Glass Skylights and Spruce Roof Stairs
- Item Frames, Feathers, and Glass Bottles
Step-by-Step Implementation Guide
- Build an attic studio space directly under a steep roofline using spruce stairs and exposed log rafters.
- Replace a large section of the sloped roof with clear glass blocks to create a dramatic skylight.
- Construct an artist’s easel by placing two spruce trapdoors vertically, attaching a painting to the front.
- Position an armor stand next to the easel holding a feather to represent the artist’s paintbrush.
- Set up a low color palette table using spruce slabs covered with item frames holding red, blue, and yellow dyes.
- Hang various sizes of Minecraft paintings across the walls at different heights to create a gallery display.
- Place a cauldron filled with blue-dyed water in the corner for brush cleaning.
- Roll out a large, colorful wool area rug in the center of the loft floor to anchor the artistic space.
9. The Stonemason & Gemstone Carving Workshop
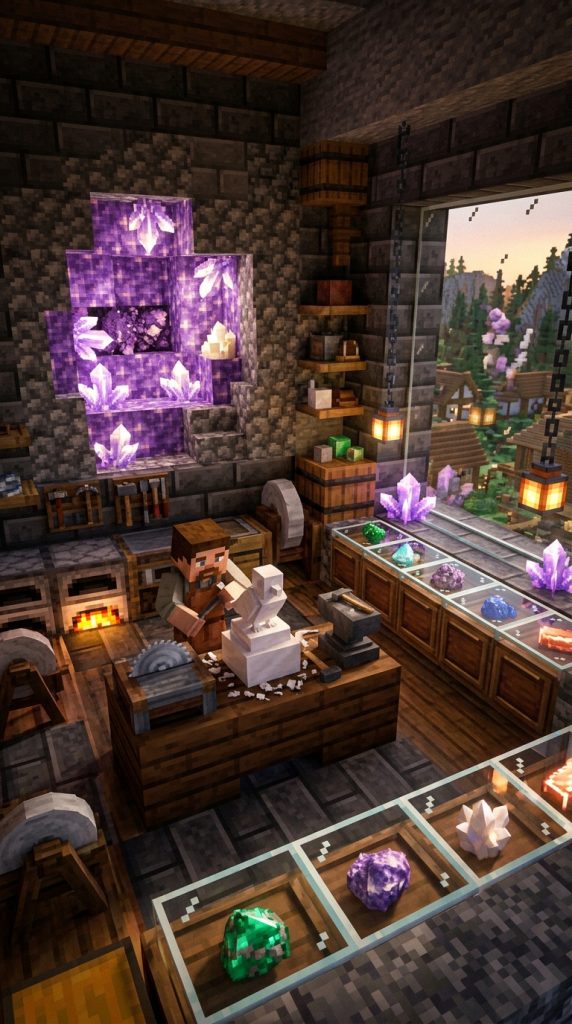
Sculpting Raw Minerals into Architectural Art
For players who love geology, subterranean builds, and mineral collecting, a gemstone sculpting studio offers a rugged yet refined aesthetic. This workshop focuses on cutting raw stone, polishing crystals, and sculpting marble statues.
Incorporating deepslate, copper, quartz, amethyst geodes, and dripstone creates a rich textural environment. Using stonecutters, anvils, and grindstones provides functional tools that double as perfect industrial decoration pieces.
Displaying Amethyst Crystals and Mineral Geodes
Amethyst clusters and bud blocks introduced in modern Minecraft updates are ideal for gemstone studios. Building a natural geode cutout into the wall makes it appear as though your studio was built directly inside a crystal vein.
Using stonecutters alongside anvils creates realistic stone-carving machinery. Displaying mineral items like raw copper, raw gold, emeralds, and diamonds inside glass display cases adds luxury and visual interest.
Gemstone Workshop Materials List
- Amethyst Blocks, Clusters, and Calcite
- Deepslate, Smooth Quartz, and Granite
- Stonecutters, Anvils, and Grindstones
- Glass Blocks and Item Frames
- Raw Minerals (Copper, Gold, Emeralds, Amethyst)
Step-by-Step Implementation Guide
- Construct thick, sturdy walls using polished deepslate bricks mixed with raw deepslate and tuff.
- Build a natural amethyst geode display in a wall niche using calcite, basalt, and amethyst clusters.
- Place a stonecutter and an anvil in the center workspace as primary stone-carving tools.
- Position a smooth quartz block on an armor stand base to simulate a half-carved marble statue.
- Build glass-topped display counters using quartz slabs and glass blocks to showcase polished gemstones.
- Place item frames inside the glass counters holding emeralds, diamonds, lapis lazuli, and raw copper.
- Add a grindstone mounted on a copper block base to serve as a mineral polishing wheel.
- Illuminate the dark stone studio using glowing amethyst clusters and subtle deepslate copper lanterns.
10. The Cozy Yarn & Knitted Wool Croft
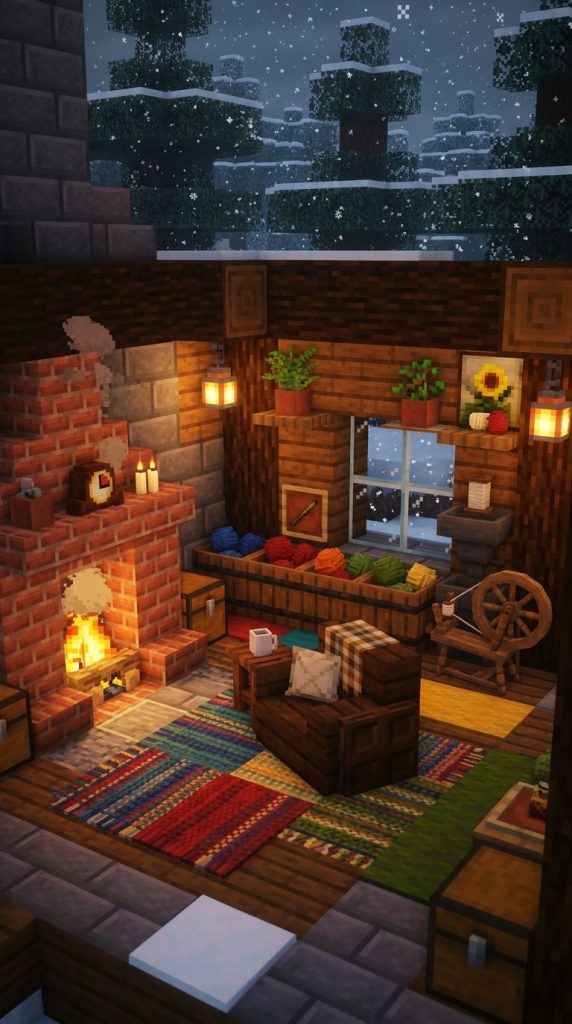
Creating Warm Fiber Art Havens in Snow Biomes
Nestled in a snowy mountain or spruce forest, a yarn croft is the ultimate warm shelter. Focused on spinning, dyeing, and knitting wool, this cottage uses soft textures, warm fireplaces, and overflow storage bins packed with colorful yarn.
Combining dried kelp blocks (as peat fuel), wool, carpets, and wooden barrels creates a snug highland aesthetic. It provides a warm contrast to cold exterior snowstorms, making it one of the coziest builds possible in Minecraft.
Building Yarn Bins and Knitting Stations
Simulating yarn bins can be achieved by placing colored wool blocks inside wooden barrels or behind trapdoor crates. Mixing textures like carpet layers on top of wool blocks adds soft depth that looks like hand-knitted blankets.
A warm brick fireplace with a chimney structure is essential for a cozy croft. Placing a rocking chair (using a spruce stair with trapdoors on the sides) beside the hearth creates an inviting spot for evening knitting sessions.
Fiber Croft Supplies Checklist
- Wool blocks and Carpets in soft pastel or warm tones
- Barrels, Spruce Trapdoors, and Chests
- Brick Fireplace blocks, Netherrack/Campfire
- Dried Kelp Blocks and Oak Logs
- Spruce Stairs and Banners
Step-by-Step Implementation Guide
- Build a cozy cottage exterior using spruce logs, stone bricks, and a steep dark oak roof.
- Construct a roaring brick fireplace along the main wall, complete with an enclosed campfire for safety.
- Place a comfortable armchair beside the fire using spruce stairs flanked by spruce trapdoors.
- Build yarn storage bins using open wooden barrels filled with different colored wool blocks.
- Layer different colored carpets across the floor around the fireplace to look like handmade rag rugs.
- Set up a spinning wheel station using a sideways grindstone attached to a fence post and loom.
- Store dried kelp blocks and oak logs beside the fireplace as cozy fuel for cold winter nights.
- Hang wool banners in soft pastel shades along the windows as thick, insulating curtains.
11. The Leathercraft & Bookbinding Scriptorium
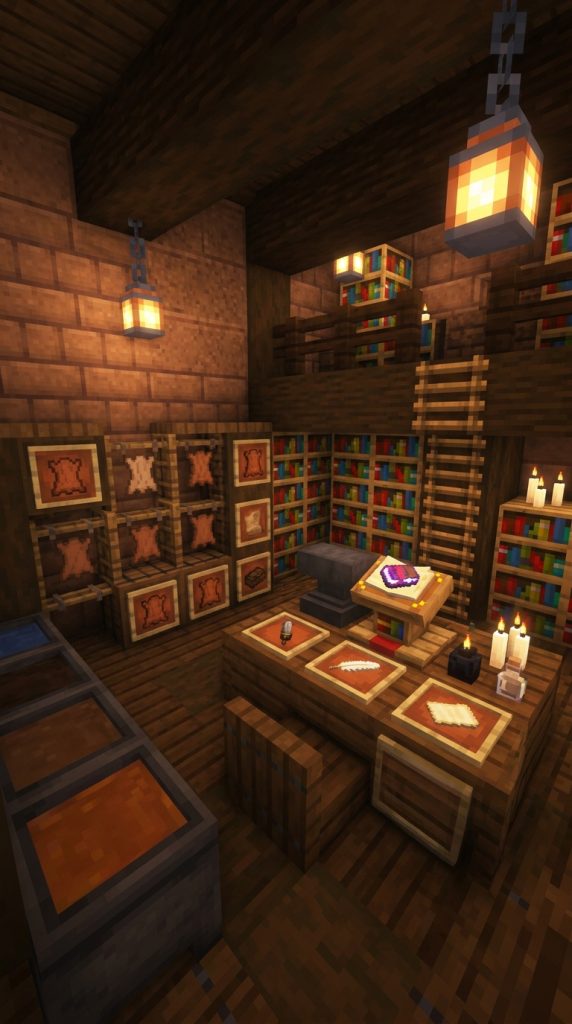
Crafting Leather Goods, Manuscripts, and Tomes
A leathercraft and bookbinding scriptorium bridges the gap between rugged leatherworking and scholarly bookmaking. This studio features tanning vats, leather racks, printing presses, and rows of hand-bound books ready for library distribution.
Using item frames with leather, books, and saddles alongside cauldrons and lecterns gives this build a detailed historical feel. The rich brown tones of leather and wood pair beautifully with warm brass and copper accents.
Simulating Tanning Vats and Leather Frames
Tanning vats are easily created using cauldrons filled with brown-dyed water (on Bedrock edition) or mud/water blocks. Hanging leather items in item frames attached to spruce fences creates realistic leather drying racks.
Building a bookbinding press involves combining a lectern, an anvil, and a stone slab. Displaying enchanted books on lecterns adds a subtle magical shimmer that enhances the high-end artisan feel of the scriptorium.
Scriptorium Materials List
- Leather, Books, Paper, and Saddles
- Cauldrons, Anvils, and Lecterns
- Item Frames, Spruce Fences, and Trapdoors
- Mud Bricks, Dark Oak Wood, and Copper
- Enchanted Books for glowing displays
Step-by-Step Implementation Guide
- Build dark oak and mud brick walls to create a rich, scholarly studio interior.
- Place three cauldrons in a row filled with brown and orange water to serve as leather tanning vats.
- Construct leather drying racks using spruce fence posts with item frames holding raw leather.
- Build a bookbinding desk using dark oak slabs, placing an anvil on one side as a heavy paper press.
- Position a lectern holding a glowing enchanted book in the center of the main workspace.
- Mount item frames on the desk containing leather, feathers, and paper supplies.
- Line the upper walls with double-height bookshelves accessible via a spruce trapdoor ladder.
- Light the room with warm copper lanterns and glowing candles placed on book stacks.
12. The Clockmaker & Redstone Tinkerer’s Workshop
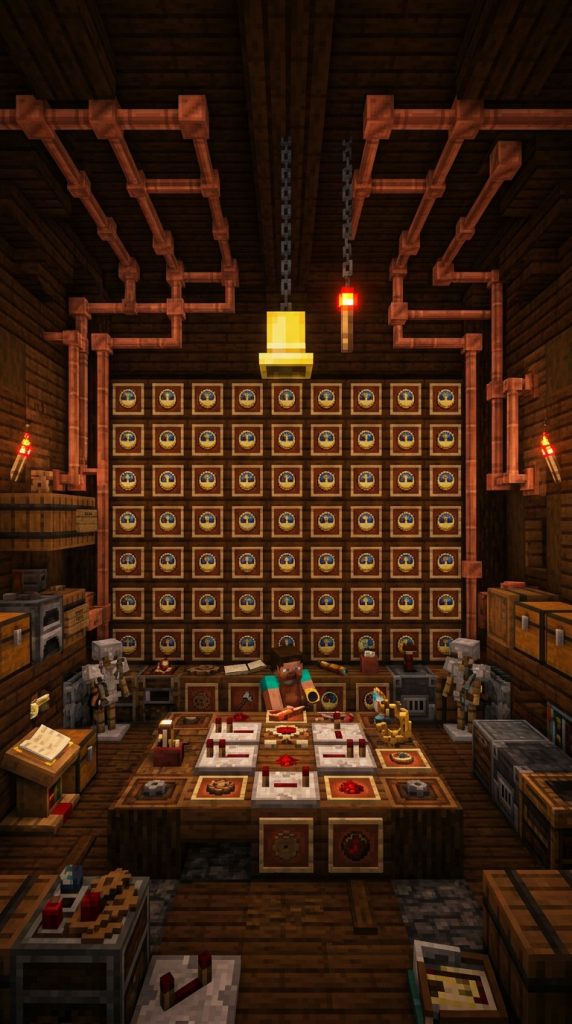
Assembling Brass Gears, Clocks, and Mechanical Wonders
For players who love a touch of steam-era technology mixed with cozy crafting, a clockmaker’s workshop is a brilliant choice. This studio is filled with ticking clocks, brass gears, copper pipes, and subtle redstone gizmos.
Utilizing clocks, redstone repeaters, comparators, copper blocks, and lightning rods gives the room an intricate, high-tech artisan look. It combines mechanical intellect with cozy, warm lighting and detailed woodwork.
Integrating Clocks and Copper Gear Machinery
Clocks mounted in item frames across walls act as ticking wall clocks of various sizes and designs. Placing copper blocks, cut copper stairs, and lightning rods creates intricate brass pipework running along the ceiling and walls.
Incorporating active redstone components like repeaters and comparators onto crafting benches makes them look like precision clockwork mechanisms being assembled. Adding a target block or observer gives the impression of advanced mechanical testing.
Clockmaker Workshop Materials List
- Clocks, Item Frames, and Compass items
- Redstone Repeaters, Comparators, and Target Blocks
- Copper blocks, Cut Copper Stairs, and Lightning Rods
- Spruce Wood, Dark Oak, and Glass Panes
- Spyglasses and Bell blocks
Step-by-Step Implementation Guide
- Construct a rich wood-paneled room using alternating dark oak and spruce plank blocks.
- Mount a large grid of item frames on the back wall containing clocks to create a wall of ticking timepieces.
- Run copper lightning rods and cut copper stairs along the ceiling corners to simulate pneumatic brass pipes.
- Set up a precision watchmaker workbench using cartography tables and dark oak trapdoors.
- Place redstone repeaters, comparators, and a spyglass flat on the bench to represent open clock gears and magnifying tools.
- Hang a gold bell from the ceiling center to serve as the master workshop chime.
- Add a target block and observer unit under the bench as a mechanical testing engine.
- Illuminate the intricate workshop using copper lanterns and glowing redstone torches for a cozy, mechanical ambiance.