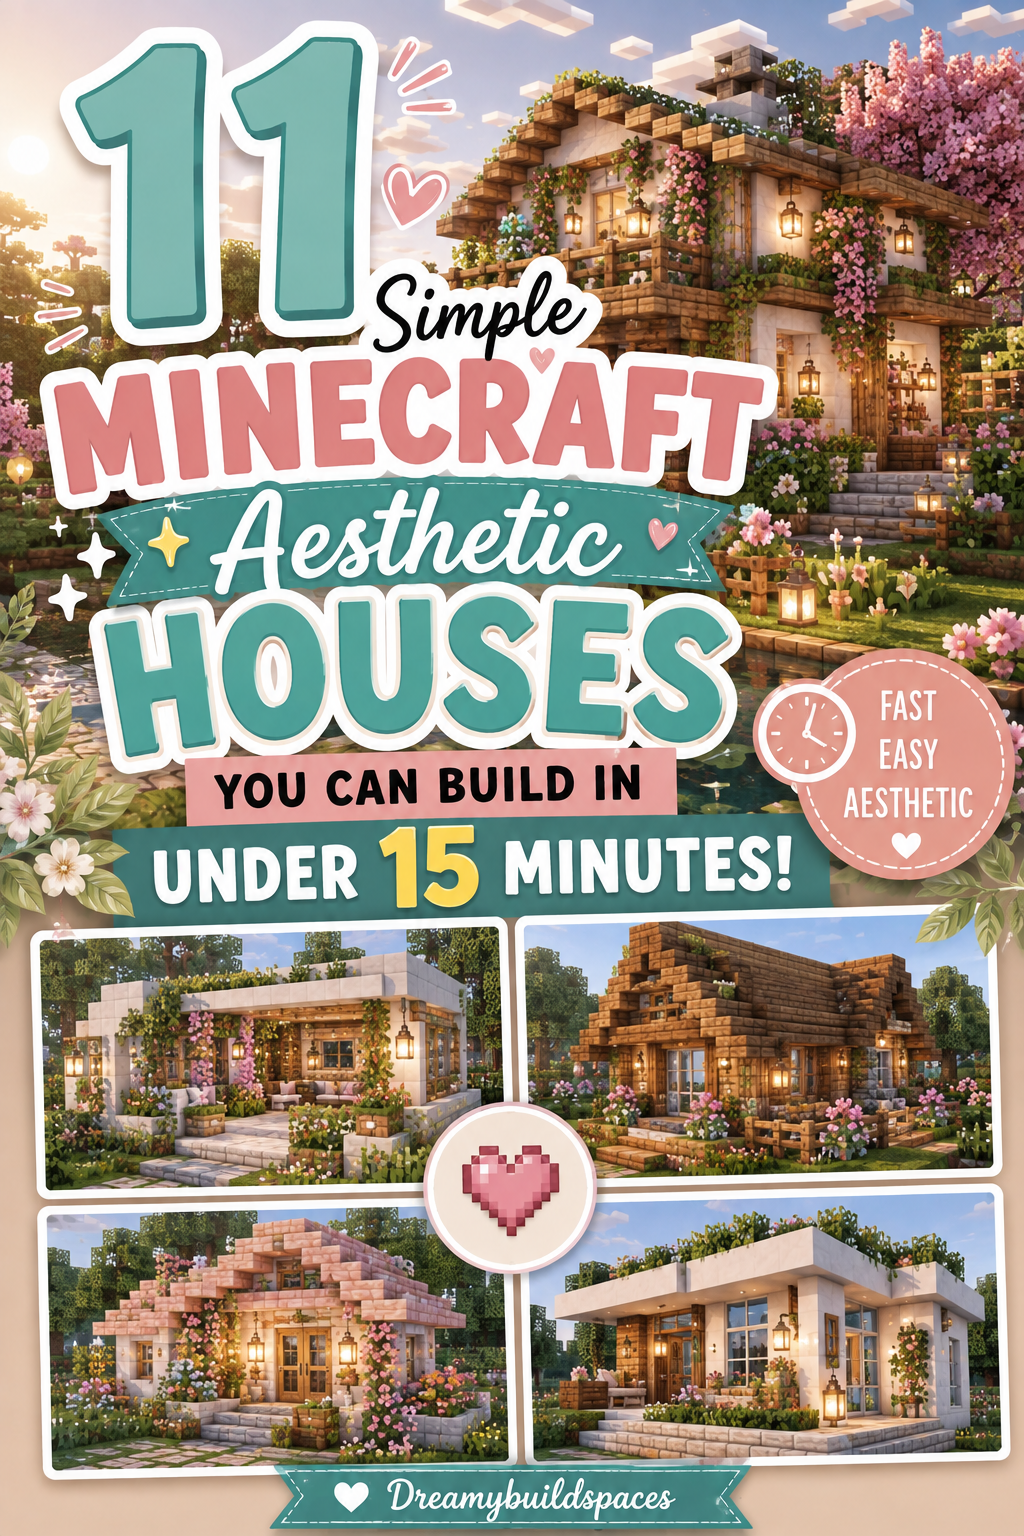
11 Simple Minecraft Aesthetic Houses You Can Build in Under 15 Minutes
Minecraft building has undergone a profound cultural revolution. In the early days of the game, survival architecture was purely functional—a dirt box to keep the creepers out, or a towering cobblestone pillar to mark your spawn point. Today, however, players demand more from their virtual homes. The modern Minecrafter seeks an “aesthetic house”—a build that seamlessly blends utility with visual harmony, environmental integration, and cozy interior design.
Yet, the challenge remains: striking the perfect balance between jaw-dropping beauty and time efficiency. Spending fifty in-game days meticulously detailing a massive gothic cathedral is rewarding in creative mode, but entirely impractical in a fresh survival world when you need a secure bed, functional storage, and crafting stations before your first nightfall. These thirteen simple Minecraft aesthetic houses are specifically engineered to bridge this gap. They are designed to be built in under fifteen minutes using readily available early-game materials, yet they possess the architectural silhouette, depth, and charm of builds featured on viral Pinterest boards. Let us dive into the ultimate guide for rapid, beautiful survival housing.
Why Aesthetic Building is Crucial for Survival Progression
Building a visually pleasing home is not just about vanity; it is a core pillar of a successful Minecraft survival journey. A well-lit, organized, and aesthetically pleasing base provides a psychological sanctuary from the chaotic, hostile world outside.
Furthermore, the principles of aesthetic building teach essential lessons in spatial awareness, block gradients, depth perception, and light manipulation. By mastering these concepts in small, rapid builds, you lay the foundational skills required for monumental mega-bases later in your progression. These thirteen homes prove that you never need to sacrifice style for speed.
Mastering Speed and Block Palettes
Achieving a high-end aesthetic in under fifteen minutes requires disciplined preparation and an intimate understanding of efficient block palettes. Before placing a single block, it is highly recommended to gather a substantial starting kit: at least two stacks of primary logs, one stack of planks, a stack of cobblestone or stone, significant amounts of glass panes, and basic lighting.
The key to rapid aesthetic detail lies in texture variation and structural depth. Instead of building flat walls entirely of one wood type, elite builders intersperse stripped logs, contrasting plank types, and natural stone foundations. They utilize stairs and slabs not just for roofing, but for recessing windows and creating layered wall textures. Let us explore thirteen stunning designs tailored for rapid construction.
1. The Cozy Spruce A-Frame Cabin

Mountain Architecture Utilizing Steep Roof Angles for Rapid Depth
Bringing organic cabin charm to life quickly requires architectural silhouettes that inherently suggest shelter. The Cozy Spruce A-Frame Cabin achieves this by using steep roof angles that descend almost to ground level, eliminating the need for extensive wall building. The entire structure rests on a sturdy foundation of stone bricks, giving it a grounded, established look even on day one.
This design is exceptionally resource-efficient and fits perfectly into snowy taiga biomes, dense forests, or mountain slopes, making it an ideal starter home for wilderness adventurers.
How to Build the Spruce A-Frame Cabin Step-by-Step
First, lay out a rectangular foundation measuring 7 blocks wide by 9 blocks deep using stone bricks. Next, erect five vertical pillars of stripped spruce logs at the four corners and a central apex, rising 6 blocks high.
Connect these pillars overhead to form the A-frame skeleton. Fill the front and back gable ends entirely with vertical stripped spruce logs for a rustic facade. Install large glass panes on the front for natural lighting. Afterward, build the angled roof slope using alternating rows of spruce stairs and dark oak stairs to create subtle texture gradients. Finally, add a small stone chimney stack using brick blocks and a lit campfire for smoke.
Required Survival Resources and Materials List
- Stripped Spruce Logs and Spruce Wood Planks
- Stone Bricks and Stone Brick Stairs
- Dark Oak Stairs and Dark Oak Slabs
- Glass Panes and Spruce Trapdoors
- Brick Blocks, Campfire, and Iron Bars
- Basic Lighting (Torches or Lanterns)
2. The Modern Oak and Glass Cube

Sleek Minimalist Design Utilizing Symmetrical Structure and Tinted Glass
For players who prefer clean lines and monochromatic palettes over rustic cabins, the Modern Oak and Glass Cube is a superior choice. This build embraces architectural modernism by using a symmetrical cube shape framed by solid oak logs, contrasted against large expanses of glass panes that flood the interior with sunlight.
Its simple geometric form makes expansion incredibly easy; simply mirror the cube shape adjacent to the original structure to create a larger, interconnected modern complex.
How to Build the Modern Cube Step-by-Step
Begin by outlining a perfect square base measuring 7×7 blocks using polished smooth stone. At each corner, build a vertical pillar of stripped oak logs rising 7 blocks high. Connect these pillars at the top using more stripped oak logs to create a complete structural frame.
Fill the walls on three sides using light gray tinted glass panes, leaving a central 2-block gap on the front for the entrance. For the roof, create a flat deck using smooth stone slabs, adding an overhang on the front facade. Construct a modern front door using an iron door and button mechanism. Afterward, decorate the flat roof with potted azalea bushes and sea lanterns hidden beneath white carpet for hidden, modern illumination.
Required Survival Resources and Materials List
- Stripped Oak Logs and Smooth Stone Blocks
- Light Gray Tinted Glass Panes and Smooth Stone Slabs
- Iron Door, Stone Button, and Oak Fence Gates
- Sea Lanterns, White Carpet, and Flower Pots
- Azalea Bushes, Ferns, and Ladder
- Basic Bed, Chests, and Crafting Table
3. The Elevated Birchwood Loft
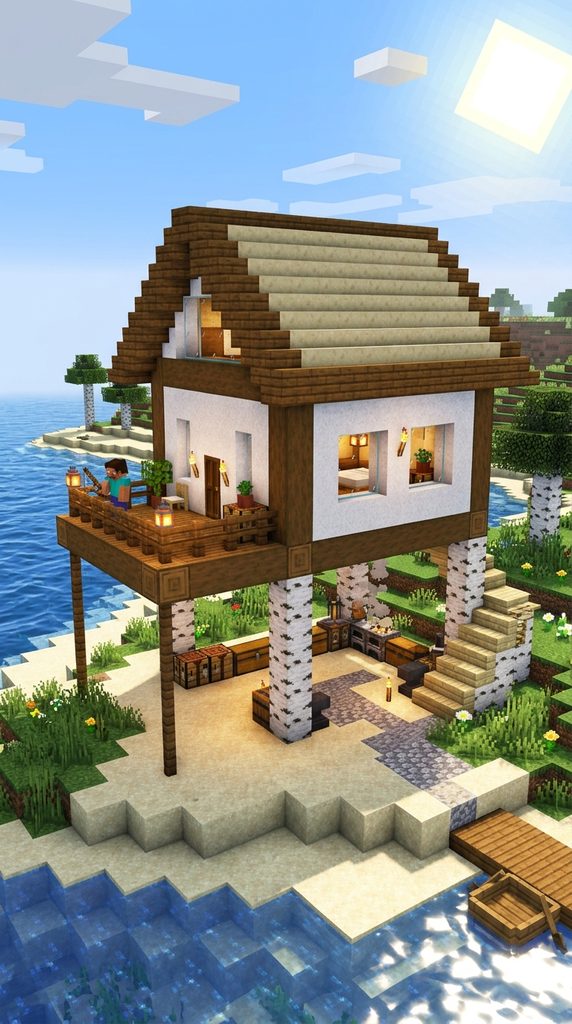
Maximizing Limited Space with Raised Flooring and Functional Ground-Level Utility
When building on a small survival island or in a crowded village, maximizing vertical footprint is essential. The Elevated Birchwood Loft solves this by raising the entire primary living quarters one floor off the ground atop sturdy birch log pillars. This design leaves the entire ground floor open and shaded, perfect for outdoor furnaces, animal pens, or secure farming plots.
The use of light birch wood and white concrete powder gives the home a bright, airy, beach house aesthetic that feels open despite its compact size.
How to Build the Elevated Loft Step-by-Step
First, establish four foundation pillars using stripped birch logs, positioned 5 blocks apart in a square formation and rising 4 blocks high. Build a robust horizontal floor platform connecting these pillars using birch planks. Erect walls 3 blocks high using white concrete powder for the main living space.
Install a pitched roof overhead using smooth sandstone stairs. Add a small exterior balcony on the front facade using birch fences. Afterward, build a simple staircase using smooth stone stairs descending from the balcony to the ground level. Finally, furnish the airy loft with a bed, double chests, and a wall-mounted brewing stand.
Required Survival Resources and Materials List
- Stripped Birch Logs and White Concrete Powder
- Smooth Sandstone Stairs and Smooth Sandstone Slabs
- Birch Wood Planks, Birch Stairs, and Birch Fences
- Glass Panes, Birch Trapdoors, and Ladder
- Bed, Double Chests, Crafting Table, and Furnace
- Brewing Stand and Flower Pots with Tulips
4. The Nether-Gothic Blackstone Keep

Threatening Dark Fantasy Styling Forged from Blackstone and Deepslate
Embrace a dark, brooding aesthetic early in your survival world with the Nether-Gothic Blackstone Keep. While deepslate and blackstone are typically late-game resources mined in the deepest caves, locating a basalt delta biome in the Nether or a simple ruined portal near spawn makes this imposing dark fortress surprisingly rapid to construct.
Its compact, defensive silhouette with arrow-slit windows and a crenelated roofline makes it ideal for survival players living near dangerous pillager outposts or zombie-infested plains.
How to Keep the Blackstone Keep Step-by-Step
Begin by outlining a square foundation measuring 9×9 blocks using polished basalt pillars. Build four fortified corner towers using alternating polished deepslate bricks and regular deepslate, rising 9 blocks high. Connect these towers with curtain walls 5 blocks high, utilizing regular blackstone and gilded blackstone for randomized texture.
Install narrow glass-pane slit windows along the curtain walls for aesthetic defense. Construct a flat, battlement roofline using blackstone bricks and blackstone walls as crenelations. For the entrance, build a towering portcullis archway using basalt pillars and a dark oak door reinforced with iron trapdoors. Finally, mount soul lanterns atop basalt pillars for an ominous, cool-toned glow.
Required Survival Resources and Materials List
- Polished Basalt Pillars, Polished Deepslate Bricks, and Deepslate
- Blackstone, Gilded Blackstone, and Blackstone Brick Stairs
- Dark Oak Door, Iron Trapdoors, and Blackstone Walls
- Soul Lanterns, Blackstone Pressure Plates, and Banner
- Bed, Chest, and Crafting Table
- Netherrack and Flint and Steel (for a decorative, safe hearth)
5. The Cozy Cherry Blossom Teahouse
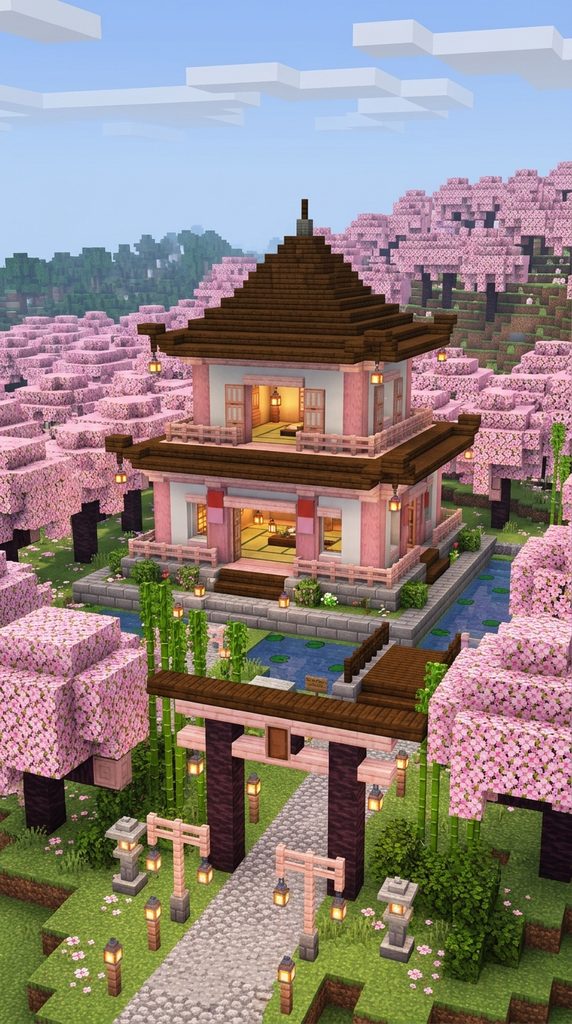
Whimsical Japanese-Inspired Architecture Featuring Curved Gables and Pink Terracotta
Introduce a touch of elegant Eastern serenity to your survival world quickly with the Cozy Cherry Blossom Teahouse. Built primarily using pale cherry wood planks, white concrete, and pink terracotta, this build exudes tranquility and soft, romantic charm. Its signature feature is the multi-tiered flared pagoda roof, which is surprisingly easy to construct using simple stair blocks.
This architectural style looks breathtaking nestled within mountain cherry groves, overlooking a calm ocean bay, or positioned beside a tranquil meditation pond.
How to Build the Cherry Blossom Teahouse Step-by-Step
Start by constructing a square raised platform 5×5 blocks wide and 1 block high using stripped cherry logs. Erect exterior walls 4 blocks high using alternating pink terracotta and white concrete blocks for textural depth. Install large glass panes across the front facade overlooking your garden view.
Construct a multi-tiered pagoda roof by building two concentric squares of dark oak stairs, creating flared eaves that overhang the walls significantly. Top the peak with a final square of dark oak slabs. Afterward, create a decorative front gateway using cherry fence gates and hanging lanterns suspended by iron chains. Finally, furnish the minimalist interior with a single central bed, crafting table, and potted azalea bushes.
Required Survival Resources and Materials List
- Cherry Wood Logs, Cherry Wood Planks, and Cherry Stairs
- Pink Terracotta, White Concrete Powder, and Smooth Quartz
- Dark Oak Stairs, Dark Oak Slabs, and Dark Oak Fence Gates
- Glass Panes, Lanterns, and Iron Chains
- Potted Azalea Bushes, Glow Lichen, and Bamboo Stalks
- Bed, Crafting Table, and Furnace
6. The Crimson Stem Witch’s Hut
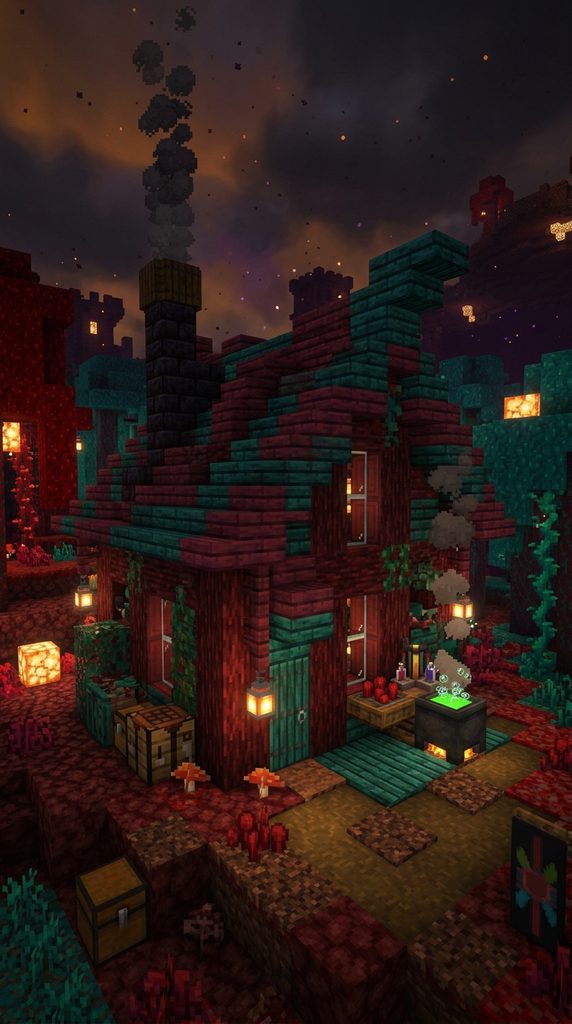
Mystical Dark Fantasy Dwelling Using Crimson Wood and Warped Fungus Accents
Perfect for players spawning near vast crimson forests in the Nether, the Crimson Stem Witch’s Hut offers a unique blend of mystical dark fantasy and survival utility. Using the rich, saturated red of stripped crimson stems for the walls and the contrasting teal-blue of warped wood for the roof trims creates a striking, unsettling visual palette.
The asymmetrical, slightly hunched roofline and the addition of a bubbling cauldron outside instantly establish a witchy, arcane ambiance.
How to Build the Crimson Stem Witch’s Hut Step-by-Step
Lay a small, slightly irregular circular foundation 7 blocks across using coarse dirt and Blackstone. Erect exterior walls 5 blocks high using vertical stripped crimson stems, creating a textured log-cabin look. Install only small, sparse tinted glass panes for windows.
Construct a steep, slightly asymmetrical A-frame roof using crimson stairs, accented along the ridge and eaves with warped wood stairs. Build a small, smoky chimney using Nether bricks and a lit campfire. Afterward, create an exterior brewing station using a cauldron, brewing stand, and glow lichen hanging nearby. Finally, light the dark interior entirely with flickering soul torches mounted on basalt pillars.
Required Survival Resources and Materials List
- Stripped Crimson Stems, Crimson Wood Planks, and Crimson Stairs
- Warped Stem Wood, Warped Planks, and Warped Stairs
- Blackstone, Nether Bricks, and Basalt Pillars
- Tinted Glass Panes, Soul Torches, and Glow Lichen
- Cauldron, Brewing Stand, and Water Bucket
- Bed, Chest, and Crafting Table
7. The Desert Sandstone Oasis Villa

Sun-Drenched Mediterranean Styling Built with Smooth Sandstone and Terracotta
Capture the warm, earthy aesthetic of a desert oasis villa quickly using readily available sandstone found abundantly in arid biomes. By combining smooth sandstone blocks, cut sandstone pillars, and accents of orange and yellow terracotta, you achieve a sophisticated, sun-drenched Mediterranean look that feels cohesive with the environment.
The flat roof design is simple to construct and provides an excellent vantage point for scouting surrounding desert landscapes.
How to Build the Sandstone Oasis Villa Step-by-Step
Begin by outlining a rectangular base 9×7 blocks using smooth sandstone blocks. Erect exterior walls 5 blocks high using alternating orange terracotta and cut sandstone blocks to break up monotony. Install arched entryways using smooth sandstone stairs placed upside-down along the top curve.
Construct a flat roof deck using smooth sandstone slabs, adding decorative crenelations around the perimeter using regular sandstone blocks. Afterward, build an ornate central courtyard entryway using prominent sandstone pillars and a dark oak door. Finally, pave the surrounding courtyard with coarse dirt and plant cacti and palm trees (jungle wood and jungle leaves) for an authentic oasis feel.
Required Survival Resources and Materials List
- Smooth Sandstone, Cut Sandstone, and Sandstone Stairs
- Orange Terracotta, Yellow Terracotta, and Smooth Sandstone Slabs
- Dark Oak Door, Stone Button, and Iron Trapdoors
- Glass Panes, Ladders, and Lanterns
- Cacti, Jungle Wood Logs, and Jungle Leaves
- Water Bucket, Bed, Chest, and Crafting Table
8. The Arctic Ice Spire Stronghold
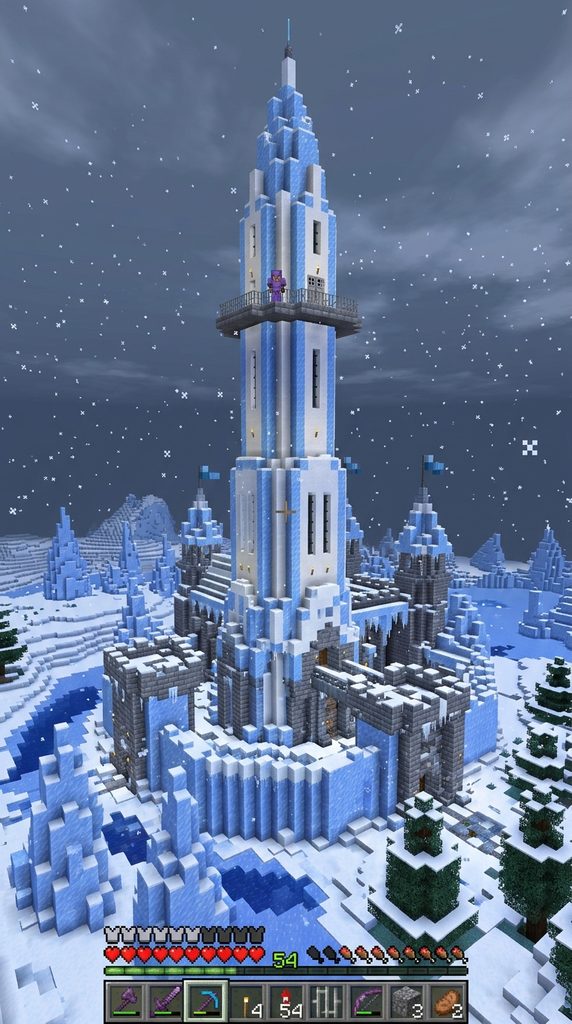
Defensive Structures Blending Seamlessly into Snowy Tundra Biomes Using Packed Ice
For players who choose the harsh beauty of snowy plains biomes, the Arctic Ice Spire Stronghold offers a rapid, thematic base solution. While clear blue ice melts near torches, packed ice and regular snow blocks are entirely stable. By alternating vertical pillars of blue ice and white concrete, you create a striking, clean aesthetic that sparkles brilliantly under moonlight.
Its tall, slender, spire-like design requires minimal ground footprint, making it an excellent choice for survival players building high above snowy valleys.
How to Keep the Ice Spire Stronghold Step-by-Step
Begin by constructing a circular foundation 7 blocks across using smooth snow blocks. Erect a towering, slightly conical central spire using alternating vertical pillars of blue ice and white concrete, rising 15 blocks high. For the main living level 5 blocks off the ground, build a small circular platform using quartz pillars.
Erect low walls using packed ice blocks, leaving only narrow, slit windows. Construct a conical roof peak overhead using blue ice stairs, topped with a lightning rod. Afterward, create an elevated exterior balcony using iron bars. Finally, light the interior entirely with hidden light sources (sea lanterns beneath white carpet) to maintain the sleek, minimalist ice aesthetic.
Required Survival Resources and Materials List
- Blue Ice Blocks, Packed Ice Blocks, and Blue Ice Stairs
- Smooth Snow Blocks, White Concrete, and White Stained Glass
- Quartz Pillars, Quartz Stairs, and Iron Bars
- White Carpet, Sea Lanterns, and Lightning Rod
- Bed, Chest, and Crafting Table
- Ladder and Trapdoor (for secure entry from below)
9. The Mushroom-Cap Hobbit Burrow

Whimsical Organic Architecture Built Directly into Grassy Hillsides Using Giant Mushroom Blocks
Blending fantasy charm with survival utility is achieved perfectly by carving a hobbit burrow into a grassy hillside and capping the entrance with giant mushroom blocks. While giant mushrooms are typically mid-game acquisitions requiring silk touch axes or bonemeal farms, their unique organic texture is unparalleled for whimsical fairy-tale aesthetics.
The curved green turf roof blends seamlessly into the environment, offering excellent natural camouflage against wandering hostile mobs.
How to Build the Mushroom Burrow Step-by-Step
First, carve a rounded, circular cavern into the side of a rolling grassy hill. Line the subterranean walls with coarse dirt, rooted dirt, and smooth stone bricks. Install a charming round wooden entrance using oak stairs and a dark oak door. Build secure glass viewing slits beside the door.
Construct the signature mushroom cap overhead using alternating red mushroom blocks and brown mushroom blocks, creating a dome that overhangs the entrance significantly. Afterward, pave the winding entryway path with podzol and coarse dirt. Finally, light the cozy, low-ceilinged interior with glowing liana vines draped naturally from the ceiling blocks.
Required Survival Resources and Materials List
- Red Mushroom Blocks and Brown Mushroom Blocks
- Grass Blocks, Coarse Dirt, and Rooted Dirt
- Oak Stairs, Dark Oak Door, and Smooth Stone Bricks
- Glass Panes, Lanterns, and Glowing Liana Vines
- Bed, Double Chests, Crafting Table, and Furnace
- Brewing Stand and Flower Pots
10. The Industrial Cyberpunk Habitation Pod

High-Tech Urban Styling Utilizing Gray Concrete, Iron Grates, and Glowing Cyan Glass
Channeling the gritty, high-tech atmosphere of a futuristic industrial city is easy with the Industrial Cyberpunk Habitation Pod. Built from alternating gray concrete, industrial iron grates, and glowing cyan glass panes, this build feels like it belongs in a massive sprawling mega-corporation skyscraper.
The compact, modular design makes stacking multiple pods vertically simple, allowing you to rapidly expand your survival base into a towering dystopian residential complex.
How to Keep the Cyberpunk Pod Step-by-Step
Begin by outlining a square base 7×7 blocks using gray concrete blocks. Erect exterior walls 5 blocks high using alternating gray concrete and industrial iron grate blocks to create a textured metal facade. Install large floor-to-ceiling windows on the front using cyan tinted glass panes.
For the roof, create a flat deck using smooth stone slabs, adding an overhang on the front facade. Construct a modern secure entryway using an iron door and button mechanism. Afterward, run cyan and magenta neon LED strips (tinted glass over sea lanterns) along the ceiling and exterior facade. Finally, furnish the utilitarian interior with a simple bunk bed setup (stairs and bed) and item-frame monitors.
Required Survival Resources and Materials List
- Gray Concrete Blocks, Iron Grate Blocks, and Smooth Stone Slabs
- Cyan Tinted Glass Panes and Dark Prismarine Stairs
- Iron Door, Stone Button, and Item Frames
- Sea Lanterns, Tinted Glass (for neon), and Redstone Components
- Bed, Chest, and Crafting Table
- Ladder and Trapdoor (for vertical access)
11. The Simple Acacia Savannah Duplex

Bright, Airy Architecture Celebrating African Plains Aesthetics with Contrasting Orange Terracotta and Stripped logs
Conclude your rapid building journey by embracing the warm, vibrant colors of the African savannah. The Simple Acacia Savannah Duplex celebrates warm orange terracotta, stripped acacia wood, and stark white concrete trim, creating a bright, breezy home that harmonizes effortlessly with sweeping acacia trees and dry golden grass biomes.
The open-air veranda design captures cooling desert breezes while providing a secure elevated porch for relaxing at sunset.
How to Build the Acacia Duplex Step-by-Step
Begin by outlining a rectangular base 9×5 blocks using smooth stone. Erect exterior walls 4 blocks high using warm orange terracotta blocks, framed cleanly at the corners with vertical stripped acacia logs. Install large glass panes across the front facade to let in golden hour sunlight.
Construct a gently pitched roof using acacia wood stairs, overhanging the walls significantly to provide natural shade. Afterward, build a raised front veranda porch using acacia wood slabs and fences. Finally, illuminate the exterior warmly with hanging copper lanterns.
Required Survival Resources and Materials List
- Stripped Acacia Logs, Acacia Wood Planks, and Acacia Stairs
- Orange Terracotta Blocks and Smooth Stone Foundation Slabs
- Acacia Fences, Acacia Slabs, and Glass Panes
- Copper Lanterns and Iron Chains
- Bed, Double Chests, Crafting Table, and Furnace
- Potted Cacti, Coarse Dirt, and Dead Bushes (for landscape integration)