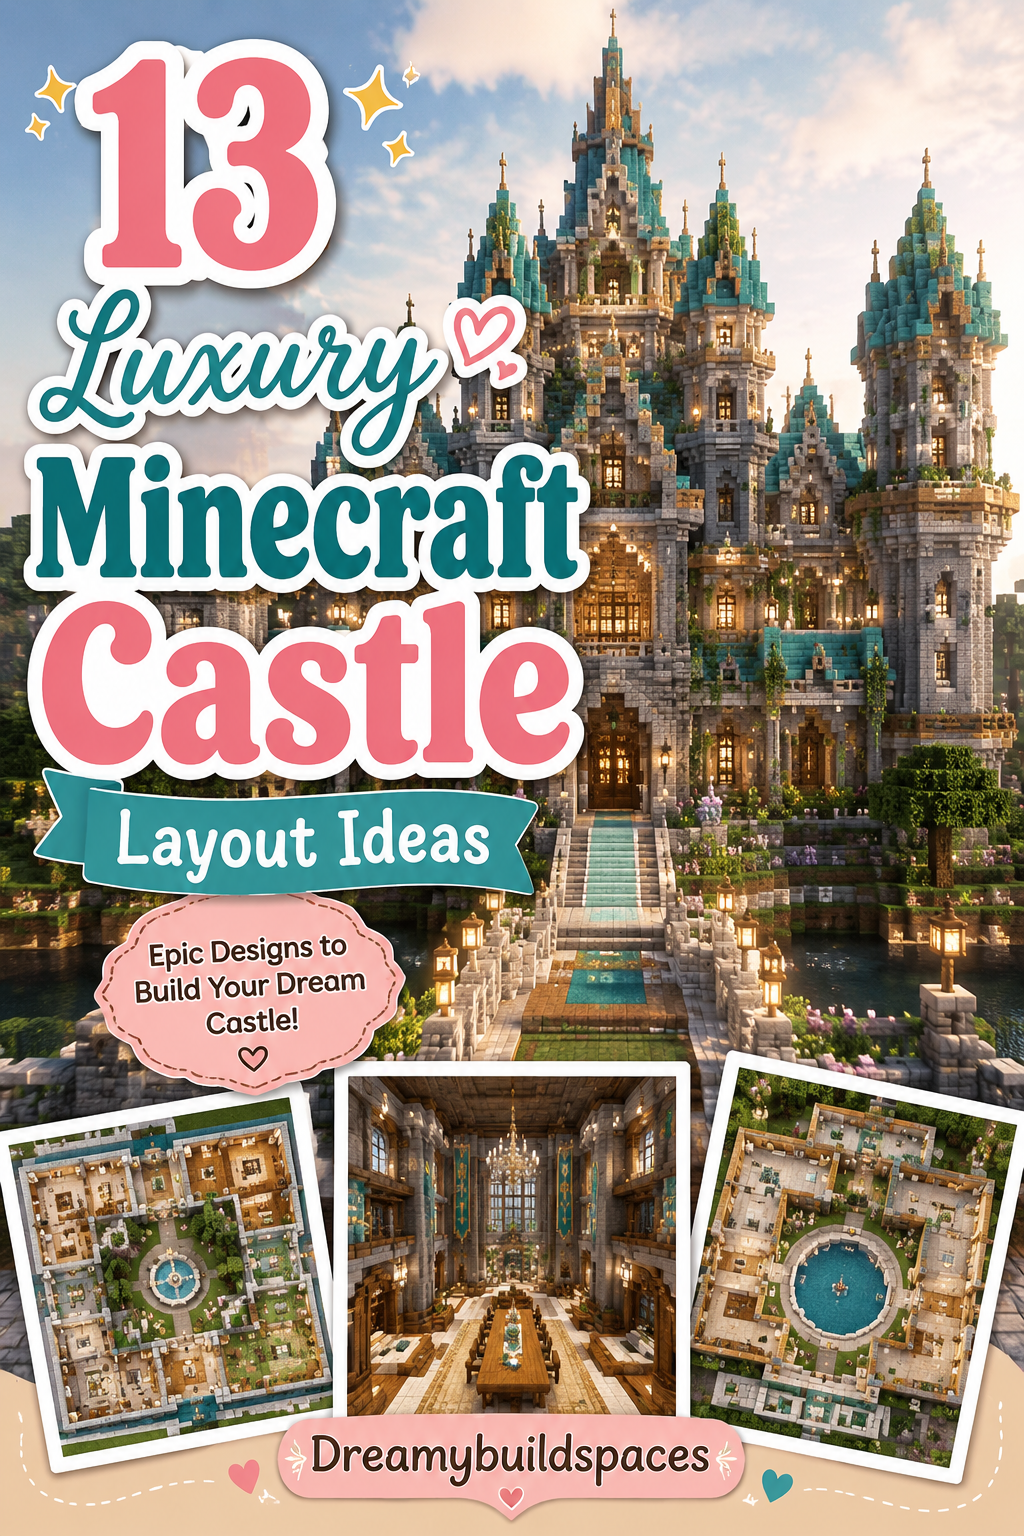
13 Luxury Minecraft castle Layout Ideas
Designing a luxury castle in Minecraft requires a deep understanding of scale, visual weight, and structural layout. A common mistake is building flat, uniform walls that lack depth, which makes even the largest fortresses look dull and uninspiring. To achieve a truly high-end, majestic appearance, you must think like a medieval architect while leveraging the unique block palette of the game.
Every grand layout needs a balanced distribution of shapes, utilizing circular towers to break up the harsh angles of square courtyards. Incorporating structural depth through buttresses, wall indents, overhanging battlements, and tiered levels will instantly elevate your build from a simple stone box to an impressive, viral-worthy masterpiece.
1. The Gothic Obsidian Citadel Layout
The Gothic Obsidian Citadel layout relies heavily on dramatic verticality, sharp spires, and a dark, imposing color scheme that commands attention across your world. This layout is designed for players who want their stronghold to feel powerful, mysterious, and deeply luxurious through the use of rare, dark blocks.

Defining the Dark Gothic Architecture
This specific design style emphasizes soaring heights, pointed archways, and intricate stone carvings made from deepslate variants and polished blackstone. The dark exterior blocks contrast beautifully with bright internal lighting sources, creating a striking, high-contrast look that pops against any survival or creative background landscape.
Mapping the Multi-Tiered Footprint
The footprint begins with a massive, star-shaped defensive base wall that spreads across a seventy-by-seventy block area to ensure structural stability. Four primary corner towers, measuring nine blocks in diameter, extend upward and taper slightly as they reach their final, needle-like spire roofs.
Step-by-Step Citadel Construction Guide
Start by outlining the entire foundation using deepslate brick stairs and polished basalt blocks to establish a clean, textured boundary path. Build the outer curtain walls to a height of fifteen blocks, leaving deep recessions every five blocks to install grand stained-glass windows.
Next, construct the central gatehouse by framing a massive five-block-wide iron bar portcullis between two heavily reinforced, forward-facing defensive bastions. Elevate the main central keep an additional twenty blocks higher than the outer walls, capping the peak with a steep, pointed obsidian roof.
Finally, decorate the exterior trim using nether brick fences, soul lanterns, and crying obsidian accents to introduce a glowing, ethereal ambiance to the build. Inside the inner ward, lay down a polished blackstone floor pattern interspersed with gold blocks for a regal finish.
Essential Materials and Blocks Checklist
- Deepslate Bricks, Tiles, and Polished Deepslate
- Blackstone, Polished Blackstone, and Gilded Blackstone
- Obsidian and Crying Obsidian blocks
- Nether Brick Blocks, Stairs, and Fences
- Tinted Glass and Purple Stained Glass Panes
- Soul Lanterns, Soul Campfires, and Glowstone
- Iron Bars for defensive gates and grates
- Gold Blocks for high-end interior accent trims
2. The Sun-Drenched Quartz Palace Layout
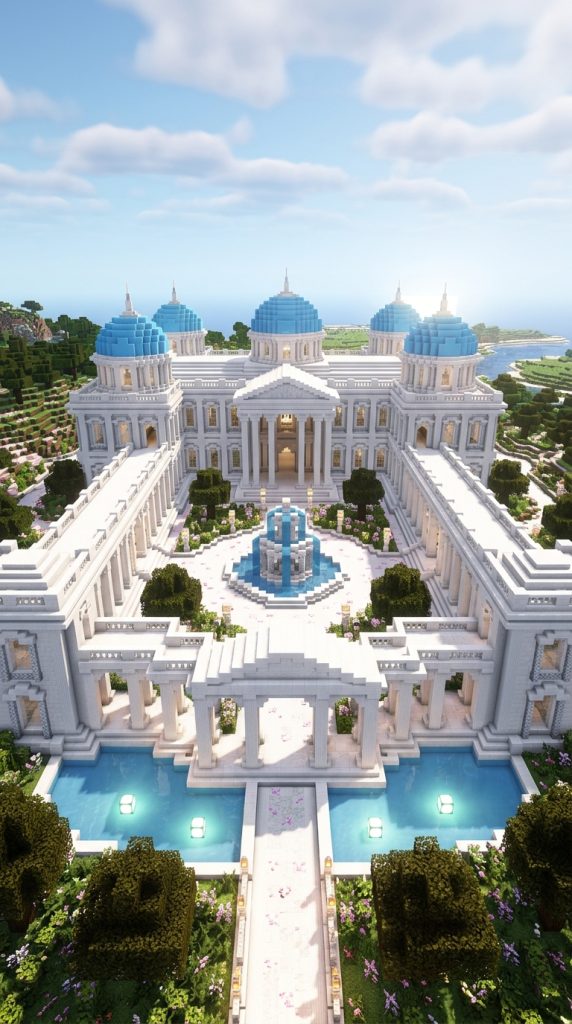
The Sun-Drenched Quartz Palace shifts away from dark, moody fortresses toward a brilliant, neoclassical aesthetic inspired by historical Mediterranean structures. This layout focuses on pristine white surfaces, wide-open outdoor courtyards, reflecting pools, and lush, vibrant greenery that makes the entire build feel like a royal paradise.
Defining the Neoclassical Quartz Aesthetic
This layout utilizes smooth quartz, diorite, and calcite to build bright, clean surfaces that reflect the daylight beautifully across the entire castle grounds. It prioritizes symmetry, grand column-supported arcades, flowing water elements, and golden highlights to establish a clean, wealthy, and highly sophisticated architectural theme.
Mapping the Open-Air Courtyard Layout
The foundation uses a symmetrical hundred-by-hundred block grid, featuring a massive central courtyard that connects all individual wings of the palace. The left wing houses the grand ballroom and dining halls, while the right wing is reserved for the private royal sleeping quarters.
Step-by-Step Palace Construction Guide
Lay down the entire ground floor perimeter using smooth quartz blocks, leaving a large circular opening in the center for a grand fountain. Raise the exterior walls twenty blocks high, utilizing alternating pillars of quartz bricks and calcite to create subtle texture along the flat surfaces.
Construct a grand double-staircase entry at the front of the palace, leading up to a massive pillared portico made of smooth quartz pillars. Build large, sweeping dome roofs over the main residential wings using light blue concrete and wrap the edges with polished diorite stairs.
Install extensive reflecting pools along the front exterior, lining the bottom with sea lanterns to illuminate the water completely during the night. Finish the courtyard by planting flowering azalea bushes, dark oak trees, and pink petals along the pathways.
Essential Materials and Blocks Checklist
- Smooth Quartz Blocks, Bricks, and Pillars
- Calcite and Polished Diorite blocks
- Light Blue Concrete and Cyan Terra Cotta
- Gold Blocks and Smooth Stone Slabs
- Sea Lanterns and Froglights for modern illumination
- Flowing Water Buckets for fountains and pools
- Flowering Azalea Leaves and Moss Blocks
- Spruce Wood Slabs for contrast floor borders
3. The Imperial Crimson Nether Bastion Layout
The Imperial Crimson Nether Bastion is a layout designed to turn the hostile environment of the Nether into a luxurious, highly secured stronghold. By blending the organic, swirling textures of nether growths with heavy, industrial stone blocks, this layout creates an unyielding home base.

Defining the Fortified Nether Aesthetic
This architectural style relies on blackstone bases to resist lava, mixed with bright crimson stems and shroomlights to provide a rich, royal color pop. The combination of dark, indestructible stone and organic red elements yields an aggressive, high-end look perfect for a Nether conqueror’s main base.
Mapping the Concentric Defensive Circles
The footprint is built using three concentric circular walls, with the outermost ring measuring eighty blocks wide to repel any surrounding environmental hazards. The inner rings sit on elevated lava-insulated steps, creating a natural terraced effect that draws the eye upward toward the main central keep.
Step-by-Step Bastion Construction Guide
Dig a circular trench around your entire build site and fill it completely with flowing lava to act as a highly dangerous moat. Build the first defensive wall out of polished blackstone bricks, adding regular arrow slits using blackstone stairs placed facing toward each other.
Construct the second tier five blocks higher, building an open-air walkway lined with crimson fences and hanging soul lanterns for clear visibility. For the central keep, use crimson hyphae blocks to build grand vertical pillars that support a massive, reinforced netherite-accented throne room.
Incorporate shroomlights directly into the ceilings and floors, hiding them behind crimson trapdoors to emit a warm, filtered crimson glow across the rooms. Complete the layout by carving out a secure, indoor strider dock that connects directly to the outer lava moat.
Essential Materials and Blocks Checklist
- Polished Blackstone Bricks and Cracked variants
- Crimson Stems, Hyphae, and Crimson Planks
- Netherrack and Red Nether Bricks
- Shroomlights and Magma Blocks for lighting
- Crimson Nylium and Nether Wart Blocks
- Lava Buckets for structural moats and hazards
- Netherite Blocks for ultra-luxury structural accents
- Soul Torches for contrast blue accent lighting
4. The Coastal Sandstone Fortress Layout
The Coastal Sandstone Fortress is engineered to sit dramatically on the edge of an ocean cliffside or across a sprawling desert beach landscape. This layout mimics historical desert empires, utilizing sandy tones, flat clay roofs, grand desert towers, and refreshing indoor water aqueducts to fight the heat.

Defining the Desert Empire Style
This design theme relies exclusively on smooth sandstone, cut sandstone, and terracotta to craft a warm, textured look that blends with desert terrain. It features flat roofs with detailed battlements, grand arches, and exposed wooden structural support beams that add contrast to the sandy block palette.
Mapping the Cliffside Modular Footprint
The layout is completely modular, consisting of interconnected square and rectangular modules built at varying heights along the natural coastal elevation lines. A central aqueduct runs straight through the middle of the modules, gravity-feeding water from a high mountaintop down to a coastal harbor.
Step-by-Step Sandstone Construction Guide
Carve out flat terraces along your coastal cliff face, reinforcing the base of each level with rough sandstone walls and mud bricks. Build the individual room modules using a mix of smooth sandstone for the walls and cut sandstone for the window borders.
Construct a massive, central watchtower that stands forty blocks tall, featuring a large open-air fire basket at the top to serve as a lighthouse. Install horizontal mud brick wall segments along the tops of the roofs to create functional battlements for defending against phantoms.
Run water channels along the tops of the interior walls, letting the water spill down through copper grates into indoor cooling pools. Decorate the pathways with dead bushes in pots, sugarcane farms, and orange banners that wave in the coastal sea breeze.
Essential Materials and Blocks Checklist
- Smooth Sandstone, Cut Sandstone, and Chiseled Sandstone
- Red Sandstone variants for floor accents
- Mud Bricks and Packed Mud blocks
- Mud Brick Stairs and Wall segments
- Copper Grates and Oxidized Copper accents
- Water Buckets for functional interior cooling aqueducts
- Orange, Yellow, and Brown Wool for banners
- Jungle Wood Planks for exposed structural ceiling beams
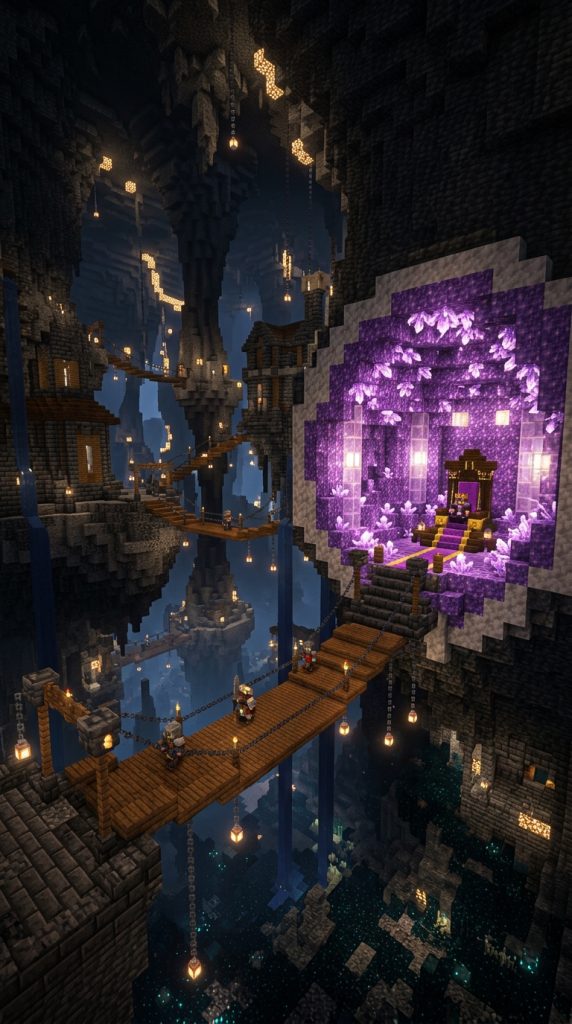
5. The Subterranean Amethyst Cavern Keep Layout
The Subterranean Amethyst Cavern Keep takes castle building completely underground, transforming a massive deep-world cave system into a hidden, luxurious, crystal-infused palace. This layout utilizes the natural curves of the earth, hanging bridges, and glowing crystal formations to create an unforgettable magical fortress environment.
Defining the Mystical Crystal Aesthetic
This style leans into a magical, high-fantasy theme by combining the rough, dark textures of deepslate with the vibrant purple hues of amethyst blocks. It emphasizes glowing magical fonts, suspended structures that hang from the cave ceiling, and glowing moss paths that wind through the darkness.
Mapping the Suspended Cave Footprint
The footprint does not rest entirely on the cave floor; instead, it spans across multiple floating stone islands and suspended hanging platforms. The main throne room is carved directly into a massive, natural amethyst geode located at the back wall of the cavern.
Step-by-Step Cavern Construction Guide
Locate or blast out a massive underground cavern that measures at least sixty blocks high and eighty blocks wide for ample building room. Build massive support pillars out of tuff and cobble deepslate that connect the floor of the cave to the high ceiling.
Construct the primary castle rooms inside the floating stone islands, bridging the gaps between them using chain-supported spruce wood suspension paths. Replace the interior walls of the main keep with a combination of amethyst blocks, budding amethyst, and purple stained glass.
Install hidden glowstone blocks directly behind the amethyst clusters to make the crystals appear as though they are naturally emitting magical light. Line the cave floor beneath the bridges with a thick layer of sculk blocks to create a deep, endless void appearance.
Essential Materials and Blocks Checklist
- Amethyst Blocks, Amethyst Clusters, and Budding Amethyst
- Deepslate Bricks, Tiles, and Chiseled Deepslate
- Tuff and Calcite for natural cave texturing
- Spruce Wood Planks, Stairs, and Trapdoors
- Chains and Iron Bars for suspended bridges
- Glowstone and Sea Lanterns for hidden backlight source
- Sculk Blocks for creating a void-like cavern floor
- Spore Blossoms to create particle effects in air
6. The Floating Sky-Reach Prismarine Bastion Layout
The Floating Sky-Reach Prismarine Bastion brings your luxury castle to the clouds, utilizing a stunning mythological, ocean-in-the-sky aesthetic. This incredibly unique layout pairs the teal and green shades of prismarine with pristine white quartz, creating a breathtaking celestial palace that looks completely otherworldly.

Defining the Celestial Aquatic Theme
This design philosophy blends ocean-born blocks with sky-high vertical layouts, creating the illusion of a grand sea kingdom lifted into the heavens. It relies heavily on animated prismarine textures, sweeping cloud-like quartz curves, and cascading waterfalls that drop down into the world below.
Mapping the Floating Island Chain
The layout consists of a massive central floating island flanked by four smaller satellite islands that house defensive wizard towers. Grand arching bridges made of quartz link the outer islands to the central keep, forming a star-shaped pattern when viewed from above.
Step-by-Step Sky Bastion Construction Guide
Build a massive, irregular island base high in the sky using stone, dirt, and grass blocks, ensuring the underside looks naturally weathered. Frame the main castle walls using dark prismarine for the base supports to anchor the structure with a deep teal color.
Construct the upper walls using smooth quartz, creating grand, looping archways that framing the open sky instead of traditional glass windows. Build conical tower roofs using prismarine bricks, running a trim of sea lanterns along the edges for an evening glow.
Let massive water streams flow out from the sides of the floating islands, dropping hundreds of blocks down into the ground-level ocean. Style the island edges with weeping vines, glow berries, and white concrete powder to mimic the soft appearance of clouds.
Essential Materials and Blocks Checklist
- Prismarine Blocks, Prismarine Bricks, and Dark Prismarine
- Smooth Quartz Blocks, Stairs, and Slabs
- Sea Lanterns for thematic, color-matched lighting
- White Concrete, White Concrete Powder, and Wool
- Water Buckets for grand cascading sky waterfalls
- Glow Berries and Cave Vines for hanging decoration
- Spruce Fences for structural bridge railings
- Birch Planks for clean, bright interior flooring
7. The Classic European Red Roof Fortress Layout
The Classic European Red Roof Fortress embraces the traditional, timeless architectural style seen throughout medieval Germany and the scenic alpine regions. This layout focuses on realism, using heavy stone foundations, intricate timber-framed upper floors, and steep, vibrant red tiled roofs that stand out vividly.

Defining the Traditional Medieval Aesthetic
This style is instantly recognizable by its combination of rough stone bases, white plaster walls, and steep crimson or mangrove wood roofs. It emphasizes practical medieval defense elements, such as functional machicolations, enclosed wooden wall walks, hoarding platforms, and majestic multi-layered defensive gates.
Mapping the Ridge-Line Fortress Footprint
The footprint is long and narrow, designed to sit perfectly along the spine of a mountain ridge or a high hill overlooking a village. The layout features a clear progression from the low-security outer bailey to the high-security inner keep at the highest point.
Step-by-Step European Construction Guide
Build a thick, sloping foundation wall out of a randomized mixture of cobblestone, stone bricks, and cracked stone bricks for realistic weathering. Raise the first two stories of the main keep using this stone mixture, leaving small, rectangular window slits for archers.
For the third and fourth stories, switch to a timber-framed style by creating a grid of dark oak logs filled in with calcite. Construct a steep, forty-five-degree roof over all towers and halls using mangrove stairs, finishing the peaks with polished deepslate walls.
Build an overhanging wooden walkway along the top of the stone walls, utilizing dark oak trapdoors as protective shutters for defenders. Detail the ground levels with gravel pathways, coarse dirt patches, hay bales, composters, and iron bars over cellar windows.
Essential Materials and Blocks Checklist
- Cobblestone, Stone Bricks, and Mossy Stone Bricks
- Calcite or White Concrete for timber-frame filler
- Dark Oak Logs and Stripped Dark Oak variants
- Mangrove Wood Stairs and Planks for red roofs
- Polished Deepslate Walls for chimney and roof peaks
- Hay Bales, Barrel blocks, and Composters for detailing
- Iron Bars and Lanterns for traditional castle lighting
- Gravel and Coarse Dirt for realistic ground paths
8. The Elven Blossom Wood Keep Layout
The Elven Blossom Wood Keep integrates architecture directly into the heart of an ancient, massive forest biome, blending nature and luxury seamlessly. This layout curves around giant tree trunks, utilizing organic shapes, flowering canopies, and elegant wooden structures to create an enchanting fairy-tale kingdom.

Defining the Organic Elven Style
This design philosophy rejects harsh, straight lines in favor of sweeping, organic curves that mimic growing branches and natural vine formations. It relies on a delicate color palette of cherry wood, copper, mud bricks, and dense layers of flowering leaves to look perfectly integrated.
Mapping the Intertwined Canopy Footprint
The layout is built entirely off the ground, winding through the branches of three massive, custom-built ancient oak and cherry blossom trees. The rooms are circular and connected by sweeping, curved wooden platforms that do not use any vertical ground support pillars.
Step-by-Step Elven Construction Guide
Construct three massive tree trunks using a mixture of oak wood and mangrove wood, extending them forty blocks into the air. Branch out the tops of the trees using large clumps of cherry leaves and pink petals to create a thick canopy.
Build the main living platforms around the trunks, using cherry wood slabs to create smooth, sweeping curves that glide between the branches. Erect the room walls using a combination of stripped birch logs and cut sandstone to maintain a bright, elegant appearance.
Craft elegant, dome-shaped roofs out of raw copper blocks, allowing them to slowly oxidize over time into a beautiful sage-green color. Hang spore blossoms from the undersides of the platforms, letting green particles drift down across the forest floor below the keep.
Essential Materials and Blocks Checklist
- Cherry Wood Planks, Stairs, and Cherry Leaves
- Stripped Birch Logs and Oak Wood blocks
- Raw Copper Blocks for slowly oxidizing metal roofs
- Cut Sandstone and Mud Bricks for organic walls
- Spore Blossoms for magical ambient particle effects
- Froglights hidden inside leaf blocks for soft lighting
- Pink Petals and Moss Carpets for floor decoration
- Glow Berries for natural, hanging light sources
9. The Frozen Glacial Ice Palace Layout
The Frozen Glacial Ice Palace is an architectural marvel designed specifically for the unforgiving expanse of a jagged spikes or frozen ocean biome. This layout leverages the translucent properties of various ice types, contrasting them with dark stones to create a stark, gleaming fortress.

Defining the Arctic Frost Aesthetic
This style relies on packed ice, blue ice, and cyan stained glass to build shimmering structures that let light filter through the walls. It uses dark deepslate or blackstone frames to anchor the translucent ice blocks, preventing the build from looking washed out against snow.
Mapping the Radial Snowflake Footprint
The entire layout is built using a strict radial symmetry design that perfectly mimics the intricate geometric shape of a six-sided snowflake. The central core houses a massive ice-carved throne room, with six identical corridors radiating outward toward defensive frosted watchtowers.
Step-by-Step Ice Palace Construction Guide
Clear a large area of snow layers down to the solid ice sheet foundation to establish your perfectly flat building grid. Outline the six-sided snowflake shape using polished deepslate stairs to create a sharp, dark border for the ice walls.
Raise the main walls twenty blocks high using packed ice, which provides a solid, non-melting structure that completely blocks out wind. Intersperse columns of blue ice along the corners to add a deeper blue tone and structural variety to the facades.
Construct grand vaulted ceilings using cyan stained glass blocks, allowing players inside to view the dancing northern lights during the night. Line the exterior base walls with soul campfires, letting the blue smoke rise up along the cold ice walls without melting them.
Essential Materials and Blocks Checklist
- Packed Ice and Blue Ice blocks (non-melting)
- Polished Deepslate, Deepslate Bricks, and Stairs
- Cyan Stained Glass Blocks and matching Panes
- Soul Campfires and Soul Lanterns for blue flames
- Snow Blocks and Powder Snow for natural integration
- Quartz Stairs for bright, frost-like exterior trim
- Sea Lanterns hidden under ice floors for a glow
- Chiseled Deepslate for structural column bases
10. The Industrial Steampunk Keep Layout
The Industrial Steampunk Keep transitions away from magical and medieval themes into a gritty, realistic, machine-driven layout powered by steam and clockwork. This layout features prominent copper piping networks, smoking chimneys, exposed iron gears, and massive mechanical defense systems that shield the inner core.

Defining the Mechanical Steampunk Style
This aesthetic blends the rustic charm of spruce wood and mud bricks with the heavy, metallic presence of copper, iron, and netherite. It prioritizes functional-looking machinery, exposed interior shafts, rotating gear decorations, and constant smoke particles rising from massive, industrial-scale furnaces.
Mapping the Asymmetrical Factory Footprint
The footprint is completely asymmetrical, breaking away from traditional castle balance to mimic a sprawling, constantly expanding industrial factory complex. A massive central boiler room serves as the structural heart, flanked by uneven assembly halls, smelting rooms, and laboratory towers.
Step-by-Step Steampunk Construction Guide
Build a heavy, industrial base layer using deepslate tiles and copper blocks, intentionally leaving areas exposed to show weathering and oxidation. Construct massive, non-functional gears along the exterior walls by arranging dark oak stairs and copper grates in large circles.
Run long pipelines across the ceilings and walls using lightning rods and copper blocks, terminating them at iron iron-trapdoor vent locations. Build tall, towering smokestacks out of granite and brick blocks, placing campfires at the bottom inside to create rising smoke.
Install rows of blast furnaces, cauldrons, and anvils along the workshop floors to give the interior a busy, functional workspace feel. Decorate the exterior with chains, levers, redstone repeaters, and copper bulbs to give the impression of complex, live wiring.
Essential Materials and Blocks Checklist
- Copper Blocks, Cut Copper, and Oxidized variants
- Lightning Rods and Copper Grates for pipe networks
- Deepslate Tiles and Dark Oak Stairs for gears
- Bricks, Granite, and Polished Granite for chimneys
- Campfires for creating rising industrial smoke effects
- Copper Bulbs and Redstone Torches for mechanical lights
- Blast Furnaces, Cauldrons, Anvils, and Grindstones
- Chains, Levers, and Iron Bars for factory trim
Core Ideas for Grand Castle Architecture
Designing luxury castles requires strong layouts. You must plan out your zones carefully. Good architecture relies on distinct visual layers. Therefore, transition points are highly essential. Every wall needs depth and unique block texturing. As a result, your builds will look fantastic.
Always vary your height levels. This method creates dynamic shapes. Next, select cohesive block palettes. You will achieve great results.
11. The Cherry Blossom Shogun Palace Layout
This layout captures the elegant grace of ancient oriental fortresses. It blends perfectly with new cherry grove biomes.

Defining Eastern Royal Architecture
This style focuses heavily on tiered roofs and symmetrical balance. It utilizes stark contrasts between white walls and dark wood beams.
Mapping the Courtyard Footprint
The base covers a ninety-by-ninety grid. Furthermore, it features tiered platforms. Gardens surround the central pagoda structure completely.
Step-by-Step Shogun Construction Guide
First, lay mud brick foundations across your site. Then, build thick retaining stone walls.
Next, raise primary pillars using stripped dark oak logs. Space them exactly five blocks apart.
Consequently, fill the gaps with smooth quartz blocks. This mimics traditional paper screens perfectly.
Afterward, construct wide, sweeping roof eaves. Use cherry wood stairs for this step.
Ensure the corners curve gracefully upward toward the sky. Thus, you achieve the classic pagoda silhouette.
Finally, plant flowering azalea bushes along your paths. Add small water ponds for tranquility.
Essential Materials and Blocks Checklist
- Stripped Dark Oak Logs and Planks
- Cherry Wood Planks and Cherry Stairs
- Smooth Quartz Blocks for white walls
- Mud Bricks for sturdy base platforms
- Cherry Tree Leaves and Pink Petals
- Water Buckets for peaceful garden ponds
- Paper Lanterns for authentic soft lighting
- Moss Blocks for natural landscaping details
12. The Sunken Atlantean Trench Keep Layout
This layout takes your castle deep underwater. It sits inside a profound ocean trench.

Defining Deep Ocean Luxury Style
This architecture relies on shimmering, animated prismarine blocks. It incorporates glowing sea elements for mystical visibility.
Mapping the Domed Sub-Aquatic Footprint
The layout features interconnected glass biomes. Specifically, a massive central glass dome anchors four smaller outer pods.
Step-by-Step Ocean Construction Guide
First, clear a massive trench floor area. Remove all kelp and seagrass systematically.
Next, outline your circular pods using dark prismarine. This establishes a strong, visible perimeter.
Subsequently, build towering curved walls with cyan glass blocks. Ensure the structures are completely airtight.
After that, drain the interior space using sponges. Now, you can safely work inside.
Furthermore, install vertical conduit structures in the center. These provide necessary light and underwater breathing.
Finally, detail the walkways using sea pickles. Lay down polished diorite blocks for floors.
Essential Materials and Blocks Checklist
- Dark Prismarine and Prismarine Bricks
- Cyan Stained Glass Blocks and Panes
- Sponges for draining water efficiently
- Conduits and Prismarine Sea Lanterns
- Sea Pickles for ambient path lighting
- Polished Diorite Slabs for smooth floors
- Heart of the Sea for conduits
- Kelps and Sea Anemones for decoration
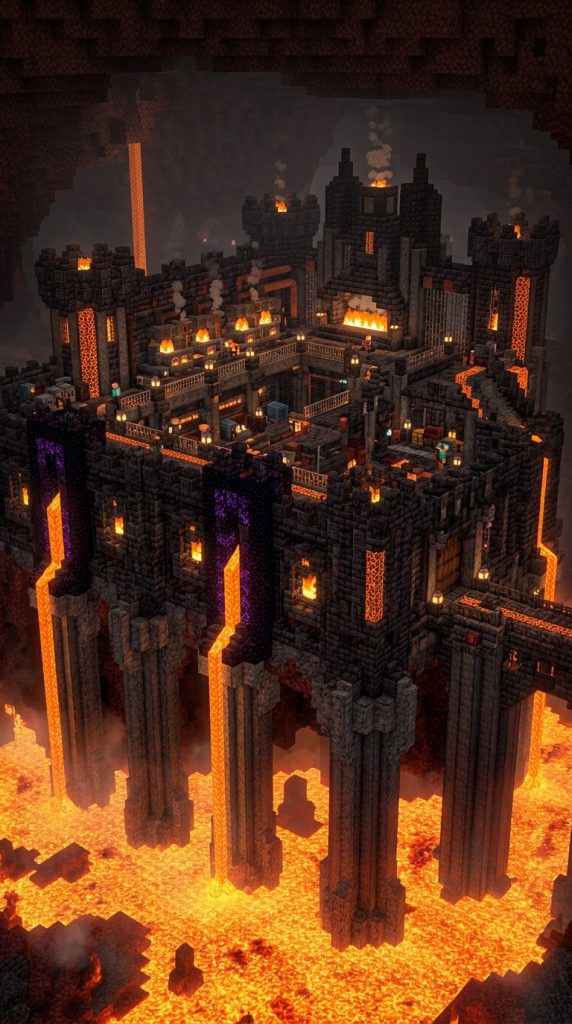
13. The Volcanic Obsidian Forge Stronghold Layout
This final layout uses active volcanic terrain. It creates an intimidating, indestructible industrial fortress.
Defining the Volcanic Forge Theme
This aesthetic combines dark basalt with molten lava flows. It highlights industrial strength and fiery luxury.
Mapping the Lava-Insulated Footprint
The fortress features a jagged, aggressive layout grid. It hangs directly over an active magma lake.
Step-by-Step Forge Construction Guide
First, build thick foundational pillars using polished basalt. Anchor them deeply into the magma lake floor.
Next, construct the outer defensive curtain walls. Use solid obsidian blocks for maximum blast resistance.
Subsequently, carve out wide channels along the battlements. Pour active lava down these defensive pathways.
Afterward, frame the grand interior forge room. Use nether brick stairs for grand archways.
Furthermore, place multiple blast furnaces along the walls. This creates a functional, industrial atmosphere.
Finally, illuminate the dark halls with magma blocks. Add iron bars for secure window grates.
Essential Materials and Blocks Checklist
- Solid Obsidian and Crying Obsidian blocks
- Polished Basalt and Smooth Basalt pillars
- Lava Buckets for active defensive flows
- Nether Brick Blocks, Stairs, and Fences
- Blast Furnaces and Smelting Smalters
- Magma Blocks for natural warm lighting
- Iron Bars for industrial safety windows
- Blackstone Slabs for smooth walkway paths